How to Boot from External Ssd Windows 10: Step-by-Step Guide
To boot your Windows 10 system from an external SSD, you need to adjust certain settings in your computer’s BIOS.
The BIOS should be set to boot from USB first before the internal hard drives.
Then, connect your external SSD that contains the bootable Windows 10 system. Make sure to restart your computer after these changes.
Booting from an external SSD allows you to run a different operating system without altering the current one installed on your computer.
This can be useful for troubleshooting issues, testing new operating systems, or running a mobile OS.
Booting from an external SSD is a handy resource for individuals who want to run different operating systems on their machine.
It allows you to segregate your main operating system and personal files from the secondary OS, adding an additional layer of data security and flexibility to your computing experience.
7 Steps: Booting from External SSD in Windows 10
| Steps | Description |
|---|---|
| Step 1 | Connect the external SSD to your Windows 10 PC |
| Step 2 | Restart the computer |
| Step 3 | Press the key for Boot Options (usually F12, F11, or F8) |
| Step 4 | Select your external SSD from the list of boot devices |
| Step 5 | Confirm your selection and the PC will boot from the SSD |
| Step 6 | After successful booting, you can use Windows 10 as usual |
| Step 7 | Once you are done, remember to change the boot order back to your main hard drive |
Key Takeaway

Five Facts About: Booting from External SSD in Windows 10
Benefits Of Booting From External Ssd In Windows 10
Boot from an external SSD in Windows 10 to experience faster startup times, improved performance, and increased storage capacity. Transform your Windows 10 experience with the benefits of an external SSD.
Enhanced performance and speed:
- Booting from an external SSD in Windows 10 enables enhanced performance and speed compared to traditional hard drives. This is because SSDs offer faster data transfer rates, resulting in quicker boot times and improved overall system responsiveness.
- By bypassing the internal hard drive, which can often be a bottleneck, booting from an external SSD allows for smoother multitasking and faster application loading times.
Portability and convenience:
- One of the key advantages of booting from an external SSD in Windows 10 is the portability it provides. You can easily carry your operating system with you and use it on different computers, whether it’s your personal laptop or a work computer.
- With the emergence of compact and lightweight external SSDs, you can have the power of your Windows 10 operating system in your pocket, making it convenient for on-the-go professionals or digital nomads.
- Additionally, booting from an external SSD allows you to have your own personalized operating system settings and configurations wherever you go, without relying on the host computer’s settings.
Ability to use multiple operating systems:
- Booting from an external SSD in Windows 10 gives you the flexibility to use multiple operating systems. You can install different operating systems on separate partitions of the external SSD and choose which one to boot from depending on your needs.
- This feature is particularly useful for those who need to work with different operating systems for various purposes, such as developers working on multiple platforms or individuals who need to test their software across different environments.
- By leveraging an external SSD, you can experiment with different operating systems and easily switch between them without the need for complex partitioning or dual-boot setups.
Booting from an external SSD in Windows 10 offers several compelling benefits. It provides enhanced performance and speed, delivers portability and convenience, and enables the use of multiple operating systems.
Whether you aim for faster boot times, the freedom to carry your operating system wherever you go, or the flexibility to experiment with different environments, booting from an external SSD is a viable solution.
Preparing Your External Ssd For Booting
Gain control over your Windows 10 boot process by learning how to properly prepare your external SSD.
Follow these steps to easily boot from your external SSD and enhance your system’s performance:
Choosing The Right External Ssd:
- Select an external SSD that is compatible with your device.
- Consider the storage capacity you need for your Windows 10 installation.
- Look for SSDs with high read and write speeds for optimal performance.
Formatting The Ssd For Windows 10:
- Connect your external SSD to your Windows 10 device.
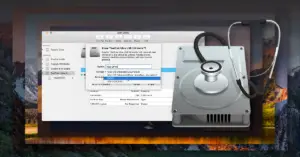
- Open the Disk Management utility by right-clicking the Start button.
- Locate your external SSD in the list of drives and right-click on it.
- Select “Format” and choose the file system as “NTFS” for Windows 10 compatibility.
- Assign a drive letter to the SSD and click “OK” to start the formatting process.
Creating A Bootable Usb Drive:
- Download the Windows 10 ISO file from the official Microsoft website.
- Insert a USB drive into your computer with at least 8GB of storage capacity.
- Use a tool like Rufus to create a bootable USB drive with the Windows 10 ISO file.
- Select your USB drive, choose the “MBR” partition scheme, and set the file system as “NTFS.”
- Click on the “Start” button to begin the creation of the bootable USB drive.
By following these steps, you can prepare your external SSD for booting Windows 10. Ensure you choose the right external SSD, format it correctly, and create a bootable USB drive. This will ensure a smooth and efficient booting experience on your Windows 10 device.
Now that your external SSD is ready, you can proceed to the next steps of booting from it.
Setting Up Your Bios For External Ssd Boot
Setting up your BIOS for external SSD boot on Windows 10 is crucial for efficient and fast startup.
Ensure to follow the necessary steps and configurations to successfully boot from your external SSD.
To boot from an external SSD on Windows 10, you’ll need to configure and enable certain settings in your computer’s BIOS. Don’t worry if you’re not familiar with BIOS settings – we’ll walk you through the process step by step.
Just follow these instructions:
Accessing The Bios Settings
Accessing the BIOS settings allows you to make changes to your computer’s hardware configuration.
To do this, follow these steps:
- Start your computer and watch for a message on the screen that indicates which key or keys you need to press to access the BIOS settings. Common keys are Del, F2, or F10.
- Once you identify the correct key(s), press and hold it or repeatedly tap it until you enter the BIOS menu.
Enabling Usb Boot Option
Now that you’re in the BIOS menu, follow these instructions to enable the USB boot option:
- Use the arrow keys on your keyboard to navigate to the “Boot” or “Boot Sequence” section within the BIOS menu.
- Look for an option called “Boot Priority” or “Boot Order” and select it.
- Locate the option for USB boot and move it to the top of the boot priority list using the designated keys or instructions provided on-screen.
- Save the changes and exit the BIOS menu. Your computer will now be configured to boot from a USB device.
Setting The External Ssd As The Primary Boot Device
Now that you’ve enabled USB booting, it’s time to set the external SSD as the primary boot device.
Follow these steps:
- Connect your external SSD to a USB port on your computer.
- Restart your computer and enter the BIOS menu using the same key(s) mentioned earlier.
- Navigate to the “Boot” or “Boot Sequence” section within the BIOS menu.
- Look for the option to set the primary boot device and select it.
- Choose your external SSD from the list of available devices.
- Save the changes and exit the BIOS menu.
Congratulations! You have successfully set up your BIOS to boot from an external SSD on Windows 10.
Now your computer will prioritize the external SSD as the boot device, allowing you to enjoy the benefits of faster boot times and improved performance.
Remember, it’s important to follow the instructions precisely and save any changes you make in the BIOS menu.
With these settings properly configured, you’ll be able to harness the power of your external SSD for an enhanced computing experience. Happy booting!
Installing Windows 10 On External Ssd
Learn how to easily install and boot Windows 10 from an external SSD for increased speed and storage flexibility. A step-by-step guide to optimize your system for seamless performance.
So, you’ve decided to install Windows 10 on an external SSD and harness the benefits of fast boot times and improved performance. Let’s dive into the step-by-step process, starting from inserting the bootable USB drive.
Inserting The Bootable Usb Drive:
- Connect the bootable USB drive to an available port on your computer.
- Restart your computer and enter the BIOS setup by pressing the designated key (usually F2 or Del) during the startup process.
- Navigate to the “Boot” tab in the BIOS menu using the arrow keys.
- Locate the “Boot Priority” or “Boot Order” option and select it.
- Change the boot priority to prioritize the USB drive over the internal hard drive.
- Save the changes and exit the BIOS setup.
Now that you have successfully inserted the bootable USB drive, let’s proceed to the next step of installing Windows 10 on the external SSD.
Installing Windows 10 On The External Ssd:
- Restart your computer and let it boot from the USB drive.
- Follow the prompts to begin the Windows 10 installation process.
- Select the language, time zone, and keyboard layout that apply to your preferences.
When prompted to choose an installation type, select “Custom:
Install Windows only (advanced).”
- Select the external SSD as the destination for the Windows 10 installation.
- Continue with the installation process by following the on-screen instructions.
With Windows 10 now installed on your external SSD, it’s important to configure the necessary settings to ensure a smooth boot process from the SSD.
Configuring Windows 10 Settings For External Ssd Boot:
- Connect the external SSD to a USB port on your computer.
- Boot your computer and enter the BIOS setup by pressing the designated key during startup.
- Navigate to the “Boot” tab in the BIOS menu using the arrow keys.
- Find the “Boot Priority” or “Boot Order” option and set the external SSD as the first boot option.
- Save the changes and exit the BIOS setup.
- Restart your computer and enjoy the speedy boot times and improved performance of Windows 10 running on your external SSD.
By following these simple steps, you can easily install and configure Windows 10 on an external SSD, unlocking the speed and convenience of an external bootable drive. So, why wait? Experience the benefits of faster startup and fluid performance today!
Troubleshooting Boot Issues With External Ssd
If you encounter boot issues with your external SSD on Windows 10, follow these troubleshooting steps to address the problem efficiently.
From checking the BIOS settings to ensuring the SSD is properly connected, these tips will help you resolve any booting problems with your external SSD.
If you’re experiencing boot problems with your external SSD on Windows 10, don’t worry! We’ve got you covered.
In this section, we’ll explore some troubleshooting steps to help you get back up and running smoothly. Check out the following:
Checking For Compatibility Issues:
- Ensure that your external SSD is compatible with Windows 10 by cross-checking the manufacturer’s specifications.
- Verify if your device meets the minimum system requirements for Windows 10.
- Ensure that the USB port you’re using supports the required data transfer speeds for SSD operation.
Updating Ssd Firmware And Drivers:
- Visit the SSD manufacturer’s website and check for any available firmware or driver updates.
- Download and install the latest firmware or driver updates specifically designed for Windows 10 compatibility.
- Follow the manufacturer’s instructions to update the firmware or drivers on your external SSD.
Resolving Boot Error Messages:
If you encounter any boot error messages, try the following steps to resolve them:
- Disconnect the external SSD from your computer and restart the system.
- Reconnect the external SSD to a different USB port on your computer and check if the error persists.
- Disable any secure boot or TPM-related settings in your computer’s BIOS settings.
- Ensure that the boot priority in your BIOS settings is correctly configured to prioritize the external SSD.
If you’re still experiencing boot issues or encountering error messages, consider the following:
- Connect the external SSD to a different computer to determine if the issue is specific to your Windows 10 system.
- Reach out to the SSD manufacturer’s support for further assistance.
Remember, troubleshooting boot issues with an external SSD can require some trial and error. By following these steps, you’ll be on your way to resolving any problems and getting your system up and running smoothly again.
Using Boot Manager For Dual Booting From External Ssd
Learn how to boot from an external SSD in Windows 10 using a boot manager. Easily set up a dual boot system for increased flexibility and performance.
Are you looking to enhance your Windows 10 experience by booting from an external SSD? We’ve got you covered! In this guide, we will walk you through the process of using the Boot Manager to enable dual booting from your external SSD.
With this method, you can easily switch between multiple operating systems and select your desired one at startup.
Let’s get started!
Configuring Boot Manager For Dual Boot:
- Access the Boot Manager by restarting your computer and pressing the appropriate key (usually F12 or Esc) during startup.
- Once in the Boot Manager, select the option to enter the BIOS settings.
- In the BIOS settings, navigate to the Boot tab and ensure that your external SSD is recognized and listed as a bootable device.
- If the external SSD is not listed, you may need to enable the “External Device Boot” option or check if your SSD requires any specific drivers.
- Once the external SSD is recognized, make sure it is set as the primary boot device.
- Save the changes and exit the BIOS settings.
Installing And Managing Multiple Operating Systems:
- Install your desired operating systems on the external SSD using their respective installation media.
- During the installation process, ensure that you select the external SSD as the installation destination.
- Once the installation is complete, the operating systems will be installed on the external SSD.
Selecting The Desired Operating System On Startup:
- Restart your computer and enter the Boot Manager again by pressing the appropriate key.
- In the Boot Manager, you will see a list of the installed operating systems on the external SSD.
- Use the arrow keys to highlight the desired operating system and press Enter to boot into it.
- Voila! You can now enjoy the benefits of dual booting from your external SSD.
By following these steps, you can configure the Boot Manager to dual boot from your external SSD and seamlessly switch between multiple operating systems. So go ahead and make the most of your Windows 10 experience!
Tips To Optimize Boot Performance From External Ssd
Learn how to optimize boot performance from an external SSD on Windows 10 with these helpful tips. Boost your system’s speed and efficiency for a seamless user experience.
If you’re using an external SSD to boot your Windows 10 system, there are several tips you can follow to optimize your boot performance.
These tips range from managing startup programs to configuring BIOS settings and regularly updating your Windows and SSD drivers.
By implementing these strategies, you can ensure a smooth and speedy boot experience.
Let’s explore each of these tips in detail:
Managing Startup Programs:
- Evaluate your startup programs: Identify which programs are set to automatically start when you boot your computer. Determine if all these programs are necessary for your workflow or if there are any that can be disabled.
- Disable unnecessary startup programs: Turn off any programs that you don’t need immediately upon booting up your system. This can be done through the Task Manager or the startup settings in Windows 10.
- Prioritize essential programs: Arrange the startup programs in a way that allows the most critical ones to begin first, reducing the overall boot time.
Configuring Bios Settings For Fast Boot:
- Access BIOS settings: Restart your computer and enter the BIOS setup menu by pressing the designated key during startup (usually Del, F2, or F10).
- Enable fast boot option: Look for the fast boot option in the BIOS settings and ensure it is enabled. This option allows the system to skip certain hardware initialization processes, resulting in faster boot times.
- Adjust boot order: Arrange the boot order to prioritize your external SSD over other devices. This ensures that your system directly boots from the SSD, rather than searching for other bootable devices first.
Regularly Updating Windows 10 And Ssd Drivers:
- Install Windows updates: Keep your Windows 10 operating system up to date by regularly installing the latest updates released by Microsoft. These updates often include performance improvements and bug fixes that can enhance your boot experience.
- Update SSD drivers: Visit the manufacturer’s website for your external SSD and check for any driver updates. Update the drivers if available to ensure compatibility and optimal performance with your Windows 10 system.
By following these tips, you can optimize your boot performance from an external SSD on Windows 10.
Managing startup programs, configuring BIOS settings, and keeping your Windows and SSD drivers updated are essential practices for achieving a faster and more efficient boot experience.
Take the time to implement these strategies and enjoy a smoother start to your computing sessions.
Safely Removing And Disconnecting External Ssd From Windows 10
To safely remove and disconnect an external SSD from Windows 10 and boot from it, follow these steps:
1. Click on the “Safely Remove Hardware” icon in the taskbar.
2. Select the SSD from the list and click “Stop. ”
3. Once it’s safe, unplug the SSD. Remember to always follow these steps to protect your data and prevent any potential issues.
When it comes to using an external SSD with your Windows 10 system, it’s important to follow the correct steps for safely removing and disconnecting the device.
Improperly removing the SSD can lead to data corruption and other issues. To avoid any problems, follow the guidelines below:
Shutting Down The System Properly:
To ensure that you safely disconnect your external SSD from your Windows 10 computer, it is crucial to shut down the system properly.
Here’s how you can do it:
- Click on the Start menu located at the bottom left corner of your screen.
- Select the Power icon.
- Choose the Shut down option to turn off your computer completely.
Safely Ejecting The External Ssd:
After shutting down your system, it’s essential to safely eject the external SSD to prevent any data loss or damage.
Follow these steps to do it correctly:
- Locate the system tray, typically found at the bottom right corner of your screen.
- Find the Safely Remove Hardware and Eject Media icon and click on it.
- Select your external SSD from the list of connected devices.
- Wait for a notification confirming that it’s safe to remove the SSD.
Disconnecting The External Ssd From The Computer:
Now that you have safely ejected the external SSD, you can disconnect it from your Windows 10 computer.
Here’s how:
- Locate the USB connection port where your external SSD is plugged in.
- Firmly grasp the USB connector and gently remove it from the port.
- Avoid pulling on the cable as it may damage the connector or the port.
- Store your external SSD in a safe place to prevent any physical damage.
Remember to always follow these steps when disconnecting your external SSD from your Windows 10 computer to maintain data integrity and avoid potential issues.
By taking the time to properly shut down, safely eject, and disconnect your SSD, you ensure the longevity and performance of your device.
FAQ About How to Boot from External Ssd Windows 10
How Do I Set Up My External Ssd to Boot Windows 10?
1. Connect the external SSD to your PC and make sure it is detected by Windows.
2. Open Settings, go to Update & Security > Recovery, click Restart Now under Advanced startup section and select Troubleshoot from Choose an Option screen.
3. Select Advanced Options > UEFI Firmware Settings and then restart your computer again.
4. Once in BIOS Setup Utility, look for Boot tab or Secure Boot option (depending on your system) and disable it if enabled previously as external drives can’t boot when secure boot is enabled; save changes before exiting BIOS Setup Utility.
What Software Do I Need to Use an External Ssd for Booting Windows 10?
You will need to install Windows 10 on the external SSD, then use a boot manager like GRUB or rEFInd to launch it from your main system’s hard drive.
Is It Necessary to Format the External Ssd before Using It for Booting Windows 10?
Yes, it is necessary to format the external SSD before using it for booting Windows 10. The formatting process will create a new file system on the drive that is compatible with Windows 10 and ensure that all of the data stored on the drive can be used by the operating system.
Can I Install Programs on an External Ssd And Still Be Able to Boot from It With Windows 10?
Yes, you can install programs on an external SSD and still be able to boot from it with Windows 10. You may need to enable the external drive as a bootable device in your BIOS/UEFI settings before attempting to install or boot from it.
Conclusion
Booting from an external SSD in Windows 10 can provide a significant performance boost and enhance overall system responsiveness.
By following the steps outlined in this guide, you can easily set up and configure your external SSD to optimize your Windows 10 experience.
Remember to ensure compatibility, format the SSD properly, and adjust the boot order in the BIOS settings.
Additionally, consider regularly updating your SSD’s firmware and backing up your important data to minimize the risk of data loss.
With the ability to carry your Windows 10 operating system and applications with you wherever you go, an external SSD offers convenience and flexibility.
Whether you’re a gamer, a professional, or simply looking to speed up your computer, booting from an external SSD is a worthwhile investment. So why wait? Unlock the potential of your Windows 10 system today.

Harold Williams is a senior writer and technical editor at Drives Hero with 20+ years of experience in IT administration. He specializes in storage systems, SSD reviews, and performance testing, bringing real-world insight to every guide.