How to Clone a Sata Hard Drive to Ssd? A Cloning Software!
To clone a SATA Hard Drive to an SSD, you will need a cloning software. There are several available in the market, with popular options being Acronis True Image and Clonezilla.
These tools create an exact copy of the hard drive, including the operating system, applications, and data onto the SSD.
Cloning a hard drive to an SSD involves creating an exact replica of the hard drive’s content onto the SSD.
This process requires software that can copy all the data, including the operating system, onto the new drive. It’s an effective method for backing up data or migrating to a faster or larger drive.
Cloning a SATA hard drive to an SSD is not a complicated process when executed with proper software.
This method is especially useful when you need to upgrade your drive without going through the fuss of reinstalling all your programs and files.
Clonezilla and Acronis True Image are some of the reliable tools that can help you achieve this effortlessly.
8 Steps To Clone A SATA Hard Drive to SSD
| Steps | Description |
|---|---|
| 1. Gather Necessary Equipment | Obtain a SATA to USB adapter, the SSD, and cloning software. |
| 2. Install Cloning Software | Install the cloning software onto the computer with the SATA hard drive. |
| 3. Connect SSD to Computer | Use the SATA to USB adapter to connect the SSD to the computer. |
| 4. Initialize SSD | Use disk management to initialize the SSD on the computer. |
| 5. Clone SATA Hard Drive | Open the cloning software and select the SATA hard drive as the source disk and the SSD as the target disk. Start the cloning process following the instructions of the software. |
| 6. Swap Drives | Once the cloning process is complete, power down the computer, remove the old SATA hard drive, and install the SSD. |
| 7. Boot Computer from SSD | Power on the computer and ensure it boots from the new SSD. |
| 8. Confirm Successful Cloning | Check that all files and applications are present and functioning correctly on the SSD. |
Key Takeaway
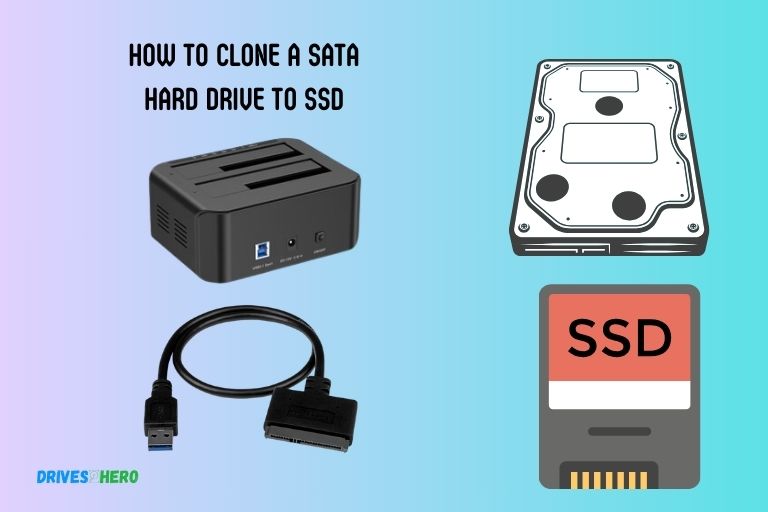
Five Facts About Cloning A SATA Hard Drive To SSD
Why Clone A Sata Hard Drive To Ssd
Want to upgrade your computer’s performance? Learn how to clone your SATA hard drive to an SSD for faster speeds and improved efficiency.
With this step-by-step guide, you’ll be able to seamlessly transfer all your data and settings without any hassle. Say goodbye to slow boot times and hello to a faster, more responsive system.
Replacing a traditional SATA hard drive with a solid-state drive (SSD) can bring a significant improvement to the performance and reliability of your computer.
However, manually reinstalling the operating system and transferring all your files can be time-consuming and complicated.
That is where the process of cloning a SATA hard drive to an SSD comes to your rescue.
By duplicating the content of your existing hard drive onto the new SSD, you can seamlessly migrate your system without the hassle of reinstalling everything from scratch.
Let’s explore the benefits of cloning a SATA hard drive to an SSD:
Benefits Of Cloning A Sata Hard Drive To Ssd
Increased Performance and Speed:
- Quicker boot times: With an SSD, your computer will start up much faster, reducing the waiting time and enabling you to be more productive.
- Improved application loading: Applications and games will launch in a fraction of the time, ensuring a smooth and efficient user experience.
- Faster file transfers: Whether you’re moving large files or copying data, SSDs can significantly speed up the process, saving you valuable time.
Enhanced Reliability and Durability:
- No moving parts: Unlike traditional hard drives, SSDs have no mechanical components that can fail or cause read/write errors, making them less prone to damage.
- Reduced risk of drive failure: SSDs are more resilient to wear and tear, offering increased lifespan and reliability for your data storage needs.
- Shock and vibration resistance: SSDs are designed to withstand physical impacts, ensuring your data remains intact even under rugged conditions.
Cloning a SATA hard drive to an SSD is a cost-effective and time-saving solution to elevate your computer’s performance and reliability.
With increased speed, enhanced durability, and seamless data migration, you can enjoy a more efficient and enjoyable computing experience.
Take advantage of the benefits offered by an SSD and experience the transformation yourself.
Preparing For Cloning Process
Learn how to effectively clone your SATA hard drive to an SSD, ensuring a seamless transition and improved performance.
Discover step-by-step instructions and valuable tips to successfully prepare for the cloning process.
Before initiating the process of cloning your SATA hard drive to SSD, it is crucial to prepare yourself and gather the necessary tools and equipment. You through the essential steps to ensure a successful cloning process.
Backup Important Data And Files
To prevent any data loss or potential mishaps during the cloning process, make sure to back up all the important data and files on your SATA hard drive.
Follow these steps:
- Use a reliable backup solution such as external hard drives, cloud storage, or a network-attached storage (NAS) device.
- Create a copy of important files, documents, photos, videos, and any other data you cannot afford to lose.
- Verify the backup’s integrity to ensure that all files have been successfully copied.
Check Compatibility Between Sata Hard Drive And Ssd
Before commencing the cloning process, it’s essential to check the compatibility between your SATA hard drive and the SSD.
Ensure that:
- Your SSD is compatible with your system’s SATA interface (SATA II, SATA III, etc. ).
- You have enough physical space in your system to accommodate the SSD.
- Your system’s power supply can handle the SSD’s power requirements.
Gather Required Tools And Equipment
To guarantee a smooth cloning process, gather the necessary tools, and equipment beforehand.
Here’s what you’ll need:
- SATA-to-USB adapter or dock: This will allow you to connect both the SATA hard drive and SSD externally to your system.
- Cloning software: Find reliable cloning software that suits your needs. Popular options include Clonezilla, MiniTool Partition Wizard, and Macrium Reflect.
- Screwdriver: Depending on your system’s design, you may need a screwdriver to open and access the hard drive and SSD slots.
- Anti-static wristband (optional): While not mandatory, it’s advisable to use an anti-static wristband to prevent static discharge that could damage sensitive components.
- Clean workspace: Prepare a clean and organized workspace, free from static, dust, and other potential hazards.
Remember, thorough preparation is key to a successful cloning process. Following these steps will help safeguard your valuable data and ensure a smooth transition from your SATA hard drive to SSD.
Step-By-Step Guide To Clone A Sata Hard Drive To Ssd
Learn how to clone a SATA hard drive to an SSD with this step-by-step guide. Easily transfer your data and enjoy the enhanced performance of an SSD for faster and more reliable computing.
Cloning a SATA hard drive to an SSD can significantly improve your computer’s performance and speed. We will walk you through the process of cloning your SATA hard drive to an SSD.
Follow these instructions carefully to ensure a successful clone and seamless transition.
Installing The Cloning Software:
To begin, you will need to install cloning software on your computer.
Follow these steps:
- Research and choose a reliable and user-friendly cloning software.
- Download the software from the official website or a trusted source.
- Open the installation file and follow the on-screen instructions to install the software.
- Launch the cloning software once the installation process is complete.
Connecting The Ssd To The Computer:
Now that you have the cloning software installed, it’s time to connect the SSD to your computer.
Here’s how:
- Power off your computer and disconnect all peripheral devices.
- Open your computer case and locate the SATA ports on your motherboard.
- Connect one end of a SATA data cable to an available SATA port on your motherboard.
- Connect the other end of the SATA data cable to the SSD.
- Connect a SATA power cable from your power supply to the SSD.
Initiating The Cloning Process:
With the SSD properly connected, you can start the cloning process.
Follow these instructions:
- Launch the cloning software you installed earlier.
- Select the option to clone a hard drive or disk.
- Choose your SATA hard drive as the source disk and the SSD as the destination disk.
- Review the cloning settings and make any necessary adjustments.
- Click on the “Start” or “Clone” button to initiate the cloning process.
- Wait for the software to complete the cloning process. This may take some time depending on the size of your hard drive.
Verifying The Cloned Data And Files:
Once the cloning process is finished, it’s essential to verify the cloned data and files.
Here’s what to do:
- Close the cloning software and shut down your computer.
- Disconnect the SATA hard drive from your computer.
- Power on your computer using only the SSD as the primary storage device.
- Check if your computer boots up properly and all files and data are accessible.
- Verify that all the folders, files, and settings from your SATA hard drive have been successfully transferred to the SSD.
Removing The Sata Hard Drive And Installing The Ssd:
If everything has been successfully cloned and verified, you can now remove the SATA hard drive and replace it with the SSD.
Follow these steps:
- Power off your computer and disconnect all peripheral devices.
- Open your computer case and locate the SATA hard drive.
- Disconnect the SATA and power cables from the hard drive.
- Carefully remove the SATA hard drive from its mounting bracket or slot.
- Place the SSD in the vacant slot or bracket.
- Connect the SATA and power cables to the SSD securely.
Booting Up The Computer With The Cloned Ssd:
With your SSD properly installed, it’s time to boot up your computer and start enjoying the improved performance.
Here’s how:
- Close your computer case and reconnect all peripheral devices.
- Power on your computer and wait for it to boot up.
- Verify that the computer recognizes the SSD as the primary boot device.
- If necessary, access your computer’s BIOS settings to ensure the SSD is set as the primary boot device.
- Once the computer has booted up successfully, you can start using your system with the cloned SSD.
Following these steps, you can clone your SATA hard drive to an SSD and enjoy the benefits of improved performance and faster boot times.
Make sure to double-check the cloning process and verify the cloned data to ensure a smooth transition to the new SSD.
Troubleshooting And Tips For Successful Cloning
Clone your SATA hard drive to an SSD easily with these troubleshooting tips. Enhance your computer’s performance by transferring data seamlessly and following these simple instructions.
Cloning a SATA hard drive to an SSD can significantly improve the performance of your computer. However, like any technical process, there may be some hiccups along the way.
To ensure a smooth clone and minimize any potential issues, it’s important to follow some troubleshooting steps and consider specific tips.
We will discuss common issues that may arise during the cloning process, how to resolve them, ensuring sufficient storage space on the SSD, and optimizing the SSD for maximum performance.
Common Issues And How To Resolve Them
Cloning a SATA hard drive to an SSD may encounter a few common issues.
Here are some troubleshooting tips to help you resolve them:
- Incompatible Cloning Software: Ensure that you are using cloning software that supports both SATA hard drives and SSDs. If you encounter compatibility issues, consider using alternative software that is specifically designed for this purpose.
- Insufficient Power Supply: Sometimes, insufficient power supply can lead to cloning failures. Make sure your computer is plugged into a reliable power source, and consider using a UPS (Uninterruptible Power Supply) if available.
- Unrecognized SSD: If your computer fails to recognize the SSD, double-check the connections and ensure that the SSD is properly connected to the system. If the issue persists, try connecting the SSD to a different SATA port.
- Sector Alignment: Misaligned partitions can cause performance issues. Use cloning software that supports sector alignment, or manually align the partitions on the SSD using appropriate tools.
- Source Drive Errors: If the source SATA hard drive has errors or bad sectors, it may affect the cloning process. Prioritize running disk repair utilities or performing a thorough disk check before attempting the cloning process.
Ensuring Sufficient Storage Space On The Ssd
To successfully clone a SATA hard drive to an SSD, it is essential to have enough storage space on the SSD.
Here are some tips to ensure sufficient storage:
- Calculate Required Storage: Determine the total space used on your SATA hard drive and choose an SSD with sufficient capacity to accommodate it. Consider leaving some extra space for future updates and installations.
- Remove Unnecessary Files: Before starting the cloning process, eliminate unnecessary files, temporary files, and old backups from your SATA hard drive. This will reduce the total space required on the SSD.
- Compress Files: If you have large files that are seldom accessed, consider compressing them to save space while still retaining their accessibility.
Optimizing The Ssd For Maximum Performance
To fully optimize your newly cloned SSD and extract its maximum performance potential, consider the following tips:
- Enable TRIM: Ensure that TRIM, an SSD optimization feature, is enabled on your operating system. This feature helps maintain the long-term performance of the SSD by minimizing write amplification.
- Avoid Defragmentation: SSDs don’t benefit from defragmentation like traditional hard drives. In fact, it can potentially shorten the SSD’s lifespan. Disable automatic defragmentation for the SSD.
- Update Firmware: Check for any available firmware updates for your SSD. Updating the firmware can address potential bugs and improve overall performance.
- Enable AHCI Mode: Make sure that your computer is set to AHCI (Advanced Host Controller Interface) mode rather than IDE (Integrated Drive Electronics) mode. AHCI mode allows for better SSD communication and performance.
Troubleshooting common issues, ensuring sufficient storage space, and optimizing your SSD are crucial steps to successfully clone a SATA hard drive to an SSD.
By following these tips and recommendations, you can enjoy improved performance and enhanced productivity on your system.
FAQ On How To Clone A Sata Hard Drive To Ssd
Can I Clone A Sata Drive To Ssd?
Using cloning software, you can easily clone data from a SATA drive to an SSD.
How Do I Clone A Sata Hard Drive?
To clone a SATA hard drive, follow these steps:
1. Connect both the source and target drives to your computer.
2. Use cloning software, like Clonezilla or Macrium Reflect, to initiate the cloning process.
3. Select the source drive and destination drive in the software.
4. Start the cloning process and wait until it completes.
5. Once finished, disconnect the drives and test the cloned drive to ensure it works properly.
Remember to handle the drives with care and ensure you have enough space on the target drive to accommodate the data from the source drive.
Is It Possible To Clone Hdd To Ssd?
Yes, it is possible to clone an HDD to an SSD, ensuring a seamless transfer of data.
How Do I Transfer Data From Sata To Ssd?
To transfer data from SATA to SSD, connect the SSD to your computer and use software to clone or migrate the data.
How Do I Clone A Sata Hard Drive To Ssd?
To clone a SATA hard drive to an SSD, you need cloning software like EaseUS Todo Backup or Macrium Reflect. Follow the software’s instructions to complete the cloning process.
Conclusion
Cloning a SATA hard drive to an SSD is a straightforward process that can greatly improve the performance and speed of your computer.
By following the steps outlined in this blog post, you can successfully transfer all your data and settings to the new SSD, ensuring a seamless transition.
To summarize, begin by preparing your SSD and cloning software, then connect both your old hard drive and the SSD to your computer.
Launch the cloning software and select the source and destination drives. Start the cloning process and patiently wait for it to complete.
Once finished, shut down your computer and replace the old hard drive with the new SSD. Remember to double-check that everything is working correctly before disposing of the old hard drive.
With the increased speed and performance of your new SSD, you’ll have a noticeable improvement in your computer’s overall performance.
Now you can enjoy a faster and more efficient computing experience.

