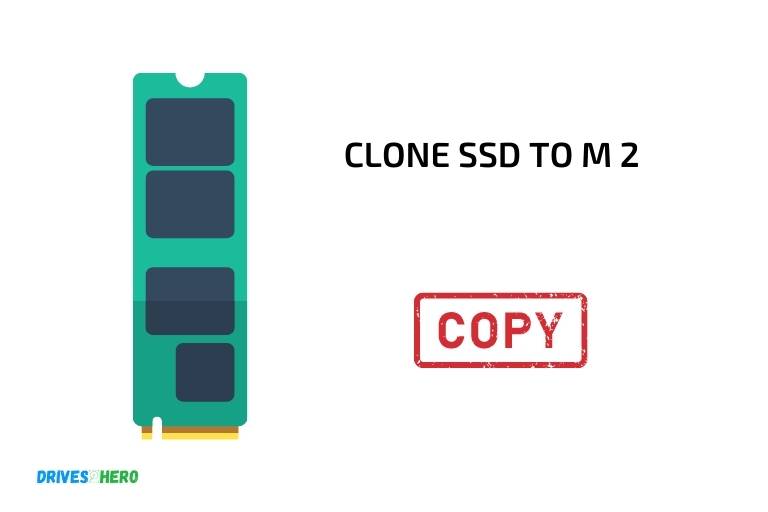
How to Clone Ssd to M 2 – A Step-by-Step Guide
To clone an SSD to an M.2 drive, you must first connect both drives to your computer, use reliable cloning software, and follow the necessary steps to ensure a successful cloning process.
Cloning an SSD to an M.2 drive involves transferring all data, including the operating system and installed applications, from the original SSD to the new M.2 drive.
This process enables you to upgrade your storage without the need to reinstall your OS and applications, saving both time and effort.
Before starting the cloning process, verify that your computer supports the M.2 drive and check for compatibility with your motherboard.
Once connected, back up your important data from the source SSD to avoid any potential data loss. After the cloning is complete, ensure that the computer is configured to boot from the new M.2 drive in the BIOS settings.
Finally, you can format the old SSD for other storage purposes or keep it as a backup.
Steps to Clone SSD to M.2
| Step | Instructions | Required Tools |
|---|---|---|
| 1 | Create a backup of the SSD data | Backup software, external storage |
| 2 | Connect the M.2 drive to the computer | M.2 to USB adapter or M.2 slot on the motherboard |
| 3 | Initialize the M.2 drive | Disk Management in Windows or Disk Utility in macOS |
| 4 | Download and install cloning software | Free or paid cloning software (e.g. Macrium Reflect, Clonezilla, or Acronis True Image) |
| 5 | Launch the cloning software and select the source (SSD) and destination (M.2) drives | Cloning software |
| 6 | Configure the cloning settings (e.g. partition size adjustment, cloning options) | Cloning software |
| 7 | Start the cloning process | Cloning software |
| 8 | Wait for the cloning process to complete | (No tools needed) |
| 9 | Shut down the computer and remove the old SSD | (No tools needed) |
| 10 | Install the cloned M.2 drive in the computer | M.2 slot on the motherboard, screwdriver (if necessary) |
| 11 | Boot up the computer and ensure everything is working properly | (No tools needed) |
Key Takeaway

Benefits of Cloning SSD to M.2
Understanding The Basics Of Cloning Ssd To M 2
Are you thinking about cloning your ssd to m 2, but don’t know where to start? Look no further! We’ll provide a step-by-step guide on how to perform this task.
But first, let’s gain a better understanding of what cloning is and its benefits.
What Is Cloning?
Cloning is the process of creating an exact copy of an existing drive and transferring it to a new storage device. In simpler terms, it copies the data from one drive to another, making it an exact replica of the original.
What Are The Benefits Of Cloning Ssd To M 2?
Cloning an ssd to m 2 has many benefits, including:
- Faster boot-up and loading times
- Increased storage capacity
- Improved system performance and efficiency
- Easy data transfer between drives
How Does Cloning Work?
Cloning typically involves using specialized software to copy the contents of one drive to another.
Here’s a simple step-by-step guide to cloning ssd to m 2:
- First, connect both drives to your computer. Make sure your m 2 drive has enough space to accommodate all data from the SSD.
- Download and install cloning software on your computer. There are several free and paid software options available, such as acronis true image, macrium reflect, and clonezilla.
- Open the cloning software and select the option to clone an existing drive.
- Choose your ssd as the source drive and your m 2 drive as the destination drive.
- Configure any settings or options, such as the partition size and format.
- Begin the cloning process and wait for it to complete. The duration may vary depending on the size of the data being transferred.
- Once the cloning process finishes, shut down your computer and remove the original SSD.
- Boot your computer using the m 2 drive as the primary boot device.
- Verify that all your data and settings are intact and functioning correctly.
Cloning ssd to m 2 can be an essential step in upgrading your computer’s storage and performance. By following the steps outlined you’ll be able to easily clone your ssd to m 2 and reap all the benefits.
Preparing For Cloning
Solid state drives (ssds) are the preferred storage media for many enthusiasts due to their speed and reliability.
The advent of m 2 drives made things even better by providing even faster speeds and, in some cases, space-saving. However, moving your data from an ssd to an m 2 is not as simple as copying files from one folder to another.
To ensure no data loss and a successful move from ssd to m 2, you’ll need to follow a few steps.
Here’s what to do:
Understanding The Different Types Of Ssds And M 2S
Not all ssds are created equal, and the same goes for m 2 drives. Knowing which one you own and which suits your needs will make a difference when cloning your SSD.
Here are the different types:
Ssds
- Sata ssd: Uses the sata interface commonly found in laptops and desktops.
- Nvme ssd: Uses the newer nvme (non-volatile memory express) interface, which is distinctively faster than sata.
M 2S
- Sata m 2: Has the sata interface and is slower than nvme.
- Nvme m 2: Uses the faster nvme interface, and is the preferred choice for cloning.
Knowing which type of ssd and m 2 you own will make things easier when it comes to cloning. Make sure that your system has an m 2 slot compatible with the drive you’re planning to clone your ssd onto.
Making Sure Your M 2 Is Compatible With Your Ssd
Not all m 2 drives are compatible with all ssds.
Here are a few things to note before cloning:
- Check your motherboard’s user manual or online specifications to make sure it supports the m 2 drive you’re planning to use.
- Make sure your m 2 supports the same interface as your ssd. For instance, you can’t clone an nvme ssd to an m 2 with a sata interface.
- Check if your m 2 slot supports the nvme protocol. Some older motherboard models may only support sata interface m 2 drives.
Creating A Backup Of Your Data
After settling on the appropriate m 2, the next step is making sure that you backup all your data before cloning. A backup ensures you don’t lose anything important, and you can always revert to it should things go wrong.
Here’s how:
- Connect an external hard drive to your computer via usb or any other compatible port.
- Transfer all your important files to the external hard drive.
- Disconnect the hard drive once the transfer of files is complete.
Now that you understand the different types of ssds and m 2s, made sure your m 2 is compatible with your ssd, and created a backup of your data, you’re ready to clone your ssd to an m 2.
The Cloning Process
Downloading And Installing Cloning Software
To clone your ssd to m 2, you will need to download and install cloning software.
These are the steps to follow:
- Choose your preferred cloning software and download it from the official website or a reliable source.
- Install the cloning software on your computer by following the installation prompts.
- Once the software is installed, open it and familiarize yourself with its interface.
Connecting Your Ssd And M 2
After installing the cloning software, you will need to connect your ssd and m 2.
Here’s how to do it:
- Turn off your computer and disconnect all cables.
- Open the case of your computer and locate the ssd and m 2 slots.
- Insert your ssd into the cloning dock or enclosure and connect it to your computer.
- Insert your m 2 into the m 2 slot on your motherboard and connect it to your computer.
Starting The Cloning Process
Once you have installed the cloning software and connected your ssd and m 2, you can begin the cloning process.
Follow these instructions:
- Open the cloning software and select the option to clone a disk or drive.
- Choose your ssd as the source disk and your m 2 as the target disk.
- Configure the cloning options, including partition layout and disk size, if necessary.
- Start the cloning process and wait for it to complete.
Remember to check that the cloning process was successful by checking the m 2 drive. Once that is done, you can disconnect all cables, close the computer case, and start using your newly cloned m 2 drive.
Troubleshooting And Finishing Up
Cloning your ssd to m. 2 can be tricky, especially if you’ve never done it before. While the process is relatively straightforward, there are many things that can go wrong.
That’s why we’ve dedicated this section of our blog post to troubleshooting and finishing up your cloning process.
Here are some things to keep in mind:
Checking For Errors
Before you do anything else, you should check for errors. This will help you catch any mistakes early on so that you can fix them before they cause any serious problems.
Here are some things to look out for:
- Check for any error messages or warnings that may appear during the cloning process
- Look for any files or folders that may have been left out during the cloning process
- Double-check that your m.2 drive has enough space to accommodate your ssd’s data
Making Sure Everything Was Cloned Properly
Once you’ve checked for errors, it’s time to make sure that everything was cloned properly.
Here are some things to look for:
- Check that all of your files and folders have been transferred to your m.2 drive.
- Make sure that your m.2 drive is bootable by restarting your computer and selecting it as your primary boot device.
- Verify that all of your applications and drivers are working as expected.
Updating Drivers And Firmware
After you’ve made sure that everything was cloned properly, it’s time to update your drivers and firmware. This is important because outdated drivers and firmware can cause performance issues and other problems.
Here’s what you need to do:
- Visit your computer manufacturer’s website and download the latest firmware and drivers for your hardware.
- Follow the instructions provided by your manufacturer to install the updates.
- Restart your computer once the updates have been installed.
Finalizing The Process
Now that you’ve updated your drivers and firmware, it’s time to finalize the process. This means making sure that everything is working as expected and that you’ve properly disposed of your old SSD.
Here are some things to keep in mind:
- Test your m.2 drive to make sure that everything is working properly
- Erase your old ssd or dispose of it safely
- Enjoy your new, faster, and more efficient m.2 drive!
Troubleshooting and finishing up the cloning process can be just as important as completing the actual cloning process.
By following these guidelines, you can ensure that your new m. 2 drive is working properly and that all of your data has been successfully transferred.
Remember to always double-check everything and take your time to avoid any potential issues.
Frequently Asked Questions Of How To Clone Ssd To M 2
How Do I Clone Ssd To M.2?
You can clone ssd to m. 2 using various free software like aomei more backup, macrium reflect, and clonezilla.
Why Should I Clone My Ssd To M.2?
Cloning ssd to m. 2 can give you a boost in performance, increase storage, and improve the overall efficiency of your system.
What Are The Requirements For Cloning Ssd To M.2?
To clone ssd to m. 2, you need a m. 2 port on your motherboard, an m. 2 ssd, and cloning software.
Can I Clone Ssd To M.2 Without Reinstalling Windows?
Yes, you can clone ssd to m. 2 without reinstalling windows using cloning software like aomei more backup, macrium reflect, and clonezilla.
Conclusion
Cloning ssd to m. 2 is essential for users who want to transfer data efficiently without losing files in the process. We understand that this process can seem daunting, but our step-by-step guide has made it simple for you to follow.
Remember to prepare well before starting the procedure and select the right tools suited for your system. Ensure that you stay patient throughout the process as it can take some time to complete.
The key takeaway from this guide is that with the right tools and a clear understanding of the procedure, cloning ssd to m.
2 is an easy task that can save you time and resources. So, get started with the right mindset and always prioritize safety because there’s nothing as critical as your data.


