How to Connect Nvme Ssd to Sata: 10 Easy Steps!
To connect an NVMe SSD to SATA, you can’t do it directly as they’re incompatible due to differing interfaces and protocols.
NVMe is a protocol for accessing high-speed storage media that brings many advantages compared to legacy protocols like SATA.
However, you can use a NVMe to SATA adapter or an enclosure for connection.
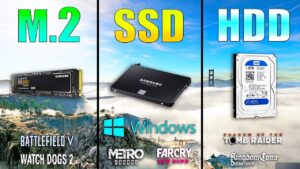
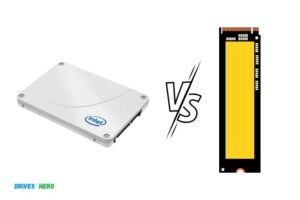
NVMe and SATA are different types of SSD interfaces used to connect the drives to the computer’s motherboard.
NVMe SSDs are faster and use the PCIe slot on your motherboard while SATA SSDs are slower and use the SATA ports.
NVMe SSDs and SATA ports are not directly compatible, but they can be connected using an NVMe to SATA adapter or an enclosure.
To connect an NVMe SSD to SATA, you can’t do so directly because they use different protocols and interfaces.
NVMe SSDs are faster and connect to the PCIe slots on the motherboard while SATA SSDs use the slower SATA ports.
But using an NVMe to SATA adapter or enclosure, you can enable the connection between the two, allowing your system to recognize and use the NVMe SSD.
10 steps to Connect NVMe SSD to SATA
| Steps | Description |
|---|---|
| 1 | Purchase an NVMe to SATA adapter |
| 2 | Power off your computer |
| 3 | Open the computer case |
| 4 | Locate the SATA interface |
| 5 | Connect the NVMe SSD to the adapter |
| 6 | Connect the adapter to the SATA interface |
| 7 | Secure the SSD and adapter in the case |
| 8 | Close the computer case |
| 9 | Power on your computer |
| 10 | Check to see if the SSD is successfully connected through the computer’s BIOS or operating system |
Key Takeaway
Five Facts About: Connecting NVMe SSD to SATA
Understanding The Different Nvme Ssd And Sata Connectors
Understanding the different connectors for NVMe SSD and SATA is essential to know how to connect an NVMe SSD to SATA.
With a variety of connectors available, it can be confusing, but learning the differences will help you properly connect your NVMe SSD to SATA for optimal performance.
Understanding The Connector Types
NVMe SSDs and SATA SSDs are both popular storage options, but they use different types of connectors. Understanding these connector types is crucial when it comes to connecting an NVMe SSD to SATA.
Let’s dive into the specifics:
NVMe Connectors:
- M.2 Key M Connector: The M.2 Key M connector is primarily used for NVMe SSDs. It has multiple pins and provides high-speed data transfer rates, making it an excellent choice for users seeking optimal performance.
- U.2 Connector: The U.2 connector, also known as SFF-8639, is commonly used in enterprise settings. It supports both NVMe and SATA protocols, offering flexibility when it comes to drive selection.
SATA Connectors:
- SATA III Connector: The SATA III connector is widely used for SATA SSDs. It is a 7-pin connector that delivers data transfer speeds of up to 6 Gbps. SATA III connectors are compatible with both SSDs and traditional hard drives, making them a versatile choice for storage solutions.
- SATA Express Connector: The SATA Express connector is a combination of SATA and PCIe technologies. However, it is not as commonly used as other connector types.
Now that you have a better understanding of the different connector types, let’s explore the importance of compatibility when connecting NVMe SSDs to SATA.
Finding The Right Adapter For Your System
Connect your NVMe SSD to your SATA system effortlessly with the right adapter. Ensure smooth data transfer and compatibility without any technical hassle.
Researching Adapter Options:
When it comes to connecting an NVMe SSD to a SATA interface, finding the right adapter for your system is crucial.
There are several options available in the market, each with its own features and compatibility. Before making a purchase, it is important to research and consider your specific needs and requirements.
Here are some key points to keep in mind:
- Form Factor Compatibility: Check if the adapter is compatible with the form factor of your NVMe SSD and SATA interface. Common form factors include M.2 and PCIe. Ensure that the adapter supports the same form factor to ensure proper functionality.
- Speed and Performance: Consider the speed and performance capabilities of the adapter. Look for an adapter that supports high data transfer rates to maximize the performance of your NVMe SSD.
- Power and Cooling: Some adapters may require additional power or cooling solutions to ensure smooth operation. Check if your system can provide the necessary power and cooling requirements for the adapter you choose.
- Compatibility with Computer Models: Different computer models may have specific requirements when it comes to adapter compatibility. It is important to review the specifications of your computer model and ensure that the adapter is compatible.
- Customer Reviews and Ratings: Always take the time to read customer reviews and ratings of the adapter you are considering. This will give you insight into the experiences of other users and help you make an informed decision.
Considerations For Specific Computer Models:
When choosing an adapter to connect your NVMe SSD to a SATA interface, it is essential to consider the specific requirements of your computer model. Different computer models may have different compatibility and compatibility requirements.
Here are some considerations to keep in mind:
- Dell: Dell computer models may require specific adapters due to their proprietary designs. Check if the adapter you are considering is compatible with Dell systems to ensure proper functionality.
- HP: HP systems may have their own specific adapter requirements. Make sure to research the compatibility of the adapter with HP systems before making a purchase.
- Lenovo: Lenovo computer models may also have unique adapter compatibility needs. Confirm if the adapter you are interested in works seamlessly with Lenovo systems.
- Custom-Built PCs: If you have a custom-built PC, it is important to ensure that the adapter is compatible with the motherboard and other components in your system. Check the specifications of your PC components before purchasing an adapter.
- Mac: Mac users should pay attention to compatibility with Apple systems. Look for adapters that are explicitly mentioned to work with Mac computers to avoid compatibility issues.
By keeping these considerations in mind and conducting thorough research, you can find the right adapter for your system to connect your NVMe SSD to a SATA interface.
Remember to verify compatibility and check customer reviews to ensure a satisfying and seamless experience.
Preparing Your System For Installation
To connect an NVMe SSD to a SATA system, you need to ensure your system is prepared for installation.
Follow the proper steps and guidelines to seamlessly integrate your SSD and optimize its performance:
Before you can connect your NVMe SSD to SATA, there are a few important steps you should take to ensure a smooth installation process. Taking the time to properly prepare your system will help you avoid any potential issues and safeguard your data.
Here’s what you need to do:
Backing up data:
It is crucial to back up all your important data before proceeding with the installation. This ensures that even if something goes wrong during the installation process, your valuable files and documents remain safe and secure. Make sure to create a backup on an external storage device or in the cloud.
Powering off and disconnecting peripherals:
Before you begin working on your system, it’s vital to power off your computer and disconnect any peripherals.
This includes unplugging your computer from the power source and disconnecting devices such as printers, scanners, and external hard drives. By doing this, you eliminate the risk of accidentally causing damage to your computer or any connected devices.
Removing the computer case:
To access the internals of your computer, you will need to remove the computer case. Refer to your computer’s user manual or search online for specific instructions on how to safely open your computer case.
Remember to ground yourself by touching a grounded metal object to prevent any static electricity discharge that can harm your components.
Locating the SATA connectors:
Next, you need to locate the SATA connectors on your motherboard. These are usually found near the edge of the board and are smaller than the larger power connectors. They may be labeled SATA or have different colors to help distinguish them from other connectors.
Checking compatibility:
Before proceeding, ensure that your NVMe SSD is compatible with your motherboard’s SATA connectors.
Consult both the SSD’s and motherboard’s user manuals or websites for compatibility information. This step is crucial to avoid any compatibility issues that may arise during or after installation.
Preparing the SATA cable:
Connect one end of the SATA cable to the SATA connector on your motherboard. Make sure it is securely in place and properly aligned. Remember that the connector on the SSD itself will be different from the motherboard connector, so do not connect the SSD just yet.
Mounting the NVMe SSD:
Depending on your computer case, you might need to mount the NVMe SSD in a designated slot. If your case does not have a dedicated slot, you can use an adapter to secure the SSD in an open drive bay. Ensure the NVMe SSD is firmly attached and take care not to overtighten any screws.
Connecting the NVMe SSD:
Finally, carefully connect the other end of the SATA cable to the corresponding connector on the NVMe SSD.
Ensure a snug fit, but avoid using excessive force. Double-check that both ends of the SATA cable are securely connected to their respective connectors.
With these preparations complete, you are now ready to proceed with the actual installation process of connecting your NVMe SSD to SATA.
Stay tuned for the next section of our blog post, where we guide you through the steps of connecting an NVMe SSD to SATA, ensuring maximum performance and compatibility.
Remember, by following these steps and adhering to proper installation procedures, you will be able to seamlessly integrate your NVMe SSD into your system, providing faster data transfer speeds and enhanced storage capacity.
Opening Your Computer Case
Learn how to easily connect your NVMe SSD to a SATA interface by opening your computer case and following a few simple steps.
Upgrade your storage effortlessly and improve your computer’s performance with this straightforward process. To connect an NVMe SSD to a SATA port, you’ll need to start by opening your computer case.
Follow these steps to safely access the internals of your machine:
Locating And Removing The Case Screws:
- Carefully place your computer on a flat surface, ensuring it is powered off and disconnected from the power source.
- Examine the case’s exterior to locate the screws holding it in place. These are usually found on the back or side panels.
- Use a suitable screwdriver to remove the case screws. Remember to keep them in a safe place, as you will need them to close the case later.
Opening The Computer Case:
- Once you’ve removed the screws, gently slide or lift off the side panel of the case. Some cases may have a latch or button that needs to be pressed or released to open the case.
- Take a moment to familiarize yourself with the internal layout of your computer. Note the cables, components, and any specific instructions provided by the manufacturer.
- It’s important to ground yourself before touching any internal components. You can do this by touching a metal part of the case or using an anti-static wristband.
- With the case open, you can now locate the SATA data and power connectors on the motherboard. These are typically labeled and easy to identify.
- Depending on your computer’s design, you may need to remove additional hardware to access the SATA ports. Follow any instructions from your computer’s user manual or the manufacturer’s website.
By following these steps, you’ve successfully opened your computer case and are one step closer to connecting your NVMe SSD to a SATA port.
Remember to exercise caution and refer to your computer’s documentation if you encounter any difficulties.
Installing The Adapter
To connect your NVMe SSD to SATA, you can easily install an adapter. This will allow you to extend the storage capacity of your device without any hassle or complex procedures. With a simple installation process, you can enjoy the benefits of additional storage space for your data.
Plugging In The Adapter:
When it’s time to connect your NVMe SSD to a SATA port, installing the adapter correctly is crucial.
Follow these steps to ensure a smooth installation process:
Before starting, make sure you have all the necessary tools:
- The NVMe to SATA adapter, a screwdriver, and any required screws or cables.
- Locate the NVMe slot on your motherboard and gently insert the adapter into the slot. Ensure that it is firmly seated and aligned properly.
- Take the SATA cable and connect it to the adapter’s SATA interface. This will allow your NVMe SSD to communicate with your motherboard using the SATA protocol.
- Connect the other end of the SATA cable to an available SATA port on your motherboard. Check your motherboard’s documentation for the specific port to use.
- Once the cables are connected, secure the adapter in place using the screws provided. This will prevent any movement or instability during usage.
- Ensure that all the connections are secure and tight, as loose connections can cause poor performance or connectivity issues.
- After securing the adapter, double-check that the NVMe SSD is properly seated within the adapter. Gently press down on the SSD to confirm it is securely in place.
- Finally, close up your computer case and reconnect any cables you disconnected during the installation process.
By following these steps, you’re on your way to connecting your NVMe SSD to a SATA port effectively. Enjoy the enhanced speed and performance that your SSD brings to your system.
Now that we have successfully installed the adapter, we can move on to securing it in place.
Identifying The Sata Connectors
Connecting an NVMe SSD to a SATA port requires identifying the SATA connectors for a successful installation.
By understanding the SATA connectors, you can easily connect your NVMe SSD and enjoy faster performance.
There are different types of SATA connectors that you need to identify when connecting an NVMe SSD to SATA.
Let’s take a closer look at each one:
Different Types Of Sata Connectors:
- SATA 3.0 Connector: This is the most common type of SATA connector used in modern systems. It has a data transfer speed of up to 6 gigabits per second (Gbps) and is backward compatible with SATA 2.0 and SATA 1.0.
- SATA Express Connector: This connector combines the SATA 3.0 interface with the PCI Express (PCIe) interface. It allows for faster data transfer speeds and is primarily used for high-performance storage devices.
- M.2 Connector: This connector is becoming increasingly popular in modern motherboards and laptops. It supports both SATA and PCIe interfaces and offers faster speeds compared to traditional SATA connectors.
Identifying the correct connector is crucial to ensure a successful connection.
Here’s how you can find the right one:
Check your motherboard:
Look for the SATA connector ports on your motherboard. They are usually labeled and easily identifiable. Refer to your motherboard’s manual if you’re unsure.
Inspect the connectors:
SATA connectors have distinct shapes and sizes. SATA 3.0 connectors have a small L-shaped notch, while M.2 connectors are elongated and usually have screw holes.
Make sure you are selecting the appropriate connector based on your SSD and motherboard compatibility.
Consider the data transfer speed:
If you’re aiming for faster speeds, consider using a SATA Express connector or an M.2 connector that supports the PCIe interface.
Remember to check the specifications of your SSD and motherboard to ensure they are compatible with faster transfer speeds.
Seek professional assistance:
If you’re uncertain about identifying the correct SATA connector, it’s always wise to seek help from a professional or consult your motherboard manufacturer’s support team. They can guide you through the process and provide valuable insights.
Identifying the right SATA connectors before connecting your NVMe SSD is vital to ensure compatibility and optimal performance.
Make sure to double-check your connectors and consult relevant resources to avoid any compatibility issues and enjoy a seamless experience.
Connecting The Nvme Ssd
Connect your NVMe SSD to SATA easily with our step-by-step guide. Discover the simple process to enhance your storage capabilities and optimize your system’s performance.
Connecting an NVMe SSD to a SATA interface may seem challenging, but with the right guidance, it can be a straightforward process.
By following the steps outlined below, you’ll be able to connect your NVMe SSD efficiently and ensure a secure connection.
Aligning The Ssd And Adapter Connectors:
- Gently locate the M.2 slot on your motherboard or adapter, ensuring it aligns with the SSD connector.
- Match the notch on the SSD with the corresponding keying on the slot or adapter to guarantee correct placement.
- Carefully insert the NVMe SSD into the M.2 slot, exerting slight pressure until it slots in securely.
Securing The Connection:
- Once the SSD is aligned and inserted correctly, secure it in place using the screw provided. This ensures stability and prevents any potential disconnections during usage.
- Position the SSD bracket onto the mounting hole adjacent to the M.2 slot, if available, and secure it with the designated screws.
Remember, when connecting NVMe SSDs, it’s essential to follow the manufacturer’s instructions specific to your device.
By aligning the SSD and adapter connectors accurately and securely fastening the connection, you’ll be able to make the most of your NVMe SSD’s high-speed performance.
Securing The Nvme Ssd
Connecting your NVMe SSD to a SATA interface is a crucial step in securing your data storage. Follow these simple steps to ensure a seamless and safe connection for efficient data transfer.
When it comes to connecting your NVMe SSD to SATA, it’s crucial to ensure a secure and stable connection.
By properly securing the SSD, you can prevent any potential issues and optimize its performance. There are two common methods for securing the NVMe SSD: using screws or clips.
Let’s explore each option in detail:
Using Screws To Secure The Ssd:
- Align the NVMe SSD with the designated slot on your motherboard.
- Carefully insert the screws provided with the SSD into the designated holes on the motherboard.
- Use a screwdriver to tighten the screws gently until the SSD is firmly secured.
- Make sure not to overtighten the screws, as it may damage the SSD or the motherboard.
Using Clips To Secure The Ssd:
- Look for the M.2 slot on your motherboard where the NVMe SSD will be installed.
- Attach the clips to the designated slots on the motherboard.
- Insert the NVMe SSD into the M.2 slot, ensuring it is properly aligned.
- Push the SSD down gently until it clicks into place.
- Secure the SSD by fastening the clips onto the edges of the SSD, ensuring a snug fit.
Remember, whether you choose to use screws or clips, it’s essential to follow the manufacturer’s instructions specific to your motherboard and SSD model.
Keeping the NVMe SSD securely in place will guarantee a stable connection and optimal performance for your system.
Bios Settings And Compatibility
BIOS settings play a crucial role in ensuring compatibility when connecting an NVMe SSD to SATA. Adjusting these settings properly allows for a seamless connection and optimal performance between the two devices.
Accessing Bios Settings:
To connect an NVMe SSD to a SATA port, you’ll first need to access your computer’s BIOS settings.
Follow these steps:
- Restart your computer and look for the specific key or key combination to access the BIOS. Common keys include Del, F2, or F10.
- Once you enter the BIOS, navigate to the “Settings” or “Configuration” section using the arrow keys on your keyboard.
Enabling Compatibility Features:
After accessing the BIOS settings, you’ll need to enable compatibility features to ensure smooth connectivity between NVMe SSD and SATA.
Here’s what you should do:
- Locate the “Storage” or “Peripheral” section in the BIOS menu.
- Look for an option related to NVMe or SATA settings. This option may vary depending on your computer’s manufacturer and BIOS version.
- Enable the NVMe compatibility mode or legacy support option.
- Save the changes and exit the BIOS. Your computer will restart automatically.
By accessing the BIOS settings and enabling compatibility features, you can successfully connect an NVMe SSD to a SATA port. Make sure to follow the instructions accurately to avoid any complications.
Initializing The Nvme Ssd
Learn how to connect your NVMe SSD to a SATA port effortlessly and efficiently. Say goodbye to complicated initialization processes and start enjoying the benefits of high-speed storage today.
Formatting the SSD:
Before connecting your NVMe SSD to the SATA interface, it is crucial to format the drive to ensure optimal performance.
Here’s how you can format the SSD:
- Open the Disk Management utility on your Windows computer by right-clicking on the Start button and selecting “Disk Management” from the context menu.
- Locate your NVMe SSD in the list of available drives. It will be labeled as ‘Not Initialized’ or ‘Unallocated’.
- Right-click on the NVMe SSD and select “Initialize Disk”. A dialog box will appear, providing initialization options.
- Choose the desired partition style (MBR or GPT) and click “OK” to proceed with the initialization process.
- Once the disk is initialized, you can proceed with formatting it
Assigning a drive letter:
After initializing the NVMe SSD, the next step is to assign a drive letter so that your device can recognize it correctly.
Follow these steps to assign a drive letter:
- Right-click on the unallocated space of the initialized NVMe SSD and choose “New Simple Volume” from the context menu.
- The New Simple Volume Wizard will open. Click “Next” to continue.
- Specify the desired size for your partition and select an available drive letter.
- Choose a file system format (NTFS is recommended) and assign a volume label.
- Enable the “Perform a quick format” option and click “Next” to proceed.
- Review the settings and click “Finish” to complete the process.
By formatting and assigning a drive letter to your NVMe SSD, you ensure its compatibility with the SATA interface and make it accessible for storing and retrieving data.
Now you can enjoy the enhanced speed and performance of your NVMe SSD while connected via SATA.
Verifying The Connection
Connect your NVMe SSD to a SATA interface seamlessly with our step-by-step guide. Learn how to verify the connection and optimize your storage performance effortlessly.
Once you have successfully connected your NVMe SSD to the SATA port, it is important to verify the connection to ensure everything is working properly.
In this section, we will go through the necessary steps to confirm that the NVMe SSD is recognized and the connection is stable.
Checking The Device Manager:
- Open the Device Manager on your computer by right-clicking on the Windows Start button and selecting “Device Manager” from the menu.
- Look for the “Disk drives” section and expand it to view the list of drives connected to your computer.
- You should see the NVMe SSD listed, along with any other drives you have connected. Ensure that the NVMe SSD is recognized and displayed without any warning signs or error messages.
If the NVMe SSD is not listed, try the following troubleshooting steps:
- Check the physical connection between the NVMe SSD and the SATA port to ensure it is securely attached.
- Restart your computer and check the Device Manager again. Sometimes, a simple reboot can help resolve recognition issues.
- Update your motherboard’s BIOS and drivers to the latest versions. Manufacturers often release updates that address compatibility issues.
- If none of these steps work, consult the manufacturer’s documentation or contact their support for further assistance.
Verifying The Nvme Ssd Is Recognized:
- Open your computer’s BIOS settings by restarting your computer and pressing the indicated key during startup (usually Del or F2).
- Navigate to the “Storage” or “Advanced” section of the BIOS menu.
- Look for the NVMe SSD in the list of connected storage devices. It should be listed along with other drives.
Ensure that the NVMe SSD is recognized and showing the correct capacity. If it is not listed or showing incorrect information, check the following:
- Confirm that the NVMe SSD is properly seated in the SATA port and power connectors.
- Verify that the SATA port is enabled in the BIOS settings.
- Check for any BIOS updates that may address compatibility issues.
- If you are still experiencing issues, consult the NVMe SSD’s documentation or contact their support for further assistance.
Now that you have successfully verified the connection, you can proceed with configuring your NVMe SSD and enjoying faster storage performance.
Adapter Compatibility Issues
Connect your NVMe SSD to SATA without any adapter compatibility issues with this easy-to-follow guide. Enjoy fast and efficient data transferring in just a few simple steps.
When it comes to connecting an NVMe SSD to SATA, ensuring adapter compatibility is crucial for a seamless experience.
Incompatible adapters can lead to various issues, including data corruption, performance degradation, or even complete device failure.
To avoid these complications, it’s important to identify incompatible adapters and research compatibility solutions.
Here are some key points to consider:
Identifying Incompatible Adapters
- Know your adapter type: Different adapters support various interface standards such as M.2, PCIe, or SATA. Ensure that your adapter is specifically designed to support NVMe SSD and SATA connections.
- Check the interface compatibility: Verify that the adapter’s interface matches the connector on your NVMe SSD and SATA port. For example, if the NVMe SSD uses the M.2 interface, make sure the adapter supports NVMe M.2 to SATA conversion.
- Consider power compatibility: Some adapters require additional power connections, which might not be present in all systems. Ensure that your power supply is capable of providing sufficient power to the adapter for proper functioning.
Researching Compatibility Solutions
- Read product specifications: Thoroughly review the adapter’s product specifications and documentation before making a purchase. Look for explicit compatibility information that confirms its support for NVMe SSD and SATA connections.
- Online forums and communities: Engage with tech enthusiasts and experts on online forums and communities. Seek advice from individuals who have successfully connected NVMe SSDs to SATA using adapters. They can provide valuable insights and recommend compatible adapter models.
- Manufacturer support: Reach out to the manufacturer of the NVMe SSD or the adapter for compatibility guidance. Their technical support team should be able to assist you in finding the right adapter that suits your specific requirements.
- Consult professional reviews: Look for reputable technology websites or publications that provide in-depth reviews of adapters. These reviews often include compatibility information, performance benchmarks, and user experiences.
Remember, ensuring compatibility between your NVMe SSD and SATA adapter is crucial for optimal performance and reliability.
By identifying incompatible adapters and researching compatibility solutions, you can achieve a successful connection and maximize the capabilities of your storage device.
Incorrect Bios Settings
Incorrect BIOS settings can cause issues when trying to connect an NVMe SSD to SATA. It is important to check and adjust the BIOS settings to ensure proper compatibility and functionality between the two.
Troubleshooting Bios Configuration:
When connecting an NVMe SSD to a SATA port, incorrect BIOS settings can cause compatibility issues and prevent the drive from functioning properly.
To troubleshoot and resolve these issues, follow these steps:
- Check the BIOS version: Ensure that you are running the latest version of the BIOS on your computer. Visit the manufacturer’s website for any available updates and follow the instructions to install them.
- Enable NVMe support: Access the BIOS settings by restarting your computer and pressing the designated key (usually Del, F2, or F12) to enter the BIOS menu. Look for options related to storage or SATA configuration, and enable NVMe support if available.
- Change boot order: If the NVMe SSD is not being detected or not showing up as a bootable option, verify the boot order settings in the BIOS. Ensure that the NVMe SSD is listed as one of the primary boot devices.
- Disable legacy mode: Some older systems may have an option called “legacy mode” or “compatibility mode” enabled in the BIOS. Disable this mode to ensure full compatibility with NVMe SSDs.
- Re-seat the drive: If the NVMe SSD is still not recognized, try re-seating the drive. Power off your computer, unplug the power cable, open the case, and reconnect the NVMe SSD securely. Close the case, plug in the power cable, and power on your computer to check if the drive is now detected.
- Clear CMOS: If all else fails, you can try resetting the BIOS settings to their default values by clearing the CMOS. Refer to your motherboard’s manual for instructions on how to clear CMOS, as different models may have different methods.
Following these troubleshooting steps should help you resolve any incorrect BIOS settings that may be preventing your NVMe SSD from properly connecting to a SATA port. Remember to save any changes made in the BIOS before exiting.
With the above troubleshooting methods, you can ensure that your NVMe SSD is correctly connected to a SATA port and enjoy its speed and performance benefits. Happy computing!
Connection Issues
Connect your NVMe SSD to a SATA interface effortlessly without any connection issues. Follow simple steps to ensure a smooth and secure connection for efficient data transfer. Upgrade your storage system seamlessly with this easy-to-follow guide.
How To Connect Nvme Ssd To Sata?
When it comes to connecting your NVMe SSD to SATA, you may encounter a few connection issues along the way.
The good news is that these problems can often be resolved with a few simple steps. In this section, we’ll explore two common connection issues and how to address them effectively.
Checking For Loose Connections
Before diving into more complex troubleshooting steps, it’s essential to check for any loose connections. Loose connections can cause the SSD to not be recognized or function properly.
Here’s what you need to do:
- Start by turning off your computer and disconnecting the power source.
- Open your computer case and locate the NVMe SSD and SATA connections.
- Gently remove and reinsert both the NVMe SSD and SATA cables, ensuring they are securely connected.
- Double-check that all connections are tight and properly seated.
- Close the computer case, reconnect the power source, and power on your computer.
By performing this simple check, you can eliminate the possibility of loose connections causing connectivity issues.
Reconnecting The Ssd
If you’ve confirmed that there are no loose connections, the next step is to reconnect the NVMe SSD to the SATA port.
Here’s how you can do it:
- Start by shutting down your computer and disconnecting the power source.
- Carefully disconnect the NVMe SSD from the SATA port.
- Inspect the SATA port for any visible damage or debris that might impede the connection.
- If there are any issues, clean the port using compressed air or a soft brush.
- Reconnect the NVMe SSD to the SATA port securely, ensuring it is properly aligned.
- Close the computer case, reconnect the power source, and power on your computer.
By following these steps, you can ensure a solid connection between the NVMe SSD and the SATA port, resolving any potential issues that may have hindered proper functionality.
Remember, checking for loose connections and reconnecting the SSD can often resolve connection issues.
If you’re still experiencing problems, it may be helpful to consult your computer manufacturer’s support or seek professional assistance.
FAQ About Connect Nvme Ssd to Sata
How can I connect a NVMe SSD to a SATA port?
Answer: You can use an NVMe to SATA adapter, which allows you to connect your NVMe SSD to a SATA port on your motherboard.
Does a NVMe SSD need to be connected to a special type of port?
Answer: Yes, the NVMe form factor requires a PCIe connection to the motherboard. However, with an NVMe to SATA adapter you can connect your NVMe SSD to a SATA port.
Does a NVMe SSD require different connectors than standard SATA?
Answer: Yes, a NVMe SSD requires a PCIe slot instead of the standard SATA connector. However, with an NVMe to SATA adapter you can connect your NVMe SSD to a SATA port.
How fast is NVMe compared to SATA?
Answer: NVMe is significantly faster than SATA, boasting transfer speeds up to 4 times higher.
Will a SATA port work with a NVMe SSD?
Answer: Not directly, but you can use an NVMe to SATA adapter to connect your NVMe SSD to a SATA port.
Conclusion
In closing, connecting an NVMe SSD to a SATA port can provide a significant performance boost to your system. By following the step-by-step guide outlined. You can successfully connect your NVMe SSD and unlock faster data transfer speeds.
Remember to check your motherboard’s compatibility and make any necessary BIOS updates before installation.
Once connected, take advantage of the increased storage capacity and faster load times for your applications and files. Additionally, don’t forget to regularly update your NVMe SSD drivers to ensure optimal performance.
With this simple upgrade, you can enhance your computer’s overall speed and efficiency, making it a worthwhile investment for any tech enthusiast or professional user. Happy connecting!

Harold Williams is a senior writer and technical editor at Drives Hero with 20+ years of experience in IT administration. He specializes in storage systems, SSD reviews, and performance testing, bringing real-world insight to every guide.