How to Connect Sata Cable to Power Supply?
To connect a SATA cable to a power supply, first locate the 15-pin SATA connector on the power supply. It may be labeled as “SATA” or have an image of two hard drive connectors.
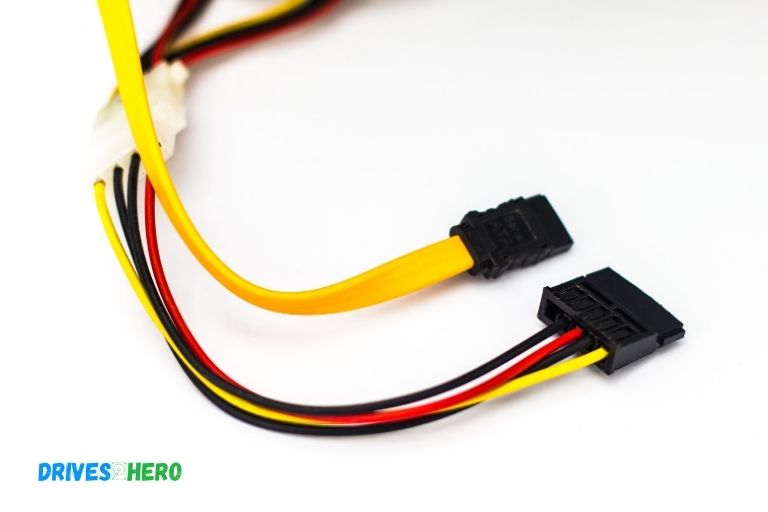
Connecting the SATA cable to the power supply is quite simple. To begin, locate the SATA power connector from your power supply and plug it into the corresponding port on your drive. From there, use a screwdriver to secure any screws provided with the connection and you are done!
Here is a table:
| Step | Action |
|---|---|
| 1 | Locate the SATA power connector on your power supply. It will typically have multiple connectors on one cable. |
| 2 | Take the SATA cable and plug it into the SATA power connector on the power supply. |
| 3 | Identify the SATA port on your device (e.g. hard drive, SSD). It will be a rectangular-shaped port with a small notch on one side. |
| 4 | Take the other end of the SATA cable and plug it into the SATA port on the device. Be sure to align the notch on the port and the cable connector. |
| 5 | Ensure that the connection is secure by gently tugging on the cable. |
| 6 | Repeat steps 3-5 if connecting additional devices to the power supply. |
| 7 | Power on your device and verify that it is recognized by your system. |
How Do I Add a Sata Cable to My Power Supply?
Adding a SATA cable to your power supply is easy.
Here are the steps you need to take:
1. Locate the spare power port on the back of your PSU.
2. Connect one end of the SATA cable into this port, and plug its other end into your device.
3. Securely fasten both ends with screws or clips as needed for proper connection and safety purposes.
4. Once done, turn on your PC/device and make sure it’s detected in BIOS or Device Manager respectively.
You’re now ready to use your new SATA connection!
Does Sata Connect to Power Supply?
Yes, SATA does connect to the power supply.
This is done in order to provide power to SATA components:
* Hard disk drives
* Solid-state drives
* Optical drives Without a connection to the power supply, these components would not have enough energy to operate properly.
Where Do I Connect My Sata Power Cable?
The SATA power cable should be connected to the PSU (Power Supply Unit).
Here are some steps to help you:
1. Find the PSU in your PC and locate the cables coming out of it.
2. Look for a SATA connector with multiple pins that looks similar to a USB port but slightly bigger, or refer to your motherboard manual for more guidance.
3. Plug in the SATA power cable into this connector firmly until you hear an audible click confirming it is secure.
Once done, your hard drive will now receive power from your PSU and be ready to use!
Do I Need to Connect Sata Cable to Psu?
No, you don’t need to connect SATA cable to PSU.
The following are the reasons why:
– SATA cables are used for connecting components such as hard drives and optical drives to your motherboard.
– The power supply unit (PSU) is responsible for providing power to all the connected components in your system.
– Therefore, a separate connection between the PSU and SATA cables is not necessary.
Where to Plug in Sata Power Cable on Motherboard
When building a computer, connecting the SATA power cable to the motherboard is an essential step. The SATA power cable should be connected to the four-pin connection labeled “SATA” or “Drive Power,” typically located near the top right corner of most motherboards.
After plugging in the cable, you can then connect your storage device such as a hard drive or optical drive to provide it with power.
Do I Need to Connect Sata Cable to Motherboard
When it comes to connecting your hard drive or optical drive to a motherboard, you will need to use a SATA cable.
This type of connection is crucial for ensuring that your components are properly connected and can communicate with each other. Without the correct cabling setup, your data may not be accessible or stored correctly.
Therefore, if you have any internal drives in your computer, make sure to connect them using a SATA cable for optimal performance.
Sata Cable for Ssd
The SATA cable is a type of interface used to connect solid state drives (SSDs) to motherboards in computers.
It features a 7-pin connector and uses the same Serial ATA protocol as traditional spinning hard disk drives, allowing for easy installation and compatibility with most systems.
The latest generations of SSDs are even able to take advantage of faster transfer speeds provided by SATA III cables, which have additional pins for increased data throughput.
Frequently Asked Question
What Type of Power Supply Do I Need to Connect a Sata Cable?
You need a SATA power cable to connect a SATA cable.
How Do I Correctly Install a Sata Cable With My Power Supply?
1. Ensure that the SATA cable is connected to a SATA port on your power supply, usually labeled as either “SATA” or “+12V”.
2. Insert one end of the SATA cable into the device you are connecting and secure it with a screw if necessary.
3. Plug the other side of the SATA cable into an available port on your motherboard.
4. Connect any additional cables needed for your device (e.g., power).
Are There Any Safety Precautions That Should Be Taken When Connecting a Sata Cable to the Power Supply ?
Yes, safety precautions should be taken when connecting a Sata cable to the power supply. Ensure that the cables are firmly connected and secure before powering on the system. Make sure there is no exposed wiring or loose terminals that could cause a short circuit.
Disconnect all other components from any power source before attempting to connect your SATA cable. Use caution when handling electronic devices as they can easily become damaged if not handled properly.
Is It Necessary to Use Additional Cables Or Adapters When Connecting a Sata Cable to the Power Supply ?
Yes, it is necessary to use additional cables or adapters when connecting a SATA cable to the power supply. The adapter typically has an extra 4-pin Molex connector that must be connected from the PSU in order for the SATA device to receive power.
Conclusion
By following the instructions in this blog post, you should be able to successfully connect your SATA cable to a power supply. It is important to make sure that both ends of the cable are firmly connected and that all connections are secure before proceeding with any other installation. Additionally, it is advisable to double-check the compatibility of your components before attempting this process.
Taking these steps can help ensure that your system runs smoothly and safely.

Harold Williams is a senior writer and technical editor at Drives Hero with 20+ years of experience in IT administration. He specializes in storage systems, SSD reviews, and performance testing, bringing real-world insight to every guide.