How to Format Nvme Ssd in Bios? 5 Step-By-Step Guide!
NVMe SSDs offer lightning-fast speeds and are becoming increasingly popular for their efficiency and performance benefits.
However, before you can fully utilize your NVMe SSD, it’s essential to format it properly. This guide will walk you through the simple steps required to format your NVMe SSD using your BIOS interface.
Whether you’re a novice or an experienced user, this step-by-step tutorial will ensure your NVMe SSD is formatted correctly for optimal performance.
Key Takeaway
Formatting NVMe SSD in BIOS: A Step-by-Step Guide
Step 1: Accessing BIOS
- Restart Your Computer: Close all applications and restart your computer.
- Enter BIOS Setup: During the startup process, press the key (often Del, F2, or F12) to enter BIOS setup. The exact key varies depending on your computer’s manufacturer. Check your computer’s manual for the specific key.
Step 2: Locating Storage Settings
- Navigate to BIOS Menus: Once in BIOS, use the arrow keys to navigate through the menus.
- Find Storage Settings: Look for a menu related to storage, usually labeled “Storage” or “Advanced Settings.”
Step 3: Identifying NVMe SSD
- Locate NVMe SSD: In the storage settings menu, identify your NVMe SSD. It should be listed along with other storage devices.
Step 4: Formatting NVMe SSD
- Select NVMe SSD: Highlight the NVMe SSD using the arrow keys.
- Access Formatting Options: Look for an option to format or initialize the SSD. This option may be labeled differently depending on your BIOS version.
- Confirm Formatting: Follow the on-screen instructions to confirm the formatting process.
- Wait for Completion: The formatting process may take a few minutes. Wait until it’s complete.
Step 5: Exiting BIOS
- Save Changes and Exit: Once formatting is complete, navigate to the exit menu in BIOS.
- Save Changes: Choose the option to save changes and exit BIOS.
- Restart Computer: Allow your computer to restart. Your NVMe SSD should now be formatted and ready for use.
By following these steps, you can easily format your NVMe SSD using the BIOS settings on your computer.
Five Facts About Formatting NVMe SSD in BIOS
Understanding The Basics Of NVME Ssd Formatting
Learn how to format NVMe SSD in BIOS with this comprehensive guide. Discover step-by-step instructions to optimize your SSD performance and ensure compatibility. Upgrade your system effortlessly with these easy-to-follow techniques.
What Is Nvme Ssd?
- NVMe SSD stands for Non-Volatile Memory Express Solid State Drive.
- It is a type of storage device that uses flash memory to store data.
- NVMe SSDs connect directly to the motherboard via the PCIe (Peripheral Component Interconnect Express) interface, allowing for faster data transfer rates compared to SATA SSDs.
The Benefits Of Using Nvme Ssd
Using an NVMe SSD offers a range of benefits, including:
- Lightning-fast Speed: NVMe SSDs leverage the high bandwidth of PCIe to deliver incredibly fast data transfer speeds, resulting in significantly reduced load times for applications and files.
- Improved Performance: With NVMe SSDs, you can experience faster boot times, quicker application launches, and seamless multitasking, enhancing overall system performance.
- Enhanced Productivity: The speed and responsiveness of NVMe SSDs empower users to complete tasks faster, increasing productivity in various professional settings.
- Reduced Power Consumption: NVMe SSDs are designed to be energy-efficient, resulting in lower power consumption and extended battery life for laptops and other portable devices.
- Compact Form Factor: NVMe SSDs are available in smaller form factors, making them ideal for ultra-thin laptops and compact systems where space is limited.
The Significance Of Formatting Your Nvme Ssd
Properly formatting your NVMe SSD is crucial for optimal performance and longevity.
Take a look at the reasons why formatting your NVMe SSD is significant:
- Preparing the Drive: Through formatting, you can prepare your NVMe SSD for data storage by creating a file system that organizes and manages your data effectively.
- Maximizing Capacity: Formatting allows you to utilize the full capacity of your NVMe SSD, erasing any previous partitions or data remnants that may limit your available storage space.
- Ensuring Compatibility: By formatting your NVMe SSD, you ensure compatibility with your operating system and enable seamless integration within your computer system.
- Error Correction: Formatting your NVMe SSD can help identify and correct any potential errors or issues that may arise over time, ensuring data integrity and reducing the risk of data loss.
- Improving Write Performance: Regularly formatting your NVMe SSD helps to maintain its write performance, preventing performance degradation and maintaining consistent speeds.
How To Access The Bios Settings For Nvme Ssd Formatting
To format NVMe SSD in BIOS, access the BIOS settings by restarting your computer and repeatedly pressing the specific key mentioned in your computer’s manual.
Once in the BIOS settings, navigate to the storage or boot menu to locate the NVMe SSD and select the option to format it.
Navigating The Bios Menu:
To access the BIOS settings, you’ll need to restart your computer and follow these steps:
- Restart your computer.
- During the startup process, look for a key prompt that indicates how to enter the BIOS setup. Common keys include F2, Del, or Esc. Note that the key may vary depending on your computer manufacturer, so consult your computer’s manual if you’re unsure.
- Once you know the key, press it repeatedly as your computer restarts until the BIOS setup utility appears.
Locating The Storage Settings In Bios:
After accessing the BIOS, you’ll need to locate the storage settings.
- Once in the BIOS setup utility, use the arrow keys on your keyboard to navigate through the menus.
- Look for a menu option related to “Storage” or “Drives.” Again, the wording may vary depending on your computer’s manufacturer.
- Select the “Storage” or “Drives” option using the Enter key.
Identifying The Nvme Ssd For Formatting:
Now that you’re in the storage settings menu, you’ll need to identify the specific NVMe SSD you want to format.
Follow these steps:
- Look for a list of connected storage devices in the storage settings menu.
- Locate the NVMe SSD by its model name or number. It should be listed among the storage devices connected to your computer.
- Once you have identified the NVMe SSD, select it using the Enter key.
With these steps, you can now access the BIOS settings and locate the storage settings for formatting your NVMe SSD. Remember to follow any on-screen instructions or prompts that might appear while navigating the BIOS.
Bios Not Recognizing The Nvme Ssd
Checking The NVME Ssd Connection:
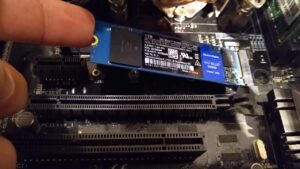
- First, ensure that the NVMe SSD is securely connected to the motherboard. Sometimes, loose connections can prevent the BIOS from detecting the drive.
- Gently remove the SSD and reinsert it, making sure it is properly seated in the slot.
- If you have multiple M.2 slots on your motherboard, try inserting the SSD into a different slot to see if the issue persists.
Updating Bios Firmware:
- An outdated BIOS firmware can sometimes be the cause of the NVMe SSD recognition issue. It’s essential to keep your BIOS up to date for optimal performance.
- Visit your motherboard manufacturer’s website and search for the latest BIOS firmware update for your specific model.
- Download the update and follow the instructions provided by the manufacturer to update your BIOS.
- After the update is complete, restart your computer and check if the NVMe SSD is now recognized by the BIOS.
Enabling Nvme Support In Bios:
- Some motherboards require you to enable NVMe support in the BIOS settings manually.
- Restart your computer and enter the BIOS settings by pressing the designated key during the startup process (usually Del, F2, or F10).
- Navigate to the storage or peripheral settings section in the BIOS menu.
- Look for an option related to NVMe or M.2 drives and ensure it is set to “Enabled.”
- Save the changes and exit the BIOS. Your computer will restart, and the NVMe SSD should now be recognized.
By following these steps, you can troubleshoot and fix the issue of the BIOS not recognizing your NVMe SSD.
Remember to double-check your connections, update the BIOS firmware, and enable NVMe support in the BIOS settings. With a bit of persistence, you’ll soon have your NVMe SSD working seamlessly in your system.
Formatting Process Taking Too Long
Formatting an NVMe SSD in BIOS can be a time-consuming process. To speed it up, follow these simple steps for quick and efficient formatting, ensuring optimal performance of your SSD.
If you find that the formatting process of your NVMe SSD is taking longer than anticipated, there are a few steps you can take to improve the speed.
Checking The Nvme Ssd Health:
- SMART technology: Use the SMART (Self-Monitoring, Analysis, and Reporting Technology) feature to assess the health status of your NVMe SSD. This will provide you with valuable information on the drive’s overall condition.
- Third-party software: Utilize third-party software, such as CrystalDiskInfo or SSD Health, to run health checks and identify any potential issues with your NVMe SSD.
- Firmware updates: Ensure that your NVMe SSD’s firmware is up to date. Manufacturers often release firmware updates to address performance issues and improve compatibility.
Optimizing The Nvme Ssd For Improved Performance:
- TRIM command: Enable the TRIM command on your NVMe SSD, which helps maintain its performance by freeing up space occupied by deleted files.
- Over-provisioning: Allocate a portion of your NVMe SSD’s capacity for over-provisioning. This reserved space improves performance and enhances the SSD’s lifespan.
- Use recommended allocation unit size: When formatting the NVMe SSD, choose the recommended allocation unit size. This setting optimizes how data is stored on the drive, enhancing its performance.
Adjusting Bios Settings For Faster Formatting:
- Legacy boot mode: Ensure that the BIOS is set to boot from the NVMe SSD in UEFI mode instead of the legacy mode. This helps speed up the formatting process.
- Enabling AHCI mode: Check if AHCI (Advanced Host Controller Interface) mode is enabled in the BIOS settings. This mode enhances the NVMe SSD’s functionality and performance.
- Disabling unnecessary features: Disable unnecessary features like Power Saving Mode or Sleep Mode in the BIOS to avoid any disturbances during the formatting process.
Optimizing the formatting process of your NVMe SSD can significantly reduce the waiting time and improve the overall performance of your drive.
By following these steps and taking the necessary precautions, you can ensure a faster and smoother experience when formatting your NVMe SSD in the BIOS.
Errors During The Formatting Process
Encountering errors during the formatting process of an NVMe SSD in the BIOS can be frustrating. However, with the right steps and caution, you can successfully format your NVMe SSD and resolve these errors, ensuring optimal performance.
Identifying Common Errors In Nvme Ssd Formatting:
Formatting an NVMe SSD in the BIOS can sometimes lead to errors that can hinder the process.
Here are some common errors you might encounter and how to identify them:
- Error code 0x80070057: This error typically occurs when there is a problem with the partitioning or formatting process. It could be due to incompatible software or an issue with the drive itself.
- Error code 0x80004005: This error usually indicates that the system was unable to format the NVMe SSD due to an access denied or invalid argument issue. It may be a result of faulty hardware connections or an outdated BIOS.
- Error code 0x8004242d: This error suggests that the target disk is not valid or cannot be found. It could occur when there is a problem with the SSD’s connection or configuration.
- Disk Management does not recognize the NVMe SSD: If the SSD does not appear in Disk Management, it might be a sign of incompatibility between the drive and the system.
Troubleshooting Error Codes:
When facing formatting errors with your NVMe SSD, here are some troubleshooting steps you can take to resolve common error codes:
- Check hardware connections: Ensure proper connections of the NVMe SSD to the motherboard and check for any loose cables or faulty ports.
- Update BIOS firmware: Visit the manufacturer’s website and download the latest BIOS firmware for your motherboard. Updating the BIOS can often resolve compatibility issues and improve performance.
- Run Windows troubleshooting tools: Utilize the built-in Windows troubleshooting tools such as the Disk Management tool or the DiskPart utility to diagnose and fix formatting issues.
- Check for software conflicts: Temporarily disable any third-party antivirus or disk management software that may interfere with the formatting process.
- Verify drive health: Run diagnostic tools provided by the SSD manufacturer to check for any underlying hardware issues or errors. This can help identify if the formatting problems are related to the drive itself.
Using Command-Line Tools To Resolve Formatting Errors:
If you encounter persistent errors during the NVMe SSD formatting process, you can try using command-line tools to troubleshoot and resolve the issues.
Here are some useful command-line tools:
- DiskPart: Launch the Command Prompt as an administrator and use the DiskPart utility to manage drives, partitions, and formatting. This tool provides advanced options for troubleshooting and repairing formatting errors.
- CHKDSK: Use the CHKDSK command to check the integrity of the SSD and scan for any errors or bad sectors. This tool can help fix logical errors that may be causing formatting problems.
- PowerShell: Employ PowerShell commands to perform disk checks and resolve specific NVMe SSD formatting errors. PowerShell offers more comprehensive control over the formatting process than the standard Windows interface.
By identifying common errors, troubleshooting error codes, and utilizing command-line tools, you can effectively resolve formatting errors that may arise during the NVMe SSD formatting process.
Regularly Updating Firmware And Drivers
Regularly updating firmware and drivers for your NVMe SSD in the BIOS is crucial for ensuring optimal performance and compatibility.
Keeping your hardware up to date is a simple yet effective way to enhance the overall efficiency and stability of your system.
The Importance Of Firmware Updates
Firmware updates play a crucial role in maximizing the performance and longevity of your NVMe SSD.
By regularly updating the firmware, you can take advantage of bug fixes, security enhancements, and improved compatibility with various hardware and software components.
Here are some key benefits of keeping your NVMe SSD firmware up to date:
Enhanced Performance: Firmware updates often include optimizations that can boost the speed and responsiveness of your NVMe SSD.
These updates may enable new features or algorithms that optimize data transfer and reduce latency, resulting in a more efficient and high-performing drive.
Bug Fixes and Stability: Just like any other software, firmware can have bugs that affect the reliability of your NVMe SSD.
Regular updates ensure that these bugs are addressed, minimizing the chances of encountering issues such as data corruption, freezing, or system crashes.
Firmware updates also often address compatibility issues with specific hardware or software configurations, ensuring seamless operation.
Security Enhancements: Firmware updates often include security patches that protect your NVMe SSD from potential vulnerabilities.
As technology advances, new security threats emerge, and firmware updates are vital in keeping your drive secure against evolving threats.
It’s essential to stay up to date with the latest firmware to ensure your data remains safe and protected.
Downloading And Installing The Latest Firmware Version
To enjoy the benefits of firmware updates, you need to download and install the latest version for your NVMe SSD.
Here’s how you can do it:
- Identify the Manufacturer: Determine the manufacturer of your NVMe SSD. This information can usually be found in the device specifications or on the manufacturer’s website.
- Visit the Manufacturer’s Website: Go to the official website of the manufacturer and navigate to the support or downloads section. Look for firmware updates specifically designed for your NVMe SSD model.
- Download the Firmware: Locate the appropriate firmware update for your NVMe SSD and download it onto your computer. Ensure that you select the correct version compatible with your specific drive model to avoid any compatibility issues.
- Prepare a Bootable USB Drive: Some firmware updates require you to create a bootable USB drive to initiate the update process. Follow the manufacturer’s instructions to create the bootable drive, ensuring it is properly formatted and contains the necessary files.
- Backup Important Data: Before proceeding with the firmware update, it’s always a good idea to back up any critical data on your NVMe SSD. While the chances of data loss during a firmware update are minimal, it’s better to be safe than sorry.
- Update the Firmware: Restart your system and access the BIOS/UEFI settings by pressing the designated key during the boot process. Navigate to the firmware update section (the location may vary depending on your motherboard manufacturer). Use the provided utility or BIOS interface to initiate the firmware update process and follow the on-screen instructions.
- Verify the Update: Once the firmware update completes, restart your system and ensure that the new firmware version is correctly installed. Some SSD management software provided by the manufacturer can help you verify the firmware version.
By regularly updating the firmware and drivers for your NVMe SSD, you can enjoy improved performance, enhanced stability, and strengthened security.
Keeping your hardware up to date ensures that you’re getting the most out of your investment and guarantees a smooth computing experience.
Optimizing Nvme SSD Performance
This guide provides step-by-step instructions on how to optimize the performance of your NVMe SSD by formatting it in the BIOS. Following these guidelines will help enhance the overall speed and efficiency of your storage device.
Enabling Trim Support:
- Enable TRIM support to enhance the performance and lifespan of your NVMe SSD.
- To do this, access your computer’s BIOS settings and navigate to the storage configuration section.
- Look for an option related to TRIM or SSD optimization and enable it.
- TRIM helps the SSD delete unused data blocks, ensuring that new data can be written more quickly.
- By enabling TRIM support, you can maintain your NVMe SSD’s performance over time.
Adjusting Power Management Settings:
- Optimizing power management settings can contribute to your NVMe SSD’s overall performance.
- From the BIOS menu, locate the power management section.
- Make sure the power management mode is set to high performance or maximum performance.
- This setting ensures that your NVMe SSD gets adequate power to deliver its full potential.
- Adjusting power management settings can result in faster read and write speeds, enhancing your overall system performance.
Managing Storage Partitions:
- Properly managing storage partitions ensures efficient data organization and utilization of your NVMe SSD.
- Open your computer’s Disk Management tool or a third-party partitioning software.
- Identify the NVMe SSD and review its existing partitions.
- If you notice any unnecessary or redundant partitions, consider merging or deleting them.
- Alternatively, you can create multiple partitions to separate your data based on importance or usage.
- Organizing your data across multiple partitions helps prevent fragmentation and improves overall performance.
By following these steps, you can optimize the performance of your NVMe SSD and take full advantage of its speedy capabilities.
Enabling TRIM support, adjusting power management settings, and managing storage partitions will ensure that your NVMe SSD operates at its peak performance, enhancing your overall computing experience.
Monitoring Nvme Ssd Health And Performance
Formatting an NVMe SSD in the BIOS is crucial for monitoring its health and performance. By following specific steps, you can optimize its functionality and ensure smooth operations.
Using Smart Tools For Monitoring:
SMART (Self-Monitoring, Analysis, and Reporting Technology) tools are invaluable when it comes to monitoring the health and performance of your NVMe SSD.
Here are some key points to consider:
- Install SMART software: Begin by installing SMART software, such as CrystalDiskInfo or HD Sentinel, which provides detailed information about your SSD’s health and performance.
- Monitor crucial stats: SMART tools allow you to monitor various important attributes of your NVMe SSD, such as temperature, remaining lifespan, error rates, and wear leveling count.
- Set up notifications: Configure SMART software to send you notifications when any attribute reaches a critical level. This will help you respond promptly and take necessary actions to prevent potential data loss or performance degradation.
Interpreting Smart Attributes:
Understanding the SMART attributes and their meanings is vital for effective monitoring and maintenance of your NVMe SSD.
Here are the key insights to consider:
- Attribute values: Each SMART attribute has a specific value associated with it, which indicates the current state of the SSD. These values provide valuable insights into the overall health and performance of the drive.
- Threshold values: SMART attributes also have predefined threshold values. If an attribute crosses its threshold, it may indicate a potential issue or impending failure. Monitoring these threshold values will help you plan necessary maintenance actions.
- Attribute trends: Analyzing the trends of SMART attribute values over time can provide valuable information about the rate of degradation or potential failures. Identifying any sudden changes or abnormal trends can help you take immediate action to prevent data loss.
Taking Proactive Measures For Maintenance:
Proactive maintenance is crucial for ensuring the longevity and optimal performance of your NVMe SSD.
Here are some proactive measures you can take:
- Keep the firmware updated: Regularly check for firmware updates provided by the manufacturer, as they often contain bug fixes and performance improvements. Updating the firmware will help maintain the SSD’s compatibility and overall stability.
- Avoid excessive heat: Excessive heat can degrade the performance and lifespan of your NVMe SSD. Ensure proper airflow in your system, avoid blocking ventilation areas, and consider using additional cooling solutions if necessary.
- Minimize write amplification: Write amplification refers to the multiplication of data writes on the SSD. Minimizing unnecessary writes by optimizing your operating system’s settings, reducing temporary file usage, and avoiding frequent small file transfers can help prolong the SSD’s lifespan.
- Regular backups: Always maintain regular backups of your important data. This ensures that even in the event of an SSD failure, you can restore your data without significant loss.
By effectively monitoring your NVMe SSD using SMART tools, interpreting SMART attributes, and implementing proactive maintenance measures, you can ensure its smooth operation, enhance its lifespan and prevent any potential data loss.
FAQ On How To Format Nvme Ssd In Bios
How do I format an NVMe SSD in BIOS?
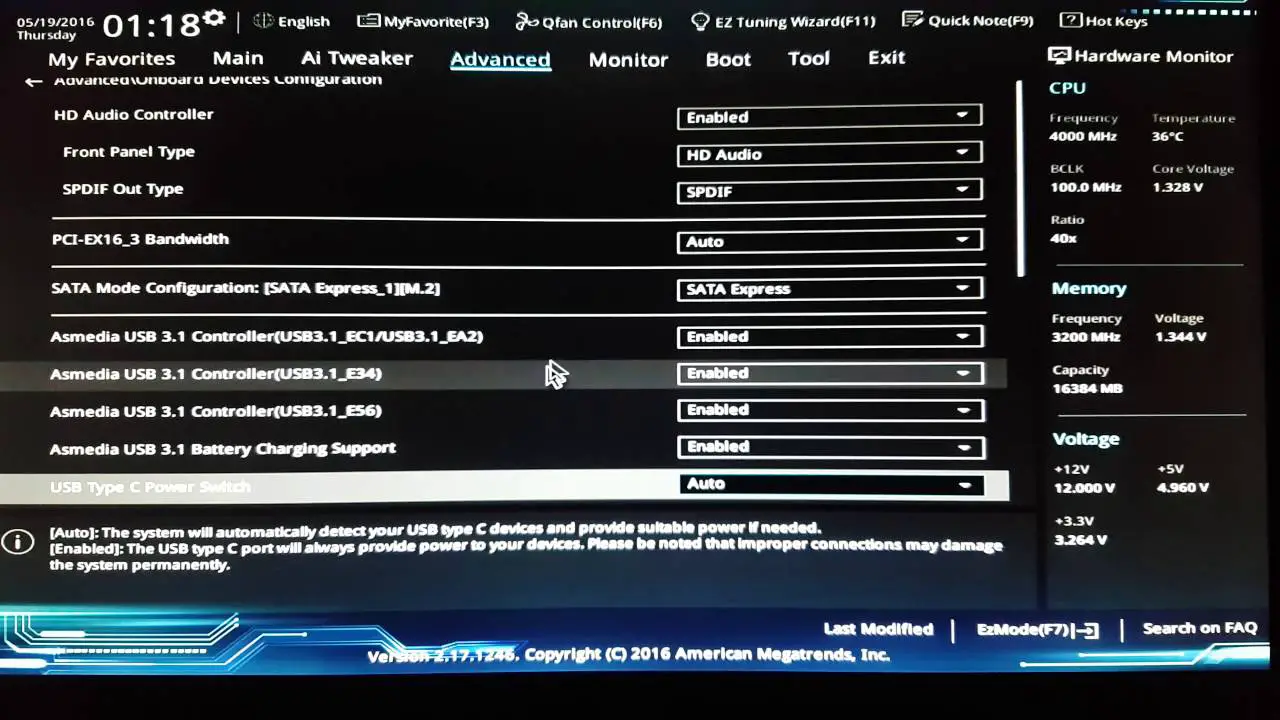
Formatting an NVME SSD in BIOS is a relatively straightforward process. In the main BIOS menu, select the “Advanced” tab.
Then select the “Onboard Device Configuration” option and look for the “NVME Configuration” sub-menu. Select “Format” and follow the prompts to complete the process.
How can I tell if an NVME SSD has been formatted?
To determine whether an NVME SSD has been formatted, enter the BIOS menu and select the “Advanced” tab.
Then select the “Onboard Device Configuration” option and look for the “NVME Configuration” sub-menu. If the SSD has been formatted, there will be a “Firmware Version” noted in the configuration options.
Is formatting my NVME SSD safe?
Yes, formatting an NVME SSD is safe and will not result in data loss. It is important to ensure that all data has been backed up to another storage device, however, in case the formatting procedure fails.
What is the difference between formatting and partitioning an NVME SSD?
Formatting an NVME SSD is essentially the same process as formatting any other type of storage device, such as a hard drive. It will erase any data stored on the device and prepare it for use.
Conclusion
Understanding how to format an NVMe SSD in BIOS is essential for optimizing the performance and lifespan of your SSD.
By following the steps outlined in this blog post, you can ensure a smooth and efficient formatting process. Remember to back up your important data before initiating the format, as it will be erased during the process.
Take the time to familiarize yourself with your specific motherboard’s BIOS interface to easily navigate through the settings.
Whether you are upgrading your system, troubleshooting an issue, or simply maintaining your SSD, formatting it correctly in BIOS is crucial.
By following the guidelines provided and keeping your BIOS up to date, you can experience the full benefits of your NVMe SSD and enhance your overall computing experience.

Harold Williams is a senior writer and technical editor at Drives Hero with 20+ years of experience in IT administration. He specializes in storage systems, SSD reviews, and performance testing, bringing real-world insight to every guide.