How To Install Windows 7 on Nvme SSD? 12 Steps!
Installing Windows 7 on NVMe SSD involves creating a bootable Windows 7 USB, integrating NVMe SSD drivers into the USB, and then installing Windows 7 from the USB onto the NVMe SSD.
NVMe SSD is a type of solid-state drive that uses the Non-Volatile Memory Express protocol to communicate with your computer.
This protocol provides faster data transfer speeds compared to traditional SSDs. However, Windows 7 doesn’t natively support NVMe SSDs, so you need to integrate the NVMe drivers manually.
Installing Windows 7 on an NVMe SSD can be a bit tricky because Windows 7 does not natively support this type of drive.
However, by integrating the necessary drivers into the installation media, you can achieve a successful installation. Remember to update the system after installation for optimal performance and security.
12 Steps Of Installing Windows 7 on Nvme SSD
| Steps | Description |
|---|---|
| 1 | Purchase or acquire a Windows 7 installation disk with a valid product key |
| 2 | Purchase or acquire an NVMe SSD |
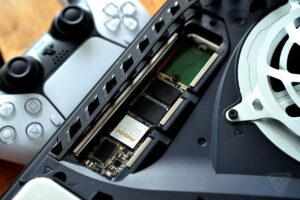
| 3 | Install the NVMe SSD into your computer |
| 4 | Enter the BIOS or UEFI settings on your computer |
| 5 | Enable NVMe support (if not already enabled) |
| 6 | Assign the NVMe SSD as the primary boot device |
| 7 | Save changes and exit the BIOS or UEFI settings |
| 8 | Insert the Windows 7 installation disk into your computer |
| 9 | Reboot your computer |
| 10 | Follow the on-screen instructions to install Windows 7 on the NVMe SSD |
| 11 | Once installation is complete, check if Windows 7 can boot from the NVMe SSD |
| 12 | Update drivers and software as necessary for optimal performance |
Key Takeaway
Five Facts About: Installing Windows 7 on Nvme SSD
Preparing For Installation
Learn how to efficiently install Windows 7 on an NVMe SSD with these step-by-step guidelines. Ensure a smooth installation process and optimize your system for enhanced performance.
Necessary Hardware And Software Requirements:
- NVMe SSD: You will need an NVMe SSD to install Windows 7. Make sure you have a compatible NVMe SSD with sufficient storage capacity.
- Motherboard compatibility: Ensure that your motherboard supports NVMe SSDs. Check the manufacturer’s website or user manual for compatibility information.
- Windows 7 installation media: You will need a bootable USB drive containing the Windows 7 installation files.
- USB port: Make sure your computer has a working USB port for connecting the bootable USB drive.
- Internet connection: To download the Windows 7 ISO file, you will need a stable internet connection.
Minimal System Requirements For Windows 7 Installation:
- Processor: At least a 1 GHz or faster processor.
- RAM: Minimum 1 GB (32-bit) or 2 GB (64-bit) of RAM is required.
- Storage: Ensure that your NVMe SSD has sufficient storage capacity for Windows 7 installation and future updates.
- Graphics card: A DirectX 9 graphics device with a WDDM 1.0 or higher driver is necessary.
- Display: A screen resolution of at least 800 x 600 pixels is recommended.
How To Check If Your System Is Compatible With Nvme Ssd:
- Check motherboard specifications: Consult your motherboard’s manual or visit the manufacturer’s website to verify NVMe SSD compatibility.
- Check BIOS version: Make sure you have the latest BIOS version installed on your motherboard, as older versions may not support NVMe SSDs.
- Use manufacturer’s tools: Some SSD manufacturers provide compatibility tools that can check if your system supports NVMe SSDs.
Creating A Bootable Windows 7 Usb Drive:
- Download the Windows 7 USB/DVD Download Tool: This tool allows you to create a bootable USB drive from the Windows 7 ISO file. You can find it on the Microsoft website or other trusted sources.
- Connect a USB drive: Insert a USB drive with at least 4 GB of storage capacity into your computer.
- Run the Windows 7 USB/DVD Download Tool: Launch the tool and follow the on-screen instructions to create the bootable USB drive.
- Select the ISO file: When prompted, browse for the Windows 7 ISO file you downloaded earlier and select it.
- Choose USB device: Select the USB drive you connected earlier as the destination for creating the bootable drive.
- Start the process: Click on the “Begin copying” button to start copying the Windows 7 files to the USB drive.
- Wait for the process to complete: The tool will copy the necessary files to the USB drive, and you’ll be notified when it’s finished.
Downloading The Windows 7 Iso File:
- Visit the Microsoft website: Go to the official Microsoft website to download the Windows 7 ISO file. Note that you will need a valid product key to activate Windows 7.
- Choose the correct version: Select the appropriate Windows 7 edition and language from the available options.
- Click on the download link: Start downloading the Windows 7 ISO file by clicking on the corresponding link.
- Wait for the download to complete: The download time will depend on your internet connection speed, so be patient.
Using A Usb Bootable Tool To Create A Bootable Usb Drive:
- Download a USB bootable tool: There are various USB bootable tools available online. Choose a reliable tool that suits your requirements.
- Install the tool: Follow the installation instructions provided by the tool’s developer to install it on your computer.
- Launch the tool: Open the USB bootable tool and locate the option to create a bootable USB drive.
- Select the Windows 7 ISO file: Browse for the Windows 7 ISO file you downloaded and select it.
- Choose the USB drive: Select the USB drive you want to make bootable.
- Start the process: Initiate the process of creating the bootable USB drive by clicking on the appropriate button.
- Wait for the tool to complete the task: The tool will format the USB drive, copy the necessary files, and make it bootable. Once finished, you’ll have a bootable USB drive ready for Windows 7 installation.
By following these steps, you can ensure that you are well-prepared for installing Windows 7 on an NVMe SSD.
Double-check the hardware and software requirements, verify system compatibility, create a bootable USB drive, and download the Windows 7 ISO file.
This ensures a smooth installation process and allows you to take advantage of the benefits offered by an NVMe SSD.
Configuring Bios For Nvme Ssd
Configuring the BIOS for NVMe SSD is essential for installing Windows 7 on these high-performance drives.
Follow these steps to optimize your system and ensure a smooth installation process.
To successfully install Windows 7 on an NVMe SSD, configuring your BIOS settings is essential. This step allows your system to recognize and utilize the full potential of NVMe technology.
In this section, we will guide you through the process of accessing the BIOS settings, enabling NVMe support, and locating the relevant options within the BIOS interface.
Accessing The Bios Settings:
Accessing the BIOS settings is the first step towards configuring your system for NVMe SSD installation.
Here’s how you can do it:
- Restarting your computer and accessing the BIOS: When your computer is restarting, you can enter the BIOS settings by pressing a specific key (such as F2 or Del) repeatedly during the boot process. The key required may vary depending on your computer manufacturer.
Different Methods To Access Bios On Different Systems:
The process of accessing the BIOS may differ depending on the system you are using.
Here are some common methods:
Method 1:
Pressing the designated key (e.g., F2 or Del) during the boot process.
Method 2:
Accessing the BIOS through the Windows Start menu. Go to the Settings menu, select Update & Security, then choose Recovery.
Under the Advanced Startup section, click Restart Now. On the reboot, you can access the BIOS through the Troubleshoot menu.
Method 3:
Using a specific key combination such as Ctrl+Alt+Del or Ctrl+Shift+Esc during the boot process.
Enabling Nvme Support In Bios:
Once you have accessed the BIOS settings, you need to enable NVMe support to ensure your system recognizes the NVMe SSD.
Follow these steps:
- Locate the “Storage” or “Advanced” tab in the BIOS interface.
- Look for an option related to “SATA Operation” or “Storage Configuration.”
- Set the option to “AHCI” or “NVMe” mode to enable NVMe support.
- Save the changes and exit the BIOS.
Locating The Nvme Settings In Bios:
After enabling NVMe support, you need to locate the relevant NVMe settings within the BIOS interface.
The exact location may vary depending on your system’s BIOS version, but here are some common places to look:
Boot or Boot Order tab:
Check for options related to boot devices or boot priorities, where you may find NVMe listed alongside other storage options.
Peripherals or Peripheral Configuration tab:
Look for options related to storage devices or disk controllers, where you might find NVMe settings.
Advanced or Advanced Settings tab:
Explore this section for options related to storage configurations, SATA settings, or disk management.
Enabling Nvme Support For Windows 7 Installation:
To ensure a successful Windows 7 installation on your NVMe SSD, follow these steps:
- Insert the Windows 7 installation media and boot your computer.
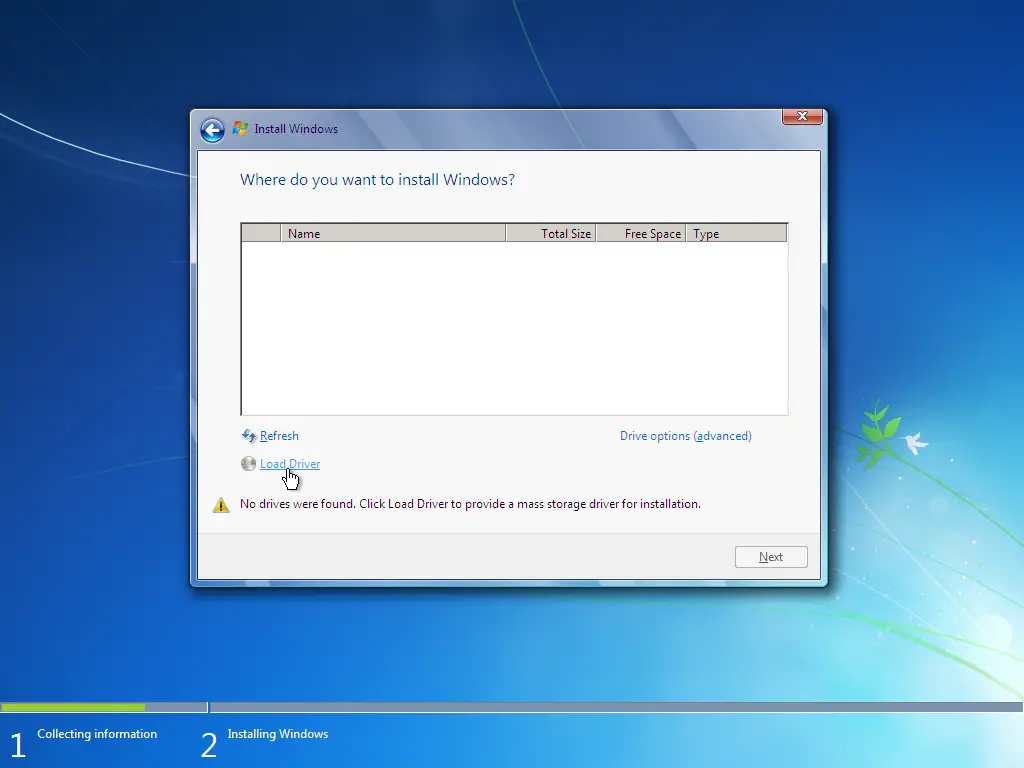
- During the installation process, when prompted to select a drive for installing Windows, check if your NVMe SSD is listed.
- If the NVMe SSD is not detected, you may need to load the NVMe drivers manually by selecting the “Load Driver” option and providing the necessary driver files.
- Once the NVMe SSD is recognized, proceed with the Windows 7 installation as usual.
By configuring your BIOS for NVMe SSD, you’re ready to install Windows 7 on this advanced storage device.
Ensure you follow the steps accurately and refer to your system’s documentation for any specific instructions.
Now, let’s move ahead to the next section:
Installing Windows 7 on NVMe SSD.
Installing Windows 7 On Nvme Ssd
Get step-by-step instructions for installing Windows 7 on an NVMe SSD, ensuring a fast and efficient system.
Discover the simple process and enjoy the benefits of improved performance on your computer. Installing Windows 7 on an NVMe SSD can help improve the performance of your system.
Follow these steps to successfully install Windows 7 on your NVMe SSD:
Booting From The Usb Drive:
To begin the installation process, you need to boot your computer from a USB drive containing the Windows 7 setup files.
Here’s how you can do it:
- Restart your computer and press the key to enter the BIOS or boot menu.
- Look for the option to change the boot order and prioritize the USB drive.
- Save the changes and exit the BIOS. Your computer will now boot from the USB drive.
Changing The Boot Order In Bios:
In order to boot from the USB drive, you may need to change the boot order in the BIOS.
Here’s how you can do it:
- Restart your computer and enter the BIOS by pressing the designated key.
- Navigate to the Boot menu and look for the boot order settings.
- Change the boot order and prioritize the USB drive over your internal storage devices.
- Save the changes and exit the BIOS.
Selecting The Usb Drive As The Boot Device:
After changing the boot order, you need to select the USB drive as the boot device to start the Windows 7 installation.
Follow these steps:
- Restart your computer and press the key to access the boot menu.
- Select the USB drive from the list of boot devices.
- Your computer will now boot from the USB drive and start the Windows 7 installation process.
Starting The Windows 7 Installation Process:
Once the computer has booted from the USB drive, you can start the Windows 7 installation process.
Here’s how:
- Choose the language, time, and currency format that you prefer.
- Click on “Install now” to begin the installation.
Selecting Language And Other Preferences:
During the installation process, you will be prompted to select the language and other preferences.
Follow these steps:
- Choose the desired language for Windows 7 installation.
- Select the appropriate time and currency format.
Entering The Product Key And Accepting The License Terms:
To proceed with the installation, you need to enter the product key and accept the license terms.
Here’s what you should do:
- Enter the product key provided with your Windows 7 copy.
- Read and accept the license terms to continue the installation.
Formatting And Partitioning The Nvme Ssd:
Before installing Windows 7 on the NVMe SSD, you will need to format and partition the drive.
Follow these steps:
- Select the NVMe SSD as the installation drive.
- Click on the “Drive options (advanced)” to access formatting and partitioning options.
Selecting The Nvme Ssd As The Installation Drive:
To install Windows 7 on the NVMe SSD, you need to select it as the installation drive.
Here’s what you need to do:
- Choose the NVMe SSD from the available drives.
- Click on “Next” to proceed with the installation.
Formatting The Drive And Creating Partitions:
Before the installation begins, you can format the NVMe SSD and create partitions as per your requirements.
Here’s how you can do it:
- Click on “Format” to format the drive.
- Click on “New” to create partitions and allocate disk space.
- Follow the on-screen instructions to partition the drive.
Completing The Windows 7 Installation:
After formatting and partitioning the NVMe SSD, you can proceed with the installation process.
Follow these steps:
- Wait for the installation process to complete.
- Your computer will then restart, and you can remove the USB drive.
- Follow the on-screen instructions to finalize the Windows 7 setup.
Installing Necessary Drivers:
After completing the Windows 7 installation, you may need to install additional drivers for optimal performance.
Here’s what you can do:
- Install the necessary drivers provided by the manufacturer.
- Update the drivers for your NVMe SSD to ensure compatibility and maximum performance.
Setting Up User Account And Password:
To secure your Windows 7 installation, you need to set up a user account and password.
Here’s what you should do:
- Create a user account with an appropriate username.
- Set a strong and secure password for your account.
- You may also set up a password hint for easier account recovery.
By following these steps, you can successfully install Windows 7 on your NVMe SSD, enhancing your system’s performance and efficiency.
Post-Installation Optimization
Optimize your Windows 7 installation on an NVMe SSD for maximum performance. Follow these steps to ensure smooth post-installation optimization.
Windows 7 is a highly popular operating system, and if you’re planning to install it on an NVMe SSD, optimizing its performance is crucial.
In this section, we will discuss the post-installation optimization steps to ensure that your Windows 7 installation on the NVMe SSD runs smoothly and efficiently.
Let’s dive in!
Updating Windows 7 And Device Drivers
Keep your Windows 7 installation up-to-date by regularly checking for and installing available Windows updates.
These updates often include important bug fixes and security patches that can enhance the overall performance and stability of your system.
Similarly, make sure to update the device drivers for your NVMe SSD and other components.
The manufacturers frequently release driver updates that can improve compatibility, speed, and functionality.
Connecting To The Internet And Checking For Updates
Connect your computer to the internet to enable the automatic update feature in Windows 7.
This will allow your system to download and install the latest updates and patches, ensuring that your operating system remains secure and efficient.
Installing Updated Drivers For Nvme Ssd And Other Devices
Visit the manufacturer’s website or use a driver update utility tool to download and install the most recent drivers specifically designed for your NVMe SSD.
These updated drivers often provide better performance, stability, and compatibility with Windows 7.
Additionally, make sure to install the latest drivers for other devices connected to your system, such as your graphics card, sound card, and network adapter.
This will ensure optimal functionality and compatibility for all your hardware components.
Configuring Power Management Settings
Adjusting power management settings can have a significant impact on the performance and lifespan of your NVMe SSD.
Head to the Power Options in the Control Panel and select the power plan that suits your needs. For optimal performance, choose the High Performance plan.
Adjusting Power Saving Options For Nvme Ssd
Within the Power Options, locate the advanced power settings and expand the Hard Disk section.
Set the Turn off hard disk after option to a higher value or select Never to prevent Windows from powering off your NVMe SSD, improving its responsiveness and reducing wear and tear.
Optimizing Power Management For Optimal Performance
- In the advanced power settings, navigate to the PCI Express section. Set the Link State Power Management to Off to prevent the NVMe SSD from entering a low-power state, ensuring maximum performance.
Testing Nvme Ssd Performance
After completing the optimization steps, it’s important to test the performance of your NVMe SSD to ensure everything is functioning as expected.
Running benchmarking tools can help you evaluate the speed, latency, and overall performance of your NVMe SSD.
Using Benchmarking Tools To Measure Ssd Performance
Utilize benchmarking tools like Crystal DiskMark or AS SSD Benchmark to measure the read and write speeds, IOPS (Input/Output Operations Per Second), and access times of your NVMe SSD.
These tools provide valuable insights into the performance of your SSD and can help identify any potential issues.
Monitoring Temperatures And Health Status
Monitor the temperatures and health status of your NVMe SSD regularly using software utilities provided by the manufacturer or third-party applications.
This helps ensure that your SSD is running within safe operating temperatures and keeps you informed about any potential health issues.
By following these post-installation optimization steps, you can ensure that your Windows 7 installation on the NVMe SSD is running at its best, delivering enhanced performance, stability, and longevity.
Troubleshooting Common Issues
Learn how to troubleshoot common issues that may arise while installing Windows 7 on an NVMe SSD.
With step-by-step guidance and practical tips, you can overcome any obstacles and enjoy a smooth installation process.
When it comes to installing Windows 7 on an NVMe SSD, you may encounter some common issues.
Don’t worry, though – in this section, we will discuss how to troubleshoot these problems and get your installation up and running smoothly.
Windows 7 Installation Not Detecting Nvme Ssd
If your Windows 7 installation is not detecting your NVMe SSD, there are a few steps you can take to address the issue:
- Make sure your NVMe SSD is properly connected to your computer.
- Check if your NVMe SSD requires specific drivers. If so, you will need to load the drivers during the installation process.
- Ensure that your motherboard BIOS firmware is up to date.
- Try switching the NVMe SSD to a different PCIe slot.
Updating Motherboard Bios Firmware
Updating your motherboard BIOS firmware can often resolve compatibility issues and improve overall system stability.
Here’s how you can update it:
- Identify your motherboard model and visit the manufacturer’s website to download the latest BIOS firmware.
- Follow the instructions provided by the manufacturer to flash the updated BIOS onto your motherboard.
Ensuring Nvme Ssd Is Properly Connected
To ensure that your NVMe SSD is properly connected, follow these steps:
- Power off your computer and unplug it from the power source.
- Open your computer case and locate the NVMe SSD slot.
- Gently remove the NVMe SSD from the slot and reinsert it firmly.
- Double-check that all connections are secure, including power and data cables.
Blue Screen Errors During Installation
If you encounter blue screen errors during the installation process, consider the following troubleshooting steps:
- Make sure that your NVMe SSD is compatible with Windows 7. Check the manufacturer’s specifications for Windows 7 compatibility.
- Verify that your system meets the minimum requirements for Windows 7 installation.
- Ensure that all hardware components, such as RAM and graphics card, are securely installed.
- Try installing Windows 7 using a different installation media or USB drive.
- If the problem persists, check for any conflicting drivers or software.
Checking Compatibility Of Drivers And Software
Before installing Windows 7 on your NVMe SSD, it’s essential to verify the compatibility of your drivers and software.
Here’s what you need to do:
- Visit the manufacturer’s official website for each hardware component and check for Windows 7 drivers. If any are unavailable, consider upgrading to a newer version of Windows.
- Ensure that all software programs you intend to use are compatible with Windows 7. Consult the software vendor’s website for compatibility information.
Resolving Driver Conflicts And Issues
If you encounter driver conflicts or issues during or after the installation, follow these steps to resolve them:
- Use the Device Manager in Windows 7 to identify any problematic drivers.
- Visit the manufacturer’s website to download and install the latest drivers for your hardware components.
- Consider uninstalling any unnecessary drivers or software that may be causing conflicts.
Slow Performance After Installation
If you experience slow performance after installing Windows 7 on your NVMe SSD, there are a few optimizations you can try:
- Disable unnecessary startup programs using the System Configuration utility (msconfig).
- Ensure that your NVMe SSD is set as the primary boot device in the BIOS settings.
- Update your graphics card drivers to the latest version for improved performance.
- Install the latest Windows 7 updates to ensure system stability and performance.
Configuring Windows 7 For Optimum Performance
To optimize Windows 7 for better performance on an NVMe SSD, consider the following steps:
- Enable TRIM support for your NVMe SSD by using the command “fsutil behavior set disable delete notify 0″.
- Adjust the power settings to prioritize performance over energy savings.
- Disable unnecessary visual effects and animations in the Windows settings to reduce resource usage.
- Regularly defragment your NVMe SSD using the built-in Disk Defragmenter tool.
Troubleshooting Potential Hardware Or Software Issues
If you continue to experience issues with your Windows 7 installation on an NVMe SSD, it’s essential to troubleshoot potential hardware or software problems.
You can try:
- Running a diagnostic tool to check for any hardware issues.
- Scanning your system for malware or viruses using reliable antivirus software.
- Contacting the manufacturer’s support for further assistance if the problem persists.
Remember, installing Windows 7 on an NVMe SSD may require additional steps and precautions compared to traditional storage devices.
By troubleshooting common issues and following the recommended solutions, you can ensure a successful installation and optimal performance of your Windows 7 system on an NVMe SSD.
FAQ About How To Install Windows 7 on Nvme SSD
What is an NVMe SSD?
An NVMe SSD (Non-Volatile Memory Express Solid State Drive) is a type of storage device that utilizes the NVMe protocol to provide faster read and write speeds compared to traditional SATA-based solid-state drives.
How do I install Windows 7 on an NVMe SSD?
Installing Windows 7 on an NVMe SSD is a relatively simple process.
You will need to make sure that your motherboard is compatible with the NVMe protocol, and that you have a Windows 7 installation disc or ISO file.
Once you have those components ready, you can follow the instructions in the Windows 7 installation guide to correctly install Windows 7 on your NVMe SSD.
Do I need to make any changes to the BIOS settings to install Windows 7 on an NVMe SSD?
Yes, you will need to make some changes to the BIOS settings in order to install Windows 7 on an NVMe SSD.
Depending on your motherboard, you may need to enable the NVMe protocol, or select the NVMe drive as the primary boot device.
Refer to your motherboard’s user manual for more information on enabling the NVMe protocol.
Conclusion
Installing Windows 7 on an NVMe SSD can greatly improve your computer’s performance and speed.
By following the step-by-step process outlined in this blog post, you can ensure a successful installation without any hiccups.
The first step is to ensure that your computer’s BIOS is compatible with NVMe drives, and then proceed to format and partition the SSD to prepare it for installation.
Next, you will need to create a bootable USB drive with Windows 7 installation files and boot your computer from it.
The installation process may take some time, but once completed, you can enjoy the benefits of a faster and more efficient system.
Remember to backup your important files before starting the installation, and always double-check that you have the correct drivers and updates for your hardware.
With these guidelines in mind, you can confidently install Windows 7 on your NVMe SSD and experience improved performance like never before.

Harold Williams is a senior writer and technical editor at Drives Hero with 20+ years of experience in IT administration. He specializes in storage systems, SSD reviews, and performance testing, bringing real-world insight to every guide.