How to Install M 2 Ssd in Dell Laptop? 8 Steps!
To install an M.2 SSD in a Dell laptop, you need to access the laptop’s internal components, locate the M.2 SSD slot, and insert the SSD properly. Finally, secure the SSD with a screw and reassemble the laptop.
M.2 SSDs are compact storage devices that allow for faster data transfer speeds and improved overall performance in laptops. Installing an M.2 SSD in a Dell laptop involves disassembling the device, identifying the correct slot, and properly attaching the SSD.
Before attempting to install an M.2 SSD in your Dell laptop, ensure that your device is compatible with this type of storage device. Check the laptop’s user manual or consult the manufacturer’s website for compatibility information.
Additionally, make sure to back up any important data and create a system restore point before beginning the installation process to avoid potential data loss or system issues.
8 Steps for Installing an M.2 SSD in a Dell Laptop
| Step | Description |
|---|---|
| 1 | Turn off the laptop |
| 2 | Remove laptop’s back cover carefully |
| 3 | Locate the M.2 SSD slot |
| 4 | Remove the screw(s) securing the existing M.2 SSD (if applicable) |
| 5 | Carefully insert the new M.2 SSD into the slot |
| 6 | Secure the SSD with the screw(s) previously removed |
| 7 | Reattach the laptop’s back cover |
| 8 | Turn on the laptop and verify the installation in BIOS or Disk Management |
Key Takeaway
Four Facts About Installing M 2 SSD in Dell Laptop
Understanding M 2 Ssd And Why It’S Essential For High-Performance Computing
If you’re looking to increase your dell laptop’s performance, then an m 2 ssd might be just what you need. Simply put, m 2 ssd technology is a newer type of solid-state drive (ssd) that’s faster and more efficient than traditional hard disk drives (hdds).
Explanation Of M 2 Ssd Technology And Its Benefits
M 2 ssds have a smaller form factor, making them perfect for use in smaller devices like laptops.
They’re also faster at accessing and transferring data, thanks to their use of the pcie bus to communicate with your computer’s processor. In other words, m 2 ssds don’t have to rely on an sata interface, which is slower than pcie.
Here are some benefits of m 2 ssd technology:
- Faster read and write speeds
- Smaller form factor for greater compatibility with smaller devices like laptops
- Reduced energy consumption
- No moving parts, which means they’re more durable and can withstand physical shock caused by dropping or bumping your laptop
Reasons Why You Should Upgrade Your Dell Laptop With An M 2 Ssd
Now that you understand what m 2 ssds are and why they’re so important, it’s time to consider upgrading your laptop with one.
Here are some reasons why:
- Improved performance: With an m 2 ssd, you’ll experience faster boot times, faster data transfer rates, and smoother overall performance.
- Increased productivity: Applications will load faster, making you more efficient and productive.
- More storage capacity: With m 2 ssds, you’ll get more storage capacity than with traditional hdds, so you can store more files, music, photos, and videos.
Don’t settle for sluggish performance on your dell laptop; upgrade to an m 2 ssd and experience the benefits it offers.
Things You Need To Consider Before Installing M 2 Ssd In Dell Laptop
Checking Compatibility Of The Ssd With The Dell Laptop
Before you begin the installation process, you must check the compatibility of the ssd with your dell laptop.
Not all dell laptops support m 2 ssd storage, so it is necessary to make sure that your model does. Some key points to note when checking compatibility are:
- Check your laptop’s product manual or the dell website to see if m 2 ssd storage is supported.
- Ensure that you have a free m 2 slot in your laptop for the installation of the ssd.
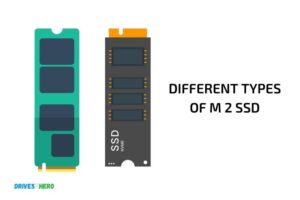
- Check the type of m 2 ssd that is compatible with your laptop. Dell laptops support either a sata or nvme m 2 ssd.
Understanding The Technical Specifications Of The Hard Drive
Before you purchase an m 2 ssd for your dell laptop, it is essential to have a basic understanding of the technical specifications of the hard drive.
The technical specifications can help you to choose the right ssd for your laptop and ensure optimal performance.
Here are some technical specs to consider:
- Ssd interface: Check whether the interface is sata or nvme. Dell laptops support either of these two ssd interface types.
- Storage capacity: Determine the amount of storage capacity you require. Ssds come in various storage capacities, and you must choose one that meets your storage needs.
- Form factor: Check the form factor of the ssd, as an m 2 ssd has different length and width specifications. The most common form factor for m 2 ssds is 2280.
Necessary Tools And Equipment Required For Ssd Installation
Before beginning the installation process, ensure you have all the necessary tools and equipment to make the process easier and more efficient.
The essential tools and equipment required for installing m 2 ssd in dell laptop are:
- A suitable screwdriver: You will need a screwdriver that fits the screw heads on your laptop. You can find the screwdriver type on the laptop product manual
- Anti-static wristband: An anti-static wristband can prevent electrostatic discharge from damaging your laptop’s internal components.
- The m 2 ssd: Purchase an m 2 ssd that is compatible with your dell laptop.
- Data transfer tools: If you want to transfer data from your old hard drive to the new m 2 ssd, you will need a data transfer cable or an external hard drive enclosure.
Backup Of Data And Hard Drive
Before installing the new ssd, it is crucial to protect important data stored on your laptop’s existing hard drive.
Consider taking the following backup steps:
- Back up your data: Make sure to take a full backup of all your data and files to an external hard drive, cloud storage or any other suitable device.
- Create a system image: Creating a system image allows you to restore your current system settings, installed software, and configurations, in case something goes wrong during the installation process.
- Create a system repair disk: A system repair disk can help you diagnose and repair any boot problems that arise after installing the new ssd.
Step By Step Guide To Install M 2 Ssd In Dell Laptop
Clearing Up Your Workspace And Preparing The Laptop
Before beginning, it’s essential to understand that opening your laptop will void any warranty it may still have. Ensure that you are entirely okay with this before continuing.
Here’s what to do before opening your laptop:
- Power off the dell laptop and remove any cords and accessories.
- Flip the laptop over to detach the battery.
- After discharging it, unscrew the back cover and remove it.
- Consider the anti-static precautions; touching a metal object like aluminum foil or the tinfoil wrap around the anti-static bag will help ensure that you don’t damage the laptop with static electricity.
Opening The Dell Laptop Case And Finding The Location To Install Ssd
The next step is to locate the slot for the m 2 ssd. Many dell laptops have the m 2 slot on the motherboard or a separate frame fixed to the motherboard.
- The m 2 ssd slot will have a screw or release mechanism.
- Refer to the owner’s manual to find specific instructions on the placement of the storage device.
- Ensure that the laptop is fully powered off and unplugged from the wall socket.
Preparing M 2 Ssd For Installation: Setting Up The Drive And Orientation
The following steps will guide you through the preparation of the m 2 ssd before installation.
- Insert the m 2 ssd into the slot carefully, holding it by its sides.
- Ensure the m 2 ssd aligns with the socket, as it only fits one way and can bend out of shape easily if inserted in the wrong orientation.
- Use the screw or release mechanism on the socket to secure the m 2 ssd.
Installing M 2 Ssd In Dell Laptop: Securing The Device And Assembly
After installing the m 2 ssd, it’s time to close the case and power up the laptop.
- Reattach the back cover and screws to the dell laptop’s bottom.
- Reinsert the battery.
- Power the laptop on and check the bios to ensure that the new drive is recognized and listed under system information.
Post-Installation Optimization: Testing And Ensuring The New Drive Is Working Optimally
Finally, you need to check that the new drive works as it should.
- Check the laptop’s performance, including boot-up time, application launch time, and file transfers.
- Use diagnostic software to check the m 2 ssd’s health, speed, and temperature.
- Review your operating system’s documentation to ensure that windows recognizes the m 2 ssd.
- If all is good, ensure that you have backed up important data and delete any unnecessary junk files, optimizing your computer’s performance.
Congratulations! You’ve installed your m 2 ssd on your dell laptop successfully. Keep in mind that these instructions are general guidelines. There may be slight variations depending on the exact model and configuration you are working with.
Troubleshooting Ssd Installation Issues In Dell Laptops
M 2 ssds have revolutionized the storage industry by providing fast read and write speeds and a smaller form factor. Upgrading to an m 2 ssd from a traditional hdd or ssd can significantly enhance the performance of your dell laptop.
However, sometimes, the installation process can be tricky, leading to various issues. In this post, we’ll discuss some common installation issues and provide solutions to those problems. We’ll also give tips to avoid making mistakes during ssd installation.
Identifying Issues With Ssd Installation
Before delving into the solutions, it’s vital to identify the potential issues that you might face during the installation process.
Here are some common problems that users encounter while installing an m 2 ssd in their dell laptop:
- Dell laptops have different configurations, and some of them may not support m 2 ssds. Therefore, it’s necessary to check your laptop’s manual before purchasing an m 2 ssd.
- Some models of dell laptops have only one m 2 ssd slot. So, if your laptop already has an m 2 ssd, you may not be able to install another one.
- While installing an m 2 ssd, it’s essential to make sure that your laptop’s bios and drivers are up to date. Outdated firmware may prevent your laptop from recognizing the new ssd.
- If you’re replacing your current storage device with an m 2 ssd, you need to clone your old drive into the new one. If not done correctly, this could lead to data loss.
Solutions To Common Installation Issues
Now that we know the potential problems let’s discuss some solutions:
- Make sure that your laptop supports m 2 ssds before purchasing one.
- If your laptop has only one m 2 ssd slot, you may have to remove the existing ssd to install the new one.
- Update your laptop’s bios and drivers to the latest version before installing the new ssd.
- Use reliable cloning software like macrium reflect or acronis true image to transfer data from your old drive to the new ssd.
Tips To Avoid Common Mistakes During Ssd Installation
Upgrading your laptop’s storage with an m 2 ssd is not rocket science; however, it’s vital to avoid any mistakes during the installation process.
Here are some tips to help you avoid making mistakes:
- Before starting the installation process, ensure that you have all the necessary tools and equipment beside you.
- Don’t forget to back up your data before starting the cloning process.
- Handle the ssd with care and avoid static electricity; it might damage the ssd.
- Ensure that the m 2 ssd is compatible with your laptop by checking its specifications and manual.
- Follow the installation guide provided with your ssd, carefully and step by step.
Installing an m 2 ssd is a great way to boost your dell laptop’s performance, but the installation process can have some challenges. By following our tips and solutions, you can smoothly install an m 2 ssd in your dell laptop and enjoy faster read and write speeds.
FAQ On Installing M 2 Ssd In Dell Laptop
What Is An M 2 Ssd Used For In A Laptop?
An m 2 ssd is used to improve the laptop’s storage capacity and boost its read and write speeds.
Is It Necessary To Clone My Old Hard Drive Before Installing The M 2 Ssd?
Yes, cloning your current hard drive is necessary to transfer your operating system and files to the m 2 ssd.
What Tools Do I Need To Install An M 2 Ssd In My Dell Laptop?
You’ll need a phillips screwdriver, a thin metal pry tool, and an m 2 ssd compatible with your dell laptop.
Can I Change The Boot Order After Installing The M 2 Ssd?
Yes, you can change the boot order in the bios settings of your dell laptop after installing the m 2 ssd.
Conclusion
Now that you have learned how to install m 2 ssd in your dell laptop, you can enjoy faster performance and storage capacity. Installing an m 2 ssd is a relatively simple process that adds significant value to your computing experience.
Your dell laptop will boot up faster and run applications more smoothly. With increased storage space, you can store more data and have faster access to your files. Remember to backup your critical data before proceeding with the installation to avoid data loss.
Furthermore, make sure to secure the screws and reconnect the battery before testing and verifying the ssd’s functionality. So, don’t wait any longer; enjoy the benefits of a fast and efficient dell laptop with an m 2 ssd. Follow these easy steps to get started on your upgrade journey and elevate your computing experience.

