How to Install M 2 Ssd in Hp Laptop? 10 Steps!
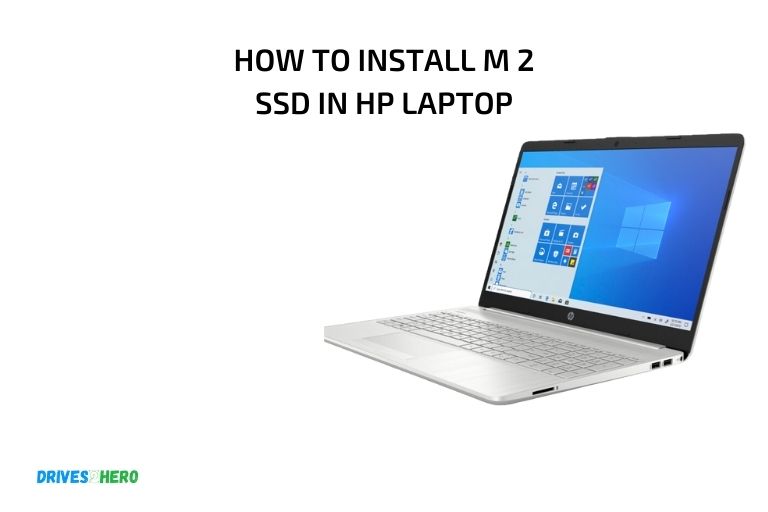
To install an M.2 SSD in an HP laptop, you need to open the laptop, locate the M.2 slot, insert the SSD, and then reassemble the laptop.
M.2 SSDs are a versatile and high-performance storage option for laptops, offering faster read and write speeds compared to traditional hard drives.
Installing an M.2 SSD in an HP laptop requires some technical skills, as you will need to open the laptop and potentially remove some components to access the M.2 slot.
Before starting the installation process, make sure to backup your important data as a precaution. Using proper grounding techniques, such as wearing an anti-static wristband, can prevent damage to your laptop’s internal components from static electricity.
It’s also crucial to confirm your HP laptop model’s compatibility with the M.2 SSD you intend to install, as not all laptops come with an M.2 slot, and some might have different slot sizes or keying options. Check your laptop’s user guide or the manufacturer’s website for compatibility information.
Step-by-Step Guide on Installing an M.2 SSD in a HP Laptop
| Step No. | Action Needed | Description |
|---|---|---|
| 1. | Preparation | Gather the necessary tools, such as a Phillips screwdriver, and backup your data on your current storage drive if necessary. |
| 2. | Power Off the Laptop | Turn off the laptop and disconnect any external devices, the power cord, and remove the battery if possible. |
| 3. | Open the Laptop | Locate and remove any screws securing the bottom panel of the laptop, then carefully lift the panel to access the internals. |
| 4. | Identify the M.2 Slot | Find the M.2 slot on the laptop’s motherboard, typically labeled with “M.2” or “SSD”. |
| 5. | Remove the Screw | Remove the small screw securing the M.2 slot, if present. Be careful not to lose it. |
| 6. | Insert the M.2 SSD | Align the notches on the M.2 SSD with the slot, then gently insert the SSD at a 30-degree angle. |
| 7. | Secure the M.2 SSD | Press the M.2 SSD down onto the motherboard and secure it with the previously removed screw. |
| 8. | Close the Laptop | Replace the bottom panel of the laptop and secure it with the screws you previously removed. |
| 9. | Power On the Laptop | Reconnect the battery (if applicable), power cord, and any external devices, then power on the laptop. |
| 10. | Configure the SSD | Follow the necessary steps to initialize and format the M.2 SSD in your operating system, then restore any backed-up data if needed. |
Key Takeaway

Four Facts About Installing M 2 SSD in HP Laptop
What Is An M.2 Ssd And Why Upgrade?
If you’re looking to boost the performance of your hp laptop, upgrading to an m. 2 ssd is an excellent option. But what is an m. 2 ssd, and why would you want to upgrade to it?
Let’s dive into the details.
Explanation Of M.2 Ssds In Simple Terms
An m. 2 ssd is a small, high-performance solid-state drive that connects directly to your laptop’s motherboard. It’s much faster than traditional hard drives, and because it doesn’t have any moving parts, it’s more durable.
Here are some key features of an m. 2 ssd:
- Compact size
- High-speed data transfer rates
- Improved boot times
- Increased durability
Benefits Of Upgrading To M.2 Ssd In Your Hp Laptop
Upgrading to an m. 2 ssd in your hp laptop can provide several significant benefits, including:
- Faster boot times: Your laptop will start up faster with an m.2 ssd.
- Improved overall performance: An m.2 ssd will help your laptop run faster and smoother, with faster app load times and improved multitasking capabilities.
- Increased storage capacity: Many m.2 ssds offer larger storage capacities than traditional hard drives.
- Extended battery life: M.2 ssds use less power than traditional hard drives, which can help extend your laptop’s battery life.
If you’re considering upgrading to an m. 2 ssd, keep in mind that not all laptops are compatible. Make sure to do your research and check your laptop’s specifications before buying an m. 2 ssd.
Preparing For Installation
Before you start with the installation of an m. 2 ssd in your hp laptop, there are a few crucial things you need to consider. Preparing for installation ensures a smooth installation process and reduces the risk of damage to your device.
Follow these steps to prepare yourself for the process.
Check Your Laptop Compatibility
Before you purchase an m. 2 ssd, it’s crucial to make sure that your hp laptop is compatible with m. 2 ssds. Check your device’s manual or the manufacturer’s website to verify this.
Choosing The Right M.2 Ssd
Not all m. 2 ssds work with every laptop, so ensure that you choose an m. 2 ssd that is compatible with your hp laptop. Look for a device that offers the same type of storage as your previous drive, whether it’s sata or nvme.
Tools You’Ll Need
You’ll need some specific tools to carry out installation, so be sure to have these before you begin the process. Here’s a list of the tools you’ll need:
- A screwdriver with a small head
- An anti-static wristband
- A plastic spudger to pry apart the laptop cover
To wrap it up, with the right tools, research, and preparation, you can easily and successfully install an m. 2 ssd in your hp laptop. Just remember to handle everything with caution, so your device avoids damage.
Step-By-Step Guide To Installing M.2 Ssd In Hp Laptop
Removing The Back Cover
Installing an m. 2 ssd in an hp laptop can increase its storage speed significantly. But before we start, we need to remove the back cover.
Here’s how it’s done:
- Turn off the laptop and unplug it from the power source.
- Flip the laptop upside down and locate the screw(s) that hold the back cover in place.
- Unscrew the back cover using a precision screwdriver and gently remove it, being careful not to damage any cables.
Locate Where To Insert M.2 Ssd
Now that we have the back cover removed, let’s locate the m. 2 ssd slot.
Here are the key points:
- Find the slot where the m.2 ssd is inserted. It’s usually located near the ram compartment.
- Locate the screw that holds the placeholder or existing m.2 ssd in place. You’ll need to remove it to install the new one.
Inserting The M.2 Ssd
Now that we’ve found the location of the m. 2 ssd slot, we can move on to inserting the new m. 2 ssd.
Here’s how it’s done:
- Insert the m.2 ssd into the slot at a 30-degree angle.
- Gently press down on the m.2 ssd until it clicks into place.
- Make sure that the connector pins are fully inserted and secure.
Securing M.2 Ssd With Screwdriver
We’re almost done! Now we just need to screw the m. 2 ssd in place.
Here’s how it’s done:
- Use the screw that you removed earlier and screw the new m.2 ssd in place.
- Tighten the screw until it’s snug but don’t over-tighten it, as this could damage the m.2 ssd.
- Gently press the back cover back into place and screw it back in place.
Congratulations! You’ve successfully installed a new m. 2 ssd into your hp laptop. Enjoy the increased storage speed and smoother performance!
Post-Installation Procedures
Congratulations on successfully installing your m. 2 ssd in your hp laptop! However, your journey does not end here. There are essential post-installation procedures that you need to perform to ensure your laptop’s optimal performance.
Reinstalling Your Windows Operating System
Reinstalling your windows operating system is strongly recommended after installing a new m. 2 ssd.
Here’s why:
- Reinstalling the windows operating system will enable the system to detect the new ssd and allocate the required resources optimally to ensure maximum performance.
- Reinstalling your windows os will also ensure that the new system boots faster, as it is installed on the new ssd.
Here are the steps to reinstall your windows operating system:
- Create a windows installation media using an official microsoft tool or use the one that came with your laptop.
- Connect the installation media (usb drive or dvd) to your laptop.
- Power on your laptop and press f9 repeatedly to enter the boot menu.
- Select the installation media from the menu to boot from it.
- Follow the prompts to install a fresh copy of windows os on your new m.2 ssd.
Cloning Your Old Hard Drive To New M.2 Ssd
Cloning your old hard drive to your new m. 2 ssd is an effective method of migrating all your data and applications from the old drive to the new m. 2 ssd. This method saves you time and effort by enabling you to avoid reinstalling the operating system and applications.
Here are the steps to follow:
- Acquire a reliable disk cloning software such as acronis or easeus todo backup.
- Install the cloning software and launch it.
- Connect the new m.2 ssd using an external enclosure or sata cable.
- Select the “clone disk” option and choose your old hard drive as the source and your new m.2 ssd as the target disk.
- Follow the prompts to complete the cloning process.
- Power off your laptop and replace the old hard drive with the new m.2 ssd.
Migrating Operating System Using Hp’S Recovery Disc
Hp laptops come with a recovery partition that you can use to migrate the operating system to the new m. 2 ssd.
Here is how to migrate your operating system using hp’s recovery disc:
- Connect the new m.2 ssd to your laptop using an external enclosure or a sata cable.
- Locate the hp recovery disc that came with your laptop or create one using the hp recovery manager software.
- Place the hp recovery disc in the disc drive and power on your laptop.
- Press f9 repeatedly to enter the boot menu and select the disc drive as the boot device.
- Follow the prompts to perform a system recovery to migrate the operating system to the new m.2 ssd.
Now that you know the post-installation procedures, ensure you follow them to the letter to enjoy the enhanced performance of the new m. 2 ssd.
Troubleshooting Common Installation Issues
Installing a new m. 2 ssd in your hp laptop can significantly improve its performance. However, the installation process is not always straightforward, and you may encounter some common issues.
Here’s how to troubleshoot them:
Laptop Not Recognizing New M.2 Ssd
If your hp laptop fails to recognize the new m. 2 ssd, follow these steps:
- Check if the m.2 slot is compatible with your new ssd.
- Reinstall the m.2 ssd, ensuring that it’s correctly seated in the slot.
- Check the bios settings and ensure that the m.2 slot is enabled.
- Update the firmware and bios to the latest version.
Bios And Uefi Settings Configuration
Configuring the bios and uefi settings is vital when installing a new m. 2 ssd.
Here are the key points to remember:
- Access the bios/uefi by pressing the appropriate key during bootup – usually, it’s f2 or del.
- Check if the m.2 slot is enabled and set to the correct mode (ahci or nvme).
- Disable secure boot to allow the laptop to boot from the new m.2 ssd.
- Use the clone utility provided by the ssd manufacturer to migrate your operating system and data from the old drive to the new m.2 ssd.
Updating Firmware And Bios
Updating the firmware and bios can fix common installation issues and improve compatibility with new hardware.
Follow these steps:
- Check the current firmware and bios version on your hp laptop.
- Download the latest firmware and bios version from the hp support site.
- Create a bootable usb drive with the firmware/bios update tool.
- Boot your hp laptop from the usb drive and follow the on-screen instructions to update the firmware/bios.
Installing a new m. 2 ssd in your hp laptop can add significant speed and storage capacity to your system. However, you must make sure to troubleshoot any common issues during installation.
By following these tips, you can get the most out of your new m. 2 ssd and enjoy faster boot times, improved overall performance, and increased storage capacity for your files, programs, and games.
FAQ About Installing M 2 Ssd In Hp Laptop
What Is An M 2 Ssd?
An m 2 ssd is a solid-state drive that is designed to fit into the m 2 slot of a computer’s motherboard.
Why Should I Install An M 2 Ssd In My Hp Laptop?
Installing an m 2 ssd in your hp laptop can help speed up the boot time and application launches, and improve overall system performance.
Can I Install An M 2 Ssd In Any Hp Laptop?
No, not all hp laptops are compatible with m 2 ssds. It is important to check the specifications of your laptop before attempting to install one.
How Do I Install An M 2 Ssd In My Hp Laptop?
To install an m 2 ssd in your hp laptop, you first need to locate the m 2 slot on your laptop’s motherboard, then insert the ssd into the slot and secure it in place.
Conclusion
Congratulations! You have successfully installed an m 2 ssd in your hp laptop. By following the step-by-step guide mentioned in this blog post, you have improved your laptop’s performance and storage capacity. Make sure to secure the ssd with screws and reattach the back cover of your laptop.
Don’t forget to format and transfer your data to the new ssd. Installing an m 2 ssd is a simple process that can significantly enhance your laptop’s speed and overall experience. In addition, you can use this guide for any future ssd installations.
Thank you for taking the time to read this blog post, and we hope it has been helpful to you. If you have any questions or comments, please feel free to leave them below. Happy computing!


