How to Install Nvme Ssd in Sata Slot? 10 Easy Steps!
Unfortunately, you cannot directly install an NVMe SSD in a SATA slot. NVMe and SATA are different interfaces and they require different connectors.
While SATA uses the AHCI protocol, NVMe uses the PCIe bus, which is why NVMe drives are faster and more efficient.
However, there are NVMe to SATA adapters available in the market that allow you to connect an NVMe SSD to a SATA slot, but the performance will be limited by the SATA interface.
NVMe (Non-Volatile Memory Express) and SATA (Serial ATA) are two different types of interfaces used for connecting SSDs (Solid State Drives) to a computer.
NVMe uses the PCIe (Peripheral Component Interconnect Express) bus in the computer which allows for faster data transfer rates compared to SATA.
However, these two interfaces use different connectors, which means an NVMe SSD cannot be directly installed into a SATA slot.
While it’s technically possible to connect an NVMe SSD to a SATA slot using an adapter, it’s not recommended.
The speed of NVMe SSDs is limited by the SATA interface, meaning you won’t get the full performance benefits of the NVMe drive. It’s suggested to use a proper NVMe slot if available for better performance and efficiency.
10 Steps To Installing Nvme Ssd in Sata Slot
| Steps | Description |
|---|---|
| 1. | Identify your SATA slot |
| 2. | Purchase an NVMe to SATA adapter |
| 3. | Power down your system |
| 4. | Disconnect the current SATA drive |
| 5. | Insert the NVMe SSD into the adapter |
| 6. | Connect the adapter to the SATA slot |
| 7. | Secure the drive and adapter in place |
| 8. | Power up your system |
| 9. | Install your Operating System (OS) on the NVMe SSD if necessary |
| 10. | Verify the SSD is recognized by your system |
Key Takeaway

Four Facts About Installing Nvme Ssd in Sata Slot
The Benefits Of Installing An Nvme Ssd In A Sata Slot
Upgrade your storage with the benefits of installing an NVMe SSD in a SATA slot. Enjoy faster speeds and improved performance for your system. Transform your computer experience with this simple installation process.
Faster Data Transfer Speeds:
- An NVMe SSD installed in a SATA slot can significantly enhance data transfer speeds.
- Enjoy lightning-fast performance with read and write speeds of up to 3,500MB/s and 2,500MB/s respectively.
- Benefit from improved loading times, quicker file transfers, and seamless multitasking.
- Say goodbye to frustrating bottlenecks and experience a smooth computing experience.
Increased Storage Capacity:
- Installing an NVMe SSD in a SATA slot allows for increased storage capacity.
- Expand your storage options and keep up with your growing data needs.
- Enjoy the freedom to store more files, applications, videos, and games without worrying about running out of space.
- Never compromise on storage capacity again and have ample room for all your digital content.
Improved Overall System Performance:
- Upgrading to an NVMe SSD in a SATA slot can provide a significant boost to your system’s performance.
- Experience a snappier and more responsive system with reduced loading times for applications and games.
- Enjoy seamless multitasking capabilities, allowing you to run multiple applications simultaneously without any lag.
- With improved overall system performance, you can maximize productivity and efficiency in your day-to-day tasks.
By installing an NVMe SSD in a SATA slot, you can enjoy faster data transfer speeds, increased storage capacity, and improved overall system performance.
Say goodbye to slow loading times and limited storage space as you embrace the future of storage technology.
Upgrade your system today and experience the incredible benefits of NVMe SSDs.
Understanding Nvme Ssds And Sata Slots
NVMe SSDs can be installed in SATA slots, providing faster data transfer speeds. Learn how to install an NVMe SSD in a SATA slot for enhanced performance and storage capacity.
If you’re looking to upgrade your computer’s storage capacity, installing an NVMe SSD in a SATA slot can be a smart choice.
But before you jump into the installation process, it’s important to understand the basics of NVMe SSDs and SATA slots.
We’ll explore what NVMe SSDs are, what SATA slots are, and the key differences between the two.
What Is An Nvme Ssd?
- NVMe stands for Non-Volatile Memory Express, which is a type of storage interface.
- NVMe SSDs are designed to deliver faster data transfer rates and lower latency compared to traditional SATA-based SSDs.
- They use PCIe (Peripheral Component Interconnect Express) lanes to connect directly to the motherboard, bypassing the SATA interface.
- NVMe SSDs are available in various form factors, including M.2 and PCIe add-in cards.
- They offer high performance, making them ideal for tasks that require rapid data access, such as gaming, video editing, and graphic design.
What Is A Sata Slot?
- SATA, or Serial ATA, is a computer bus interface that connects storage devices, such as SSDs and HDDs, to the motherboard.
- SATA slots are physical connectors on the motherboard where you can plug in SATA-compatible devices.
- These slots are commonly used for connecting traditional SATA-based SSDs, hard drives, optical drives, and other storage devices.
- SATA slots typically feature a data cable and a power cable to provide the necessary connections for the device.
Key differences between NVMe and SATA:
- Interface: NVMe SSDs use the PCIe interface, while SATA-based SSDs use the SATA interface.
- Speed: NVMe SSDs offer significantly faster data transfer rates compared to SATA SSDs. The NVMe interface allows for higher bandwidth and lower latency, resulting in quicker data access.
- Compatibility: NVMe SSDs require a compatible NVMe slot on the motherboard, whereas SATA-based SSDs can be connected to any SATA slot.
- Form factor: NVMe SSDs are available in various form factors, such as M.2 and PCIe add-in cards, while SATA SSDs typically come in the 2.5-inch drive form factor.
- Price: NVMe SSDs tend to be more expensive than SATA SSDs due to their higher performance capabilities.
Now that you have a better understanding of NVMe SSDs and SATA slots, you can make an informed decision on whether to install an NVMe SSD in a SATA slot.
Remember to check your motherboard’s compatibility and follow proper installation guidelines to ensure a smooth upgrade experience.
Step-By-Step Guide To Installing An Nvme Ssd In A Sata Slot
Learn how to easily install an NVMe SSD in a SATA slot with this step-by-step guide. Upgrade your storage with confidence and maximize your system’s performance.
Step 1: Gather The Necessary Tools And Components
Before you begin installing an NVMe SSD in a SATA Slot, you’ll need to gather a few essential tools and components.
Here’s what you’ll need:
- Phillips head screwdriver: This will be used to open the computer case and secure the NVMe SSD.
- NVMe SSD: Make sure you have the appropriate NVMe SSD that is compatible with your system.
- Mounting bracket (if necessary): Some NVMe SSDs may require a mounting bracket for installation.
- Thermal paste (if necessary): If your NVMe SSD requires thermal paste for heat dissipation, ensure you have it on hand.
Step 2: Preparing Your System For Installation
Before you dive into the installation process, it’s essential to ensure your system is prepared.
Here’s what you need to do:
- Shut down your computer: Turn off your computer and unplug it to avoid any accidents.
- Ground yourself: To prevent any damage from static electricity, ground yourself by touching a metal object or wearing an anti-static wristband.
Step 3: Opening The Computer Case
Now that you’re ready to proceed, it’s time to open your computer case.
Follow these steps:
- Locate the screws: Identify the screws that secure your computer case. Consult your computer’s manual if needed.
- Unscrew the case: Use your Phillips head screwdriver to remove the screws and carefully slide off the computer case.
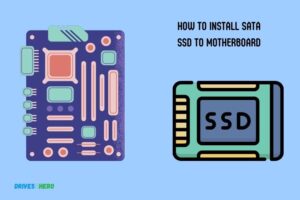
Step 4: Locating The Sata Slot
Next, you’ll need to locate the SATA slot where the NVMe SSD will be installed.
Follow these steps:
- Identify the SATA slots: Look for the SATA slots on your motherboard. They are usually rectangular in shape and will be labeled.
- Determine available slots: Check which SATA slots are available for installation. Refer to your motherboard manual for specific details.
Step 5: Preparing The Nvme Ssd For Installation
Before inserting the NVMe SSD into the SATA slot, some preparation may be required.
Follow these steps:
- Connecting the NVMe SSD to the mounting bracket (if necessary): If your NVMe SSD requires a mounting bracket, attach it securely.
- Applying thermal paste (if necessary): If your NVMe SSD requires thermal paste, ensure you carefully apply a small amount to the appropriate area.
Step 6: Installing The Nvme Ssd In The Sata Slot
Now that your NVMe SSD is ready, it’s time to install it into the SATA slot.
Follow these steps:
- Ensuring proper alignment: Align the connector pins on the NVMe SSD with the SATA slot on your motherboard.
- Securing the SSD in place: Gently press the NVMe SSD down into the SATA slot until it is firmly seated. If necessary, secure it with screws.
Step 7: Closing The Computer Case And Connecting Cables
With the NVMe SSD installed, it’s time to close the computer case and connect the necessary cables.
Follow these steps:
- Secure the case: Slide the computer case back onto the frame and secure it with the screws you removed earlier.
- Connecting cables: Reconnect any cables that were disconnected during the case opening, ensuring proper connections.
Step 8: Powering On The System And Verifying The Installation
The final step is to power on your system and ensure the NVMe SSD installation was successful.
Follow these steps:
- Plug in and turn on your computer: Connect the power cable and press the power button to start up your system.
- Check the system recognition: Access your system BIOS or operating system to check if the NVMe SSD is detected and recognized.
- Verify installation: Open your file explorer or disk management program to ensure the NVMe SSD is visible and functioning properly.
Congratulations! You have successfully installed an NVMe SSD in a SATA slot. Enjoy the improved performance and storage capacity it provides.
Troubleshooting And Common Issues
Learn how to troubleshoot and resolve common issues when installing an NVMe SSD in a SATA slot. Gain a clear understanding of the process and ensure a successful installation without any hiccups.
Installing an NVMe SSD in a SATA Slot can be a complex process, and it’s not uncommon to encounter some issues along the way.
Below are some common problems you might face and troubleshooting steps to help you resolve them:
Compatibility Issues:
- Mismatched connectors: Ensure that the NVMe SSD and SATA slot connectors match. A mismatch can lead to improper connections and cause compatibility issues.
- Older motherboard: Older motherboards may not support NVMe SSDs. Check your motherboard’s specifications and make sure it supports NVMe technology.
- Limited PCIe lanes: Some motherboards have limited PCIe lanes, and adding an NVMe SSD could affect other devices’ performance. Verify if your motherboard can handle the additional SSD without compromising performance.
Bios Settings And Firmware Updates:
- Incorrect BIOS settings: Check your BIOS settings to ensure that the SATA slot is configured to support NVMe SSDs. Look for options like “M.2 Support” or “NVMe Support” and enable them if necessary.
- Outdated firmware: Make sure your motherboard’s firmware is up to date. Manufacturers often release firmware updates that address compatibility issues and improve performance. Visit the motherboard manufacturer’s website and follow their instructions to update the firmware.
Error Messages And Troubleshooting Steps:
“Unknown Device” error:
- If you receive this error message, it indicates that your NVMe SSD is not recognized by the system. Try the following troubleshooting steps:
- Check the SSD connections and ensure they are secure.
- Update your motherboard’s BIOS to the latest version.
- Verify that the SATA slot supports NVMe SSDs.
“Boot device not found” error:
- If you encounter this error message after installing the NVMe SSD, it might indicate an issue with the boot order. Follow these steps:
- Enter the BIOS settings and check the boot order sequence.
- Ensure that the NVMe SSD is set as the primary boot device.
- Save the changes and restart the system.
Remember, troubleshooting steps may vary based on your motherboard and NVMe SSD model. Always consult the user manual or the manufacturer’s website for specific instructions.
By identifying and addressing compatibility issues, adjusting BIOS settings, and troubleshooting common errors, you can successfully install an NVMe SSD in a SATA slot and enjoy the benefits of faster storage speed.
FAQ For How To Install Nvme Ssd In Sata Slot
Can I Replace Sata Ssd With Nvme Ssd?
Yes, you can replace a SATA SSD with an NVMe SSD for improved performance.
Can I Install Nvme On Any Slot?
Yes, NVMe can be installed on any slot. Ensure compatibility and proper installation.
How Do I Install An Nvme Ssd In A Sata Slot?
To install an NVMe SSD in a SATA slot, you will need to use an adapter that converts the NVMe interface to SATA. This adapter allows you to connect the NVMe SSD to the SATA slot on your motherboard.
Can I Use An Nvme Ssd In A Sata Slot?
Yes, you can use an NVMe SSD in a SATA slot by using an adapter. The adapter will convert the NVMe interface to SATA, allowing you to connect the NVMe SSD to the SATA slot on your motherboard.
What Are The Benefits Of Installing An Nvme Ssd In A Sata Slot?
By installing an NVMe SSD in a SATA slot, you can take advantage of the faster read and write speeds offered by NVMe technology. This can improve the overall performance and responsiveness of your system.
Conclusion
Installing an NVMe SSD in a SATA slot is a relatively simple process that can significantly improve the performance of your computer.
By following the steps outlined in this guide, you can take advantage of the faster speeds and increased storage capacity offered by NVMe technology.
Be sure to prepare your computer by ensuring compatibility, gathering the necessary tools, and backing up your data beforehand.
Then, carefully insert the NVMe SSD into the available SATA slot and secure it in place. Once the installation is complete, don’t forget to format and initialize the drive to start using it.
Whether you are a gamer, content creator, or simply want a faster and more efficient computer, upgrading to an NVMe SSD is an excellent choice.
Enjoy the benefits of faster boot times, shorter file transfer durations, and seamless multitasking capabilities with your newly installed NVMe SSD.

Harold Williams is a senior writer and technical editor at Drives Hero with 20+ years of experience in IT administration. He specializes in storage systems, SSD reviews, and performance testing, bringing real-world insight to every guide.