How to Install Sata Ssd to Motherboard? 10 Easy Steps!
To install a SATA SSD (Solid State Drive) to a motherboard, you first need to turn off your computer and disconnect it from the power source.
Open the computer case and identify the SATA port on your motherboard. Then, connect one end of the SATA cable to the SSD and the other end to the SATA port on the motherboard.
Secure the SSD in a drive bay or with a mounting bracket. Finally, reconnect the power cable and turn your PC on.
A SATA SSD is a type of storage device that uses the SATA interface to connect to the motherboard of a computer. The SATA interface is a standard for connecting and transferring data from hard disk drives (HDDs) to computer systems.
It’s a relatively simple process to install a SATA SSD to a motherboard, and doing so can significantly improve the performance of your computer.
Installing a SATA SSD to a motherboard is a straightforward task that can greatly enhance your computer’s performance.
However, it’s crucial to ensure that the SSD is securely attached to prevent it from moving around inside the case, which could cause damage.
Always remember to disconnect the power source before starting the installation process to avoid any electrical mishaps.
With this upgrade, you’ll notice a significant improvement in your computer’s speed and overall performance.
10 Steps To Installing SATA SSD To Motherboard
| Steps | How to Install Sata Ssd to Motherboard |
|---|---|
| 1 | Turn off your computer |
| 2 | Open the computer case |
| 3 | Identify the SATA and power connectors on your motherboard |
| 4 | Attach the SATA cable to the SSD and the motherboard |
| 5 | Connect the power cable to the SSD |
| 6 | Secure the SSD in the case |
| 7 | Close the computer case |
| 8 | Turn on your computer |
| 9 | Configure the BIOS to recognize the new SSD |
| 10 | Format the SSD in your operating system |
Key Takeaway
Five Facts About Installing SATA SSD To Motherboard
Choosing The Right Sata Ssd For Your Motherboard
Ensure optimal performance and speed by selecting the right SATA SSD for your motherboard. Discover hassle-free installation steps to connect your SATA SSD to the motherboard for enhanced storage capabilities.
When it comes to upgrading your storage capabilities, installing a SATA SSD to your motherboard can significantly boost speed and performance.
However, it’s important to choose the right SSD that is compatible with your specific motherboard model. Considering the following factors will help you make an informed decision:
Factors To Consider When Selecting An Ssd For Your Motherboard
- Interface: Check if your motherboard supports SATA (Serial ATA) interface for SSDs. Most modern motherboards do, but it’s always good to confirm before making a purchase.
- Data transfer speed: Look for an SSD that offers high data transfer speeds. SSDs with SATA III interface provide faster speeds compared to older SATA II models. This ensures quick access to your files and applications.
- Storage capacity: Determine your storage needs and choose an SSD with sufficient capacity. SSDs come in various sizes, so opt for one that matches your requirements. Consider the type of files you intend to store, such as documents, media, or games.
- Form factor: Check the physical dimensions of the SSD and ensure it fits your motherboard’s specifications. Common form factors include 2.5-inch and M.2 SSDs.
- Budget: Set a budget for your SSD purchase and explore options within that range. SSD prices have become more affordable in recent years, so there are plenty of choices available.
Understanding Sata Ssd Compatibility With Different Motherboards
SATA SSDs are widely compatible with different motherboard models, but it’s essential to ensure your motherboard supports the SATA interface.
Here are a few key points to keep in mind:
- SATA III: Most modern motherboards have SATA III ports, which are backward compatible with SATA II SSDs. However, using a SATA III SSD will make full use of the available speed.
- SATA II: If your motherboard only supports SATA II, you can still use a SATA III SSD, but its performance will be limited to SATA II speeds.
- Motherboard documentation: Consult your motherboard’s documentation or manufacturer’s website to confirm its compatibility and recommended SSD types.
Researching And Comparing Ssd Options For Your Specific Motherboard Model
To find the perfect SATA SSD for your motherboard, follow these steps:
- Determine your motherboard model: Check the model number and specifications of your motherboard. This information can typically be found on the motherboard itself or in its documentation.
- Visit the manufacturer’s website: Go to the website of your motherboard’s manufacturer and navigate to the support or product page. Look for compatibility information and recommended SSD models.
- Online research: Conduct online research to find user reviews and recommendations for SSDs that are compatible with your specific motherboard model. This will help you make an informed decision based on real-world experiences.
- Compare specifications: Compare the specifications and features of different SSDs to find the one that best suits your needs. Look for details such as storage capacity, data transfer speed, and price.
- Consider reputable brands: Stick to well-known and reputable brands when choosing an SSD. They often offer better quality and customer support.
By considering the factors mentioned above and conducting thorough research, you can confidently choose the right SATA SSD for your motherboard, ensuring improved performance and storage capabilities.
Preparing Your Motherboard For Ssd Installation
Learn how to install a SATA SSD to your motherboard with these step-by-step instructions, ensuring optimal performance for your PC.
Checking Your Motherboard Specifications For Available Sata Ports:
Ensure you have the necessary SATA ports on your motherboard before proceeding with the SSD installation.
Here are a few steps to help you check:
- Refer to the manufacturer’s manual or visit their website to obtain the specifications of your motherboard.
- Look for information regarding the available SATA ports.
- Take note of the number of SATA ports and their respective locations on the motherboard.
Verifying The Type And Version Of Sata Connector Your Motherboard Supports:
It is crucial to verify the type and version of SATA connector that your motherboard supports.
Follow these steps:
- Identify the SATA connector(s) on your motherboard. It can typically be found near the SATA ports or labeled clearly.
- Determine the SATA version your motherboard supports, such as SATA 2, SATA 3, or even the latest SATA 3.2.
- Note the type of connector, whether it is SATA data cable (usually a flat cable) or SATA power connector (typically a smaller L-shaped connector).
Gathering The Necessary Tools For The Installation Process:
Before installing the SATA SSD to your motherboard, make sure you have the following tools ready:
- Phillips screwdriver: Required to remove screws from your computer case and secure the SSD to the motherboard.
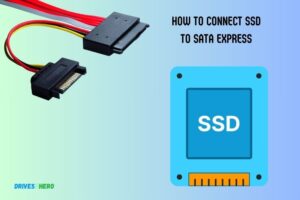
- SATA data cable: Used to connect the SSD to the motherboard, ensuring data transfer.
- SATA power cable: Supplies power to the SSD from the power supply unit.
- Mounting screws: Used to secure the SSD to the motherboard or the computer case, depending on the mounting location.
- Anti-static wrist strap (optional): Recommended to prevent static electricity damage to the components.
Remember, it is important to gather all the necessary tools beforehand to ensure a smooth installation process without any interruptions or delays.
Step-By-Step Guide To Installing A Sata Ssd To Your Motherboard
Learn how to install a SATA SSD onto your motherboard with this step-by-step guide. Upgrade your storage easily and efficiently by following these simple instructions. Start enjoying faster speeds and improved performance in no time.
Unplugging And Powering Down Your Computer:
Before you begin installing a SATA SSD to your motherboard, it’s important to ensure that your computer is powered down and unplugged. It’s crucial to follow these steps to avoid any potential damage to your hardware.
Locating The Sata Ports On Your Motherboard And Preparing The Ssd:
To install your SATA SSD, you’ll need to locate the SATA ports on your motherboard. These ports are usually labeled, so refer to your motherboard’s manual for their exact location.
Once you’ve identified the SATA ports, follow these steps to prepare the SSD:
- Gather the necessary tools, such as a screwdriver, to open your computer case.
- Touch a metal surface to discharge any static electricity.
- Remove the side panel of your computer case to access the internals.
- Identify an available mounting location for your SSD.
- Attach the SSD to the mounting location using the provided screws.
Connecting The Sata Data Cable To Your Motherboard And Ssd:
The SATA data cable is responsible for transferring data between your SSD and the motherboard.
Here’s how you can connect the cable:
- Locate a free SATA data port on your motherboard.
- Connect one end of the SATA data cable to the SSD.
- Connect the other end of the SATA data cable to the motherboard’s SATA port.
Securing The Ssd To Your Computer Case:
Securing your SSD to the computer case helps prevent any accidental damage or vibrations while the computer is in use.
Follow these steps to secure the SSD:
- Ensure that the SSD is aligned properly with the mounting location.
- Use the provided screws to fasten the SSD securely to the computer case.
- Make sure the SSD is snugly fitted and doesn’t move or wiggle.
Connecting The Sata Power Cable To Your Ssd:
The SATA power cable supplies power to your SSD.
Here’s how you can connect the power cable:
- Locate a free SATA power connector from your power supply unit.
- Connect one end of the SATA power cable to the SSD.
- Connect the other end of the SATA power cable to the SATA power connector from the power supply unit.
Verifying The Connections And Powering On Your Computer:
Before closing your computer case, it’s crucial to verify that all the connections are secure:
- Ensure that the SATA data cable and SATA power cable are firmly connected to the SSD and motherboard.
- Reattach the side panel of your computer case.
- Plug in and power on your computer.
- Check if the SSD is detected by accessing the BIOS or checking the operating system.
By following this step-by-step guide, you can successfully install a SATA SSD to your motherboard. Remember to handle your hardware with care and take necessary precautions throughout the installation process.
Enjoy the increased storage speed and performance that an SSD brings to your computer!
Configuring Your Motherboard And Os To Recognize The New Ssd
Discover how to seamlessly connect and configure your new SATA SSD to your motherboard and operating system for optimal recognition and utilization.
Maximize your storage capabilities with these step-by-step instructions to enhance your system’s overall performance.
Congratulations on installing your SATA SSD to your motherboard! Now it’s time to configure your system to recognize and optimize the new SSD.
Follow the steps below to ensure a smooth setup process:
Accessing Your Bios And Ensuring The Ssd Is Detected:
- Restart your computer and press the designated key to enter the BIOS settings (refer to your motherboard manual if unsure).
- Navigate to the storage configuration or SATA configuration section.
- Verify that your SSD is detected by the motherboard. If not, check the connections and power supply.
Formatting And Partitioning The Ssd:
- Once you’ve confirmed the SSD’s detection, exit the BIOS and boot into your operating system.
- Press the Windows key + X and select “Disk Management.”
- Find your SSD in the list of drives and right-click on it.
- Choose “Format” to prepare the SSD for use.
- Select the file system you want (usually NTFS) and allocate a drive letter for easy access.
- Click “OK” to initiate the formatting process.
Updating Your Motherboard Firmware And Ssd Drivers:
- Visit the manufacturer’s website for your motherboard and find the support or downloads section.
- Download and install the latest firmware or BIOS update for your motherboard.
- Follow the provided instructions carefully to complete the update process.
- Next, visit the SSD manufacturer’s website and download the latest drivers for your SSD model.
- Install the SSD drivers according to the manufacturer’s instructions.
Transferring Or Reinstalling Your Operating System To The Ssd:
- Before proceeding, ensure you have a backup of your important data.
- If you want to transfer your existing OS, you can use disk cloning software like Clonezilla or Macrium Reflect.
- Follow the software instructions to clone your system drive to the SSD.
- Once the cloning process is complete, restart your computer and change the boot order in the BIOS to prioritize the SSD.
- If you prefer a clean installation, you can reinstall your operating system directly to the SSD.
- Insert your OS installation media (e.g., USB or DVD) and boot from it.
- Follow the on-screen prompts to install your OS, selecting the SSD as the installation destination.
By following these steps, you should be able to configure your motherboard and operating system to recognize your new SATA SSD seamlessly.
Enjoy the increased speed and storage capacity that your SSD brings to your computer!
Tips And Troubleshooting For A Successful Installation
Looking to install a SATA SSD to your motherboard? Check out these tips and troubleshooting techniques for a successful installation.
So, you’ve decided to upgrade your computer with a shiny new SATA SSD! Installing an SSD to your motherboard can greatly enhance your system’s performance and provide you with faster data transfers.
However, like any hardware installation, there can sometimes be hiccups along the way. We’ll provide you with valuable tips and troubleshooting techniques to ensure a smooth and successful installation process.
Troubleshooting Common Issues During Ssd Installation:
SSD not detected by the motherboard: Check if all cables are properly connected and seated securely. Ensure that both the power and data cables are firmly connected to the SSD and motherboard.
Additionally, ensure that the SATA port you have plugged your SSD into is enabled in the BIOS settings.
Compatibility issues: Verify that your motherboard supports SATA SSDs. Check the manufacturer’s documentation or website for compatibility information.
If your motherboard is older, you may need a BIOS update to add support for SATA SSDs.
Slow performance: If you notice slower-than-expected performance after installing your SSD, ensure that you have enabled the AHCI (Advanced Host Controller Interface) mode in the BIOS settings.
This mode allows the SSD to utilize its full potential. Additionally, ensure that you have the latest firmware and drivers installed for both the SSD and motherboard.
Maximizing The Performance Of Your Sata Ssd And Motherboard:
- Enable TRIM: TRIM is a feature that helps maintain the performance and lifespan of your SSD. Ensure that TRIM is enabled in your operating system settings for the SSD.
- Optimize your operating system for SSD: Some operating systems have specific settings that can enhance SSD performance. Look for SSD optimization guides or settings specific to your operating system.
- Update firmware and drivers: Regularly check for firmware and driver updates for your SSD and motherboard. These updates can provide performance optimizations and resolve compatibility issues.
Setting Up Regular Backups And Maintenance For Your Ssd:
- Backup important data: Just like any storage device, it’s crucial to regularly backup your data on the SSD. In case of hardware failure or accidental data loss, having backups ensures you won’t lose important files.
- Regularly update your backups: As you add or modify data on your SSD, make sure to update your backups accordingly. Regularly scheduled backups provide an extra layer of protection for your data.
- Perform maintenance tasks: Over time, your SSD might accumulate unnecessary files or experience performance degradation. Perform regular maintenance tasks, such as running disk cleanup utilities, defragmentation (for traditional HDDs, not necessary for SSDs), and checking for errors or bad sectors.
By following these tips and applying troubleshooting techniques, you’ll be well on your way to a successful SATA SSD installation. Your computer will thank you for the improved performance and faster data transfers.
FAQ On How To Install Sata Ssd To Motherboard
How Do I Know If My Motherboard Supports Sata Ssds?
To check if your motherboard supports SATA SSDs, refer to the specifications or user manual of your motherboard. Look for SATA ports labeled “SATA” or “SATA 3,” which are compatible with SATA SSDs.
Can I Install A Sata Ssd Without Reinstalling The Operating System?
Yes, you can install a SATA SSD without reinstalling the operating system. You can clone your existing system from the old hard drive to the new SSD using specialized software or backup and restore tools.
What Cables Do I Need To Connect A Sata Ssd To A Motherboard?
To connect a SATA SSD to a motherboard, you will need a SATA data cable and a SATA power cable. These cables are usually included with the motherboard or the SSD itself.
How Do I Physically Install A Sata Ssd To My Motherboard?
To physically install a SATA SSD to your motherboard, first, power off your computer and unplug it.
Then, locate an available SATA port on your motherboard and connect one end of the SATA data cable to the SSD and the other end to the SATA port.
Finally, connect the SATA power cable to the SSD.
Do I Need To Format A New Sata Ssd Before Using It?
No, you do not need to format a new SATA SSD before using it. Most SSDs come pre-formatted and ready to use. However, if your SSD is not recognized by your computer, you may need to format it using your operating system’s disk management tool.
Conclusion
To sum up, installing a SATA SSD to your motherboard can greatly enhance the performance of your computer.
With the simple steps outlined in this guide, you can easily upgrade your storage solution and experience faster boot times, quicker file transfers, and improved overall system responsiveness.
By following the recommended precautions and guidelines, such as grounding yourself and ensuring compatibility, you can confidently undertake this installation process.
Remember to back up your data before proceeding and consult the manufacturer’s instructions for any specific requirements. Whether you are a gamer, content creator, or just a casual user, adding an SSD to your system is a worthwhile investment.
Upgrade your computer’s storage capacity and optimize its performance with the installation of a SATA SSD today. Enjoy the benefits of faster and more efficient computing for all your tasks and activities.

