How to Install Windows After Ssd Upgrade
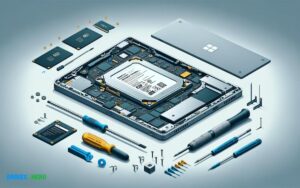
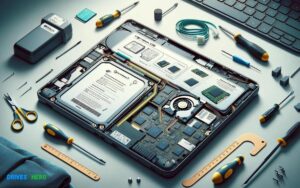
To install Windows on a new SSD, create a bootable USB drive with the Windows Media Creation Tool, then boot from the USB to initiate installation. Select the SSD as the destination drive for Windows setup to proceed.
Upgrading to a solid-state drive (SSD) offers a significant performance boost for any computer, making tasks like booting up the operating system, launching applications, and transferring files much faster. Before installing Windows on your newly upgraded SSD, ensure you have backed up any important data from your old drive.
It’s crucial to ascertain that the SSD is properly connected to your computer and recognized by the BIOS or UEFI. With the right tools prepared, such as a bootable USB flash drive with the Windows installation media, the installation process is streamlined and user-friendly. Ensuring your system meets the necessary requirements for the version of Windows you’re installing is essential for smooth operation post-upgrade.

Key Takeaway
Introduction To Ssd Upgrades And Windows Installation
The game-changing transition from traditional Hard Disk Drives (HDD) to Solid State Drives (SSD) can skyrocket the performance of any computer system. As you consider upgrading to an SSD and installing Windows on it, it’s important to make the journey smooth and hassle-free. This section provides a comprehensive guide to understanding the benefits of SSDs, preparing for installation, and executing the Windows setup on your new, lightning-fast drive.
Understanding The Advantages Of Ssd Over Hdd
SSDs have transformed the computing experience with their superior speed, durability, and efficiency. When compared to HDDs, SSDs excel in several key areas:
- Speed: SSDs provide faster boot times, quicker file transfers, and overall snappier system performance.
- Durability: With no moving parts, SSDs are less susceptible to physical shock and damage.
- Energy Efficiency: SSDs consume less power, which can lead to longer battery life for laptops.
- Silent Operation: Absence of mechanical parts means SSDs operate silently.
Pre-installation Checklist For Windows On An Upgraded Ssd
Before diving into the Windows installation, ensure everything is set for a flawless transition. This entails:
- Backup Data: Save any important files from your current system to avoid data loss.
- Product Key: Have your Windows product key on hand, as you’ll need it to activate the operating system.
- Compatible Hardware: Verify that your computer’s hardware is compatible with an SSD upgrade.
- Installation Media: Create a Windows installation media on a USB drive or DVD.
- BIOS Update: Ensure your computer’s BIOS or firmware is updated to the latest version.
- Driver Updates: Download the latest drivers for your hardware, particularly for the SSD.
Preparing For A Fresh Windows Installation
Upgrading to an SSD is a fantastic way to boost your computer’s performance, but it often requires a fresh Windows installation. Preparing for a Fresh Windows Installation is a critical step that ensures a smooth transition and secures your important files. This guide will walk through the essentials: backing up your data, creating installation media, and checking compatibility and BIOS settings.
Backing Up Important Data Before Installation
Before proceeding with the installation, you need to protect your personal files. A complete data backup is crucial to prevent the loss of any important documents, photos, or programs. Use an external hard drive, cloud storage, or another SSD/HDD to transfer your files. Consider the following methods:
- Copy and paste files manually to an external drive
- Utilize Windows’ built-in backup feature
- Employ third-party backup software for a full system image
Verify the integrity of the backup by checking if files open properly on another device before moving on to the installation.
Creating A Windows Installation Media
You’ll need a bootable USB drive with the Windows installer on it. To create one, you’ll require a USB flash drive with at least 8GB of storage and access to a functioning Windows machine:
- Download the Media Creation Tool from Microsoft’s official website.
- Run the tool and select
Create installation media (USB flash drive, DVD, or ISO file) for another PC. - Follow the on-screen instructions to choose the correct Windows version and architecture.
- Choose USB flash drive as your media type and wait for the creation process to complete.
Once the USB drive is ready, it can be used to install Windows on your new SSD.
Ensuring Compatibility And Bios Settings
Before beginning the installation process, ensure your system meets the minimum requirements for the Windows version you’re planning to install. Check against:
| Requirement | Specification |
|---|---|
| Processor | 1 gigahertz (GHz) or faster |
| RAM | 1 gigabyte (GB) for 32-bit or 2 GB for 64-bit |
| Storage | 16 GB for 32-bit OS or 20 GB for 64-bit OS |
| Graphics card | DirectX 9 or later with WDDM 1.0 driver |
| Display | 800×600 resolution or higher |
Additionally, adjust your BIOS settings to boot from the USB drive:
- Restart your computer and enter the BIOS setup. This is usually done by pressing a key like
F2,F12,Del, orEscduring startup. - In the BIOS menu, navigate to the Boot Order section.
- Set the USB drive as the first boot device.
- Save your changes and exit the BIOS.
With your backup ready, installation media created, and BIOS set up, you’re now fully prepared to install Windows on your new SSD.
Step-by-step Guide To Installing Windows On A New Ssd
Upgrading to a solid-state drive (SSD) is a surefire way to boost your computer’s performance. But after you’ve installed your speedy new SSD, you’ll need to install Windows to get your system up and running. This guide will take you through a seamless transition, providing a step-by-step walk-through on how to install Windows on your fresh SSD. Tailored for both beginners and experienced users, it will ensure nothing stands between you and a rejuvenated computing experience.
Initiating The Windows Setup Process
Before you start, ensure you have a Windows installation media ready, such as a bootable USB drive or DVD. Restart your computer and press the key required to enter the boot menu (often F12, ESC, or F2). Select the bootable USB or DVD containing the Windows setup and press Enter. Shortly after, the Windows setup screen will greet you; this is your starting line.
Selecting The Ssd As The Installation Destination
- When the Windows setup loads, choose your language, time, and keyboard preferences, then click ‘Next’.
- Click ‘Install Now’ and enter your Windows product key if prompted.
- Accept the license terms and choose ‘Custom: Install Windows only (advanced)’.
- Here, you’ll see a list of all drives connected to your PC. Find and choose your new SSD.
If the SSD is brand new, it will likely show as ‘Unallocated Space’. Fear not; this is standard procedure. We’ll take care of that in the next step.
Partitioning And Formatting The Ssd (if Necessary)
If the SSD shows unallocated space, it’s time to prepare it for installation:
- Select the SSD and click ‘New’ to create a partition. Windows will automatically suggest the maximum disk space. For most cases, using the full space is ideal. Click ‘Apply’ when you’re ready.
- Windows might create additional partitions for system files; this is a normal step for proper boot management.
- After creating the necessary partitions, select the primary partition (usually Drive 0 Partition 2) and click ‘Format’ to prepare it for Windows installation.
- Upon completion, click ‘Next’ to start the installation onto your SSD.
Windows will then begin laying down its digital foundations on your SSD. This process can take a while, so grab a beverage and let Windows do its thing.
Completing The Windows Installation And Initial Setup
Once the installation is complete, your system will reboot. Be ready to remove the installation media if it’s not set to boot from the SSD first. Otherwise, you might end up restarting the installation process. After rebooting:
- You’ll be guided through a series of initial setup choices, ranging from regional settings to user account creation.
- Follow the on-screen prompts and customize your Windows experience to your liking. Choose a network, configure privacy settings, and decide whether to sync your settings if you have a Microsoft account.
- Install the necessary drivers for your hardware components and complete any remaining updates that Windows might suggest.
Congratulations! With these simple steps, your system will be sporting a fresh Windows installation on a brand new SSD, ensuring a faster and more responsive computing adventure.
Post-installation Setup And Configuration
Welcome to the Post-Installation Setup and Configuration guide! You’ve successfully upgraded your computer with a shiny new SSD and completed the Windows installation. Now, it’s time to prime your system to take advantage of that blazing speed and efficiency! This crucial phase involves installing the necessary drivers, restoring your data, and tweaking your settings to optimize SSD performance. Let’s dig into the details and get your system up and running at its best.
Installing Essential Drivers And Updates
First things first: It’s imperative to ensure your system’s components work in harmony with Windows on your new SSD. Kick things off by installing the latest drivers and updates.
- Visit the manufacturer’s website to download drivers for your motherboard, graphics card, and any other peripherals.
- Run Windows Update to install the latest OS patches, which often contain important security fixes and performance improvements.
- Don’t forget to check for firmware updates specifically for your SSD model to guarantee optimal operation and longevity.
Restoring Data From Backup And Reinstalling Applications
Restoring your personal files and reinstalling applications is next on the agenda. With a fresh install, you have the perfect opportunity to organize and declutter.
- Use your preferred backup solution or Windows’ native tools to restore personal files such as documents, photos, and music.
- Reinstall essential software, prioritizing productivity tools, web browsers, and security software.
Remember, only bring back what you need to keep the system clean and responsive.
Optimizing Ssd Settings In Windows
Your SSD shines when it’s properly optimized. Windows usually tunes itself, but a few manual adjustments further enhance performance and prolong your drive’s lifespan.
| Optimization Task | Action |
|---|---|
| Enable AHCI Mode | Confirm it’s active in BIOS for improved speed and performance. |
| Confirm TRIM Command | Use the command prompt and type fsutil behavior query DisableDeleteNotify to ensure TRIM is enabled (0 means enabled). |
| Disable Defragmentation | Since SSDs don’t need defragmentation, ensure that it’s turned off to avoid unnecessary write operations. |
Troubleshooting Common Installation Issues
Installing a new SSD should lead to a notable boost in speed and efficiency for your system, but occasionally, the process doesn’t go as smoothly as anticipated. Whether it’s installation errors, booting issues, or just tweaking for optimal performance, knowing how to troubleshoot common installation problems can save you time and frustration. The following tips will guide you through the most common problems so you can enjoy the full potential of your SSD upgrade.
Dealing With Installation Errors Or Ssd Detection Issues
Encountering installation errors or SSD detection problems can be a common hurdle. If your system isn’t recognizing your new SSD, check the connections first. Ensure the data and power cables are securely connected. For laptops, confirm that the drive is seated in the bay correctly. If issues persist, consider the following:
- Update your BIOS: Manufacturers often release updates that improve hardware compatibility. Ensure your motherboard’s BIOS is up to date.
- Disk Management: If the SSD is visible in BIOS but not in your operating system, use Disk Management to initialize and format the SSD.
- Driver Issues: Sometimes, the SATA controller driver can cause detection issues. Try updating the driver or switching to a different controller mode like AHCI in the BIOS.
Resolving Boot Problems After Installation
Right after installing a fresh Windows on your SSD, boot issues can be particularly troubling. If you’re faced with a booting problem:
- Check the boot order in your system BIOS: The system may still be trying to boot from the old drive.
- Boot Repair: Utilize Windows’ built-in startup-repair tool. This can often fix any boot-related issues.
- Clean Installation: If other solutions fail, a clean install of Windows on the SSD often rectifies the problem.
Performance Tuning And Maintenance Tips For Your New Ssd
Once installed, optimizing your SSD not only boosts its performance but also prolongs its lifespan:
| Tuning Tip | Action | Benefit |
|---|---|---|
| System Configuration | Adjust the system settings like disabling disk defragmentation and enabling TRIM. | These actions help maintain SSD performance and longevity. |
| Firmware Updates | Regularly check for and install firmware updates from the SSD manufacturer. | Keep your SSD up-to-date for the best performance and latest features. |
| Software Optimization | Use software tools provided by SSD manufacturers for optimization. | Optimized software can enhance data processing and management efficiency. |
Remember to maintain regular backups and monitor the health of your SSD with tools like S.M.A.R.T. analysis to prevent data loss.
Conclusion
Upgrading to an SSD and installing Windows can significantly boost your computer’s speed and efficiency. With the steps outlined in this guide, the process should be straightforward. Remember to back up data and ensure compatibility. This upgrade is a smart move for enhancing your PC’s performance.
Dive in, your improved computing experience awaits!

Harold Williams is a senior writer and technical editor at Drives Hero with 20+ years of experience in IT administration. He specializes in storage systems, SSD reviews, and performance testing, bringing real-world insight to every guide.