How to Upgrade Ssd Drive
To upgrade your SSD drive, first determine the compatible SSD type and size for your device. Next, clone or transfer your data to the new SSD before installation.
Upgrading your SSD drive can significantly enhance your computer’s performance and storage capabilities. Whether you’re a gamer needing more space for games or a professional streamer needing faster access to files, swapping to a larger or faster solid-state drive is a substantial move.
With the right tools and a clear guide, even novices can undertake this task successfully. It’s essential to backup your data before starting the process to prevent any potential data loss. One must be meticulous in following the upgrade process, which usually includes software assistance for cloning your existing drive’s contents. Embracing this upgrade not only boosts your system’s speed but also extends its overall lifespan, making it a savvy investment for anyone looking to keep their technology current.
Key Takeaway
Introduction To Ssd Upgrades
Are you contemplating a system upgrade for enhanced performance and speed? An SSD (Solid State Drive) upgrade can be a game-changer. Moving from a traditional hard drive to an SSD can result in significant improvements. This upgrade requires understanding the technology, recognizing the benefits, and determining if your system is ready.
Understanding Ssd Technology
Solid State Drives have revolutionized data storage with their blazing fast performance and reliability. Unlike HDDs with mechanical parts, SSDs store data on interconnected flash-memory chips. The absence of moving parts means reduced risk of physical damage and lower latency.
- Flash Memory Chips – More durable than mechanical drives.
- Speed – Capable of reading and writing data at incredible speeds.
- Form Factors – Various sizes to fit different devices including 2.5 inches, M.2, and mSATA.
Benefits Of Upgrading To An Ssd
Swapping out your hard drive for an SSD comes with a multitude of advantages. Here is what you can expect:
| Benefit | Impact |
|---|---|
| Speed | Up to 10x faster data access and boot times. |
| Durability | Greater resistance to shocks and drops. |
| Energy Efficiency | Less power draw, longer battery life for laptops. |
| Noise Reduction | Operation is silent due to no moving parts. |
Determining If Your System Is Ready For An Ssd Upgrade
To know if your system is a good candidate for an SSD upgrade, check the following criteria:
- Compatibility with your motherboard’s interface (SATA or PCIe).
- Adequate space in the system chassis for physical installation.
- Support for booting from an SSD—if planning to use it as a boot drive.
- Current system performance and potential bottlenecks that an SSD won’t address.
A critical step is to ensure you have the correct tools and data migration strategy in place. Upgrading should be a smooth process, resulting in a noticeably faster and more responsive computer.
Choosing The Right Ssd For Your Needs
Upgrading your storage with a Solid State Drive (SSD) is a game-changer for speeding up load times and enhancing overall system performance. But with the plethora of SSD options available, picking the right one can be a daunting task. Let’s navigate through the essential considerations to select the perfect SSD tailored to your storage demands and performance aspirations.
Assessing Storage Capacity Requirements
The first step in your SSD upgrade path is to determine how much storage you’ll need. This largely depends on your usage patterns:
- General Users: For everyday computing, a 256GB or 512GB SSD typically suffices.
- Professional Users: If you work with large files or run demanding applications, aim for 1TB or more.
- Gamers: Modern games can be quite large, so a 1TB to 2TB drive is advisable for a seamless experience.
Consider your current usage and future needs to avoid running out of space prematurely.
Comparing Ssd Types: Sata, Nvme, And Pcie
SSDs come in different interfaces, affecting their speed and compatibility:
- SATA SSDs are a solid upgrade from HDDs and are compatible with most systems, but they’re bounded by the older SATA interface speeds.
- NVMe SSDs, on the other hand, leverage newer technology to provide exponentially faster read/write speeds over PCIe connections.
- PCIe SSDs directly connect to the motherboard’s PCIe slots, offering the highest potential speed and are ideal for intensive tasks.
Match the SSD type to your motherboard’s capabilities and desired performance level.
Reading Ssd Specifications And Performance Metrics
When evaluating SSDs, performance metrics and specifications are key indicators of the drive’s capabilities. Check the following:
| Specification | Description |
|---|---|
| Sequential Read/Write Speeds | Measures how fast data can be read/written in a sequential order, usually in MB/s or GB/s. |
| Random Read/Write Speeds | Reflects performance during random storage access, critical for system responsiveness. |
| IOPS | Input/Output operations per second, a measure of how many individual read/write requests the SSD can handle. |
| Endurance (TBW) | Total bytes written over the drive’s lifetime, an indication of its longevity. |
Reviewing these metrics ensures your SSD can handle your expected workload efficiently.
Considering Brand, Warranty, And Price
Finally, weigh in factors like brand reputation, warranty length, and price. Reliable SSD manufacturers often back their products with extensive warranties, signaling trust in their longevity. Brands like Samsung, Crucial, and Western Digital are notable mentions in the SSD market. Look for warranties of 3 years or longer. While more premium SSDs come at a higher cost, don’t overlook budget-friendly options that meet your performance standards. Balance the overall value against your budget to make a smart purchase decision.
Preparing For The Ssd Upgrade
Are you ready to give your computer a significant speed boost? Upgrading to a solid-state drive (SSD) can rejuvenate an aging system or enhance performance in a newer machine. Before you start the installation process, proper preparation is crucial. This guide will walk you through the steps to ensure your SSD upgrade goes smoothly. Pay close attention as we back up data, gather essential tools and software, and create a full system image for recovery.
Backing Up Your Data
Securing your data is the first step in the upgrade process. It’s vital to back up all personal files, documents, and applications to avoid any data loss. Consider using an external hard drive or a cloud storage service to store your data safely. For the most critical files, a secondary backup is recommended. Follow the steps below:
- Identify vital files and applications
- Select your backup method: external drive or cloud
- Execute a full data backup
- Verify the backup to ensure data integrity
Gathering Necessary Tools And Software
With your data secured, the next step involves acquiring the required tools and software. This includes a screwdriver for opening your computer case, as well as drive cloning software to transfer your current operating system and files to the new SSD. Ensure you have:
- A suitable screwdriver (typically a Phillips)
- SSD mounting bracket (if applicable for desktops)
- Drive cloning software
- USB-to-SATA adapter or docking station (for laptop upgrades)
- All necessary SSD firmware updates from the manufacturer’s website
Creating A Full System Image For Recovery
To safeguard against potential issues during the upgrade, create a full system image. This image is a complete copy of your existing hard drive, including the operating system, installed programs, system settings, and personal files. If something goes wrong, you can restore your computer to its former state. Step-by-step instructions include:
- Choose a reliable disk imaging software
- Connect an external drive to store the system image
- Follow the software’s instructions to create the image
- Once complete, store the external drive in a safe location
Completion of these preparatory steps provides peace of mind and sets the stage for a smooth SSD upgrade.
The Installation Process
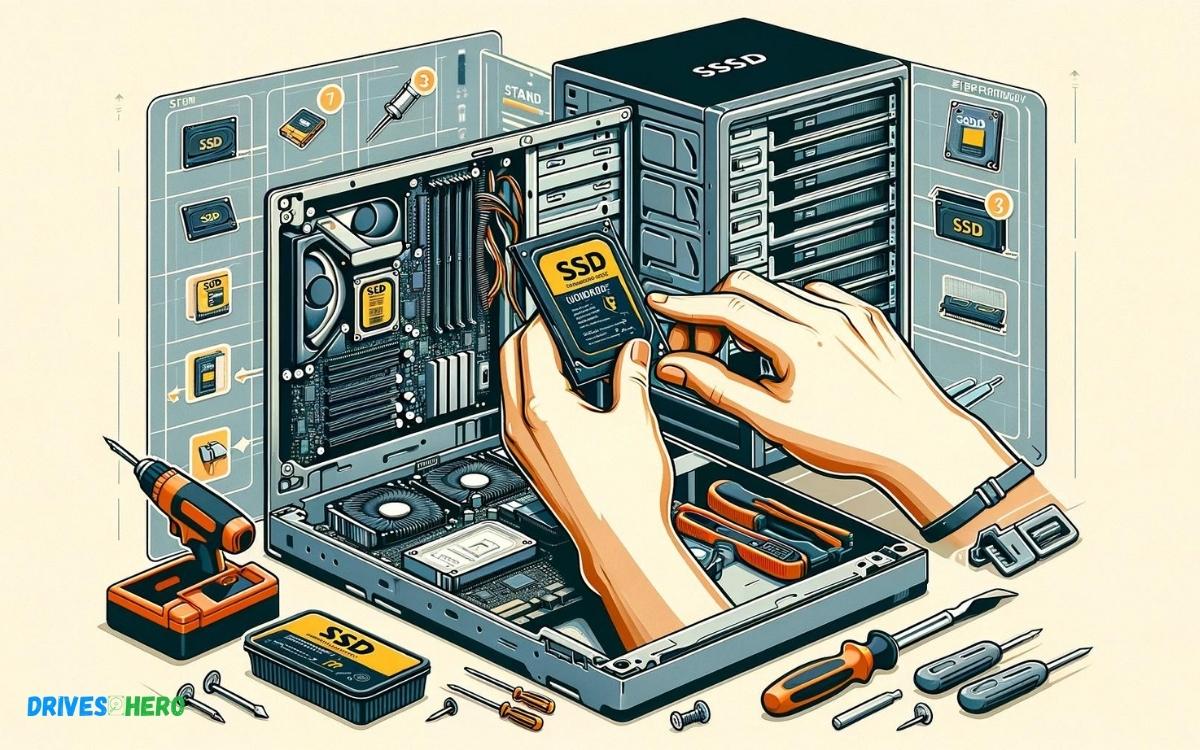
Upgrading your computer with a new SSD (Solid State Drive) is one of the most effective ways to boost its performance. This detailed step-by-step guide covers everything you need to know about installing an SSD. Whether you’re working on a desktop PC or a laptop, follow these clear instructions for a smooth upgrade experience.
Opening Your Computer Case Or Laptop Compartment
Before diving into the upgrade, ensure your computer is powered off and disconnected from any power sources. Safety comes first, and handling electronic components requires caution.
- For desktop PCs, remove the side panel, typically held in place by screws or a latching mechanism.
- For laptops, look for the dedicated compartment (usually on the bottom panel) that houses the HDD or SSD. Screws will secure this, which you’ll need to carefully unscrew.
Take note of any static electricity precautions, such as using an anti-static wristband or working on a non-conductive surface.
Removing The Old Drive (if Applicable)
Once you have access to the drive bay, it’s time to remove the existing drive, if necessary. Pay close attention to how the drive is mounted, as you’ll need to install the new SSD in the same way.
- Disconnect any cables connected to the old drive.
- Unscrew the mounting screws or unclip the drive from its bay.
- Slide the drive out gently from its connection interface.
Physically Installing The Ssd
Handling the new SSD with care, it’s time to secure it in place. Some SSDs may require an adapter to fit into the larger 3.5-inch bays typically designed for HDDs.
- Place the SSD into the drive bay or mounting bracket.
- Align the screw holes of the SSD with the bay or bracket.
- Screw the SSD into place, ensuring it is snug and secure.
Connecting The Ssd To The Motherboard
The final step is to connect your SSD to the motherboard. This step is crucial for your computer to recognize and communicate with the new drive.
Locate the SATA port on your motherboard—a slim, L-shaped connector—and gently insert the corresponding cable from the SSD into this port. For power, connect the SSD to the power supply unit (PSU) using a SATA power connector. Double-check all connections to make sure they’re firm and correct, then close up your computer case or laptop compartment.
With the SSD now in place, you’re ready to power on your computer and move on to setting up the drive for use, which typically involves initializing, partitioning, and formatting the drive using your operating system’s disk management tools.
Software Setup And Configuration
Embarking on the path of upgrading your SSD drive is both exhilarating and pivotal for enhanced computer performance. After the physical installation of your new solid-state drive, setting up the software is the next critical step. This process ensures that your drive is ready for use and optimized for peak performance. Attention to the following critical stages is paramount as you initiate the SSD’s software setup and configuration.
Formatting The Ssd And Partitioning (if Required)
Before the SSD can store data, it must be formatted. This process clears the drive and sets up a file system. If you’re starting fresh, partitioning may also be necessary. Partitioning divides the drive into distinct sections that your system can manage separately. Here’s how you can format and partition your SSD:
- Access Disk Management: Search for ‘Disk Management’ in your Windows search bar and select ‘Create and format hard disk partitions.’
- Locate the SSD: You should see your new SSD listed. Verify it by the storage capacity.
- Partition (if required): Right-click on the SSD and select ‘New Simple Volume.’ Follow the wizard to create and size your new partition.
- Format: During the creation of a new volume, you’ll have the option to format the SSD. Choose a file system (NTFS for Windows) and assign a volume label.
Installing Or Cloning The Operating System
With a formatted SSD, the next step is to install an operating system (OS). If you’re upgrading, you might prefer to clone your current system. Both processes require careful execution: let’s delve into each procedure.
- OS Installation: Insert your installation media and boot from it. Follow on-screen instructions to install the OS onto your SSD.
- Cloning: Using cloning software, replicate your existing drive’s contents onto your SSD. This method keeps all your data and system settings intact.
Installing Drivers And Firmware Updates
For optimal performance, install the latest drivers and firmware for your SSD. These are typically available through the SSD manufacturer’s website: proceed with the following steps.
- Check SSD Model: Determine the exact model of your SSD.
- Visit Manufacturer’s Website: Navigate to the support or downloads section.
- Download Updates: Look for relevant drivers or firmware updates and download them.
- Install Updates: Execute the downloaded files and follow the prompts to update your SSD.
Optimizing Ssd Settings In The Os
The final step in the software setup is to optimize SSD settings within your operating system. Adjustments to these settings can significantly reduce unnecessary write actions and prolong the life of your SSD. Engage the following settings to fine-tune your SSD:
- Disable Defragmentation Schedules: SSDs don’t require defragmentation. Ensure it’s disabled to avoid excessive wear.
- Enable TRIM: TRIM helps your OS understand which blocks of data are no longer considered in use and can be wiped internally, which helps maintain the performance of your SSD.
- Adjust Page File: Consider reducing or moving the page file if you have ample RAM, to limit writes to the SSD.
- Turn Off Indexing: To prevent additional wear on your SSD, disable indexing unless you frequently search your drive for files.
Post-upgrade Considerations
Completing an SSD upgrade heralds a significant performance boost for your computer, but the journey doesn’t end with the hardware swap. Post-upgrade considerations are crucial to ensure you reap the full benefits of your new solid-state drive. From testing for optimum performance to maintaining your SSD’s health long-term, these steps will secure a seamless transition and sustained advantages.
Testing The Ssd For Performance And Stability
Performance and stability tests are essential after installing a new SSD. Use reliable benchmarking tools to measure the speed and responsiveness of your SSD. Confirm that the read and write speeds align with the manufacturer’s specifications. Check for any signs of instability, such as crashes or freezes, which could indicate issues with the installation process or incompatibility.
- Sequential Read/Write Speeds: Verify that your SSD achieves its advertised throughput for large file transfers.
- Random Read/Write Speeds: Measure performance during random access to ensure swift operational speeds during everyday tasks.
- System Boot Time: Record the time it takes for your operating system to start up, a direct indicator of your SSD’s efficiency.
Data Management: Moving Files To The New Ssd
With the new SSD installed, transferring your data is next on the agenda. Create a systematic approach to move files from your old storage to the new drive. Utilize data migration tools if available, or manually copy essential files.
- Ensure a complete backup of data before the transfer.
- Choose a reliable data transfer tool compatible with your SSD.
- Prioritize vital files for transfer to take advantage of the SSD’s speed.
Maintaining Ssd Health And Performance
Optimizing your SSD post-upgrade is key to maintaining its health. Use built-in software tools to periodically check the SSD’s health. Enable TRIM support to prolong the lifespan of the SSD by allowing the operating system to inform the SSD which blocks of data are no longer in use and can be wiped. Avoid unnecessary writes to the SSD to minimize wear.
- Regular Firmware Updates: Keep your SSD firmware up to date to enhance performance and stability.
- Optimization Utilities: Leverage software that can optimize your SSD’s performance through system tweaks.
- Monitoring Software: Install tools that monitor the SSD’s health parameters, alerting you to potential issues before they escalate.
Troubleshooting Common Ssd Upgrade Issues
Occasionally, you may encounter hurdles with an SSD upgrade. Common issues include non-detection of the SSD, slow performance post-installation, or data migration challenges. Here’s a quick troubleshooting guide:
| Issue | Possible Cause | Solution |
|---|---|---|
| SSD Not Detected | Incomplete connection or BIOS setting | Check data and power cables; review the BIOS settings |
| Slow Performance | Old drivers or incorrect configuration | Update drivers; verify that AHCI mode is enabled in BIOS |
| Data Transfer Issues | Corrupt files or faulty transfer cable | Ensure file integrity; replace the cable if necessary |
Conclusion: Maximizing Your Device’s Potential With An Ssd Upgrade
Embarking on an SSD upgrade journey rewards you with remarkable improvements in speed and reliability, tailoring your device to meet modern performance standards. This shift translates not only to faster boots and load times but also ushers in a durable solution less susceptible to physical shocks. Let’s delve into the concluding insights on how this transformation can unfold the true capacity of your tech gear.
Recapping The Benefits Of Ssd Upgrades
Upgrading to an SSD offers a plethora of advantages:
- Rapid data access: Curtails boot-up time and accelerates file retrieval.
- Enhanced durability: No moving parts reduce wear and tear risks.
- Quiet operation: SSDs operate without the noise typical of mechanical drives.
- Energy efficiency: Lower power draw extending battery life in laptops.
Long-term Considerations For Your Ssd
Ensuring your SSD remains at peak performance over time demands certain considerations. Regular firmware updates, avoiding disk defragmentation, and maintaining at least 15% free space are crucial habits. Most importantly, frequent backups protect your data against unforeseen failures.
Further Resources For Ssd Maintenance And Support
Lastly, continuous education on SSD maintenance is vital for longevity. Familiarize yourself with the tools and software provided by SSD manufacturers. Dive into online tech forums, user guides, or even specific tech support services to keep your SSD in top-notch shape.
Your device’s potential soars with an SSD upgrade, ensuring you stay ahead with a robust, agile computing experience.
Conclusion
Upgrading your SSD drive doesn’t have to be daunting. With the right tools and steps, you’ve got this down pat. Embrace the speed and efficiency boost that awaits your computer. Need more tech insights? Keep tuning in. Together, let’s make tech upgrades a breeze.

Harold Williams is a senior writer and technical editor at Drives Hero with 20+ years of experience in IT administration. He specializes in storage systems, SSD reviews, and performance testing, bringing real-world insight to every guide.