How to Upgrade to a Larger Ssd
“Looking to supercharge your storage capacity and speed up your system? Upgrading to a larger SSD is the perfect solution! In this guide, we’ll take you through the simple steps to upgrade from your current SSD to a larger one, whether you’re aiming for more space for your files or faster performance for your applications. Say goodbye to storage limitations and hello to a smoother, more spacious computing experience. Let’s dive in and make your upgrade process seamless and efficient!”
To upgrade to a larger SSD, clone your current drive to the new SSD or perform a clean install. Ensure compatibility with your system before purchase.
Upgrading to a larger SSD can significantly enhance the storage capacity and performance of your computer, making it a popular choice for anyone seeking a smoother and faster user experience. Swapping out your current drive for an SSD with more storage space allows you to manage larger files and more applications with ease.
It also translates to quicker boot times, faster data transfer, and improved overall system responsiveness. This process can vary slightly based on whether you have a laptop or desktop, but generally involves purchasing the right SSD, backing up your data, and physically replacing the old drive. Remember to safeguard your data by backing up important files before starting the upgrade process.

Key Takeaway
“Quick Guide: Upgrading to a Larger SSD in 13 Easy Steps”
Step 1: Gather Your Tools
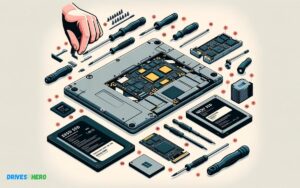
Before you start, ensure you have:
- New SSD
- Screwdriver
- SATA-to-USB cable (optional)
- Backup drive (optional)
Step 2: Backup Your Data (Optional)
To prevent data loss, back up your current SSD’s data onto an external drive.
Step 3: Shut Down Your Computer
Turn off your computer and disconnect all cables.
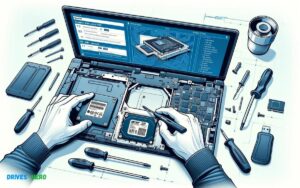
Step 4: Open Your Computer Case
Use a screwdriver to remove the case and locate your current SSD.
Step 5: Disconnect Cables
Carefully unplug the SATA and power cables connected to your current SSD.
Step 6: Remove the Old SSD
Take out the screws holding the SSD in place and gently slide it out.
Step 7: Install the New SSD
Slide the new SSD into the slot and secure it with screws.
Step 8: Reconnect Cables
Attach the SATA and power cables to the new SSD securely.
Step 9: Close Your Computer Case
Put the case back on and tighten the screws.
Step 10: Boot Up Your Computer
Power on your computer and ensure it recognizes the new SSD.
Step 11: Initialize and Format the SSD
Go to Disk Management (Windows) or Disk Utility (Mac) to initialize and format the new SSD.
Step 12: Restore Data (Optional)
If you backed up your data, transfer it back onto the new SSD.
Step 13: Enjoy Your Upgraded Storage!
Your SSD upgrade is complete. Enjoy the improved storage capacity and performance!
By following the steps outlined in this guide, you can safely and effectively migrate your data from your old SSD or HDD to the new larger SSD, ensuring a smooth transition without losing any important information.
Understanding The Basics Of Ssd Upgrades
Are you noticing slower system performance or running out of storage space quickly? It might be time to consider upgrading to a larger Solid State Drive (SSD). Upgrading an SSD is a transformative step to enhance your computer’s speed, responsibility, and storage capacity. But before diving into the swap, several core aspects require your attention. Understanding the nitty-gritty of SSD upgrades can ensure a smooth transition and optimal performance post-upgrade.
Identifying The Need For A Larger Ssd
Spotting the signs that you require a larger SSD is the initial step to upgrade. Insufficient storage space can lead to performance bottlenecks, but space isn’t the only factor. Faster boot times, better data transfer speeds, and a boost in overall system responsiveness are vital indicators pointing toward the need for an upgrade. Ask yourself these questions to determine if it’s time to upsize your SSD:
- Storage Space: Are you frequently running out of space?
- Performance: Is your current drive failing to keep up with demanding applications?
- Speed: Do you experience lengthy load and transfer times?
- Future Proofing: Do you need an SSD that accommodates future storage needs?
Comparing Ssd Types And Performance Metrics
Once you’ve identified the need for more storage, comparing the types of SSDs and their performance metrics is essential. Not all SSDs are created equal, and they come in various builds that can significantly impact their performance:
| Type | Performance | Use Case |
|---|---|---|
| SATA SSDs | Standard speeds | Generic usage and budget builds |
| NVMe SSDs | High speeds | Performance-intensive tasks |
| M.2 SSDs | Varied, depends on SATA or NVMe | Compact systems |
Key performance metrics include:
- Read/Write Speeds: Determines data transfer rate.
- IOPS (Input/Output Operations Per Second): Measures operational performance.
- Endurance: Refers to the lifespan or durability of the SSD.
Understanding Form Factors And Interface Standards
Grasping the form factors and interface standards is crucial for compatibility and maximizing the potential of your new SSD. Form factors dictate the size and shape of the SSD; common ones include 2.5-inch, mSATA, and M.2. Interface standards, such as SATA and NVMe, determine the connection and speed capabilities of the drive. For instance:
- 2.5-inch SSDs: Typically use a SATA interface, perfect for most laptops and desktops.
- mSATA: Compact size for ultra-thin devices.
- M.2: Smaller, more versatile, and often operates on NVMe for higher speeds.
Identifying the right form factor and interface for your system ensures not just physical fitting but also the utilization of full data transfer speeds. Check your device specifications to confirm what’s supported before purchasing your new SSD.
Preparation For Ssd Upgrade
Considering an SSD upgrade? You’re on the right path to significantly boost your computer’s performance. Swapping out your old hard drive for a larger, faster SSD will make your system feel like new. But before you can enjoy the speed benefits and enhanced reliability of your new solid-state drive, it’s crucial to lay down the groundwork to ensure a smooth transition. Here’s how you can prepare.
Back Up Important Data
Securing your data is the foremost step in the preparation process. To avoid any potential data loss during the upgrade:
- Identify which files and applications are crucial for your everyday use.
- Consider utilizing cloud services or an external hard drive to store copies of your important files.
- Make sure to have an up-to-date system image backup in case you need to restore your operating system.
Choosing The Right Ssd For Your Needs
The market is overflowing with SSD options, and selecting the right one is pivotal. Focus on:
- SSD capacity—more space allows you to store more data.
- The form factor that is compatible with your computer, whether it’s a 2.5-inch drive or an M.2 configuration.
- Read and write speeds—to ensure the performance meets your expectations.
Don’t overlook the quality and durability of the SSD. Check reviews and warranty periods for assurance of a reliable investment.
Tools And Resources Required For Ssd Installation
Before diving into the installation process, make sure you have all the necessary tools and resources. A standard SSD installation should include:
| Tool/Resource | Description | Importance |
|---|---|---|
| Screwdriver | For opening the computer case and securing the SSD. | Essential |
| SATA Cable (if required) | To connect the SSD to the motherboard. | Essential for 2.5-inch SSDs |
| Mounting Bracket | To ensure a snug fit for the SSD in a 3.5-inch bay. | Only if needed |
| USB to SATA Adapter | For cloning your existing drive without opening your computer. | Convenient for data cloning |
| Cloning Software | Allows you to transfer data from the old drive to the new SSD. | Important for a seamless transition |
| Antistatic Wrist Strap | To prevent electrostatic discharge damage to sensitive components. | Recommended |
Gather these essentials to ensure a hassle-free installation and protect your investment.
The Step-by-step Upgrade Process
Upgrading your computer’s storage to a larger Solid State Drive (SSD) can breathe new life into an aging system, or simply give you the additional space you need for files, applications, and games. But how do you make the transition without losing your existing data or dealing with complex installation issues? By following this straightforward step-by-step upgrade process, you’ll be able to switch to a new SSD smoothly and efficiently.
Physically Installing The New Ssd
The first step in upgrading your SSD is to integrate the new drive into your system. Begin by gathering your tools—typically a screwdriver—and ensure your computer is powered down and unplugged. Follow these steps:
- Open your computer case to access the drive bay.
- Identify the SATA power and data cables you’ll use for the new SSD.
- If applicable, attach the SSD to a drive tray and secure it with screws.
- Mount the SSD in an available drive bay.
- Connect the SATA power and data cables to the SSD.
- Reassemble your computer case and make sure everything is tightly secured.
Cloning Your Existing Drive To A New Ssd
Once the physical installation is complete, the next phase is transferring your data. Cloning is an effective method to replicate your current drive’s contents onto your new SSD.
- Connect your new SSD to the system using a USB-to-SATA adapter or a SATA port if it’s not installed internally.
- Boot your computer and launch a trusted cloning software.
- Select your old drive as the source, and your new SSD as the destination.
- Initiate the cloning process and wait for completion. Do not interrupt this process.
- Once cloning is done, shut down your system and, if you used an external connection, disconnect the old drive and replace it with the new SSD.
Configuring Bios/uefi Settings For The New Ssd
After successfully cloning your drive, you’ll need to ensure your system boots from the new SSD. This involves tweaking the BIOS or UEFI settings.
- Power on your PC and enter the BIOS/UEFI settings by pressing the key prompted during startup (often DEL, F1, or F2).
- Locate the boot order settings within the BIOS/UEFI.
- Adjust the boot order so that the new SSD is the first boot device.
- Save changes and exit the BIOS/UEFI.
- Your computer should now boot from the new SSD with all your data intact and operational.
By carefully following these detailed steps, your transition to a larger SSD can be simple and hassle-free. With your system upgraded, you’ll enjoy faster performance and expanded storage capacity, ensuring a more efficient computing experience.
Post-installation Steps
Welcome to the crucial stage of your SSD upgrade journey. After slotting in your new, spacious SSD and completing the cloning process, it’s imperative to carry out a few post-installation steps to ensure everything runs smoothly. This is not just a check-list task; it’s the assurance that your upgrade transitions seamlessly from the old drive to the new.
Verifying The Integrity Of The Data Transfer
To start, confirm the success of the data transfer. Boot your system from the new SSD and observe if the operating system starts without a hitch. Run some applications and check for access to your files to make sure everything is as it should be.
Use disk management tools to compare the data on both SSDs. These tools can run a check to verify that all blocks were cloned properly. You should see your data mirrored exactly from the old drive to the new. If discrepancies arise, you may need to re-clone or seek out specific files for manual transfer.
Optimizing Performance And Settings
With your data verified, move on to optimizing your new SSD’s performance. Firstly, ensure that TRIM is enabled. This command helps to maintain the performance of the SSD over time. Check in with your operating system to confirm that it’s on by default.
Next, review your system power settings. SSDs don’t require the same power saving settings that are typically designed for HDDs. Adjust them to prevent your SSD from entering ‘low power’ states too often, which can impede performance.
Another crucial adjustment is to make sure your BIOS is set to AHCI mode, which optimizes SSD operations. This might require a change in your system’s BIOS settings.
Recycling Or Repurposing Your Old Ssd
Your old SSD can still serve a purpose after an upgrade. Consider turning it into a portable drive with an external enclosure. This can be highly convenient for backing up data or transporting files between devices.
If the drive is still healthy but simply too small, it could be used as an additional storage device in your system. Otherwise, look into eco-friendly recycling options to dispose of the SSD properly. Remember, tech recycling centers have the means to ensure that toxic materials are handled responsibly.
By carrying out these post-installation steps correctly, not only do you solidify the upgrade’s success but you also empower your computing experience towards optimal performance.
Troubleshooting Common Installation Issues
Upgrading to a larger SSD can breathe new life into your computer, providing faster data access, more storage space, and a noticeable boost in performance. But sometimes, installation doesn’t go as smoothly as planned. Encountering hiccups during the process is common, but fear not. With the right solutions at hand, these issues can be addressed effectively, ensuring a smooth upgrade experience. Let’s delve into some troubleshooting tips for the most common SSD installation issues.
Addressing Boot And Recognition Problems
One of the first walls you might hit post-upgrade is a system that refuses to boot or doesn’t recognize your new SSD. Start with the basics:
- Check connections: Ensure your SSD is firmly connected to both power and data cables.
- BIOS settings: Enter your system’s BIOS and verify if the SSD is detected. Occasionally, switching from Legacy to UEFI mode (or vice versa) can resolve detection issues.
- Boot order: While in BIOS, also ensure the boot priority is set to boot from the SSD first.
If these steps don’t resolve the issue, consider a firmware update for the SSD from the manufacturer’s website, which can often fix recognition problems.
Solving Data Transfer Errors
Data transfer errors can turn an SSD upgrade into a frustrating task. Tackle these errors head-on:
- Software compatibility: Confirm the cloning software is compatible with your SSD and update it to the latest version.
- USB connection: If using a USB-to-SATA adapter, verify that it supports the transfer rates required by your new SSD.
- Disk space: Check that the data you’re transferring doesn’t exceed the capacity of your new SSD.
If problems persist, performing a clean OS installation on the SSD might be a more reliable alternative to cloning.
Dealing With Performance Discrepancies After Upgrade
Expectations are high for SSD performance, but what if the reality doesn’t match? To address this:
| Action | Impact |
|---|---|
| Enable AHCI mode | Enhances performance and enables features like Native Command Queuing (NCQ). |
| Update drivers | Ensures optimal communication between the SSD and the motherboard. |
| Check for firmware updates | Can fix known bugs and stability issues. |
If performance issues persist, a deeper dive into the SSD’s settings via dedicated software from the manufacturer may reveal optimization options.
Maintaining Your New Ssd
Upgrading to a larger solid-state drive (SSD) can significantly improve the performance and storage capacity of your system. Once you’ve made the switch, ensuring your new SSD continues to operate at peak performance is crucial. Proper maintenance is the key to extending its lifespan and reliability. In the following sections, we will delve into the best practices for keeping your SSD in top condition.
Regular Maintenance Tips For Ssd Health
Maintaining your SSD is straightforward but essential. By following these tips, you can help ensure your drive runs efficiently:
- Keep your system clean: Regularly clean your operating system to avoid unnecessary temporary files and data from accumulating and consuming valuable SSD space.
- Minimize write operations: Be mindful of applications that write excessively to the drive and try to limit their usage.
- Enable TRIM: Ensure the TRIM command is enabled in your operating system to help the SSD efficiently manage garbage collection, which will help maintain optimum write speeds.
- Avoid defragmentation: Unlike HDDs, SSDs do not benefit from defragmentation and running defrag tools can unnecessarily wear out the drive.
Monitoring Ssd Performance And Lifespan
It’s important to monitor the health of your SSD to avoid data loss and unexpected failures. Use the following methods to keep an eye on your drive’s condition:
- SSD management software: Many SSD manufacturers offer dedicated software to monitor drive health, available space, and performance.
- SMART data: Use tools to read the Self-Monitoring, Analysis, and Reporting Technology (SMART) data for early warning signs of potential drive failure.
- Benchmarking tools: Perform periodic benchmarks to compare the current performance of your SSD with its initial speeds.
Understanding Firmware Updates And When To Apply Them
Firmware updates can provide significant benefits such as improved performance and stability for your SSD. However, understanding when and how to apply these updates is critical:
- Check manufacturer’s website: Regularly visit your SSD manufacturer’s website for firmware updates and read the update notes for any performance improvements or bug fixes.
- Backup before updating: Always backup your data before applying firmware updates to protect against any potential data loss during the update process.
- Follow update guidelines: Adhere to the manufacturer’s instructions for the update process to avoid any issues that could damage the SSD or void its warranty.
Conclusion
Upgrading to a larger SSD can significantly boost your system’s performance and storage capabilities. With the right tools and steps, the process is straightforward and worthwhile. Embrace the speed and efficiency of a larger SSD and experience a revitalized computer that meets your growing digital demands.
Ready, set, upgrade!

Harold Williams is a senior writer and technical editor at Drives Hero with 20+ years of experience in IT administration. He specializes in storage systems, SSD reviews, and performance testing, bringing real-world insight to every guide.