How to Upgrade Ssd Without Losing Data
“Ready to boost your storage capacity without losing any of your precious data? In this guide, we’ll walk you through the process of upgrading your SSD without losing a single file. Whether you’re aiming to increase storage space or improve performance, we’ve got you covered. Say goodbye to data migration headaches and hello to a seamless SSD upgrade process. Let’s get started on expanding your storage without the fear of losing your valuable data!”
To upgrade your SSD without losing data, clone your current drive to the new SSD. Use reliable cloning software to create an exact copy of your existing storage.
Upgrading your computer’s SSD is a straightforward process that can notably improve your system’s performance and storage capacity. This task often intimidates users due to the potential risk of data loss, but with the right tools and a cautious approach, you can seamlessly transition to a larger or faster SSD while keeping all your data intact.
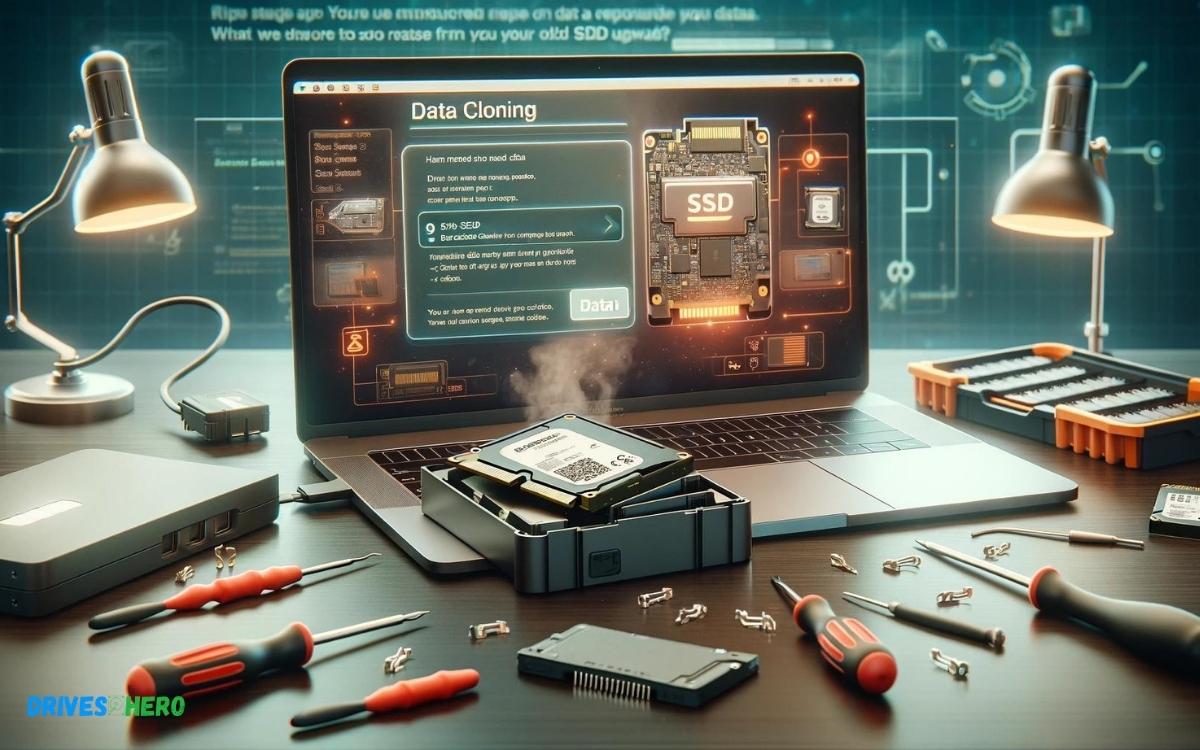
Cloning is the key strategy, as it replicates every bit of data from your old drive onto the new one. Engaging in this practice not only preserves your files, applications, and settings but also ensures a smooth computing experience post-upgrade. By choosing reputable cloning software and following the provided instructions carefully, even users with minimal technical knowledge can successfully upgrade their SSDs without the headache of data loss.
Key Takeaway
“Upgrade SSD Without Data Loss: Easy Step-by-Step Guide”
Step 1: Back Up Your Data
Before starting the upgrade process, it’s crucial to back up all your data to an external storage device or a cloud service. This ensures that your files and important documents are safe in case of any unexpected issues during the upgrade.
Step 2: Check Compatibility
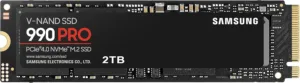
Make sure the new SSD is compatible with your computer. Check the physical size (2.5-inch or M.2), interface (SATA or NVMe), and capacity requirements. Refer to your computer’s manual or manufacturer’s website for compatibility information.
Step 3: Gather Necessary Tools
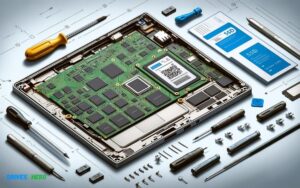
You’ll need a screwdriver (typically Phillips head) to open your computer’s casing and remove the old SSD. Additionally, have an anti-static wrist strap or mat to prevent damage from electrostatic discharge.
Step 4: Clone Your SSD
Use disk cloning software like EaseUS Todo Backup, Macrium Reflect, or Clonezilla to clone your existing SSD to the new one. Follow the software’s instructions to create a complete copy of your data onto the new SSD.
Step 5: Physically Install the New SSD
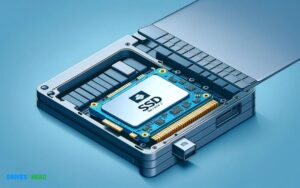
Shut down your computer and disconnect all cables. Open the casing using the screwdriver and locate the existing SSD. Carefully remove it by unscrewing any mounting brackets or screws holding it in place. Install the new SSD in the same slot and secure it with the screws.
Step 6: Boot Up Your Computer
Reconnect all cables and close the casing. Turn on your computer and enter the BIOS/UEFI settings (usually by pressing a key like F2, F12, or DEL during boot-up). Ensure that the new SSD is detected in the BIOS.
Step 7: Verify the Cloned Data
Once the computer boots up, verify that all your data and applications are present on the new SSD. Open some files and programs to confirm everything is functioning as expected.
Step 8: Erase the Old SSD (Optional)
If you no longer need the old SSD, you can securely erase it to prevent any data recovery. Use disk wiping software like DBAN (Darik’s Boot and Nuke) or the built-in disk management tools in your operating system.
Step 9: Enjoy Your Upgraded SSD
Congratulations! You’ve successfully upgraded your SSD without losing any data. Enjoy the improved performance and storage capacity of your computer.
In conclusion, by following these simple steps, you can upgrade your SSD without the risk of losing any valuable data. Ensuring compatibility, backing up your files, and cloning your SSD are essential precautions to take. With the new SSD installed and your data intact, you can enjoy improved performance and storage capacity on your computer.
Introduction To Ssd Upgrades
Welcome to the dynamic world of storage enhancement where upgrading to a Solid State Drive (SSD) can revolutionize your computing experience. Moving from an HDD to an SSD is a game-changer, offering a significant boost in speed, efficiency, and overall system performance. Ensuring data integrity while upgrading, however, is a crucial step that demands attention. Dive into this comprehensive guide to seamlessly transition to an SSD without losing a single byte of your precious data.
Understanding Ssds: Benefits Over Traditional Hdds
SSDs are the preferred choice for modern computing due to their:
- Faster data access: SSDs provide lightning-fast read and write speeds compared to HDDs, meaning quicker boot times, faster file transfers, and better system responsiveness.
- Enhanced durability: Without any moving parts, SSDs are less susceptible to physical damage, making them more reliable and long-lasting.
- Reduced power consumption: SSDs consume less power, which can lead to longer battery life for laptops and greener computing overall.
- Quieter operation: The absence of mechanical parts in an SSD leads to silent operation, a serenity highly valued in both office and home environments.
With these compelling advantages, it’s clear why upgrading to an SSD is a top priority for those seeking to optimize their computers.
Importance Of Data Preservation During Upgrade
Upgrading your drive should not mean risking your data. Data preservation is paramount:
- It ensures that personal files, photos, applications, and settings remain intact.
- Prevents data loss that could lead to significant productivity setbacks or loss of valuable memories.
- Allows for a hassle-free transition to new technology without the need for extensive reconfigurations or reinstalls.
Taking the right precautions and following a thorough process is vital for a successful upgrade that keeps your data safe.
Overview Of The Ssd Upgrade Process
Transitioning to an SSD typically involves the following steps:
- Backing up data to ensure it is recoverable in case of any mishaps during the upgrade process.
- Choosing the right SSD based on your capacity needs and budget constraints.
- Cloning your existing drive to the SSD to create a precise copy of your current system setup, enabling a seamless transition without data loss.
- Physically installing the SSD in your system, which may vary depending on the device.
- Verifying the success of the data transfer and ensuring the SSD is functioning correctly as your new primary drive.
By following these steps and approaching the upgrade with care, you can enhance your system with an SSD and relish a significant performance improvement, all the while securing your digital life.
Planning Your Ssd Upgrade
An SSD upgrade is a surefire way to boost the speed and performance of your computer. Yet, the thought of upgrading your solid-state drive (SSD) can seem daunting when considering the potential loss of your precious data. Fret not! The key to a seamless upgrade is careful planning and execution. This section walks you through the integral steps of selecting the right SSD, gathering the necessary tools, and backing up your data securely to ensure a successful upgrade without losing a single byte.
Selecting The Right Ssd: Capacity And Compatibility
Before diving into the upgrade process, choosing the correct SSD is critical. Consider the following:
- Storage Capacity: Evaluate how much space you need. Are you looking to simply boost your operating system’s speed, or do you need ample storage for large files and applications? Opt for an SSD with enough capacity to meet both your current and future needs.
- Form Factor and Interface: The SSD must physically fit your system and connect properly. Common form factors include 2.5-inch, M.2, and mSATA, while interfaces range from SATA to PCIe. Confirm your motherboard’s compatibility before purchasing.
- Performance Tier: SSDs come with varying performance levels, so select one that matches your workload requirements. Entry-level SSDs can enormously outperform hard drives, while high-end models are designed for intensive tasks and applications.
Tools Required For Ssd Cloning And Installation
To clone your current drive to your new SSD and install it, you’ll require the right tools:
- Cloning Software: Crucial to facilitate a smooth transition, cloning software duplicates your existing drive’s content onto your new SSD.
- SSD Mounting Kit: Some SSDs need a mounting kit to fit into larger drive bays.
- Screwdriver: Necessary to secure the SSD in place.
- External SSD Enclosure/Adapter: If you’re cloning externally or need to use the SSD as an external drive at any point.
- USB Flash Drive: Handy for firmware updates or to use as a bootable drive if needed.
Backing Up Your Data: Methods And Best Practices
Ensuring you have a comprehensive backup is indispensable:
- Full System Backup: Create an image of your entire system so you can revert to it if anything goes awry. Utilize reliable backup software or the built-in tools within your operating system for this purpose.
- Cloud Storage or External Drive: Back up your most critical files to cloud services or an external hard drive for an extra layer of security.
- Regular Updates: Update your backup routinely, especially before starting the upgrade process, to ensure the most recent data is safe.
- Verify Backup: Always check the integrity of your backup to confirm that data restoration is possible.
By meticulously planning your SSD upgrade and following these steps, the risk of data loss can almost be mitigated completely, leading you toward a significant performance enhancement with peace of mind.
The Cloning Process
The Cloning Process begins with a crucial endeavor for anyone wishing to upgrade their hard disk drive (HDD) to a solid-state drive (SSD) without losing valuable data. Cloning is essentially a process that creates an exact replica of your existing drive’s contents onto a new drive. This replication includes the operating system, installed applications, system settings, and all personal files, ensuring a seamless transition with minimal downtime. If performed correctly, cloning allows you to upgrade your storage solution while retaining a familiar computing environment.
Choosing Cloning Software: Features To Look For
Selecting the right cloning software is pivotal for a seamless transition. Essential features to look for include:
- Compatibility: Ensure the software supports your operating system and recognizes both HDDs and SSDs.
- User-Friendly Interface: A straightforward, intuitive user interface helps avoid confusion and errors during the cloning process.
- Bootable Clone Creation: This feature allows you to boot directly from your new SSD after the cloning process is complete.
- Data Compression: To save time and storage space, cloning software should offer the ability to compress data during transfer.
- Custom Cloning: Options to clone entire drives or specific partitions are beneficial, providing flexibility based on individual needs.
Step-by-step Guide To Cloning Your Hdd To Ssd
Follow this guide to clone your existing HDD onto your new SSD:
- Start by connecting your SSD to your computer using a SATA-to-USB cable or an SSD enclosure.
- Launch the previously chosen cloning software and select the ‘Clone’ or ‘Migrate’ feature.
- Choose your source drive (current HDD) and target drive (new SSD) within the software interface.
- Review any additional settings or options, such as sector-by-sector cloning or file exclusion, before proceeding.
- Initiate the cloning process and wait for it to complete. This could take several hours depending on data size.
- Once the process finishes, replace the HDD with the SSD in your computer’s drive bay or connect it to the motherboard directly.
- Reboot your computer and enter BIOS to ensure the SSD is recognized and set as the primary boot device.
- Boot into your operating system and verify that all data has been successfully cloned.
Troubleshooting Common Cloning Issues
Despite careful planning, you might encounter issues during the cloning process. Some tips for troubleshooting include:
| Issue | Potential Solution |
|---|---|
| Cloning software fails to recognize the SSD | Check connections and compatibility between your SSD and the computer. |
| Cloning process is excessively slow | Ensure no other extensive system tasks are running and consider using a different connection port if available. |
| Errors during cloning | Scan the HDD for errors and attempt the cloning process again. |
| Computer fails to boot from SSD | Recheck BIOS settings and the boot order. Make sure the SSD is properly installed. |
Installing The New Ssd
Swapping your old storage for a brand-new SSD is a surefire way to invigorate your computer. With transfer speeds outpacing traditional hard drives by a landslide, an SSD upgrade is synonymous with lightning-quick boot times and snappy application performance. Follow this guide to install an SSD without a hitch and without losing any precious data along the way.
Preparing Your System For Ssd Installation
First things first, ensuring a smooth transition starts with preparation. Before diving into the physical swap, take these essential steps:
- Backup your data – Always secure a copy of your files to avoid accidental loss.
- Check the compatibility of your new SSD with your system.
- Update your operating system and drivers to the latest versions.
- Create a recovery drive or a full system image backup if you plan to clone your system.
- Ensure you have the necessary tools for the installation, like a screwdriver.
Physical Installation Of The Ssd Into Your Computer
With preparations out of the way, it’s time to roll up your sleeves and get hands-on. The following steps will walk you through the hardware installation:
- Power down your computer and disconnect all cables.
- Open your computer’s case with the necessary tool, typically a screwdriver.
- Locate the drive bay or existing drive slot for the SSD. If needed, use an adapter for a 2.5″ SSD to fit into a 3.5″ bay.
- Secure the SSD into the slot or bay, and tighten it with screws if applicable.
- Connect the SATA data cable from your motherboard to the SSD, and attach the SATA power cable from your power supply.
- Replace the computer’s case panel and screw it back into place.
Post-installation Steps: Booting Up And Configuration
With the SSD securely installed, the final phase is to boot up and configure the system:
- Reconnect your computer to power and interfaces, then turn it on.
- Enter the BIOS or UEFI setup. Adjust the boot order to prioritize the new SSD if necessary.
- If you’ve cloned your old drive to the SSD, your system should boot as normal. Otherwise, proceed with a fresh operating system installation.
- After the system boots, double-check that your SSD is recognized and allocated correctly.
Voila! You’re now the proud operator of a revitalized computer, supercharged by an SSD. Enjoy the resounding speed and reliability that comes with your successful installation!
Data Integrity And Performance
When upgrading to a new Solid State Drive (SSD), preserving data integrity and ensuring peak performance are critical. Protecting existing data while transitioning to a faster storage solution can seem daunting, but by following a meticulous process, you can achieve a smooth upgrade without data loss. Once the data is transferred, optimizing the SSD’s performance to benefit from its speed and reliability is just as important. This guide will walk you through the process of verifying data post-cloning, optimizing your operating system for your new SSD, and maintaining your drive for long-term efficiency.
Verifying Data Post-cloning: Ensuring A Successful Transfer
Post-cloning verification is a crucial step in the SSD upgrade process. It helps confirm that all data has been copied accurately from the old drive to the new SSD. To ensure a successful transfer, use reliable software to clone your drive and immediately check the cloned data against the original. Follow these steps:
- Choose trusted cloning software that guarantees a sector-by-sector replication.
- After cloning, boot from the new SSD to ensure the operating system loads correctly.
- Compare file sizes and counts between the old drive and new SSD using a file explorer.
- Run checksum verification or hash comparisons for critical files to ensure integrity.
Optimizing Ssd Performance Through Os Tweaks
Once you’ve confirmed the data transfer is successful, tuning your operating system will help you get the most out of your new SSD. Performance enhancement involves tweaking certain settings that were optimized for HDD use. Consider the following adjustments:
- Update to the latest firmware specifically designed for your SSD.
- Enable TRIM support to prolong the life and performance of your SSD.
- Adjust your power settings to the high-performance plan for optimal SSD functioning.
- Turn off disk defragmentation, as it’s not necessary and can reduce the lifespan of an SSD.
Through these technical enhancements, your system will be tailored to leverage the fast read/write capabilities of your new SSD.
Maintaining Your Ssd: Tips And Tricks
Maintenance is a key factor in the longevity and performance of your SSD. Use the following tips to keep your SSD in top shape:
| Tip | Description |
|---|---|
| Regular Software Updates | Keep your operating system and drivers up-to-date to maintain compatibility and performance. |
| Avoid Overfilling | Ensure to leave some free space on your SSD to avoid a decrease in performance. |
| Manage Write Operations | Minimize unnecessary write operations by disabling indexing and reducing temporary file storage. |
Regular attention to these aspects will ensure your SSD stays reliable and efficient, providing a significant performance boost to your system.
Troubleshooting And Support
Upgrading your SSD is an excellent way to boost your system’s performance and storage capacity. However, preserving your data throughout this process is critical. Post-upgrade, you may encounter issues or errors that can seem daunting. Don’t worry, this section will guide you through troubleshooting and support to ensure a smooth transition.
Addressing Post-upgrade Issues And Errors
Upon completing an SSD upgrade, you might face some common problems ranging from system boot errors to missing files. It’s crucial to address these issues promptly to prevent data loss. Begin by checking the SSD’s connections and ensure the drive is properly seated. If the problem persists, consider the following actions:
- Boot errors: Access your BIOS settings and verify the boot order. Adjust if necessary to prioritize your new SSD.
- Missing files: Check the cloning software’s log for errors and retry the process if needed.
- Drive not showing: Initialize and format the SSD through Disk Management on Windows or Disk Utility on macOS.
When To Seek Professional Support
While many post-upgrade issues can be resolved with patience and troubleshooting guides, certain scenarios require a professional touch. Seek assistance if you experience:
- Repeated boot failures that prevent access to the BIOS or operating system.
- Persistent data access errors or if your system fails to recognize the new SSD after trying initial fixes.
- Significant data loss, where crucial files are missing, and backup restoration does not resolve it.
Resources For Further Assistance And Learning
For those who wish to deepen their understanding or require additional help, numerous resources are available:
| Resource Type | Description | Access |
|---|---|---|
| Online Forums | Communities of tech enthusiasts and experts who provide free advice. | Accessible via tech-related websites and platforms. |
| Manufacturer Support | Dedicated assistance from your SSD’s manufacturer. | Available through official support channels. |
| Knowledge Base | Articles, guides, and tutorials on SSD upgrades and troubleshooting. | Found on various tech education sites. |
| Videos and Tutorials | Step-by-step visual guides for understanding the upgrade process. | Platforms like YouTube host a plethora of such content. |
Remember, while upgrading your SSD can seem technical, proper tools, a bit of knowledge, and the right support can make all the difference. Preserve your data and enhance your experience by efficiently addressing any hiccups that arise.
Conclusion
Upgrading your SSD can be a breeze with the right steps. Protect your data by backing it up, cloning efficiently, and carefully selecting your tools. Trust the process, embrace the speed boost, and revel in your system’s newfound agility without any data loss.
Happy upgrading!

Harold Williams is a senior writer and technical editor at Drives Hero with 20+ years of experience in IT administration. He specializes in storage systems, SSD reviews, and performance testing, bringing real-world insight to every guide.