How to Make a Sata to Usb Cable? 8 Steps!
Making your SATA to USB cable can be a cost-effective and practical solution.
With just a few readily available components and some basic tools, you can create a functional SATA to USB cable that allows you to connect your storage device to any USB-enabled device such as a computer or laptop.
We’ll walk you through the step-by-step process of making your own SATA to USB cable, providing you with the freedom to access your data whenever and wherever you need it.
Key Takeaway
Crafting a SATA to USB Cable: Step-by-Step Guide
Step 1: Gather Materials
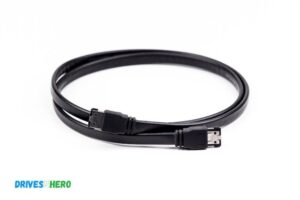
Gather the necessary materials: a USB cable with a connector that matches your device (usually USB-A or USB-C), a SATA data cable, and a SATA power cable.
Step 2: Prepare the USB Cable
Cut the USB cable to the desired length, leaving enough length to work comfortably. Strip the outer insulation of the USB cable to expose the wires inside.
Step 3: Identify Wires
Identify the wires inside the USB cable: typically red (power), black (ground), green (data+), and white (data-). Use a multimeter to confirm the connections if necessary.
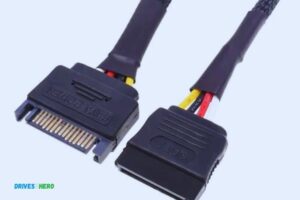
Step 4: Prepare the SATA Cables
Cut the SATA data cable and SATA power cable to the desired length. Strip the insulation of these cables to expose the wires inside.
Step 5: Connect Power and Ground
Connect the red wire from the USB cable to the 5V (red) wire of the SATA power cable. Connect the black wire from the USB cable to the ground (black) wire of the SATA power cable.
Step 6: Connect Data Wires
Connect the green wire from the USB cable to the SATA data+ wire and the white wire to the SATA data wire.
Step 7: Insulate Connections
Securely solder the connections between the wires. Use heat shrink tubing or electrical tape to insulate the connections and prevent shorts.
Step 8: Test the Cable
Before using the cable, test it with a SATA device to ensure proper functionality. Connect the SATA device to a USB port on your computer using the newly made cable.
By following these steps, you can customize the length and configuration of the cable to suit your specific needs. Enjoy the satisfaction of crafting your tech solution.
Introduction To The USB Cable
The USB (Universal Serial Bus) cable is a fundamental component in modern computing and electronics. It serves as a standardized interface for connecting various devices to computers, chargers, and other compatible hardware.
USB cables are used for data transfer, charging, and powering devices, making them incredibly versatile and widely used.
USB cables come in various shapes, sizes, and configurations, but they typically consist of four wires encased in a protective outer covering.
These wires include power (Vbus), ground (GND), and two data lines (D+ and D-), which facilitate communication between devices.
Since its introduction in the mid-1990s, USB technology has undergone several iterations, each offering improvements in speed, power delivery, and compatibility.
The most common types of USB cables include:
- USB-A: This is the standard USB connector found on most computers and chargers. It’s rectangular with a flat, rectangular interface.
- USB-B: This connector is less common and is typically found on peripheral devices such as printers, scanners, and some older smartphones. It has a square-ish shape with two beveled corners.
- USB-C: The USB-C connector is becoming increasingly popular due to its smaller size, reversible design, and support for faster data transfer speeds and higher power delivery. It’s symmetrical, allowing users to plug it in either way.
USB cables are also classified by their version, denoting their speed and capabilities.
The main versions include USB 1.1, USB 2.0, USB 3.0 (also known as USB 3.1 Gen 1), USB 3.1 (also known as USB 3.1 Gen 2), and USB 3.2. Each newer version offers faster data transfer rates and improved features.
In addition to data transfer, USB cables can also deliver power to charge devices. With the advent of USB Power Delivery (USB PD), newer USB cables can deliver higher power outputs, enabling faster charging for smartphones, laptops, and other electronics.
USB cables play a crucial role in connecting and powering the vast array of electronic devices we use daily, making them an indispensable part of modern technology.
Tips for Making a SATA to USB Cable
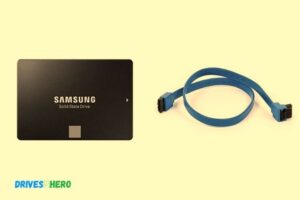
Creating a SATA to USB cable involves converting the SATA interface used for internal hard drives into a USB interface, allowing you to connect the hard drive externally to a computer or other device.
Here are some tips to consider when making a SATA to USB cable:
- Gather the necessary components: You’ll need a SATA connector, a USB connector, and a suitable cable to connect them. Make sure to choose connectors that match the specifications of your SATA hard drive and USB interface.
- Understand the pinouts: SATA and USB connectors have specific pinouts that need to be matched correctly for the cable to function. Consult the datasheets or specifications for both connectors to ensure you understand the pin assignments.
- Choose the right cable: The cable you use should be capable of carrying both data and power. Look for a cable with enough wires to accommodate the necessary connections for both SATA and USB interfaces.
- Solder carefully: When soldering the wires to the connectors, take your time to ensure proper connections. Use a soldering iron with a fine tip and solder with flux to make clean and secure joints.
- Insulate connections: After soldering the connections, use heat shrink tubing or electrical tape to insulate and protect the soldered joints. This helps prevent short circuits and ensures the longevity of your cable.
- Test the cable: Before using the cable with valuable data, test it with a spare hard drive to ensure it functions correctly. Verify that you can read and write data to the drive when connected via USB.
- Consider safety precautions: When working with electronics, always follow safety precautions to prevent injury or damage to components. This includes working in a well-ventilated area, wearing appropriate protective gear, and disconnecting power sources when soldering.
- Label the cable: Once you’ve confirmed that the cable works, consider labeling it with its function (e.g., “SATA to USB Adapter”) to avoid confusion in the future.
- Document your work: Keep notes or diagrams of the pinouts and connections you used to create the cable. This documentation can be helpful if you ever need to repair or replicate the cable in the future.
By following these tips and exercising care and attention to detail, you can create a functional SATA to USB cable for connecting internal hard drives externally to computers or other devices.
Troubleshooting Common Issues
When creating a SATA to USB cable, you may encounter various issues during the assembly process or when testing the cable.
Here are some common troubleshooting steps and potential issues you might face:
- Incorrect Wiring: One of the most common issues is incorrect wiring. Check the pinouts for both the SATA and USB connectors and ensure that you have connected the wires correctly. A simple wiring mistake can prevent the cable from functioning properly.
- Short Circuits: Short circuits happen when wires touch each other or the connectors’ metal casing. Check for exposed wires or solder joints and insulate them with heat shrink tubing or electrical tape to prevent short circuits.
- Intermittent Connections: Poor solder joints or loose connections can result in intermittent connectivity issues. Carefully inspect all solder joints to ensure they are secure and free from any cold joints or loose connections.
- Data Transfer Errors: Data transfer errors or inconsistent performance may stem from cable construction or compatibility issues. Verify that the cable supports both data and power transfer and that connectors match the SATA hard drive and USB interface correctly.
- Power Delivery Problems: If the SATA hard drive is not receiving sufficient power, it may not function properly when connected via USB. Check the power connections and ensure that the cable is capable of delivering the necessary power to the hard drive.
- Compatibility Issues: Some SATA hard drives may require additional drivers or firmware updates to work properly when connected via USB. Check the manufacturer’s documentation for any compatibility issues or required updates.
- Physical Damage: Inspect the cable and connectors for any signs of physical damage, such as bent pins, broken wires, or cracked insulation. Even minor damage can affect the cable’s performance and reliability.
- Testing: Use a multimeter or cable tester to check for continuity and proper connectivity throughout the cable. This can help identify any wiring issues or faulty connections that may be causing problems.
- Consult Documentation: If you’re unsure about the wiring or compatibility of your SATA to USB cable, consult the datasheets or specifications for the connectors and components you’re using. This can help ensure that you’re following the correct wiring and assembly procedures.
By carefully troubleshooting and addressing any issues you encounter during the assembly process, you can create a functional SATA to USB cable for connecting internal hard drives externally to computers or other devices.
Conclusion
Making a SATA to USB cable is an easy process that requires only basic tools and materials. By following the steps outlined in this post, you can easily create your own custom SATA to USB cable with minimal effort and cost.
Not only can it be used for data transfer or storage, but also you can use it as a backup solution if needed.
With its versatility and ease of use, this type of cable is sure to provide many years of reliable performance.

Harold Williams is a senior writer and technical editor at Drives Hero with 20+ years of experience in IT administration. He specializes in storage systems, SSD reviews, and performance testing, bringing real-world insight to every guide.