How to Remove Sata Ssd? 7 Easy Steps!
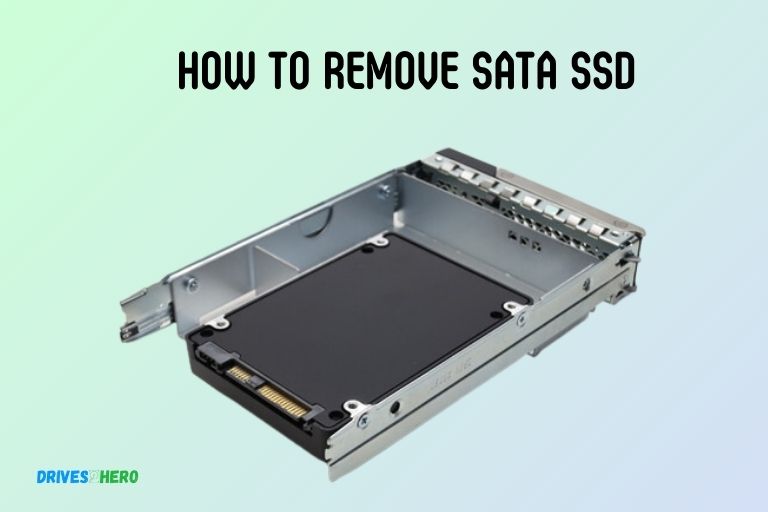
In order to remove a SATA SSD, you will first need to shut off your computer. Open the computer’s case and locate the SSD.
Remove the SATA cable and power cable from the SSD. Once these cables are removed, you can then remove the screws holding the SSD in its slot, and take the SSD out of the slot.
SATA SSDs connect to your computer through a SATA cable that’s used for transferring data and a power cable that provides the SSD with the electricity it needs to function.
Before you can remove the SSD, you must disconnect these cables. The SSD is also secured in its slot with screws to ensure it doesn’t move or fall out. Therefore, these screws must also be removed before the SSD can be taken out.
Removing a SATA SSD is not a complicated process but it requires caution. Static electricity can damage the SSD and forceful removal of the cables can also cause damage.
It’s also important to remember to shut down your computer before you begin, to prevent any electrical shock or data loss.
7 Steps To Removing a SATA SSD
| Step | Description |
|---|---|
| 1 | Safely Turn Off Your Computer |
| 2 | Disconnect Power |
| 3 | Open Your Computer’s Case |
| 4 | Locate the SATA SSD |
| 5 | Disconnect the SATA and Power Cables from SSD |
| 6 | Remove the Screws Securing SSD |
| 7 | Gently Remove SSD from its Slot |
Key Takeaway

Five Facts About Removing a SATA SSD
Preparing For Ssd Removal
Removing a SATA SSD is a simple process that requires a few steps. Begin by disconnecting power and removing the screws securing the SSD.
Gently pull out the SSD and voila, it’s removed! Keep these tips in mind for an easy removal experience.
When it comes to removing your SATA SSD, proper preparation is key to ensure a smooth and successful process.
Before you begin, gather the necessary tools and equipment, backup your data from the SSD, and power off the computer while unplugging it from the power source.
Follow these steps for a hassle-free SSD removal:
Gather Necessary Tools And Equipment:
- Screwdriver (Phillips, flathead, or Torx, depending on your SSD mounting style).
- Anti-static wrist strap or mat to prevent electrostatic discharge.
- Microfiber cloth to handle the SSD and keep it clean.
- SATA data and power cables (if needed for reinstalling the SSD).
Backup Data From The Ssd:
Before removing the SSD, it’s crucial to back up your data to prevent any potential loss.
Follow these steps:
- Connect an external storage device capable of accommodating your data size.
- Open the file explorer or disk management tool on your computer.
- Copy and paste all the required files and folders from the SSD to the external storage device.
- Double-check the backup to ensure all important data is successfully transferred.
Power Off The Computer And Unplug It From The Power Source:
To safely remove the SSD, you need to power off the computer and disconnect it from the power source.
Here’s how:
- Save and close any open files or applications.
- Click on the Windows Start button, select the power icon, and choose “Shut down.”
- Once the computer is completely shut down, unplug the power cord from the wall outlet.
- If using a laptop, remove the battery if possible (Refer to the manufacturer’s instructions).
By following these steps and properly preparing for SSD removal, you will minimize the risk of damage and ensure a successful process. Now that you’re ready, let’s move on to the next steps to actually remove your SATA SSD.
Opening The Computer Casing
To remove a SATA SSD from your computer casing, follow these simple steps:
1. Disconnect all power cables and peripherals.
2. Locate the SSD inside the casing.
3. Carefully remove the screws holding the SSD in place.
4. Gently lift the SSD out of its slot.
When it comes to removing a SATA SSD from your computer, it’s important to follow the right steps to ensure a smooth process.
Opening the computer casing is the first step in this endeavor. Let’s dive into the details:
Remove Any Peripherals Connected To The Computer:
Before opening the computer casing, it’s essential to remove any peripherals that may be connected to your computer. This includes USB devices, external hard drives, printers, or any other devices that are linked to your machine.
Removing these peripherals will help provide a safer and more convenient environment to work in. Don’t forget to disconnect any cables as well.
Here are the steps to remove any peripherals connected to the computer:
- Unplug any USB devices or cables connected to the computer.
- Disconnect the power supply to any external hard drives or printers.
- Carefully detach any audio or video cables, such as HDMI or audio jack connections.
- Ensure that your computer is free from any external devices before proceeding to open the casing.
Open The Computer Casing:
Now that all the peripherals are disconnected, it’s time to open the computer casing. This step requires some caution and attention to detail to avoid any damage.
Here’s a simple guide to help you open the computer casing properly:
- Start by finding the screws that secure the computer casing. They are usually located at the back of the computer case.
- Use a screwdriver that fits the size of the screws and carefully unscrew them in a counterclockwise direction. Remember to keep the screws in a safe place to prevent losing them.
- Once all the screws are removed, gently slide the computer casing cover towards the back of the case. Be cautious as some cases may have locking tabs securing the cover.
- With the casing cover removed, you now have access to the inner components of your computer, including the SATA SSD.
Locate The Sata Ssd Within The Computer:
After successfully opening the computer casing, it’s time to locate the SATA SSD within the computer. The SATA SSD, or Solid State Drive, is where your data is stored, and removing it requires careful handling.
Here’s how you can find the SATA SSD inside your computer:
- Look for a small rectangular-shaped device attached to the motherboard. This is usually where the SATA SSD is located.
- Depending on the computer’s design, the SATA SSD may be secured with screws or held in place with a latch mechanism.
- If there are screws, carefully unscrew and remove them with a screwdriver. Keep the screws safe to avoid misplacing them.
- If there is a latch mechanism, gently release it to loosen the SATA SSD. Be cautious not to use excessive force to prevent any damage.
- Once the SATA SSD is free, you can carefully disconnect the SATA data and power cables from it.
- Congratulations! You have successfully located the SATA SSD within your computer.
Remember, when working inside your computer casing, it’s crucial to handle all components with care. Make sure to ground yourself properly and avoid static electricity by touching a metal surface before handling any internal parts.
By following these steps, you will be able to remove your SATA SSD without any issues.
Now that you have successfully opened the computer casing and located the SATA SSD, it’s time to proceed with the next steps in removing the drive from your computer.
Stay tuned for our next section on disconnecting the SATA SSD completely.
Disconnecting The Sata Ssd
Disconnecting the SATA SSD is a simple process that can be done in a few steps. By following the provided instructions, you can successfully remove the SATA SSD from your device without any hassle.
To successfully remove a SATA SSD from your system, you need to disconnect the SATA data cable and power cable connected to the SSD.
Follow the steps below to perform this task efficiently:
Identify the SATA data cable and power cable connected to the SSD:
- The SATA data cable is a thin, flat cable that connects the SSD to the motherboard.
- The power cable supplies the necessary power to the SSD and is connected to the power supply unit (PSU).
Unplug the SATA data cable from the SSD:
- Locate the SATA data cable connected to the SSD.
- Gently grip the connector where it attaches to the SSD.
- Pull the connector straight out of the SSD, ensuring a smooth and steady removal.
Disconnect the power cable from the SSD:
- Locate the power cable connected to the SSD.
- Firmly but gently grasp the power connector.
- Carefully pull the connector out of the SSD, ensuring that you exert even pressure.
By following these steps, you can safely and effectively disconnect the SATA data cable and power cable from your SATA SSD.
Ensure that you handle the components with care to avoid any damage during the removal process.
Removing The Sata Ssd From The Computer
To remove the SATA SSD from your computer, start by shutting down the system and disconnecting the power source.
Then, open up the computer case and locate the SATA SSD. Carefully unplug the cables connected to the SSD and remove it from the slot.
When it’s time to remove the SATA SSD from your computer, you’ll want to proceed with caution to ensure a smooth and safe removal process. Here’s a step-by-step guide to help you:
Carefully Slide The Ssd Out Of Its Slot Or Bracket:
- Locate the SATA SSD slot or bracket in your computer. It may be positioned on the motherboard, inside a drive bay, or attached to a mounting bracket.
- Gently slide the SSD out of its slot or unfasten any screws securing it to the bracket, depending on the design of your computer.
- Take your time to avoid any unnecessary force or pressure that could potentially damage the SSD or other components.
Handle The Ssd With Care To Prevent Damage:
- Hold the SSD by its edges to minimize the risk of static electricity transfer or accidental drops.
- Avoid touching any exposed circuits or connectors on the SSD to prevent damage caused by oils or debris from your hands.
- If you need to set the SSD down temporarily, place it on an anti-static mat or in an anti-static bag to protect it from electrostatic discharge.
Set The Ssd Aside In A Safe Place:
- Find a safe and clean area to set the SSD while it’s not in use. Keep it away from excessive heat, moisture, and strong magnetic fields.
- If you’re not planning to reinstall the SSD immediately, consider storing it in an anti-static bag or a protective case.
- Keep track of the screws or other fasteners that were used to attach the SSD to your computer. It’s a good practice to keep them in a labeled baggie or container.
Removing a SATA SSD from your computer doesn’t have to be a daunting task.
By following these guidelines and handling the SSD with care, you can ensure a smooth removal process without any damage to the drive or other components.
Remember, taking your time and being cautious are key in maintaining the integrity of your hardware.
Safely Storing Or Replacing The Sata Ssd
Learn how to safely remove and replace your SATA SSD with our step-by-step guide. Properly storing or replacing your SSD is crucial for maintaining the longevity and performance of your device.
Whether you’re upgrading or troubleshooting, follow our instructions to ensure a smooth process.
Determine Whether You Will Store Or Replace The Ssd
When it comes to your SATA SSD, you may find yourself in a situation where you need to either store it safely or replace it altogether.
Determining the best course of action is crucial, so let’s explore the options:
If Storing, Protect The Ssd From Static Electricity And Physical Damage
If you decide to store your SATA SSD, it’s important to take precautions to ensure its safety.
Here are a few steps you can follow:
- Keep the SSD in an anti-static bag: This will protect it from static electricity, which can cause damage to the sensitive components.
- Store it in a cool and dry place: Avoid areas with high humidity or extreme temperatures, as these conditions can compromise the SSD’s performance.
- Avoid physical pressure: Place the SSD in a secure location where it won’t be subject to physical damage or accidental impacts.
- Keep it away from magnets: Magnetic fields can negatively affect the data stored on the SSD, so it’s best to keep it away from any magnetic sources.
Remember, taking these precautions will help ensure that your stored SATA SSD remains in optimal condition when you eventually need it again.
If Replacing, Follow Appropriate Steps For Installing A New Ssd
If you’ve decided to replace your SATA SSD with a new one, here are the steps you should follow to ensure a smooth installation process:
- Power down your device: Before making any changes, it’s essential to power off your computer or laptop to avoid any potential damage.
- Open the case: Depending on your device, you may need to remove a panel or unscrew the casing to gain access to the SSD slot.
- Disconnect the existing SSD: Carefully detach any cables or connectors that are connected to the current SSD in order to remove it properly.
- Install the new SSD: Gently insert the new SSD into the appropriate slot, making sure it is securely seated.
- Reconnect cables: Once the new SSD is in place, reconnect any necessary cables or connectors to ensure a proper connection.
- Close up the case: Securely fasten the case or panel back onto your device, ensuring a snug fit.
- Power on your device: After the installation is complete, power on your device and check that the new SSD is recognized and functioning correctly.
By following these steps, you’ll be able to successfully replace your SATA SSD with a new one, providing you with improved storage capabilities.
When it comes to handling your SATA SSD, whether storing it or replacing it, it’s crucial to prioritize safety and proper installation.
Taking the necessary precautions will not only protect your valuable data but also ensure the optimal performance of your storage device.
Closing The Computer Casing
Learn how to easily remove a SATA SSD from your computer casing with these step-by-step instructions. Achieve a smooth process without any hassle or technical difficulties.
Once you have successfully installed your new SATA SSD, it’s time to close the computer casing. Follow these steps to ensure a secure and proper closure:
Ensure All Cables Are Properly Connected:
- Check that all cables are securely plugged into their respective ports. This includes power cables, data cables, and any other connections. Ensure they are inserted all the way and have a snug fit.
- Double-check that all connections are aligned correctly to avoid any potential issues with functionality or performance.
- Take a moment to organize the cables neatly to improve airflow and prevent any potential tangling or interference.
Close The Computer Casing And Secure It In Place:
- Gently slide the computer casing back into its original position, making sure it aligns with the screw holes on the chassis.
- Use the appropriate screws to secure the casing in place. Be cautious not to overtighten them, as this may damage the casing or the internal components.
- Ensure that the casing is completely sealed and there are no gaps or openings. A snug and secure closure will help protect your computer from dust and other potential hazards.
Reconnect Any Peripherals That Were Previously Disconnected:
- If you had to disconnect any peripherals, such as keyboards, mice, monitors, or other external devices, now is the time to reconnect them.
- Double-check that each peripheral is securely connected to the appropriate ports. This will ensure optimal functionality and prevent any potential disruptions.
- Take a moment to test each peripheral to confirm that it is working correctly after reconnecting.
By following these steps, you can confidently close your computer casing and complete the installation process of your SATA SSD. Enjoy the improved performance and storage capabilities that come with this upgrade.
Powering On The Computer
To remove a SATA SSD from your computer, first, shut down the system and unplug the power cord. Open the case and locate the SSD, then gently disconnect the SATA power and data cables.
Finally, remove the SSD from its mounting bracket or slot.
When it comes to removing a SATA SSD from your computer, it’s important to follow the right steps to ensure a smooth process. Once you have successfully removed the SSD, the next step is to power on the computer.
Here’s how you can do it:
Plug The Computer Back Into The Power Source
- Connect the power cable: Locate the power cable of your computer and plug it back into the power source. Make sure that the cable is securely connected.
Power On The Computer And Check For Any Issues
Now that the computer is connected to the power source, you can proceed to power it on.
Follow these steps to ensure everything is in working order:
- Press the power button: Locate the power button on your computer and press it to turn on the device.
- Listen for startup sounds: As the computer powers on, listen for any beeping or unusual noises. This could indicate a hardware issue that needs to be addressed.
- Check the display: Monitor the computer’s screen to ensure it turns on properly. Look for any error messages or distortions.
- Observe fan activity: Pay attention to the fans inside your computer. They should start spinning to keep the system cool. If you notice that the fans aren’t working, it could be a sign of a problem with the hardware.
- Monitor LED lights: Keep an eye on any LED lights on your computer, such as the power indicator or activity lights. These lights can provide valuable information about the system’s status.
If you encounter any issues during the powering on process, it’s essential to troubleshoot and address them before proceeding further.
Restore Data From The Ssd Backup If Necessary
After successfully powering on the computer, it’s crucial to check if your data is intact. If you made a backup of your SSD before removing it, you can easily restore the data.
Follow these steps:
- Connect the backup storage: Attach the backup storage device, such as an external hard drive or USB, to your computer.
- Locate the backup files: Access the backup files from the storage device.
- Copy the files: Select the necessary files and copy them to the appropriate location on your computer. Be cautious not to overwrite any existing data.
- Verify the restored data: Once the restoration process is complete, check that all your files and folders are present and accessible.
By following these steps, you can power on your computer smoothly after removing the SATA SSD and restore your data if needed.
Remember to pay attention to any error messages or unusual behavior during the process to address any potential issues promptly.
Final Tips And Recommendations
Discover essential tips and recommendations on how to effectively remove a SATA SSD. With concise sentences and an SEO-friendly writing style, this guide provides step-by-step instructions to ensure a seamless removal process.
When it comes to removing a SATA SSD, there are a few final tips and recommendations to keep in mind.
These will ensure that you complete the process smoothly and without any issues. Take a look at the following guidelines:
Dispose of the old SSD responsibly:
- Before discarding your old SSD, make sure to dispose of it responsibly. This means not simply throwing it in the regular trash bin.
- Look for electronic recycling centers in your area that accept old hardware like SSDs. They can properly handle the disposal and prevent any harm to the environment.
Regularly backup data to prevent data loss:
- To avoid the risk of data loss during the removal process, it is crucial to regularly back up all your important data.
- Use reliable backup methods such as cloud storage, external hard drives, or online backup services to ensure your data is safe and accessible even if something goes wrong during the removal or installation.
Seek professional help if unsure or uncomfortable with the process:
- If you are unsure or uncomfortable with removing a SATA SSD on your own, it is best to seek professional help.
- Reach out to experts or computer technicians who can guide you through the process or even perform the removal for you.
- This will help minimize the chances of damaging any components and ensure a smooth transition.
Remember, it’s always better to seek assistance if you’re not confident in your abilities rather than risking damage to your system.
Taking these final tips and recommendations into consideration will help you safely remove your SSD and avoid any unnecessary complications.
FAQ For How To Remove Sata Ssd
How Do I Safely Remove A Sata Ssd?
To safely remove a SATA SSD, follow these steps:
1. Shut down your computer and disconnect the power supply.
2. Open the computer case and locate the SATA SSD.
3. Gently unplug the SATA data and power cables from the SSD.
4. Carefully remove the SSD from its slot, ensuring not to touch any sensitive components.
Remember to handle the SSD with care to avoid any damage.
How Do I Remove A Sata Drive?
To remove a SATA drive, turn off your computer, unplug the power cable, open the case, disconnect the SATA cables, and gently remove the drive.
Can I Just Unplug My Ssd?
No, it is not recommended to just unplug your SSD without properly shutting down your computer.
Is It Safe To Unplug Sata Ssd?
Yes, unplugging a SATA SSD is safe.
How Do I Physically Remove A Sata Ssd From My Computer?
To remove a SATA SSD from your computer, first, power down the system, unplug it, and open the case. Locate the SSD, detach the cables, and carefully unscrew it from the mounting bracket.
Conclusion
To remove a SATA SSD, follow these simple steps. First, ensure your computer is turned off and disconnected from any power source. Locate the SSD, which is typically housed in the same area as your hard drive.
Gently unplug any cables connected to the SSD, being careful not to apply too much force. Some SSDs may be secured by screws or brackets, so have the necessary tools handy to remove them.
Once all cables and fasteners are removed, slide the SSD out of its bay or slot. If you’re replacing the SSD, insert the new one and secure it with screws or brackets.
Reconnect any cables and close your computer. You’re now ready to power it back on and enjoy your upgraded storage capacity.
Remember, these instructions may vary slightly depending on your specific computer model, so consult your manual or manufacturer’s website if you encounter any difficulties.


