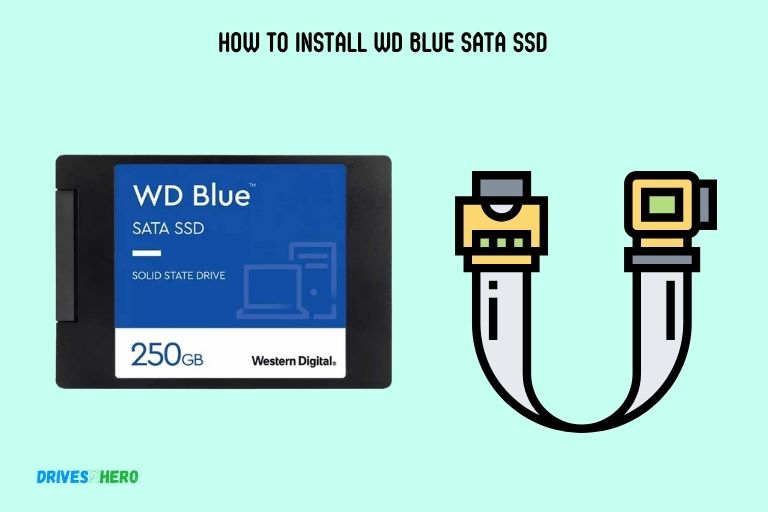
How to Install Wd Blue Sata Ssd? 14 Easy Steps!
Installing a WD Blue SATA SSD is a straightforward process that involves preparing your computer, connecting the SSD to your system, initializing the SSD, and finally, transferring your data.
To install a WD Blue SATA SSD, start by ensuring you have the right tools and your workspace is clean and dust-free. Turn off your computer and disconnect all cables.
Open the case of your computer to reveal the motherboard. You will see a slot labeled SATA, where the SSD will go. Connect the ends of the SATA cable to the SSD and the motherboard respectively.
After the SSD is securely connected, you can close your computer case, reconnect all cables, and turn your computer back on. Once the computer is on, the SSD needs to be initialized for use.
This can be done easily using the Disk Management tool in Windows. Finally, you can clone your data from your old drive to the new WD Blue SATA SSD.
The installation of a WD Blue SATA SSD is a task that can be accomplished with a little bit of patience and the right tools. It’s important to ensure the SSD is securely connected to the motherboard to avoid any potential loss of data.
Initializing the SSD is necessary to prepare it for use, and transferring your data completes the process.
14 Steps To Installing Wd Blue Sata SSD
| Steps | Instructions |
|---|---|
| 1 | Ensure You Have the Needed Tools |
| 2 | Backup Your Data |
| 3 | Power Down Your System |
| 4 | Open Your System’s Case |
| 5 | Identify SATA Power Cable |
| 6 | Connect SATA Power Cable to SSD |
| 7 | Identify SATA Data Cable |
| 8 | Connect SATA Data Cable to SSD |
| 9 | Mount SSD in Chassis |
| 10 | Replace Case Cover |
| 11 | Power Up Your System |
| 12 | Configure SSD as Primary Boot Device |
| 13 | Install Operating System |
| 14 | Restore Your Backed Up Data |
Key Takeaway
Five Facts About Installing Wd Blue Sata SSD
Understanding The Wd Blue Sata Ssd
The process of installing the Wd Blue Sata Ssd can be easily understood with clear instructions. It’s a straightforward procedure that allows users to upgrade their storage capacity efficiently.
What Is The Wd Blue Sata Ssd?
The Wd Blue Sata Ssd is a type of solid-state drive (SSD) that offers high-performance storage solutions for various devices such as laptops, desktops, and gaming consoles.
It combines Western Digital’s reliable technology with the SATA interface to provide a fast, durable, and efficient storage option for users.
Here are some key points about the Wd Blue Sata Ssd:
- Capacity options: The Wd Blue Sata Ssd comes in various capacity options, ranging from 250GB to 4TB, allowing users to choose the right amount of storage based on their needs.
- Enhanced performance: With read speeds of up to 560MB/s and write speeds of up to 530MB/s, the Wd Blue Sata Ssd ensures quick and efficient data transfer, enabling faster boot-ups, file transfers, and overall system responsiveness.
- Advanced technology: Built with Western Digital’s 3D NAND technology, the Wd Blue Sata Ssd offers enhanced reliability, endurance, and power efficiency. It also utilizes error correction technologies to prevent data loss or corruption.
- Compatibility: The Wd Blue Sata Ssd is compatible with both Windows and Mac operating systems, making it suitable for a wide range of devices. It also supports the SATA III 6Gb/s interface, ensuring seamless integration with existing systems.
- Compact design: The Wd Blue Sata Ssd features a compact form factor, making it easy to install in desktops, laptops, or other compatible devices. Its slim profile allows for flexibility in installation and ensures minimal space consumption.
Advantages Of Using The Wd Blue Sata Ssd:
- Improved performance: The Wd Blue Sata Ssd significantly enhances the performance of your device, delivering faster boot times, quick application launches, and accelerated file transfers. This ensures a smoother user experience and reduces system lag.
- Reliability and durability: With Western Digital’s advanced technology, the Wd Blue Sata Ssd offers exceptional reliability and durability. It can withstand shocks, vibrations, and extreme temperatures, safeguarding your important data and extending the lifespan of your storage solution.
- Energy-efficient: The Wd Blue Sata Ssd consumes less power compared to traditional hard drives. This not only helps reduce energy bills but also results in cooler operation, as it generates less heat. It is an ideal choice for energy-conscious users seeking efficiency without compromising performance.
- Increased storage capacity: The Wd Blue Sata Ssd provides ample storage capacity, allowing you to store and access a large amount of data, including high-definition videos, photos, games, and multimedia files. You can choose from various capacity options to suit your specific needs.
- Easy installation: Installing the Wd Blue Sata Ssd is a breeze. It uses a standard SATA interface, which is common in most devices, ensuring a simple and hassle-free installation process. Whether you are upgrading an existing system or building a new one, the Wd Blue Sata Ssd can be easily integrated.
- Silent operation: Unlike traditional hard drives that produce noise due to mechanical parts, the Wd Blue Sata Ssd operates silently. This is especially beneficial for users who require a quiet environment, such as content creators, gamers, or professionals working in noise-sensitive areas.
Overall, the Wd Blue Sata Ssd offers a reliable, high-performance storage solution with various advantages like improved performance, reliability, energy efficiency, increased storage capacity, easy installation, and silent operation.
Whether you are a professional requiring extensive storage or a casual user seeking faster data access, the Wd Blue Sata Ssd is an ideal choice.
Preparing For The Installation
Get ready for the installation of WD Blue SATA SSD with these essential steps. From hardware preparations to software configurations, this guide ensures a smooth installation process for optimal performance.
Before you begin installing your WD Blue SATA SSD, there are a few things you need to do to ensure a smooth process.
We will cover checking system compatibility, gathering necessary tools, and backing up data.
Checking System Compatibility:
To successfully install the WD Blue SATA SSD, it is important to check if your system is compatible.
Here are the key points to consider:
- Interface compatibility: Ensure that your system supports SATA connections. The WD Blue SATA SSD uses a standard SATA interface and is compatible with most modern desktop and laptop computers.
- Form factor compatibility: Check the physical size of your WD Blue SATA SSD and compare it to the available drive bays in your system. The most common form factor for consumer SSDs is 2.5 inches, but some systems may require adapters for smaller or larger form factor SSDs.
- Operating system compatibility: Verify that your operating system is compatible with the WD Blue SATA SSD. The drive is compatible with various operating systems, including Windows, macOS, and Linux. Check the Western Digital website or user manual for further details on system requirements.
Gathering Necessary Tools:
Before starting the installation process, gather the following tools to ensure a hassle-free experience:
- Screwdriver: Depending on your system, you may need a Phillips screwdriver or a Torx screwdriver to remove the existing hard drive or open the drive bay.
- Static wristband or grounding mat: Electrostatic discharge can damage sensitive electronic components. Using a static wristband or grounding mat helps prevent static electricity from harming your hardware.
- Hard drive cloning software or external storage: If you want to migrate your data from an existing drive to the WD Blue SATA SSD, you will need cloning software or external storage to create a backup of your data.
Backing Up Data:
Before proceeding with the installation, it is crucial to back up your data to avoid any potential loss.
Here are a few methods to consider:
- External hard drive: Connect an external hard drive to your computer and transfer all important files and folders to create a backup.
- Cloud storage: Utilize cloud storage services to backup your files. Services like Dropbox, Google Drive, or Microsoft OneDrive offer free and paid options to securely store your data.
- Hard drive cloning: If you prefer a seamless transition to your new WD Blue SATA SSD, consider using a hard drive cloning software to clone your existing drive onto the SSD. This preserves your files, applications, and operating system settings.
Remember, taking the time to back up your data ensures that you can easily recover any lost files and have everything ready for the installation of your WD Blue SATA SSD.
Now that you’ve checked system compatibility, gathered the necessary tools, and backed up your data, you’re ready to move on to the next steps of the installation process. Stay tuned for our next section on installing the WD Blue SATA SSD.
Step-By-Step Installation Guide
This step-by-step installation guide provides clear and concise instructions for installing the WD Blue SATA SSD. Follow these simple instructions to easily install your new SSD and enhance your computer’s performance.
Opening The Computer Case
To install a WD Blue SATA SSD, you’ll need to begin by opening the computer case.
Here’s how you can do it:
- Shut down your computer and disconnect the power cable.
- Remove any peripheral devices attached to the computer.
- Place the computer on a sturdy surface.
- Locate the screws or latches securing the computer case.
- Unscrew the screws or release the latches to open the case.
Locating The Empty Drive Bay
Once the computer case is open, you’ll need to find an empty drive bay where you can install the WD Blue SATA SSD.
Follow these steps to locate it:
- Look for the existing hard drives or other storage devices already installed.
- Identify any empty slots or bays available.
- Ensure that the empty drive bay is compatible with the WD Blue SATA SSD.
- If necessary, refer to the computer’s manual or the manufacturer’s website for guidance on locating the empty drive bay.
Connecting The Wd Blue Sata Ssd
After locating the empty drive bay, it’s time to connect the WD Blue SATA SSD.
Follow these steps to ensure a proper connection:
- Take the WD Blue SATA SSD out of its packaging and remove any protective covers or labels.
- Identify the SATA data cable and the SATA power cable.
- Connect one end of the SATA data cable to the SSD and the other end to the motherboard’s SATA port.
- Connect the SATA power cable to the SSD and to an available power connector from the power supply unit.
- Ensure that the connections are secure and properly seated.
Securing The Wd Blue Sata Ssd In Place
Once the connections are made, it’s important to secure the WD Blue SATA SSD in place to prevent any accidental disconnection.
Follow these steps to ensure a secure installation:
- Position the WD Blue SATA SSD in the empty drive bay, aligning the screw holes.
- Use the provided screws or any additional mounting brackets to secure the SSD in place.
- Tighten the screws but be careful not to overtighten, as it may damage the drive or the bay.
- Double-check that the WD Blue SATA SSD is firmly secured.
By following these step-by-step instructions, you should successfully install a WD Blue SATA SSD in your computer. Enjoy the enhanced storage performance and increased speed it brings to your system.
Configuring The Wd Blue Sata Ssd
Discover the step-by-step process of configuring and installing the WD Blue SATA SSD into your device effortlessly. Increase the storage capacity and boost the performance of your system with this user-friendly installation guide.
If you’ve recently purchased a Wd Blue Sata Ssd and are ready to install it into your computer, you’ll need to configure it properly to ensure optimal performance.
You through the necessary steps to access your computer’s BIOS settings, set the Wd Blue Sata Ssd as the boot drive, and partition and format the drive.
Accessing The Bios Settings:
- Restart your computer and look for the key to access the BIOS settings during boot-up. It is usually displayed on the screen and commonly includes keys like F2, F10, or Del.
- Press the designated key repeatedly until the BIOS setup utility appears.
- Use the arrow keys on your keyboard to navigate through the options and locate the “Boot” or “Boot Options” section.
Setting The Wd Blue Sata Ssd As The Boot Drive:
- In the “Boot” or “Boot Options” section, look for the option related to boot order or boot priority.
- Move the Wd Blue Sata Ssd to the top of the boot order by selecting it and using the designated key to move it up. This ensures that your computer will boot from the SSD instead of the old drive.
- Save the changes and exit the BIOS settings. Your computer will now prioritize the Wd Blue Sata Ssd as the boot drive.
Partitioning And Formatting The Wd Blue Sata Ssd:
- Once your computer has restarted, open the Disk Management utility. You can search for it in the Start menu or use the Windows key + X shortcut and select “Disk Management.”
- Locate the Wd Blue Sata Ssd in the list of drives. It should appear as a new, unallocated drive.
- Right-click on the unallocated space and select “New Simple Volume.” This will open the New Simple Volume Wizard.
- Follow the wizard’s instructions to assign a drive letter, specify the desired volume size, and select the file system (NTFS is recommended).
- Format the drive by using the default settings or customizing them according to your needs.
- Once the formatting is complete, your Wd Blue Sata Ssd is ready to use.
By following these steps, you can easily configure your Wd Blue Sata Ssd and ensure that it functions properly as your primary boot drive.
Remember to save your important files and data before formatting the drive to avoid any loss of data. Now you can enjoy the improved speed and performance offered by your new SSD.
Transferring Data To The Wd Blue Sata Ssd
Learn how to easily install the WD Blue SATA SSD and transfer your data seamlessly. This step-by-step guide will help you upgrade your storage without any hassle.
When it comes to installing a new SSD, one crucial task is transferring your data from the old storage device to the new one.
This ensures that you don’t lose any important files, documents, or applications. We will guide you through the process of transferring data to the WD Blue SATA SSD.
We’ll cover migrating the operating system, transferring files and applications, and verifying data transfer.
Migrating The Operating System:
- Clone your existing operating system to the WD Blue SATA SSD using specialized software like Acronis True Image or Macrium Reflect.
- Ensure that your new SSD has sufficient storage capacity to accommodate the entire operating system.
- Connect the WD Blue SATA SSD to your computer using the appropriate cables or adapters.
- Open the cloning software and follow the on-screen instructions to select the source drive (your current operating system) and the destination drive (the WD Blue SATA SSD).
- Start the cloning process and wait for it to complete.
- Once the cloning is finished, restart your computer and enter the BIOS settings to set the WD Blue SATA SSD as the primary boot drive.
- Save the changes and exit the BIOS. Your operating system should now boot from the new SSD.
Transferring Files And Applications:
- Manually copy your personal files and documents from the old storage device to the WD Blue SATA SSD. This can be done by dragging and dropping files or using file transfer utilities like Windows File Explorer or macOS Finder.
- Reinstall your applications onto the new SSD. Start by downloading the original installation files or using installation discs. Follow the installation prompts and select the WD Blue SATA SSD as the destination drive.
- If you have large or complex applications, consider using specialized migration tools provided by the software vendors. These tools can assist with the seamless transfer of settings, preferences, and licenses.
Verifying Data Transfer:
- Double-check that all your files, documents, and applications are intact and accessible on the WD Blue SATA SSD.
- Test the performance of your newly installed SSD by opening files, launching applications, and executing various tasks to ensure smooth operation.
- Verify that your operating system is correctly booting from the WD Blue SATA SSD and not the old storage device.
By following these steps, you can successfully transfer your data to the WD Blue SATA SSD, ensuring a seamless transition to faster and more reliable storage. Happy computing with your new SSD!
Troubleshooting And Tips
In just a few easy steps, you can install your WD Blue SATA SSD with confidence. Troubleshooting and tips for a seamless installation process await you.
The installation of a WD Blue SATA SSD can sometimes pose challenges for users. However, with the right troubleshooting techniques and a few handy tips, you can ensure a smooth and hassle-free installation process.
Below are some common installation issues and their solutions, along with tips for optimizing performance and maintaining your WD Blue SATA SSD.
Common Installation Issues And Their Solutions:
Connection problems:
- If you’re facing issues with connecting your WD Blue SATA SSD, follow these steps:
- Ensure that the SATA cable is securely plugged into both the SSD and the motherboard.
- Verify that the cable is not damaged or loosely connected.
- If you’re using a new SSD, check if your computer’s BIOS detects it. If not, update your BIOS to the latest version.
Partitioning and formatting errors:
Here’s what you can do if you encounter partitioning or formatting errors during installation:
- Open the Disk Management tool in your operating system and check if the SSD is recognized.
- If the SSD is recognized but not initialized, right-click on it and select “Initialize Disk.”
- Create new partitions and format them as needed using the Disk Management tool.
- If the SSD is not recognized at all, try connecting it to a different SATA port on your motherboard.
Operating system compatibility:
In some cases, your operating system may not recognize the newly installed SSD.
Consider the following solutions:
- Update your operating system to the latest version, as older versions may not have native support for the SSD.
- Install the necessary drivers or firmware updates for the SSD from the manufacturer’s website.
- If you’re using a Windows operating system, ensure that the SSD is formatted to the appropriate file system (usually NTFS).
Optimizing The Wd Blue Sata Ssd Performance:
To get the most out of your WD Blue SATA SSD, follow these optimization tips:
Enable TRIM: TRIM is essential for maintaining SSD performance over time. To enable TRIM on your SSD, follow these steps:
- Open the Command Prompt or Terminal with administrator privileges.
- Type the command “fsutil behavior set DisableDeleteNotify 0” and press Enter.
Disable disk defragmentation:
Unlike traditional hard drives, SSDs do not benefit from disk defragmentation. In fact, it can decrease performance and reduce the lifespan of the SSD.
To disable disk defragmentation:
- Open the search bar and type “Defragment and Optimize Drives.”
- Click on the application and select your SSD from the list.
- Click on “Optimize.”
Update firmware:
Regularly check for firmware updates from the manufacturer’s website. These updates can improve performance and address compatibility issues.
Maintenance Tips For The Wd Blue Sata Ssd:
To ensure the longevity and optimal performance of your WD Blue SATA SSD, consider the following maintenance tips:
- Regular backups: Regularly back up your data to an external storage device or cloud-based service to protect against data loss.
- Regular updates: Keep your operating system, drivers, and firmware up to date. Updates often include bug fixes and performance improvements.
- Avoid extreme temperatures: SSDs are sensitive to temperature extremes. Avoid exposing your SSD to excessive heat or cold.
- Avoid unnecessary writes: Minimize unnecessary writes to your SSD to prolong its lifespan. Avoid running resource-intensive applications or excessive file transfers.
By troubleshooting common installation issues, optimizing performance, and following maintenance tips, you can ensure a smooth and efficient experience with your WD Blue SATA SSD. Enjoy the improved speed and storage capabilities it brings to your system!
FAQ Of How To Install Wd Blue Sata Ssd
How To Install Sata Ssd?
To install a SATA SSD, follow these steps:
1. Power off your PC and disconnect all cables.
2. Locate the SATA ports on your motherboard.
3. Insert the SSD into an available SATA port and secure it with screws.
4. Connect the SATA data cable to the SSD and the motherboard.
5. Connect the SATA power cable from your power supply to the SSD.
6. Reconnect all cables and power on your PC.
7. Format and partition the SSD in your operating system settings.
8. Your SATA SSD is now installed and ready to use.
Is It Easy To Install Sata Ssd?
Yes, installing a SATA SSD is easy and straightforward.
How Do I Connect My Wd Hard Drive To My Computer?
To connect your WD hard drive to your computer, follow these steps:
1. First, locate the USB port on your computer.
2. Take the USB cable that came with your WD hard drive and connect one end to the hard drive.
3. Insert the other end of the USB cable into the USB port on your computer.
4. Wait for your computer to recognize the WD hard drive, which should appear as a new drive in File Explorer or Finder.
5. You can now access and transfer files to and from your WD hard drive. Remember to safely eject the WD hard drive before unplugging it from your computer to avoid any potential data loss.
Is Wd Blue Ssd Compatible With Laptop?
Yes, the WD Blue SSD is compatible with laptops.
How Do I Install Wd Blue Sata Ssd On My Computer?
To install Wd Blue Sata Ssd on your computer, you need to first open the computer case, locate an available SATA port, connect the SSD to the port using a SATA cable, and finally secure the SSD in the case using screws.
Conclusion
Installing the WD Blue SATA SSD is a simple and effective way to boost your computer’s performance. This guide has provided step-by-step instructions on how to safely install the SSD, including preparing your system, physically installing the hardware, and configuring it for optimal performance.
By following these instructions, you can significantly improve your computer’s speed and responsiveness, as well as increase its storage capacity.
Additionally, the WD Blue SATA SSD offers reliable and durable storage that is sure to meet your needs.
With its fast read and write speeds, you can enjoy faster boot times, quicker program launches, and smoother multitasking.
Don’t let a sluggish computer hold you back – upgrade to the WD Blue SATA SSD and unleash the full potential of your system.

Harold Williams is a senior writer and technical editor at Drives Hero with 20+ years of experience in IT administration. He specializes in storage systems, SSD reviews, and performance testing, bringing real-world insight to every guide.