How to Uninstall Samsung Portable Ssd Mac? 7 Steps!
Portable SSDs have become popular due to their compact size and fast data transfer speeds. However, there may come a time when you need to uninstall a Samsung Portable SSD from your Mac.
Whether you want to free up space or troubleshoot an issue, it’s important to know the proper uninstallation process.
We will walk you through the steps of uninstalling a Samsung Portable SSD from your Mac. By following these instructions, you will be able to remove the SSD quickly and efficiently.
Key Takeaway
Uninstalling Samsung Portable SSD on Mac: Quick Start
Tools Needed:
- Mac computer
- Samsung Portable SSD
Step 1: Close Applications
Ensure no applications or files from the Samsung Portable SSD are in use. Close them to prevent any potential issues during the uninstallation process.
Step 2: Eject Samsung Portable SSD
Locate the Samsung Portable SSD on your desktop. Right-click on its icon and select “Eject” to safely disconnect it from your Mac.
Step 3: Open Finder
Open the Finder on your Mac. Navigate to the “Applications” folder.
Step 4: Locate Samsung Portable SSD Software
Find the software related to the Samsung Portable SSD in the “Applications” folder. This could be the Samsung Portable SSD Software or any related applications.
Step 5: Move Software to Trash
Drag the Samsung Portable SSD software icon to the Trash. Alternatively, right-click and select “Move to Trash.”
Step 6: Empty Trash
Right-click on the Trash icon in the Dock and select “Empty Trash.” Confirm your action when prompted.
Step 7: Restart Your Mac (Optional)
For a clean removal, consider restarting your Mac to complete the uninstallation process.
By following these steps, you’ve ensured a clean removal, freeing up your system from SSD-related applications. If needed, restart your Mac for a seamless transition.
Your Samsung Portable SSD is now uninstalled and ready for any further actions or configurations you may require.
Backing Up Your Data Before Uninstallation
To ensure the safety of your data, it is important to back it up before uninstalling the Samsung Portable SSD from your Mac. This step will allow you to restore your files and prevent any loss of important information.
Importance Of Backing Up Your Samsung Portable Ssd Data On Mac
Here’s why you should prioritize backing up your Samsung Portable SSD data on Mac:
- Peace of mind: By having a backup of your data, you can remove the worry of unintentional data loss during the uninstallation process. Knowing that your files are safe and can be easily recovered brings peace of mind.
- Protection against hardware failure: Hard drives can fail unexpectedly. By creating a backup, you safeguard yourself against such hardware failures. If your Samsung Portable SSD encounters any issues, having a backup will help you quickly restore your data onto a new device.
- Protection against accidental deletion: Mistakes happen, and files can be deleted accidentally. Having a backup will allow you to retrieve your files in case they are inadvertently removed during the uninstallation process.
Different Backup Options For Secure Data Preservation
Consider these different backup methods to preserve your data securely:
- External hard drive: Connect an external hard drive to your Mac and copy your Samsung Portable SSD data onto it. This physical backup solution provides an additional layer of protection that you can easily access whenever needed.
- Cloud storage: Utilize popular cloud storage services like Dropbox, Google Drive, or iCloud to store a copy of your Samsung Portable SSD data online. This option allows for remote access to your files, offering convenience and security.
- Time Machine: Mac users can utilize the built-in Time Machine feature to automatically create backups of their Samsung Portable SSD data. Time Machine makes it easy to restore files or even revert to previous versions of documents.
Recommended Backup Software For Mac Users
For Mac users, certain backup software stands out in terms of reliability and ease of use.
Consider the following recommended backup software options:
- Carbon Copy Cloner: This software allows you to clone your Samsung Portable SSD onto another drive, creating an exact replica of your data. It offers advanced features and scheduling options for efficient backup management.
- SuperDuper! : SuperDuper! Is a user-friendly backup software that enables you to create bootable backups of your Samsung Portable SSD. It ensures that your backup is easily accessible in case you need to recover your system.
- Backblaze: Known for its simplicity, Backblaze offers unlimited cloud backup for Mac users. It provides continuous and automatic backups, ensuring that all your Samsung Portable SSD data is securely stored in the cloud.
Remember, backing up your Samsung Portable SSD data before uninstallation is essential for data preservation and peace of mind. Explore the different options available and choose the method that suits your needs best.
Accessing The Utility Software For Uninstallation
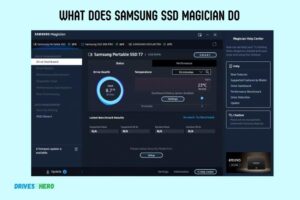
To uninstall the Samsung Portable SSD on your Mac, you can access the utility software and follow the simple uninstallation process.
Locating The Samsung Portable Ssd Software On Your Mac:
- Open Finder on your Mac by clicking on the magnifying glass icon located on the top right corner of your screen.
- Type “Samsung Portable SSD” in the search bar and press Enter.
- The search results will display the Samsung Portable SSD software application.
- Click on the application to open it.
- Once the Samsung Portable SSD software is open, you will see a menu bar at the top of your screen.
- Click on the “Samsung Portable SSD” menu option in the top left corner.
- A drop-down menu will appear. Select the “Preferences” option from the menu.
- In the Preferences window, navigate to the “General” tab.
- Under the General tab, you will find an option labeled “Uninstall.” Click on this option.
- A confirmation prompt will appear asking if you want to uninstall the Samsung Portable SSD software. Click “Uninstall” to proceed.
- Follow any additional prompts or instructions to complete the uninstallation process.
Remember, before uninstalling any software, it is essential to back up any important data or files associated with the application to prevent accidental data loss.
Checking For Remnants Of Samsung Portable Ssd On Your Mac
Discover how to completely remove any traces of Samsung Portable SSD from your Mac by following simple step-by-step instructions. Keep your system clean and optimized with this easy-to-follow guide.
Here’s how you can do it:
- Open the Finder application on your Mac.
- In the menu bar at the top of the screen, click on “Go.”
- Select “Go to Folder” from the drop-down menu.
- In the pop-up window, type “~/Library” (without the quotes) and click on the “Go” button.
Look for the following folders and files and delete them if found:
- Application Support/Samsung Portable SSD
- Caches/com.samsung.Samsung-Portable-SSD
- Preferences/com.samsung.Samsung-Portable-SSD.plist
- Containers/com.samsung.Samsung-Portable-SSD
- Return to the “Go” menu in the Finder and select “Go to Folder” again.
- This time, type “/Library” (without the quotes) and click on “Go.”
Search for the following folders and files and delete them if present:
- Application Support/Samsung Portable SSD
- Caches/com. Samsung.Samsung-Portable-SSD
- Preferences/com. Samsung.Samsung-Portable-SSD.plist
- LaunchAgents/com.samsung.SamsungPortableSSDMac.plist
- LaunchDaemons/com. Samsung.SamsungPortableSSDMac.plist
- Empty the Trash on your Mac to permanently delete the files.
By following these steps, you can ensure that any remaining files or folders related to the Samsung Portable SSD software are cleared from your Mac.
This will help you achieve complete removal of the software and driver, leaving your system free from any traces of the SSD device.
Conclusion
To successfully uninstall the Samsung Portable SSD on your Mac, follow the simple steps outlined in this blog post.
By taking the time to properly remove the SSD, you can ensure the process is completed safely and effectively. Remember to back up any important data before uninstalling to avoid any potential loss.
Once you have followed the steps, you can confidently disconnect and remove the Samsung Portable SSD from your Mac. Regularly uninstalling unnecessary software or hardware is essential for maintaining the optimal performance of your computer.
Whether you are upgrading to a new SSD or simply no longer require the use of the Samsung Portable SSD, this uninstallation guide will assist you in the process.


