How to Use Samsung T7 Ssd on Mac? 7 Steps!
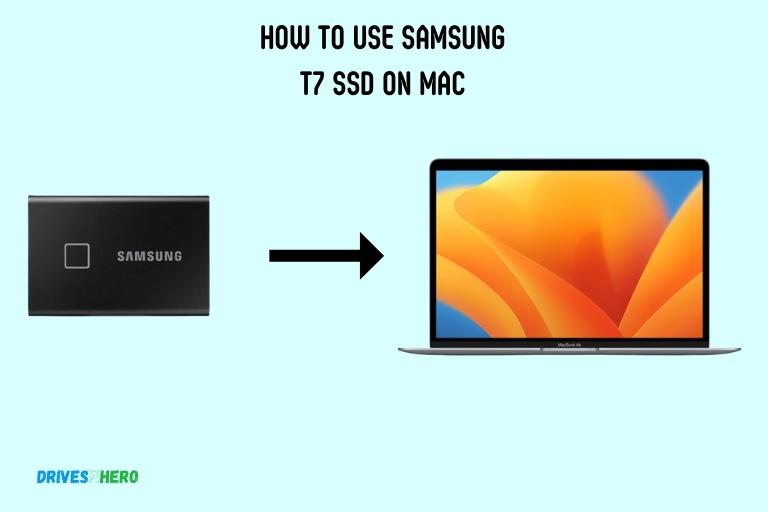
To use Samsung T7 SSD on Mac, simply connect it to your computer and format it to a compatible file system such as APFS or macOS Extended.
Navigating through the seamless integration of Samsung T7 SSD with your Mac can greatly enhance your storage and data transfer capabilities.
We’ll walk you through the straightforward process of setting up and utilizing the Samsung T7 SSD on your Mac, ensuring optimal performance and efficiency for your external storage needs.
Key Takeaway
Guide to Using Samsung T7 SSD on Mac
Step 1: Connect the Samsung T7 SSD to your Mac
Plug the USB-C cable into the Samsung T7 SSD and connect the other end to an available USB-C or Thunderbolt 3 port on your Mac.
Step 2: Power On the Samsung T7 SSD
If your SSD has a power button, press it to turn on the device. Some models may not have a separate power button and will automatically power on when connected.
Step 3: Check for Recognition
Once connected, check if your Mac recognizes the Samsung T7 SSD. You can find this information in the “Finder” under the “Devices” section. If the SSD is recognized, you’ll see it listed there.
Step 4: Format the Samsung T7 SSD (if needed)
If the Samsung T7 SSD is not formatted for macOS, you may need to format it. Open “Disk Utility” (you can find it using Spotlight with Command + Space and typing “Disk Utility”). Locate your Samsung T7 SSD in the left sidebar, select it, and click “Erase.” Choose the appropriate format (usually “ExFAT” for cross-platform compatibility) and click “Erase” to format the SSD.
Step 5: Transfer or Backup Data
Now that your Samsung T7 SSD is ready, you can transfer files to it or use it for backup purposes. Simply drag and drop files or use Time Machine for automated backups.
Step 6: Safely Eject the Samsung T7 SSD
Before disconnecting the SSD, make sure to eject it safely to avoid data corruption. Right-click on the SSD icon in the Finder and select “Eject” or drag the icon to the trash.
Step 7: Disconnect the Samsung T7 SSD
Once ejected, unplug the USB-C cable from your Mac and the Samsung T7 SSD.
Following these steps ensures a smooth and safe use of your Samsung T7 SSD with your Mac, providing fast and reliable external storage.
Formatting The Samsung T7 Ssd For Mac
Learn how to format your Samsung T7 SSD for use on your Mac with this simple step-by-step guide. Maximize your storage capacity and enhance your Mac experience effortlessly.
Understanding File System Compatibility
The file system compatibility of your Samsung T7 SSD is crucial to ensure seamless usage with your Mac.
Here are a few key points to understand:
- The Samsung T7 SSD is compatible with both Mac and Windows operating systems.
- Mac OS X version 10.10 or later is required to use the Samsung T7 SSD on your Mac.
- The T7 SSD utilizes the exFAT file system, which is advantageous for cross-platform compatibility as it can be read and written by both Mac and Windows systems.
- The exFAT file system allows for the storage of large files and folders, making it suitable for various purposes like storing multimedia files, documents, and backups.
Formatting The Ssd Using Disk Utility
To make the Samsung T7 SSD compatible with your Mac, you need to format it using Disk Utility.
Follow these steps for a smooth formatting process:
- Connect the Samsung T7 SSD to your Mac using the USB Type-C cable provided.
- Open Disk Utility by going to Applications > Utilities > Disk Utility.
- From the list of available drives and volumes, select the Samsung T7 SSD.
- Click on the “Erase” button located at the top of the Disk Utility window.
- A dialog box will appear. Choose a suitable name for your SSD by entering it in the “Name” field.
- Select the appropriate file system type from the dropdown menu. For Mac compatibility, choose “exFAT.”
Setting The Name And Scheme For The SSD
Customizing the name and scheme of your Samsung T7 SSD during the formatting process adds a personal touch.
Follow these steps to set the name and scheme:
- After selecting the Samsung T7 SSD in Disk Utility, click on the “Erase” button.
- In the dialog box that appears, enter a distinctive name for your SSD in the “Name” field.
- Next, select the appropriate scheme. If you primarily use Intel-based Macs, choose the “GUID Partition Map” scheme. For compatibility with older Macs or Windows-based systems, opt for the “Master Boot Record” scheme.
- Double-check that all the formatting settings are as desired, including the file system type and scheme, before clicking the “Erase” button to confirm the process.
By understanding file system compatibility, formatting the SSD using Disk Utility, choosing the suitable file system type, and setting a personalized name and scheme, you can seamlessly utilize your Samsung T7 SSD on your Mac without any compatibility issues.
Ensuring Compatibility Between Samsung T7 Ssd And Mac
Ensure seamless compatibility between your Samsung T7 SSD and Mac by following these simple steps. Use the drive for data transfer and storage on your Mac without any hassle, offering high-speed performance and reliable functionality.
Checking Mac System Requirements:
To ensure that your Mac is compatible with the Samsung T7 SSD, follow these steps:
- Check the system requirements: Make sure your Mac meets the minimum system requirements to use the Samsung T7 SSD. These requirements typically include the operating system version and available USB port types.
- Verify USB port compatibility: Check if your Mac has a USB-C or Thunderbolt 3 port, as these are the recommended ports for optimal performance. You may need to use an adapter if your Mac has different port types.
- Consider available storage space: Ensure that your Mac has sufficient storage space to store and transfer files to the Samsung T7 SSD. It is recommended to have at least double the amount of available space on your Mac compared to the size of the Samsung T7 SSD.
Updating Firmware For Samsung T7 Ssd And Mac:
To ensure smooth compatibility between the Samsung T7 SSD and your Mac, it is important to keep the firmware updated.
Follow these steps to update the firmware:
- Visit the Samsung Support website: Go to the official Samsung support website and locate the firmware update section.
- Download the firmware update tool: Download the firmware update tool specific to the Samsung T7 SSD model you own. Install it on your Mac.
- Connect the Samsung T7 SSD: Connect your Samsung T7 SSD to your Mac using the appropriate USB cable.
- Run the firmware update tool: Open the firmware update tool and follow the on-screen instructions to update the firmware of your Samsung T7 SSD.
- Update Mac firmware if needed: Check for any available firmware updates for your Mac and install them if necessary. Keeping both the Samsung T7 SSD and your Mac firmware up to date is vital for compatibility and optimal performance.
By following these steps and ensuring compatibility between the Samsung T7 SSD and your Mac, you can enjoy a seamless experience with increased storage capacity and lightning-fast data transfer speeds.
Resolving Connection Issues With The Samsung T7 Ssd
Resolve connection issues with the Samsung T7 SSD on your Mac effortlessly. Boost your productivity by following these easy steps to ensure seamless usage of the Samsung T7 SSD on your Mac device.
Troubleshooting Usb Connection Problems:
- Check USB port functionality on your Mac
- Try different USB ports to rule out port-related issues
- Restart your Mac to resolve software glitches
- Connect the Samsung T7 SSD to a different Mac or computer to isolate the problem
- Update the Samsung T7 SSD firmware from the official Samsung website
- Ensure your Mac’s operating system is up to date
- Disconnect other USB devices that may interfere with the SSD connection
- Reset the System Management Controller (SMC) on your Mac
- Scan your Mac for software conflicts or malware
- Contact Samsung customer support if issues persist
Checking Cable Compatibility and Integrity:
- Ensure that you are using the original USB cable that came with the Samsung T7 SSD. Using a different cable can sometimes lead to compatibility issues.
- Inspect the USB cable for any physical damages, such as frayed wires or bent connectors. These can cause connection problems and may require a replacement cable.
- Try using a different USB cable that is known to be compatible with the Samsung T7 SSD. This will help isolate whether the cable is the issue or not.
- If possible, test the USB cable with another device to ensure its functionality. This will help confirm if the cable itself is causing the connection problem.
By following these troubleshooting steps and checking the cable compatibility and integrity, you can resolve connection issues with the Samsung T7 SSD on your Mac.
Remember to try these steps one at a time and test the connection after each step to identify the specific cause of the problem.
Conclusion
Using the Samsung T7 SSD on your Mac can greatly enhance your storage and performance capabilities. With its lightning-fast speeds and compact design, this SSD is the perfect companion for any Mac user.
The simple setup process ensures that even those with limited technical knowledge can utilize the T7 SSD effectively.
The security features, such as password protection and encryption, provide peace of mind when it comes to protecting your valuable data.
Whether you need to store large files, speed up file transfers, or simply expand your storage options, the Samsung T7 SSD is a reliable and efficient solution.

