How to Install a 2.5-Inch SSD in a Desktop PC (Beginner Guide with BIOS Settings)
Installing a 2.5-inch SSD in a desktop PC is one of the most satisfying upgrades you can do yourself. It’s quick, it’s affordable, and the performance improvement over a traditional hard drive is dramatic. If you’ve never opened up a PC case before, don’t worry. This guide walks you through every step, from physically mounting the drive to making sure Windows actually recognizes it.
I’ve helped dozens of first-time builders through this exact process, and the most common stumbling point isn’t the hardware. It’s the software side: BIOS settings and disk formatting. We’ll cover all of it below, so you can go from unboxing to a fully working SSD in under 30 minutes.
What You’ll Need Before You Start
Before you crack open your PC case, gather everything on this short list. Missing a cable or adapter mid-install is frustrating, and completely avoidable.
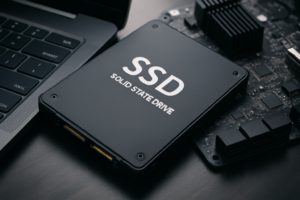
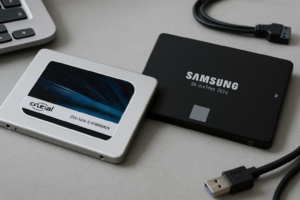
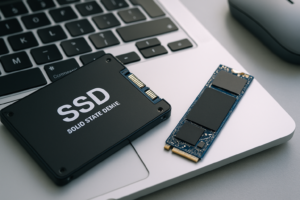
- A 2.5-inch SATA SSD. The Samsung 870 EVO and Crucial MX500 are both excellent choices for reliability and speed. If you’re unsure about capacity, our guide on choosing between 1TB and 2TB SSDs can help you decide.
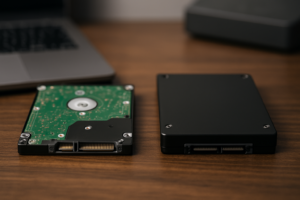
- A 2.5-inch to 3.5-inch mounting bracket. Desktop cases have 3.5-inch drive bays designed for traditional hard drives. Your slim SSD won’t fit without an adapter bracket.
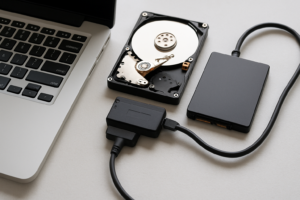
- A SATA data cable. This flat, L-shaped cable connects your SSD to the motherboard. Many motherboards include a couple in the box, but if you’ve lost yours, they’re easy to find.
- Access to a SATA power connector. This comes from your power supply (PSU) and is a wider, flat connector. Most PSUs have several unused ones dangling inside the case.
- A Phillips-head screwdriver. That’s it for tools.

Sabrent 2.5-Inch to 3.5-Inch SSD Mounting Bracket Kit
Includes mounting screws and fits standard desktop drive bays perfectly. A must-have for 2.5-inch SSD installations.
Not sure whether a 2.5-inch SATA SSD or an M.2 drive is the better fit for your build? Check out our M.2 vs 2.5-inch SSD form factor comparison to understand the differences before you buy.
Step 1: Mount the SSD in Your Desktop Case
Power down your PC completely and unplug the power cable from the wall. Press the power button once while unplugged to drain any residual charge. Then remove the side panel of your case (usually held on by thumbscrews on the back).
Take your 2.5-inch SSD and screw it into the mounting bracket using the screws that came with the bracket kit. The SSD’s connector end should be accessible and not blocked by the bracket frame. Most brackets use four small screws on the bottom to secure the drive.
Slide the bracket into an empty 3.5-inch drive bay in your case. Some cases have tool-less drive bay mechanisms with clips or rails, while others require you to screw the bracket directly into the bay. Either way, make sure it’s snug and won’t rattle around.
Tip: Some modern cases actually include dedicated 2.5-inch mounting points behind the motherboard tray or on the case floor. Check your case manual before buying a bracket. You might not need one.
Step 2: Connect the SATA Data and Power Cables
Your SSD has two connectors on one end, sitting side by side. The smaller one is the SATA data port, and the longer one is the SATA power port. They’re shaped so you can only plug them in one way, which makes this part easy.
SATA data cable: Plug one end into the SSD’s data port and the other end into any available SATA port on your motherboard. These ports are usually clustered together along the bottom or right edge of the board, labeled SATA0, SATA1, SATA2, and so on. If you want the best performance and this will be your boot drive, use the lowest-numbered SATA port available (SATA0 or SATA1), as these are typically connected to the chipset’s fastest controller.
SATA power cable: Find an unused SATA power connector coming from your power supply. It’s the wider, flat connector with a distinctive L-shape. Plug it into the SSD’s power port. If your PSU is modular and you don’t see any free SATA power connectors, you may need to attach an additional SATA power cable to the PSU itself.
If you’re planning to run this SSD alongside your existing hard drive, our guide on how to use an SSD and HDD together in one PC covers the ideal configuration for speed and storage capacity.
Step 3: Verify Detection in BIOS
Close up your case (or leave the panel off for now if you want to double-check connections), plug the power cable back in, and boot your PC. Immediately start tapping the Delete or F2 key to enter BIOS. The exact key depends on your motherboard manufacturer. ASUS and MSI typically use Delete, while Gigabyte and ASRock also use Delete. Some HP and Dell prebuilts use F10 or F2.
Once inside BIOS, look for a section labeled Storage Configuration, SATA Configuration, or simply Boot. You should see your new SSD listed by its model name (for example, “Samsung SSD 870 EVO 1TB”). If you see it, your physical installation was successful.
What if the SSD doesn’t show up in BIOS?
First, re-check both cables. A SATA data cable that isn’t fully clicked in is the number one cause of detection failures. Second, try a different SATA port on the motherboard. A dead port is rare but possible. Third, make sure the SATA controller mode is set to AHCI in BIOS, not IDE or RAID (unless you specifically need RAID). AHCI is the correct mode for SSD performance and is required for features like TRIM.
Setting the Boot Order
If you’re installing this SSD as your new boot drive (to install Windows on it, for example), go to the Boot Priority section in BIOS and move the SSD to the top of the boot order. If it’s a secondary storage drive, you can leave the boot order as-is. Save your changes and exit BIOS (usually F10).
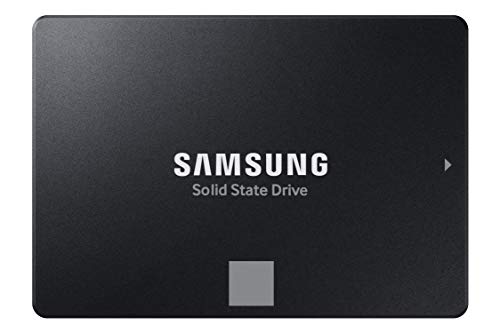
Samsung 870 EVO 1TB SATA SSD
Consistently top-performing 2.5-inch SATA SSD with excellent endurance ratings and a 5-year warranty.
Step 4: Initialize and Format the SSD in Windows
Here’s where many first-time builders get stuck. You’ve installed the SSD, BIOS sees it, but when you open File Explorer in Windows, the drive is nowhere to be found. This is completely normal. A brand-new SSD needs to be initialized and formatted before Windows will assign it a drive letter.
- Press Windows + X and select Disk Management.
- A popup should appear asking you to initialize the new disk. Select GPT (GUID Partition Table) as the partition style. GPT is the modern standard and works with UEFI, which your system almost certainly uses.
- Once initialized, you’ll see the drive listed with “Unallocated” space. Right-click on the unallocated space and select New Simple Volume.
- Follow the wizard. Accept the default size (full capacity), assign a drive letter (D:, E:, or whatever’s available), and format it as NTFS with a default allocation unit size.
- Click Finish. Your SSD will now appear in File Explorer, ready to use.
The entire formatting process takes less than a minute for an SSD. If you’re migrating your operating system from an old drive to this new SSD, you’ll want to clone the drive instead. Our walkthrough on how to clone your hard drive without losing data covers that process in detail.
Keeping Your New SSD Healthy Long-Term
Once your SSD is installed and running, a little maintenance goes a long way. Make sure Windows has TRIM enabled (it should be by default on any modern Windows install with AHCI mode active). Avoid defragmenting your SSD, as that’s a hard drive maintenance task that actually adds unnecessary wear to solid-state storage. Windows 10 and 11 are smart enough to run the correct optimization (TRIM) automatically on SSDs.
Over time, even SSDs can experience performance degradation if they’re kept nearly full or if TRIM isn’t functioning properly. If you notice your speeds dropping after several months of use, our article on why your SSD slows down over time and how to fix it explains exactly what’s happening and how to restore performance.
And whenever you eventually retire or sell this SSD, make sure you securely wipe it first. A quick format doesn’t actually remove your data.
Frequently Asked Questions
Can I install a 2.5-inch SSD without a mounting bracket?
Technically, yes. Some people just let the SSD sit on the bottom of the case or use double-sided tape. Since SSDs have no moving parts, vibration isn’t a concern like it is with hard drives. But a proper mounting bracket keeps things tidy and prevents the drive from shifting and potentially disconnecting a cable. For a few dollars, it’s worth doing right.
Do I need to install drivers for my new SSD?
No. Windows 10 and 11 include native AHCI/SATA drivers that work with every major SSD brand out of the box. You don’t need to download anything from Samsung, Crucial, or Western Digital for basic operation. Some manufacturers offer optional management software (like Samsung Magician
James Kennedy is a writer and product researcher at Drives Hero with a background in IT administration and consulting. He has hands-on experience with storage, networking, and system performance, and regularly improves and optimizes his home networking setup.