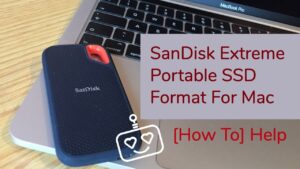
Make Your Own Portable Ssd- Easy Steps!
Creating your own portable SSD is a straightforward task that involves acquiring the right SSD and an appropriate enclosure, assembling the two, and finally setting up the drive on your computer.
The steps are easy to follow and require minimal technical skills.
Portable SSDs are a great tool for people who need extra storage space. They are versatile and offer high-speed data transfer, making them ideal for backing up important files, storing large amounts of data, or transferring files between computers.
Creating your own portable SSD not only saves you money but also allows you to customize it based on your storage needs.
Creating your own portable SSD is not only cost-effective but also allows you to customize your storage solution.
By choosing your own SSD and enclosure, you can ensure that the portable SSD meets your exact needs.
Whether you need a high-speed SSD for gaming or a large-capacity SSD for storing movies and photos, creating your own portable SSD gives you the power
9 Steps: Making Your Own Portable SSD
| Step Number | Description |
|---|---|
| 1 | Choose the Right SSD |
| 2 | Purchase a Suitable Enclosure |
| 3 | Assemble SSD into the Enclosure |
| 4 | Connect the Assembled SSD to the Computer |
| 5 | Format the SSD |
| 6 | Create a Partition on the SSD |
| 7 | Test the SSD for Functionality |
| 8 | Transfer Data to the SSD (Optional) |
| 9 | Eject the SSD Safely |
Key Takeaway

Five Facts About: Making Your Own Portable SSD
Understanding Portable Ssds
Portable SSDs offer a convenient way to store and transfer data on the go. With these easy steps, you can create your own portable SSD, giving you the freedom to carry your important files wherever you go.
Portable solid-state drives (SSDs) have revolutionized the way we store and transfer data.
With their compact design, high-speed performance, and reliable storage capabilities, portable SSDs have become an essential tool for professionals, gamers, and anyone seeking a fast and secure storage solution.
In this section, we will explore the benefits of using portable SSDs and provide an introduction to this cutting-edge technology.
Benefits Of Using Portable Ssds:
Lightning-fast data transfer:
Portable SSDs utilize flash memory technology, allowing for incredibly fast data transfer speeds.
With read and write speeds that can surpass traditional hard drives, portable SSDs enable you to quickly transfer large files, back up data, or work on projects without any delay.
Enhanced durability:
Unlike traditional hard drives, portable SSDs have no moving parts, making them highly resistant to shock, vibrations, and drops.
This durability ensures that your data remains intact even in demanding environments, making portable SSDs ideal for those who are constantly on the go.
Compact and lightweight design:
Designed to fit in your pocket or bag, portable SSDs are incredibly compact and lightweight.
You can carry your valuable data with ease, whether you’re traveling, attending meetings, or working remotely.
The slim design doesn’t compromise storage capacity, allowing you to have your important files and documents always within reach.
Secure data storage:
Portable SSDs often come equipped with encryption options, adding an extra layer of security to your data.
With password protection, you can ensure that your sensitive files remain safe from unauthorized access.
This feature is particularly important for professionals and individuals dealing with confidential information.
Versatile compatibility:
Portable SSDs are compatible with various operating systems and devices. Whether you’re using a Windows, Mac, or Linux-based computer, you can easily connect and access your data without any compatibility issues.
Additionally, portable SSDs support USB connectivity, making them compatible with laptops, desktops, gaming consoles, and even some smartphones.
Portable SSDs offer an array of benefits, including lightning-fast data transfer speeds, enhanced durability, compact design, secure data storage, and versatile compatibility.
Embrace this innovative technology to improve your data management and enjoy the convenience of portable storage wherever you go.
Why Should You Make Your Own Portable Ssd?
Creating your own portable SSD is a smart choice for those seeking reliability and flexibility.
With easy-to-follow steps, you can customize your storage solution to fit your specific needs, all while enjoying the benefits of increased speed and convenience.
Advantages Of Creating Your Own Portable Ssd:
Cost-effective solution:
Making your own portable SSD can save you money compared to buying a pre-made one.
You have control over the components you choose, allowing you to select the best quality at a lower cost.
Customizability:
By creating your own portable SSD, you can tailor it to your specific needs and preferences.
You have the freedom to choose the storage capacity and performance specifications that align with your requirements.
Upgradability:
One of the significant advantages of making your own portable SSD is the ability to upgrade it in the future.
As technology advances and your needs change, you can easily replace or add components to enhance the performance and storage capacity.
Easy maintenance:
Since you assembled the portable SSD by yourself, you have a better understanding of its components and layout.
This familiarity simplifies maintenance and troubleshooting, allowing you to easily detect and resolve any issues that may arise.
Knowledge and skill development:
Creating your own portable SSD provides an excellent opportunity to learn about computer hardware and gain valuable skills.
You can broaden your understanding of how storage devices work, and this knowledge can be applied to other tech-related projects.
Making your own portable SSD offers several advantages, including cost-effectiveness, customizability, upgradability, easy maintenance, and knowledge and skill development.
By taking control of the assembly process, you can build a portable SSD that suits your needs perfectly.
Things You’Ll Need
Looking to make your own portable SSD? Here are the essential items you’ll need to get started.
To make your own portable SSD, you will need a few essential components and tools.
Here is a list of everything you will need to get started:
- Portable SSD enclosure: This is the external casing that will hold your SSD drive.
- Solid-state drive (SSD): Choose a high-capacity SSD based on your storage needs and budget.
- Screwdriver: A small screwdriver will be needed to open the enclosure and secure the SSD inside.
- USB 3.0 cable: This cable will connect the portable SSD to your computer or device.
- Operating system: Make sure your computer has a compatible operating system to support the portable SSD.
List Of Necessary Components
- Portable SSD enclosure
- Solid-state drive (SSD)
- Screwdriver
- USB 3.0 cable
- Operating system
Tools Required For The Process
To successfully create your own portable SSD, you will need the following tools:
- Portable SSD enclosure: This is the housing for your SSD drive and will keep it safe and secure.
- A solid-state drive (SSD): Choose an SSD with the desired storage capacity suitable for your needs.
- Screwdriver: You will need a small screwdriver to open the enclosure and fasten the SSD securely.
- USB 3.0 cable: This cable is essential to connect your portable SSD to your computer or device.
- Operating system: Ensure that your computer has a compatible operating system to support the portable SSD.
Creating your own portable SSD can bring you the convenience of extra storage and the freedom to carry your files with ease.
By having the right components and tools, you can embark on this DIY project confidently. Let’s explore how to assemble your portable SSD step by step in the next section.
Step-By-Step Guide To Making Your Own Portable Ssd
Learn how to create your own portable SSD with this simple step-by-step guide. Discover the easy steps to assembling your own high-performance storage device, perfect for on-the-go data storage and transfer.
Overview Of The Process
Making your own portable SSD can be a great way to expand your storage capacity on the go.
With a few simple steps, you can create a custom portable SSD that suits your needs. This guide will walk you through the process and help you get started.
First, you need to ensure compatibility with your system. Check the specifications and requirements of your device to make sure it supports portable SSDs. This will save you time and effort in the long run.
Once you’ve confirmed compatibility, it’s time to choose the right SSD drive for your needs.
Consider factors like storage capacity, speed, and durability. Finding the perfect fit is crucial to maximize your satisfaction.
After selecting the SSD drive, you can proceed with the physical assembly of your portable SSD.
Follow the manufacturer’s instructions carefully and make sure to handle the components with care.
Finally, you’ll need to format and configure your new portable SSD. Connect it to your system and follow the steps to initialize and format the drive. This will ensure optimal performance and usability.
Ensuring Compatibility With Your System
Before embarking on the journey of making your own portable SSD, it is crucial to check if your system supports this type of storage device.
Here’s how to ensure compatibility:
- Review the specifications and requirements of your system, paying attention to supported interfaces like USB or Thunderbolt.
- Determine the available physical space to accommodate your portable SSD, considering the dimensions of the drive and available ports.
- Check for operating system compatibility, as different systems may have specific requirements.
- Ensuring compatibility will save you from purchasing components that may not work with your system and prevent any potential issues down the road.
Choosing The Right Ssd Drive For Your Needs
Choosing the appropriate SSD drive is crucial to maximize the benefits of your custom portable SSD.
Consider the following factors before making a decision:
- Storage capacity: Determine how much storage you require based on your needs. Consider both present and future usage to avoid running out of space quickly.
- Speed: Look for SSD drives with faster read and write speeds to enhance performance and transfer large files efficiently.
- Durability: Assess the durability of the SSD drive, especially if you plan to use your portable SSD in rugged environments or during travel.
- Price: Set a reasonable budget and compare different options within your price range to find the best value for your money.
- By carefully evaluating these factors, you can select the right SSD drive that meets your requirements for storage, performance, durability, and affordability.
With this step-by-step guide, you now have a clear understanding of the process of making your own portable SSD.
Ensuring compatibility with your system and choosing the right SSD drive are key steps to achieve optimal results. So, are you ready to embark on your DIY portable SSD adventure?
Let’s get started!
Preparing The Ssd Drive
Discover how to easily prepare your own portable SSD drive with simple steps. Create your personalized storage solution that is efficient, convenient, and perfect for your data needs.
Before you can make your own portable SSD, it’s important to properly prepare the SSD drive.
This involves formatting the drive and creating partitions for different purposes. Follow these easy steps to get your SSD drive ready:
Formatting The Ssd Drive
- Connect the SSD drive to your computer using an external enclosure or adapter.
- Open the Disk Management tool on your computer by pressing the Windows key + X and selecting “Disk Management” from the menu.
- Locate your SSD drive in the list of available disks. It will be labeled with the drive letter assigned to it.
- Right-click on the SSD drive and select “Format” from the context menu.
- Choose the file system you want to use for the SSD drive. NTFS is recommended for compatibility with both Windows and Mac systems.
- Give your SSD drive a name or label that identifies it easily.
- Check the option to perform a quick format if you want to save time. Note that a full format will thoroughly check the drive for errors.
- Click on the “Format” button to begin the formatting process. Be patient as it may take a few minutes to complete.
Creating Partitions For Different Purposes
- Open the Disk Management tool once again.
- Right-click on the unallocated space of your SSD drive and select “New Simple Volume” from the context menu.
- The New Simple Volume Wizard will guide you through the process. Click “Next” to proceed.
- Specify the desired size for the partition. If you want to create multiple partitions, allocate the space accordingly.
- Assign a drive letter or path to the partition.
- Choose the file system for the partition. Again, NTFS is recommended for compatibility.
- Format the partition by selecting the “Format this volume with the following settings” option. Choose a name or label for the partition as well.
- Click “Finish” to create the partition.
Now that you have successfully formatted the SSD drive and created partitions, you are ready to proceed with making your own portable SSD. Stay tuned for the next steps in our guide.
Assembling The Portable Ssd
Learn how to effortlessly assemble your own portable SSD with these easy steps. With concise instructions and a user-friendly approach, you can create your personalized storage device in no time.
Now that you have all the necessary components ready, it’s time to assemble your portable SSD.
Follow these easy steps to get your SSD up and running:
Connecting The Ssd To The Enclosure:
- Start by opening the enclosure casing. This usually involves removing screws or sliding open panels. Refer to the enclosure’s user manual for specific instructions.
- Once the enclosure is open, locate the SATA connector inside. It will typically have a data and power connector.
- Take your SSD and align the SATA connectors on the SSD with the ones in the enclosure. Make sure they are firmly connected.
- Gently push the SSD into the enclosure until it is fully inserted. Ensure that it is aligned properly and secure.
Securing The Ssd Inside The Enclosure:
- After connecting the SSD to the enclosure, secure it in place. Most enclosures will have screws or brackets to hold the SSD securely.
- Take the screws provided with the enclosure and use them to mount the SSD firmly. Make sure to tighten them enough to prevent any movement or vibrations.
- Double-check that the SSD is securely fastened inside the enclosure. This step is crucial to ensuring the longevity and stability of your portable SSD.
Testing The Connectivity:
- With the SSD securely attached to the enclosure, close the casing and tighten any screws or panels you removed earlier.
- Connect the USB cable or other appropriate connection cable provided with the enclosure to your computer or device.
- Power on your computer or device and make sure it recognizes the newly connected SSD. Your operating system should detect it as an external drive.
- Open your file explorer or disk management utility to verify that the SSD is visible and accessible on your device.
- Copy a small file to the SSD and confirm that the transfer completes successfully. This will ensure the SSD’s connectivity is working as expected.
Congratulations! You have successfully assembled your portable SSD. Now you can enjoy the benefits of carrying your data around with ease, whether you’re a photographer, videographer, or just a regular user.
It’s time to take control of your data storage and enjoy the flexibility of a portable SSD.
Configuring Your Portable Ssd
Learn how to easily configure your own portable SSD with just a few simple steps. Create your personalized portable storage solution without any hassle or technical expertise.
Installing necessary drivers and software:
To get started, ensure that you have all the necessary drivers and software for your portable SSD.
Follow these steps to install them:
- Connect your portable SSD to your computer using the provided USB cable.
- Visit the manufacturer’s website and navigate to the support or downloads section.
- Locate the specific driver and software files for your portable SSD model.
- Download the files and double-click on the installation file to begin the installation process.
- Follow the on-screen instructions to complete the installation.
Customizing settings for optimal performance:
Once you’ve installed the necessary drivers and software, it’s time to customize the settings of your portable SSD to ensure optimal performance.
Consider the following steps:
- Open the software application that comes with your portable SSD.
- Look for a settings or preferences option within the application and click on it.
- Explore the available settings and options that allow you to customize the performance of your portable SSD.
- Adjust settings such as power management, sleep mode, and error correction to match your specific needs and requirements.
- Make sure to save any changes you make to the settings before closing the application.
By following these steps, you can easily configure your portable SSD by installing the necessary drivers and software and customizing the settings for optimal performance.
Happy configuring!
Tips For Maintaining Your Portable Ssd
Looking to make your own portable SSD? Follow these easy steps to create your own device for convenient storage and transfer of files.
With a few simple tools and materials, you can have a portable SSD customized to your needs.
A portable SSD is a handy device that offers high-speed data transfer and ample storage capacity.
To ensure its longevity and optimal performance, it is essential to follow some maintenance practices.
Here are some tips to help you maintain your portable SSD:
Backup And Data Management Strategies:
Regularly back up your data:
Make it a habit to create backups of your important files and documents. This will safeguard your data in case of any unforeseen circumstances like device failure or accidental deletion.
Utilize cloud storage:
Consider utilizing cloud storage services like Google Drive or Dropbox to store copies of your important files.
This way, even if your portable SSD gets damaged or lost, you can still access your data from any device with an internet connection.
Organize your files:
Maintain a well-organized file structure on your portable SSD. Categorize your files into folders and make use of proper naming conventions. This will help you locate specific files easily and avoid clutter.
Protecting The Ssd From Physical Damage:
Invest in a sturdy carrying case:
Purchase a durable carrying case or protective sleeve for your portable SSD. This will safeguard it from scratches, accidental drops, and other physical damages when you are traveling or not using it.
Handle with care:
Always handle your portable SSD with care. Avoid exposing it to extreme temperatures, moisture, or magnetic fields, as these can damage the device and compromise its data storage.
Safely eject the SSD:
Before removing your portable SSD from the USB port, ensure that you safely eject it from your computer. This helps prevent data corruption and ensures smooth functioning of the device.
Avoid overloading the SSD:
While portable SSDs offer generous storage capacity, it is advisable not to overload them with unnecessary files and applications. This can affect the device’s performance and slow down data transfer speeds.
By following these tips, you can prolong the life of your portable SSD and ensure the safety of your valuable data.
Regular backups, efficient data management, and careful handling of the device are crucial to maintain its performance and reliability.
Take the necessary precautions to protect your SSD from physical damage, and you can enjoy seamless data access wherever you go.
Troubleshooting Common Issues
Looking to troubleshoot common issues with your portable SSD? Check out these easy steps to make your own portable SSD and solve any problems you may experience along the way.
Discover how to create a personalized solution that is portable and convenient for your needs.
Whether you’re a tech enthusiast or just looking to expand your portable storage options, making your own portable SSD can be a rewarding project.
In this section, we’ll cover some common issues you might encounter during the process and how to troubleshoot them effectively.
Dealing With Connectivity Problems
Connectivity issues can be frustrating, especially when you’re in the middle of transferring important data.
Here are some troubleshooting steps you can take to address these problems:
- Check your cables and connections: Ensure that all cables are securely plugged into their respective ports. Sometimes, loose connections can result in poor or no connectivity.
- Swap the USB port: If you’re experiencing connectivity issues, try plugging your portable SSD into a different USB port. It could be that the port you’re using is faulty or not providing enough power.
- Update your drivers: Outdated drivers can sometimes lead to connection problems. Visit the manufacturer’s website and download the latest drivers for your portable SSD.
- Restart your computer: A simple restart can often resolve connectivity issues. This allows for a fresh start, clearing any temporary glitches that may be causing the problem.
Recovering Lost Data
Losing important data can be a nightmare scenario, but there are steps you can take to retrieve it.
Here are a few methods for data recovery:
Use data recovery software:
There are several reliable data recovery software options available that can scan your portable SSD and recover lost files.
Look for software that is compatible with your operating system and follow the instructions carefully.
Consult a professional:
If you’re unable to recover the data on your own or if your portable SSD has physical damage, it’s best to seek professional help.
Data recovery experts have specialized tools and techniques to retrieve data from damaged storage devices.
Backup your data regularly:
Prevention is better than cure when it comes to data loss. Make it a habit to back up your important files regularly to minimize the risk of permanent data loss.
Remember, addressing connectivity problems and recovering lost data are common challenges that can be resolved with patience and the right tools.
By following these troubleshooting steps and taking preventive measures, you can ensure a smooth experience with your DIY portable SSD.
FAQ About Make Your Own Portable Ssd
What Tools And Materials Do I Need to Make My Own Portable Ssd ?
Tools: screwdriver; Materials: a USB 3.0 enclosure, an SSD drive, mounting screws.
How Much Time Will It Take Me to Complete the Project ?
The time it will take to complete the project depends on the complexity of the project and how much effort you are willing to put into it.
Are There Any Risks Or Dangers Associated With Making a Portable Ssd ?
Yes, there are risks and dangers associated with making a portable SSD.
Some of these include data loss through accidental damage or corruption, physical theft of the device, malware infection due to lack of proper security measures, and potential overheating due to inadequate cooling.
Is This an Expensive Project to Undertake ?
It depends on the scope of the project.
Conclusion
Creating your own portable SSD is not as complicated as it may seem. By following these easy steps, you can have your own portable storage solution that is both convenient and efficient.
First, gather all the necessary materials and tools.
Next, carefully assemble the SSD by connecting the drive to the enclosure. Make sure to secure everything properly.
After that, install the operating system of your choice onto the portable SSD. Take the time to transfer your important files and backup any data you want to keep.
Finally, test the SSD to ensure it is functioning correctly. With these simple steps, you can save money and enjoy the benefits of having your own portable SSD.
Start creating your own portable SSD today and unlock a new level of storage convenience!

Harold Williams is a senior writer and technical editor at Drives Hero with 20+ years of experience in IT administration. He specializes in storage systems, SSD reviews, and performance testing, bringing real-world insight to every guide.