How To Install An NVMe SSD In A Desktop PC
Installing an NVMe SSD is one of the best upgrades you can make to a desktop PC. Whether you’re building a new system from scratch or breathing life into an aging machine, swapping from a traditional hard drive or even a SATA SSD to an NVMe drive will make everything feel dramatically faster. Boot times drop from 30+ seconds to under 10. Applications launch almost instantly. File transfers that used to take minutes finish in seconds.
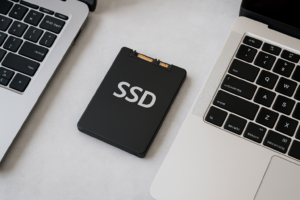
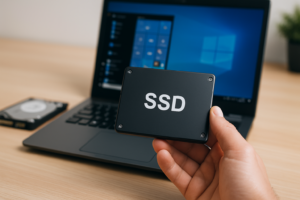
The good part about this upgrade is that it’s genuinely simple. You don’t need to run cables, mount anything in a drive bay, or worry about power connectors. An NVMe SSD is a small stick about the size of a piece of chewing gum, and it plugs directly into your motherboard. The whole physical installation takes about five minutes.
This guide walks you through every step of the process, from identifying the right slot on your motherboard to getting Windows to recognize and initialize the new drive. Even if you’ve never opened your PC case before, you’ll be able to follow along.
What You’ll Need Before You Start
Gather these items before you begin:
- An M.2 NVMe SSD in the correct form factor (almost always 2280, which means 22mm wide and 80mm long)
- A Phillips #1 screwdriver (a small one, not the standard size you’d use for case screws)
- Your motherboard manual (or the PDF version downloaded from the manufacturer’s website)
- An anti-static wrist strap (optional but recommended)
For the SSD itself, the Samsung 990 Pro is an excellent choice for a high-performance Gen 4 drive, while the WD Black SN770 offers fantastic performance at a more accessible price point. If your motherboard supports PCIe Gen 5, the Samsung 990 EVO Plus can take advantage of that extra bandwidth.

Samsung 990 Pro 2TB NVMe SSD
One of the fastest and most reliable Gen 4 NVMe drives available, perfect for a primary boot drive or heavy workloads
You won’t need thermal paste or any special mounting hardware in most cases. Modern motherboards from the last few years typically include a built-in M.2 heatsink and a mounting standoff already installed. Some newer boards even use a tool-less clip mechanism instead of a tiny screw.
Step 1: Identify Your M.2 Slot
Before you do anything physical, figure out which M.2 slot you should use. Most modern motherboards have two or three M.2 slots, but they aren’t always equal. Your motherboard manual will tell you which slots support NVMe (PCIe) drives versus SATA M.2 drives, and which generation of PCIe each slot supports.
Where to Find the M.2 Slots
M.2 slots are typically located between the CPU socket and the first PCIe x16 slot (your graphics card slot), or below the PCIe x16 slot. On many motherboards, they’re hidden beneath metal heatsink covers that blend into the board’s design. Look for flat, rectangular metal plates screwed into the motherboard surface.
If you’re installing your primary boot drive, use the M.2 slot labeled “M2_1” or the one closest to the CPU. This slot usually connects directly to the CPU’s PCIe lanes rather than going through the chipset, which gives you the best possible performance. Your motherboard manual will have a diagram showing the exact location and labeling of each slot.
Check Compatibility
Most M.2 slots on recent motherboards are “M-key,” which means they support NVMe drives. However, some budget boards include “B+M key” slots that only work with SATA M.2 drives. The physical key notch on your SSD and the slot must match. An NVMe drive has a single notch on one side (M-key), while a SATA M.2 drive has notches on both sides (B+M key).
Also confirm the supported lengths. The 2280 form factor is standard and universally supported, but some compact motherboards might only accept shorter 2242 or 2230 drives in certain slots.
Step 2: Prepare Your PC
- Shut down your computer completely. Don’t use sleep or hibernate. Do a full shutdown.
- Unplug the power cable from the back of the power supply.
- Press the power button on your case once while it’s unplugged. This discharges any residual electricity stored in the components.
- Remove the side panel of your case (usually the left side when looking at the front).
- Ground yourself by touching the metal frame of the case, or wear an anti-static wrist strap connected to the case.
If you have a graphics card that’s blocking access to the M.2 slot, you may need to remove it temporarily. Unscrew the bracket screws at the back of the case, release the retention clip on the PCIe slot, and gently pull the card straight out. Set it aside on an anti-static surface.
Step 3: Remove the M.2 Heatsink
Most motherboards from ASUS, MSI, Gigabyte, and ASRock ship with pre-installed M.2 heatsinks. These are the metal covers sitting on top of the M.2 slot area. They serve an important purpose: NVMe drives generate significant heat during sustained read/write operations, and the heatsink prevents thermal throttling.
Remove the screws holding the heatsink in place (usually one or two small Phillips screws). Lift the heatsink straight up. On the underside, you’ll typically find a thermal pad with a protective plastic film. Do not throw away this film yet. You’ll peel it off right before reassembly so the thermal pad makes clean contact with the SSD.
Set the heatsink and screws aside somewhere safe. Those tiny screws love to roll off desks and disappear forever, so consider placing them in a small bowl or on a magnetic tray.
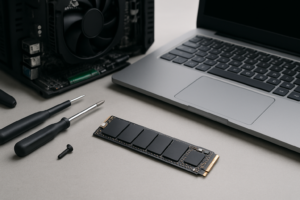
Step 4: Install the NVMe SSD
This is the main event, and it takes about 30 seconds.
Proper Orientation
Hold the NVMe SSD by its edges. You’ll notice the gold connector pins at one end with a small notch on one side. The label side of the SSD (the side with the brand name and capacity sticker) should face up, away from the motherboard. The notch in the connector lines up with the ridge in the M.2 slot, so it can only go in one way.
Inserting the Drive
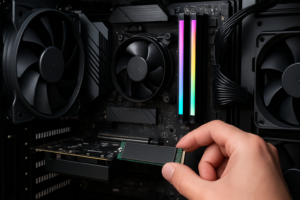
- Line up the connector with the M.2 slot at roughly a 20-30 degree angle.
- Slide the SSD into the slot firmly. It should seat with a satisfying click. Don’t force it, but it does require a bit of pressure. If it won’t go in, double-check the orientation.
- The far end of the SSD will spring up at an angle. This is normal.
- Gently press the SSD down flat and secure it with the mounting screw into the standoff at the 2280 position. Some newer motherboards use a tool-less latch or clip instead of a screw. Turn the clip or push the latch to lock the drive in place.
Don’t overtighten the screw. It’s threading into a tiny brass standoff, and stripping it would be frustrating. Just make it snug, about a quarter turn past finger-tight.
Replace the Heatsink
Peel off the protective plastic film from the thermal pad on the underside of the heatsink. Place the heatsink back over the SSD and screw it down. The thermal pad should make direct contact with the top of the SSD. If your motherboard also has a thermal pad on the bottom side (on the motherboard surface beneath where the SSD sits), peel that protective film off too before installing the drive.
If your motherboard didn’t include a heatsink, or if you’re using a slot without one, consider picking up a standalone M.2 heatsink. Even a basic aluminum heatsink will keep temperatures in check during sustained file transfers.
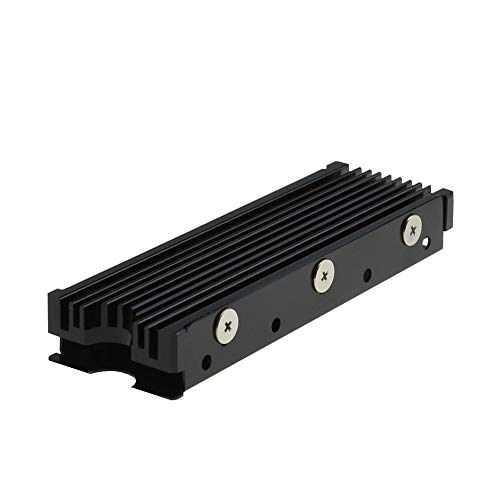
EZDIY-FAB M.2 SSD Heatsink
A budget-friendly aftermarket heatsink that fits most M.2 2280 drives and significantly reduces thermal throttling
Step 5: Reassemble and Power On
If you removed your graphics card, reinstall it by lining it up with the PCIe x16 slot and pressing it firmly until the retention clip clicks. Reattach the bracket screws. Put your case side panel back on, plug in the power cable, and connect your monitor.
Power on your system. If this is a fresh build with no operating system, the NVMe drive should appear when you enter BIOS. If you’re adding the drive to an existing system, it should boot into Windows normally while the new drive is detected in the background.
Step 6: Verify Detection in BIOS
Before you go further, it’s a good idea to confirm your motherboard actually sees the new drive. Restart your PC and press the BIOS key during boot (usually Delete, F2, or F12, depending on your motherboard brand).
Once in BIOS, look for a storage or disk information section. You should see your new NVMe drive listed with its model name and capacity. On ASUS boards, this information appears right on the EZ Mode main screen. MSI displays it in the main Dashboard. Gigabyte and ASRock have similar layouts.
If the drive doesn’t appear, try these fixes:
- Reseat the SSD. Power off, unplug, and remove and reinsert the drive. Make sure it’s pushed all the way into the connector.
- Try a different M.2 slot if your motherboard has multiple slots.
- Update your BIOS. Older BIOS versions sometimes lack support for newer NVMe drives.
- Check for slot-sharing conflicts. Some motherboards disable certain M.2 slots when specific SATA ports or PCIe slots are in use. Your motherboard manual will list these shared resources.
Step 7: Initialize the Drive in Windows
If you’re adding this NVMe SSD as a secondary drive (not your boot drive), Windows won’t automatically show it in File Explorer. You need to initialize and format it first through Disk Management.
- Right-click the Start button and select Disk Management.
- A prompt should appear asking you to initialize the new disk. Select GPT (GUID Partition Table) as the partition style. GPT is the modern standard and works with UEFI boot. Don’t choose MBR unless you have a very specific reason.
- Click OK.
- You’ll see the drive listed as “Unallocated” with a black bar. Right-click the unallocated space and select New Simple Volume.
- Follow the wizard. Assign a drive letter, choose NTFS as the file system, and give it a volume label (like “Games” or “Data”).
- Click Finish.
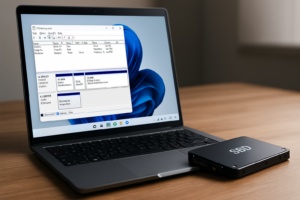
The drive will now appear in File Explorer, ready to use. The entire process takes about one minute.
If You’re Installing Windows on the New Drive
If this NVMe SSD will be your boot drive, you’ll need a Windows installation USB. Boot from the USB (change boot priority in BIOS or use the boot menu), and the Windows installer will show your NVMe drive as an installation target. Select it, click Next, and Windows will handle the rest. After installation, go back into BIOS and set the NVMe drive as your first boot device.
Step 8: Verify Performance
Once everything is set up, run a quick benchmark to make sure your drive is performing as expected. CrystalDiskMark is a free and popular tool for this. Download it, run the default test, and compare your sequential read/write numbers against the manufacturer’s specifications.
A Gen 3 NVMe drive should hit around 3,500 MB/s reads. Gen 4 drives typically reach 5,000-7,000 MB/s. Gen 5 drives can exceed 10,000 MB/s in sequential reads. If your numbers are significantly lower, check that you’re using the correct M.2 slot (one connected to CPU lanes, not chipset), and verify in BIOS that the slot is set to PCIe mode rather than SATA mode.
Tips for Getting the Most Out of Your NVMe SSD
- Enable XMP/EXPO for your RAM while you’re in BIOS. This isn’t directly related to the SSD, but since you’re already in there, you might as well make sure your memory is running at its rated speed.
- Keep the drive under 90% full. SSDs slow down as they fill up because they have less free space for wear leveling and garbage collection.
- Don’t defragment an SSD. Windows knows it’s a solid-state drive and will send TRIM commands instead. Manual defragmentation just adds unnecessary writes.
- Check for firmware updates using the manufacturer’s software (Samsung Magician, WD Dashboard, etc.). Firmware updates sometimes improve performance and fix bugs.
Frequently Asked Questions
Can I use an NVMe SSD if my motherboard only has a SATA M.2 slot?
No. NVMe drives use the PCIe protocol, and SATA M.2 slots only support the SATA protocol. An NVMe drive physically might fit into a SATA-only slot (depending on the keying), but it won’t be detected. Check your motherboard manual to confirm which protocols each M.2 slot supports. If your board only has SATA M.2 slots, you can still add NVMe storage using a PCIe-to-M.2 adapter card that plugs into a standard PCIe slot.
Do I need to install drivers for an NVMe SSD?
In most cases, no. Windows 10 and Windows 11 include built-in NVMe drivers that work with all standard NVMe drives. The drive should be detected automatically. However, Samsung drives can optionally benefit from the Samsung NVMe driver available through Samsung Magician, which some users report provides a slight performance improvement. For most people, the default Windows driver works perfectly fine.
Will a PCIe Gen 4 NVMe SSD work in a Gen 3 slot?
James Kennedy is a writer and product researcher at Drives Hero with a background in IT administration and consulting. He has hands-on experience with storage, networking, and system performance, and regularly improves and optimizes his home networking setup.