Storage Setup Guide for Photographers Shooting RAW
A single afternoon of shooting can produce 20, 50, even 100+ GB of RAW files. Multiply that by every wedding, portrait session, or landscape adventure you shoot in a year, and you’re staring down a storage problem that most generic “just buy a big hard drive” advice doesn’t solve. Photographers need a system, not just a device.
This guide walks through exactly how to structure your storage from the moment files leave your camera card to the day you archive a completed project. We’ll cover where your Lightroom catalog should live, how to tier your RAW file storage for speed and cost efficiency, and how to build a backup strategy that actually protects years of irreplaceable work.
Why Photographers Need a Different Storage Strategy
Most storage advice is written for general consumers or gamers. Photographers have a unique set of demands. Your files are enormous (a single Canon R5 RAW file can hit 45 MB, and medium format cameras push well past 100 MB per image). You need fast read/write speeds during editing but mostly just reliable long-term access for archived projects. And unlike a gamer who can re-download a lost title, your photos are one-of-a-kind.
The answer isn’t one massive drive. It’s a tiered approach: fast storage for active work, affordable bulk storage for your library, and redundant backups that follow the 3-2-1 rule. Let’s break down each layer.
Where to Put Your Lightroom Catalog (and Why It Matters)
Your Lightroom Classic catalog is a database file (.lrcat) that stores every edit, keyword, rating, and collection you’ve ever created. It’s relatively small compared to your actual photos, usually a few gigabytes even for libraries with hundreds of thousands of images. But it’s accessed constantly during editing, and its speed directly affects how snappy Lightroom feels.
Always Keep the Catalog on Your Fastest Internal Drive
The single best thing you can do for Lightroom performance is place the catalog file on an internal NVMe SSD. Not an external drive, not a NAS, not a spinning hard drive. Your internal NVMe. The Samsung 990 Pro 1TB is a top pick here, with sequential reads above 7,000 MB/s and, more importantly, excellent random read/write performance that Lightroom relies on heavily. If you’re curious about the differences between M.2 and 2.5-inch SSDs, the short version is that M.2 NVMe drives are dramatically faster for this kind of database workload.
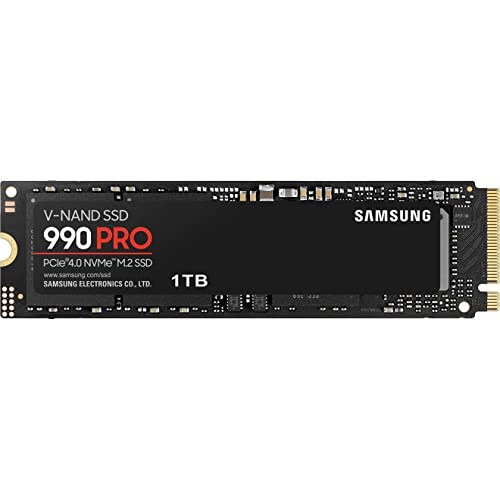
Samsung 990 Pro 1TB NVMe SSD
Excellent random I/O performance makes it ideal for hosting your Lightroom catalog and Smart Previews.
A 1TB NVMe is usually enough for the catalog, Smart Previews, and your currently active projects. You don’t need to store your entire photo library on this drive.
Smart Previews: Your Secret Weapon
Lightroom’s Smart Previews let you edit photos even when the original RAW files are offline (stored on an external drive or NAS that isn’t connected). They’re smaller DNG files, roughly 1-2 MB each. Store them alongside your catalog on that fast NVMe. This means you can cull and edit on a laptop at a coffee shop, then sync changes when you reconnect to your main library drive.
What About Lightroom CC (Cloud)?
Adobe’s cloud-based Lightroom CC stores originals in Adobe’s cloud, which sounds convenient but gets expensive fast with large RAW libraries. Most professional photographers stick with Lightroom Classic and manage their own storage. The control and cost savings are significant, especially once you pass the 1TB cloud storage mark.
Tiered RAW File Storage: The System That Scales
Think of your photo storage as three tiers, each optimized for a different phase of your workflow.
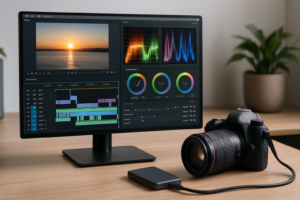
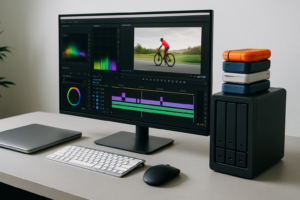
Tier 1: Active Projects (Fast SSD)
These are the shoots you’re currently editing. You need fast read speeds for smooth scrubbing through hundreds of RAW files, and fast write speeds for exporting. Keep active projects on an internal SSD or a high-speed external SSD connected via USB 3.2 Gen 2 or Thunderbolt.
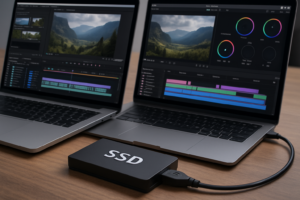
For desktop photographers, a dedicated 2TB internal SATA SSD like the Samsung 870 EVO 2TB works well as a “working drive” separate from your OS/catalog drive. For laptop shooters, a portable Thunderbolt SSD gives you similar performance in a pocket-sized enclosure. We’ve tested many of these in our roundup of the best portable SSDs for travel in 2026.
Once a project is delivered to the client, move it off this drive and into Tier 2. Keep your active drive lean so it stays fast. Over time, SSDs can slow down as they fill up, so maintaining at least 20-25% free space helps sustain performance.
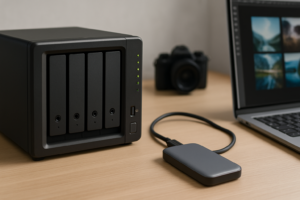
Tier 2: Near-Line Library (Large HDD or NAS)
This is where the bulk of your photo library lives: completed projects you might revisit, personal work, and everything from prior years. Speed matters less here because you’re not actively editing these files every day. What matters is capacity and reliability.
Two solid options exist for Tier 2 storage:
- Large external HDDs: A straightforward option. An 8TB or 12TB desktop external drive from WD Elements or Seagate gives you massive capacity at a fraction of the per-gigabyte cost of SSDs. If you’re wondering about the SSD vs. HDD decision, HDDs still dominate on capacity per dollar for bulk storage.
- A NAS (Network Attached Storage): A two-bay or four-bay NAS like the Synology DS224+ lets you access your library from any computer on your network. More importantly, it can run in a RAID configuration for redundancy. If you’re new to this, our NAS setup guide for beginners covers everything from hardware to initial configuration.
I recommend the NAS route for anyone with a library exceeding 4-5 TB. The ability to access your library from multiple machines, run automated backups, and add drives as your library grows makes it worthwhile.
Tier 3: Cold Archive (Offline Backup)
This is your “the house burned down” backup. Drives that live in a fireproof safe, a bank safety deposit box, or at a trusted friend’s house. You update them quarterly or after major shoots. Simple external drives work perfectly here. Label them clearly with date ranges and store them powered off.
A pair of Seagate Backup Plus 5TB portable drives rotated between your home and an offsite location is an affordable way to maintain a cold archive. When old drives reach end-of-life, make sure to securely wipe them before selling or recycling.
The 3-2-1 Backup Strategy for Photographers
You’ve probably heard of the 3-2-1 rule, but it’s worth spelling out exactly how it applies to a photography workflow:
- 3 copies of every file. The original on your working/library drive, a local backup, and an offsite backup.
- 2 different media types. For example, one copy on a NAS with spinning drives and another on an external SSD or in the cloud.
- 1 copy offsite. Cloud backup, a drive stored at another physical location, or both.
Many photographers nail the first two copies but skip the offsite component. A local backup protects against drive failure. Only an offsite backup protects against theft, fire, or flooding.
Cloud Backup for Large Photo Libraries
Cloud backup services like Backblaze Personal Backup offer unlimited storage for a fixed monthly fee, making them viable even for multi-terabyte photo libraries. The initial upload can take weeks or months depending on your internet connection, but after that, incremental backups are manageable.
If you’re weighing the costs and tradeoffs of cloud backup versus a local NAS, our cloud backup vs. local NAS cost comparison breaks down the numbers in detail. For most photographers, the ideal answer is actually both: a local NAS for fast restores and daily access, plus cloud backup as the offsite safety net.
Automating Your Backups
A backup plan you have to remember to run manually is a backup plan that will eventually fail. Use software to automate the process:
- macOS: Time Machine handles system backups. For your photo library, use Carbon Copy Cloner or ChronoSync to schedule nightly clones to your NAS or backup drive.
- Windows: Free Sync or Syncback handles scheduled folder mirroring. Veeam Agent (free edition) provides image-level backups.
- NAS-based: Synology’s Hyper Backup or QNAP’s Hybrid Backup Sync can push copies to cloud storage on a schedule.
Recommended Hardware by Library Size
Here’s a practical breakdown based on how much RAW data you’re managing:
Under 2 TB (Hobbyist/Part-Time Shooter)
Keep it simple. A 1TB NVMe for your OS, catalog, and active projects, plus a 2TB external SSD for your full library. Back up to a second external drive and a cloud service. Total: two external drives and a cloud subscription.
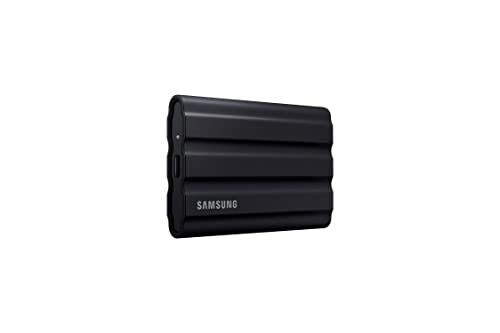
Samsung T7 Shield 2TB Portable SSD
Durable, fast, and compact enough to hold a smaller photo library with room to grow.
2 TB to 10 TB (Working Professional)
This is where a NAS starts making sense. A two-bay Synology or QNAP NAS with two matched drives in RAID 1 gives you a mirrored, network-accessible library. Keep your active projects on a fast internal or external SSD, and set up automated cloud backup from the NAS. Add a cold archive drive stored offsite.
Over 10 TB (High-Volume or Long-Career Photographer)
Move to a four-bay NAS running RAID 5 or SHR (Synology Hybrid RAID) with large-capacity drives. Understanding the differences between RAID levels helps you choose the right balance of redundancy and usable space. RAID 5/SHR gives you one-drive fault tolerance while using more of your total capacity than RAID 1. Pair this with a cloud backup service and rotated offsite drives.
A Note on Drive Selection for NAS Use
Don’t put desktop-grade drives in a NAS. Use NAS-rated drives like the WD Red Plus or Seagate IronWolf series. These drives are designed for 24/7 operation, vibration tolerance in multi-bay enclosures, and workloads typical of NAS environments. The firmware handles error recovery differently, which prevents dropped drives in RAID arrays.

WD Red Plus 8TB NAS Hard Drive
Purpose-built for NAS enclosures with optimized firmware for RAID arrays and 24/7 operation.
Import Workflow: From Card to Catalog
Your storage system only works if you follow a consistent import process. Here’s the workflow I recommend:
- Insert card, copy to active project SSD. Use a dedicated card reader (built-in readers are often slower). Copy the entire card contents to a dated folder on your fast working drive.
- Verify the copy. Use software with checksum verification (Photo Mechanic Plus, Hedge, or even a simple MD5 check) to confirm every file copied correctly before formatting the card.
- Import into Lightroom from the working drive. Point Lightroom at the folder on your SSD. Don’t use Lightroom’s “Copy” import option to move files again. Just “Add” them in place.
- Backup triggers automatically. Your backup software should detect the new files on the working drive and push copies to your NAS/backup drive on schedule.
- After project delivery, move to Tier 2. Use Lightroom’s “Move” folder function (right-click the folder in the Library module) to relocate completed projects to your NAS or library drive. Lightroom updates its catalog database automatically.
This workflow gives you speed during editing and organized long-term storage without manual file juggling.
Protecting Your Lightroom Catalog Specifically
Your RAW files are irreplaceable, but your Lightroom catalog represents hundreds of hours of editing decisions. Losing it means losing every crop, color grade, and keyword you’ve ever applied. Lightroom Classic has a built-in option to back up the catalog on exit. Enable it and set it to at least weekly.
Point the catalog backup to a different drive than where the catalog lives. If your catalog is on your internal NVMe, save the backup to your NAS or an external drive. Also include the catalog file in your automated backup jobs and cloud backup. The catalog file is small enough that cloud syncing it takes seconds.
One more thing: Lightroom catalog backups are just ZIP files of the .lrcat database. Periodically test a restore by unzipping a backup and opening it. A backup you’ve never tested isn’t really a backup.
Frequently Asked Questions
Can I store my Lightroom catalog on a NAS or external drive?
Technically you can store it on an external drive, but Adobe doesn’t support running Lightroom catalogs over a network
James Kennedy is a writer and product researcher at Drives Hero with a background in IT administration and consulting. He has hands-on experience with storage, networking, and system performance, and regularly improves and optimizes his home networking setup.