How to Build a Reliable Editing and Archive Storage Workflow
Losing a project because your storage couldn’t keep up is one of the worst feelings in creative work. You’re mid-edit on a video timeline, scrubbing through 4K footage, and your drive stutters. Or worse, a single hard drive dies and takes months of archived work with it. Most editors and creators know they need a better system, but building a proper multi-tier storage workflow feels overwhelming when you’re staring at dozens of drive options, NAS enclosures, and cloud services.
The good system doesn’t have to be complicated. A three-tier approach, fast SSDs for active projects, a NAS for local archives, and cloud backup for offsite protection, covers every scenario from daily editing to disaster recovery. This guide walks you through building each tier, connecting them into an automated workflow, and choosing the right hardware at each stage.
Understanding the Three-Tier Storage Philosophy
Think of your storage workflow like a pyramid. At the top, you have a small amount of very fast storage for whatever you’re actively working on right now. In the middle sits a larger pool of networked storage where finished projects live and stay accessible. At the base, cloud or offsite backup catches everything in case your local hardware fails, gets stolen, or burns down.
Each tier has a different job, and trying to make one tier do everything leads to compromises. An NVMe SSD is incredible for editing but too expensive per terabyte for long-term archiving. A NAS filled with spinning drives holds massive amounts of data affordably but can’t keep up with real-time 4K or 8K editing. Cloud storage protects against local disasters but retrieving terabytes of data takes time.
When these three tiers work together, you get speed where you need it, capacity where you need it, and redundancy where you need it. And you stop relying on a single point of failure.
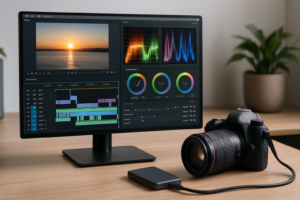
Tier 1: Fast SSD Storage for Active Projects
Your active working drive is where performance matters most. This is the drive your editing software reads from and writes to in real time. For video editors, colorists, and audio producers, lag here kills your creative flow and wastes hours over the course of a project.
Choosing the Right SSD Type
For internal storage, NVMe drives are the clear winner. A PCIe Gen 4 NVMe SSD like the Samsung 990 Pro 2TB delivers sequential read speeds above 7,000 MB/s, which means smooth playback even with demanding codecs. If you’re curious about the differences between form factors, our M.2 vs 2.5-inch SSD comparison guide breaks down exactly what you should pick for your workstation.
For laptop editors or anyone working with external drives, a Thunderbolt 4 SSD enclosure paired with a quality NVMe drive can deliver over 2,800 MB/s. The WD Black SN850X 2TB is an excellent choice for either internal or external setups.

Samsung 990 Pro 2TB NVMe SSD
Outstanding sustained write performance makes it ideal as an active editing drive for video and audio production.
How Much Fast Storage Do You Actually Need?
Most editors don’t need 8TB of NVMe. You only need enough to hold your current project and maybe one or two recent ones. For 4K video work, 2TB is the sweet spot. A typical 30-minute 4K project with raw footage, proxies, and renders can consume 500GB to 1.5TB depending on your codec and shooting ratio.
The key discipline here is moving completed projects off your fast drive as soon as they’re delivered. If your SSD stays 80%+ full all the time, your SSD performance will degrade noticeably. Keep your working drive under 70% capacity for consistent speeds.
RAID for Active Storage?
If you work with especially large projects (feature films, multicam 6K+), consider a two-drive NVMe RAID 0 for maximum throughput. You’ll double your sequential speeds and combined capacity. Just remember that RAID 0 offers zero redundancy, so if either drive fails, you lose everything on the array. This is acceptable for your working tier only because you’ll be backing up to the other two tiers. If you’re weighing the tradeoffs, our RAID 0 vs RAID 1 comparison explains when each configuration makes sense.
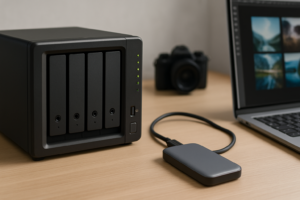
Tier 2: NAS for Local Archive and Collaboration
Once a project is finished (or on hold), it moves to your NAS. This is your local archive: always accessible, with enough capacity to hold years of work, and protected by drive redundancy.
Picking the Right NAS Hardware
For most solo creators and small teams, a 4-bay NAS hits the right balance of capacity, redundancy, and cost. The Synology DS923+ is my top recommendation. It runs Synology’s DSM operating system, which handles everything from automated backups to media indexing without needing a computer science degree. QNAP’s TS-464 is another strong option, especially if you want an HDMI output for direct media playback.

Synology DS923+ 4-Bay NAS
The best all-around NAS for creators who want reliable archiving, automated cloud sync, and easy setup.
If you’re just getting started and want to keep costs down, our guide to building a budget home NAS walks through an affordable entry point that still provides real redundancy.
NAS Drive Selection
Fill your NAS with drives designed for NAS use. Desktop drives might work initially, but they aren’t built for the constant vibration and 24/7 operation of a multi-bay enclosure. The WD Red Plus 8TB and Seagate IronWolf 8TB are both well-proven in NAS environments. Going with 8TB drives in a 4-bay enclosure configured as RAID 5 gives you roughly 24TB of usable storage with single-drive fault tolerance.
Configuring Your NAS for an Archive Workflow
Set up a clear folder structure on your NAS from day one. I recommend organizing by year, then by project name, with a consistent internal structure:
- /Archive/2026/ProjectName/01_Raw_Footage/
- /Archive/2026/ProjectName/02_Project_Files/
- /Archive/2026/ProjectName/03_Assets/
- /Archive/2026/ProjectName/04_Exports_Deliverables/
- /Archive/2026/ProjectName/05_Documentation/
This structure sounds rigid, but it saves enormous time when you need to find something two years later. Include a simple text file in each project folder noting the software version, codec used, and any project-specific details that future-you will thank present-you for writing down.
Network Performance Considerations
A gigabit Ethernet connection (1 GbE) maxes out at roughly 112 MB/s, which is fine for transferring completed projects overnight but painful for larger transfers. If your NAS and workstation both support 2.5 GbE or 10 GbE, the upgrade is worth it. The Synology DS923+ supports 10 GbE via an add-in card, and a direct connection between your workstation and NAS with a 10 GbE adapter card can push archive transfers into genuinely fast territory.
For most workflows, start with standard gigabit and schedule your archive transfers for off-hours. You can always upgrade the network link later without changing any of your storage hardware.
Tier 3: Cloud Backup for Offsite Protection
Your NAS protects against drive failure, but it doesn’t protect against theft, fire, flooding, or ransomware that encrypts everything on your local network. Cloud backup is your insurance policy against disasters that affect your physical location.
Cloud Backup Services for Large Archives
For terabyte-scale archives, you need a service that charges reasonably for storage and doesn’t gouge you on egress (download) fees. Backblaze B2 is the go-to for most creators. It’s compatible with Synology’s built-in Hyper Backup app and QNAP’s Hybrid Backup Sync, meaning your NAS can upload new archive data automatically without you touching anything.
Wasabi is another solid option with no egress fees, which matters if you ever need to restore a large amount of data. For a deeper breakdown of when cloud makes sense versus relying purely on local storage, check out our cloud backup vs. local NAS cost comparison.
What to Back Up (and What to Skip)
Backing up everything to the cloud gets expensive fast. Be strategic:
- Always back up: Raw footage, original project files, final exports, client deliverables, important documents
- Consider skipping: Proxy files (easily regenerated), render caches, temporary exports, stock footage you can re-download from the original source
A common mistake is treating cloud backup as a mirror of your entire NAS. Instead, create a dedicated “Cloud Backup” shared folder on your NAS that only contains the essential files. This can cut your cloud storage costs in half while still protecting everything that actually matters.
Encryption and Security
Always encrypt your cloud backups before they leave your network. Both Synology Hyper Backup and tools like rclone support client-side encryption, meaning your cloud provider never sees your unencrypted data. Use a strong passphrase and store it in a password manager. If you lose the encryption key, your cloud backup becomes useless.
Connecting the Tiers: Automation Is Everything
A multi-tier workflow only works if data actually moves between the tiers. If it depends on you remembering to manually copy files every week, it’ll fall apart within a month. Automation is what turns a good plan into a reliable system.
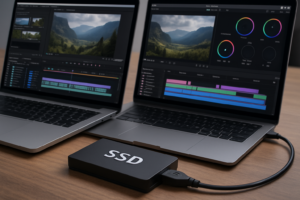
SSD to NAS: Project Archival
When you finish a project, move the entire project folder from your SSD to the NAS archive. On macOS, you can set up a Hazel rule or a simple shell script. On Windows, FreeFileSync handles this well with saved configurations you can run in two clicks. For a more automated approach, our guide on setting up automated NAS backups in 30 minutes covers the process in detail.
After the transfer completes and you’ve verified the files on the NAS, delete the project from your SSD. Don’t leave copies lingering on your fast drive. Keeping it clean is part of the discipline.
NAS to Cloud: Scheduled Nightly Sync
Configure your NAS to run cloud backup jobs every night during off-peak hours. Synology’s Hyper Backup lets you set a schedule, enable versioning (keeping multiple versions of changed files), and compress data before uploading. Set it and check the logs weekly to confirm it’s running successfully.
For the initial upload of a large existing archive, be patient. Uploading 10TB over a typical home internet connection can take weeks. Some cloud providers offer a physical drive shipping option for initial seeds, which is worth investigating if you have 20TB+ to upload.
A Weekly Check-In Habit
Spend five minutes every Monday reviewing your workflow:
- Check your SSD free space. If it’s above 70% full, archive something.
- Glance at your NAS health dashboard. Look for drive warnings or failed RAID rebuilds.
- Verify your cloud backup ran successfully over the past week.
This simple habit catches small problems before they become catastrophic failures.
Sample Workflow in Practice
Here’s how this looks for a video editor working on a client project:
Monday: Ingest raw 4K footage from camera cards directly onto your NVMe SSD. Begin editing.
Tuesday through Thursday: Edit, color grade, and mix audio. All project files live on the fast SSD. Your NAS runs its nightly cloud sync of previously archived projects in the background.
Friday: Export final deliverables. Send to client. Once approved, package the entire project folder according to your naming convention.
Weekend: Transfer the completed project folder to the NAS archive. Verify the transfer. Delete from SSD. That night, the NAS automatically uploads the new archive folder to the cloud.
Your project now exists in three locations: nowhere on the active SSD (because it’s done), on the NAS with RAID redundancy, and encrypted in the cloud. You’d need to lose all three simultaneously to actually lose the work.

WD Red Plus 8TB NAS Hard Drive
Purpose-built for NAS environments with CMR technology and vibration resistance for reliable 24/7 archive storage.
Scaling the System as Your Archive Grows
One of the best things about this three-tier approach is that each tier scales independently. When your NAS fills up, you can replace drives with larger ones (most NAS enclosures let you do this one drive at a time while maintaining your RAID array). When you need more editing speed, add a second NVMe drive. When your cloud costs increase, you can adjust what gets backed up or switch providers.
If you’re eventually upgrading drives and pulling old ones out of service, make sure you securely wipe those drives before selling or recycling them. Client footage on an improperly erased drive is a liability nightmare.
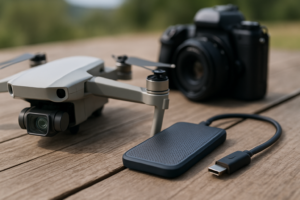
For creators who travel frequently, consider adding a portable SSD as a field backup. Having a duplicate of your raw footage on a bus-proof portable drive while traveling is cheap insurance. You can find tested recommendations in our
James Kennedy is a writer and product researcher at Drives Hero with a background in IT administration and consulting. He has hands-on experience with storage, networking, and system performance, and regularly improves and optimizes his home networking setup.