NVMe Enclosure vs Portable SSD: Which Is the Better Deal?
You need fast, portable storage. You’ve narrowed it down to two options: buy a ready-made portable SSD, or grab a bare NVMe drive and pop it into an enclosure yourself. Both get the job done, but the cost difference can be significant, and so can the performance gap. Let’s break down what you’re actually getting with each approach so you can spend wisely.
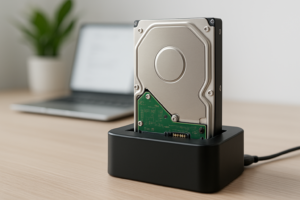
The DIY Route: NVMe Drive + Enclosure
Building your own portable SSD is surprisingly simple. You buy an M.2 NVMe drive and a USB-C enclosure separately, slide the drive in, screw it shut, and you’re done. The whole process takes about five minutes, no tools required with most enclosures. If you’ve ever installed an NVMe drive internally, this is even easier. And if you haven’t, our guide on how to install an NVMe SSD will give you the confidence to handle these tiny drives.
For the enclosure, the most popular options right now use either USB 3.2 Gen 2 (10 Gbps) or USB 3.2 Gen 2×2 (20 Gbps) interfaces. A few even support USB4 or Thunderbolt 3, which pushes the ceiling to 40 Gbps. The UGREEN NVMe enclosure is a popular budget pick at 10 Gbps, while the ORICO Thunderbolt NVMe enclosure is a solid step up if you need maximum speed.
For the NVMe drive itself, you can choose whatever capacity and tier fits your budget. A WD Black SN770 1TB gives you excellent Gen 4 performance, while a Silicon Power A60 1TB delivers solid performance at a lower price point. Either way, you’re getting a full-fat NVMe drive that you can later pull out and use inside a desktop or laptop if your needs change. That flexibility alone makes the DIY route appealing.
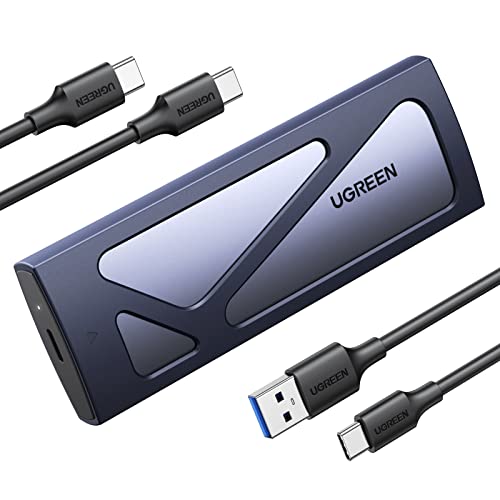
UGREEN M.2 NVMe SSD Enclosure USB-C 10Gbps
Affordable, well-built enclosure with tool-free installation and wide NVMe drive compatibility
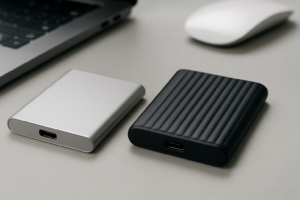
The Pre-Built Route: Portable SSDs
Portable SSDs like the Samsung T7 Shield, SanDisk Extreme Portable SSD V2, and Crucial X9 Pro come ready to use out of the box. Plug them in, format if needed, and start transferring files. There’s real value in that simplicity, and these drives are engineered as complete units with optimized firmware, thermal management, and often IP ratings for dust and water resistance.
We’ve tested many of these in real-world conditions for our roundup of the best portable SSDs for travel in 2026, and the build quality on the top models is genuinely impressive. The Samsung T7 Shield, for example, carries an IP65 rating and has survived drops onto concrete in our testing without losing a byte of data.
Most portable SSDs on the market use USB 3.2 Gen 2 (10 Gbps), which translates to real-world sequential read speeds around 900 to 1,050 MB/s. A handful of newer models, like the Samsung T9, push into 20 Gbps territory with speeds exceeding 1,500 MB/s.
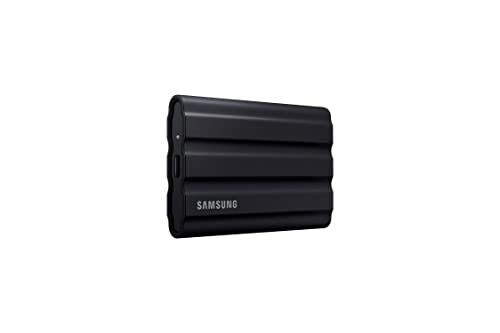
Samsung T7 Shield 1TB Portable SSD
Excellent durability with IP65 rating, strong real-world speeds, and a compact design perfect for travel
Cost Comparison: Where the DIY Build Wins
This is where the math gets interesting. When you price out a budget NVMe drive and a 10 Gbps enclosure separately, the total often comes in noticeably lower than an equivalent-capacity portable SSD from a major brand. The savings become even more dramatic at higher capacities like 2TB and 4TB, where brand-name portable SSDs carry a significant premium.
Check current pricing on Amazon and compare for yourself: search for a 1TB NVMe drive and an NVMe enclosure separately, then compare the total against a pre-built portable SSD at the same capacity. In most cases, you’ll find meaningful savings with the DIY approach. If you’re shopping during sales events, our Black Friday SSD deals guide can help you stack those savings even further.
There’s also a hidden cost advantage to the DIY setup: upgradability. When a faster or larger NVMe drive drops in price a year from now, you swap the drive and keep the enclosure. With a portable SSD, you’re buying a whole new unit.
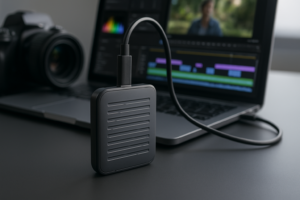
Performance: Not Always a Clear Winner
You might assume that pairing a screaming-fast Gen 4 NVMe drive with an enclosure would blow away any portable SSD. In practice, the bottleneck is almost always the USB interface, not the drive. A 10 Gbps USB 3.2 Gen 2 connection caps your real-world speeds around 900 to 1,000 MB/s regardless of whether the drive inside can do 5,000 MB/s or 2,000 MB/s.
At the 10 Gbps tier, a DIY enclosure build and a pre-built portable SSD perform almost identically in sequential read/write tests. Where the NVMe enclosure can pull ahead is in random I/O performance, since you can choose a drive with a high-quality controller. This matters if you’re working directly off the drive with lots of small files.
If you step up to a 20 Gbps or 40 Gbps enclosure, you’ll start seeing a real speed advantage over most portable SSDs. But those higher-bandwidth enclosures cost more, and you need a host device with the matching port to take advantage of it. For a deeper look at how NVMe compares to SATA in practical use, our SATA vs NVMe real-world test covers the performance differences in detail, and much of that analysis applies to external use as well.
Durability, Warranty, and Peace of… Reliability Concerns
This is where pre-built portable SSDs have a genuine edge. Products like the Samsung T7 Shield and SanDisk Extreme Pro are designed as sealed units. They’re often rated for drops, dust, and water exposure. Most come with a manufacturer’s warranty that covers the complete device.
A DIY enclosure build gives you two separate warranties, one for the drive and one for the enclosure, and neither manufacturer is going to cover damage caused by the other component. If something goes wrong, diagnosing whether the issue is the drive or the enclosure adds a layer of troubleshooting. Our article on fixing external drives that keep disconnecting covers some of the common issues you might encounter with enclosures specifically.
Thermal management is another consideration. Pre-built portable SSDs have carefully designed thermal solutions matched to their internal components. With an enclosure, the thermal design is generic. Most aluminum enclosures do a decent job, but sustained large file transfers can cause throttling on higher-performance NVMe drives. If you notice performance degradation over time with any SSD setup, our guide on why your SSD slows down and how to fix it explains what’s happening and how to address it.
My Recommendation: It Depends on Your Priority
Go DIY if you want the best value per gigabyte, if you enjoy having the flexibility to swap drives, or if you’re buying at 2TB or above where the savings are most significant. Just pick a reputable enclosure with good thermal design and a reliable NVMe drive. The WD Black SN770 paired with a UGREEN or Sabrent enclosure is a combination that consistently delivers excellent results.
Go pre-built if you prioritize ruggedness, simplicity, and a single-manufacturer warranty. If this drive is going in your camera bag, traveling through airports, or getting tossed around job sites, the integrated design and IP ratings of a Samsung T7 Shield or Crucial X9 Pro are worth paying for.

WD_BLACK SN770 1TB NVMe M.2 SSD
Outstanding Gen 4 performance in a cool-running package, making it ideal for use in external enclosures
For most people buying 1TB of storage for general file transfers and backups, the DIY route saves enough to justify the five minutes of assembly. For the road warrior who needs bomb-proof reliability, spend the extra on a purpose-built portable SSD and don’t look back.
Frequently Asked Questions
Can I use any M.2 NVMe drive in an external enclosure?
Most M.2 NVMe enclosures support the standard 2280 size (22mm wide, 80mm long), which is what the vast majority of consumer NVMe drives use. Some enclosures also support shorter 2242 and 2230 form factors. Just double-check that the enclosure supports the NVMe protocol specifically, since some M.2 enclosures only work with SATA M.2 drives, which are electrically different. Our M.2 vs 2.5
James Kennedy is a writer and product researcher at Drives Hero with a background in IT administration and consulting. He has hands-on experience with storage, networking, and system performance, and regularly improves and optimizes his home networking setup.