How to Turn an Old Internal SSD into a Portable Drive
You just upgraded your laptop’s internal SSD, and the old one is sitting on your desk. It still works perfectly fine. Maybe it’s a 500GB SATA drive from a 2019 laptop, or an NVMe stick you pulled from a desktop build last year. Either way, throwing it in a drawer (or worse, the trash) is a waste of perfectly good storage.
For the cost of a small enclosure, you can turn that old internal SSD into a fast, pocketable portable drive. The whole process takes about ten minutes, requires zero tools in most cases, and gives you a backup drive, a file-transfer tool, or a travel companion that rivals many commercial portable SSDs. Here’s exactly how to do it.
Step 1: Identify What Kind of SSD You Have
Before you buy an enclosure, you need to know what you’re working with. Internal SSDs come in a few different form factors and interfaces, and the enclosure has to match. Get this wrong and your drive literally won’t fit inside.
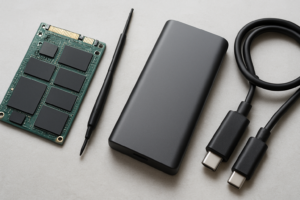
2.5-Inch SATA SSDs
These are the most common SSDs from roughly 2012 to 2020. They look like small, flat rectangles, about the size of a credit card but thicker. They use a SATA connector with an L-shaped data port and a wider L-shaped power port. If you pulled it from an older laptop or a desktop’s drive bay, this is almost certainly what you have. Popular examples include the Samsung 870 EVO, Crucial MX500, and WD Blue 3D NAND.
For a deeper comparison of how these differ from the newer stick-style drives, check out our M.2 vs 2.5-inch SSD form factor guide.
M.2 SATA SSDs
These look like small sticks of gum, typically 22mm wide and 80mm long (the “2280” size). Here’s where it gets tricky: M.2 is a physical form factor, not an interface. Some M.2 drives use the SATA protocol, and some use NVMe. An M.2 SATA drive usually has two notches (called B+M keys) on its connector edge. The WD Blue SATA M.2 and Crucial MX500 M.2 are common examples.
M.2 NVMe SSDs
These look identical to M.2 SATA drives in size and shape, but they use the much faster NVMe protocol over PCIe lanes. An NVMe drive typically has a single notch on one side (M-key only). Models like the Samsung 970 EVO Plus, WD Black SN770, and SK hynix P31 Gold fall into this category.
Quick identification tip: Look up the model number printed on your drive’s label. A two-second search will confirm whether it’s SATA or NVMe. Don’t guess, because putting an NVMe drive in a SATA-only enclosure won’t work at all.
Step 2: Choose the Right Enclosure
This is the most important purchasing decision in the whole project. Enclosures are small, affordable, and widely available, but you need to match the enclosure to your drive type.
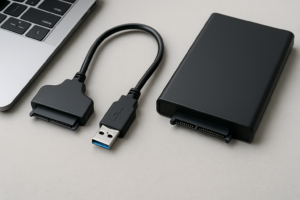
For 2.5-Inch SATA SSDs
You need a 2.5-inch SATA to USB enclosure. These are the simplest and most affordable option. Look for one with a USB 3.0 or USB 3.2 Gen 1 connection (both are 5 Gbps), which is more than enough to max out any SATA drive’s ~550 MB/s throughput. The Sabrent 2.5-inch SATA enclosure is a popular choice with a tool-free slide-in design.

Sabrent 2.5-Inch SATA to USB 3.0 Enclosure
Tool-free design with a slide-open case, reliable and budget-friendly for any 2.5-inch SATA SSD
For M.2 SATA SSDs
You need an M.2 SATA enclosure specifically. These are smaller than 2.5-inch enclosures and only accept M.2 form factor drives using the SATA protocol. Double-check the product listing, because many M.2 enclosures are NVMe-only and won’t recognize a SATA drive.
For M.2 NVMe SSDs
An NVMe enclosure is what you want. For best performance, pick one with USB 3.2 Gen 2 (10 Gbps) or USB 3.2 Gen 2×2 (20 Gbps). A 10 Gbps enclosure will give you real-world speeds around 900-1000 MB/s, which is excellent for a portable drive. The UGREEN M.2 NVMe enclosure is a solid pick with good thermal management and a USB-C interface.
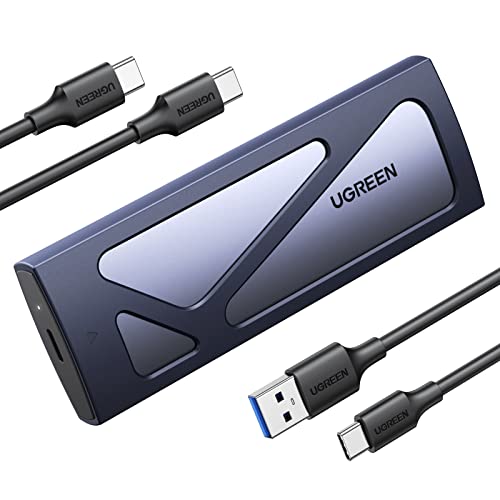
UGREEN M.2 NVMe SSD Enclosure USB-C
Aluminum body with good heat dissipation, supports 10 Gbps USB 3.2 Gen 2 for near-maximum NVMe speeds
Dual-Protocol Enclosures (SATA + NVMe)
If you’re not 100% sure whether your M.2 drive is SATA or NVMe, or if you think you might swap in different drives later, a dual-protocol enclosure handles both. The SSK dual-protocol M.2 enclosure and similar models auto-detect which protocol your drive uses. They cost slightly more, but the flexibility can save you from buying the wrong thing.
Step 3: Assemble the Drive
Most modern SSD enclosures are designed to be tool-free, but the exact assembly process varies slightly by type.
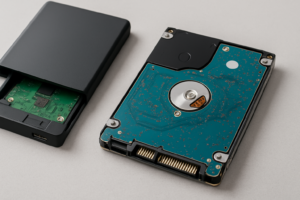
2.5-Inch SATA Assembly
- Open the enclosure (most slide apart or have a snap-on lid).
- Align the SATA connector on your SSD with the connector inside the enclosure.
- Slide the drive in until it seats firmly.
- Close the enclosure and snap or screw it shut.
- Connect the included USB cable to the enclosure and your computer.
The whole thing takes under two minutes. There’s no thermal pad to worry about and no screws on most models.
M.2 NVMe or SATA Assembly
- Open the enclosure (usually by sliding the outer shell off or removing a single screw).
- Insert the M.2 drive into the slot at a slight angle (about 30 degrees), gold contacts first.
- Press the drive down flat and secure it with the included screw or rubber retention clip.
- If the enclosure includes a thermal pad, make sure it’s positioned between the drive’s NAND chips and the aluminum shell. This matters for NVMe drives, which generate more heat.
- Reassemble the enclosure and connect via USB-C.
One common mistake: forcing the M.2 drive in upside down. The notch on the connector only aligns one way. If it doesn’t slide in smoothly, flip it over.
Step 4: Format the Drive for Your Use Case
When you plug in your newly assembled portable drive, your computer might not immediately recognize it. Don’t panic. If the drive was previously used in another system, it may have partitions or a file system your current OS doesn’t like. If your system isn’t detecting the drive at all, our guide on fixing an external drive that isn’t showing up walks through every troubleshooting step.
Before formatting, make sure you’ve pulled off any data you still need. If the old drive was in a previous computer and contains personal files, this is your last chance to copy them. And if you’re planning to give away or sell the drive later, you’ll eventually want to securely wipe it rather than just doing a quick format.
Choosing a File System
- exFAT: The best all-around choice. Works natively on Windows, macOS, and Linux. Supports files larger than 4GB. Pick this if you’ll use the drive with multiple operating systems.
- NTFS: The Windows default. Great for Windows-only use. macOS can read NTFS drives but can’t write to them without third-party software.
- APFS or HFS+: macOS-native formats. Choose APFS if the drive will only ever be used with Macs. Windows won’t read these without extra software.
- ext4: The Linux-native file system. Only use this if you’re exclusively working in Linux.
My recommendation: Go with exFAT unless you have a specific reason not to. It’s the most universally compatible option and has no meaningful performance penalty for external storage use.
How to Format on Windows
- Open Disk Management (right-click the Start button, select “Disk Management”).
- Find your new drive in the list. It may show as “Unallocated” or have old partitions.
- Right-click the drive’s partition(s) and select “Delete Volume” to clear existing data.
- Right-click the unallocated space and select “New Simple Volume.”
- Follow the wizard. Choose exFAT as the file system, assign a drive letter, and label it whatever you like.
How to Format on macOS
- Open Disk Utility (Applications > Utilities > Disk Utility).
- Select your external drive in the left sidebar. Make sure you select the drive itself, not just a partition.
- Click “Erase” at the top.
- Choose ExFAT as the format and GUID Partition Map as the scheme.
- Click “Erase” and wait for the process to finish.
If you’re connecting this to a MacBook, our step-by-step guide on connecting an external SSD to a MacBook Pro covers the specifics, including which adapters you might need for older ports.
Step 5: Test Your New Portable Drive
Before you load up the drive with important files, run a quick health check and speed test. This confirms the drive is working correctly in its enclosure and gives you a baseline for performance.
Check drive health: Use CrystalDiskInfo (Windows) or DriveDx (macOS) to check the SMART data on your SSD. You’re looking for total bytes written (TBW), power-on hours, and any error flags. If your drive has been heavily used and is approaching its rated TBW limit, it’s still fine for casual storage, but maybe don’t use it as your only backup. For more on how long you can expect your drive to last, our article on SSD lifespan and real-world data breaks down the numbers.
Test speeds: CrystalDiskMark (Windows) or Blackmagic Disk Speed Test (macOS) will show you read and write speeds. A SATA SSD in a USB 3.0 enclosure should hit 400-500 MB/s sequential reads. An NVMe drive in a 10 Gbps enclosure should reach 800-1000 MB/s. If your numbers are significantly lower, you might be connected to a USB 2.0 port (which maxes out around 35 MB/s) or the enclosure’s USB mode might be mismatched.
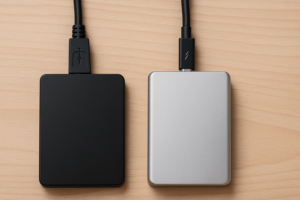
Performance Expectations: What’s Realistic
Your DIY portable SSD won’t always match a purpose-built commercial portable drive like the Samsung T7 or SanDisk Extreme, but it gets surprisingly close. Here’s what to expect:
- 2.5-inch SATA in USB 3.0 enclosure: 400-500 MB/s sequential read, 350-450 MB/s write. This is more than fast enough for file transfers, backups, and even editing photos directly from the drive.
- M.2 SATA in USB 3.0 enclosure: Same speeds as above. The M.2 form factor doesn’t make it faster; SATA is SATA regardless of the connector shape.
- M.2 NVMe in USB 3.2 Gen 2 enclosure (10 Gbps): 800-1050 MB/s sequential read. This approaches commercial portable SSD territory and is great for video work and large file transfers.
Keep in mind that NVMe drives in small enclosures can throttle under sustained loads due to heat. If you’re planning heavy use (like video editing or transferring hundreds of gigabytes at once), look for enclosures with aluminum bodies and thermal pads. Plastic enclosures run hotter and throttle sooner. If you notice performance degrading over time beyond thermal throttling, our guide on why SSDs slow down and how to fix it can help you diagnose the issue.
Practical Uses for Your DIY Portable SSD
Once your drive is assembled and formatted, here are some genuinely useful things to do with it:
- Time Machine or Windows Backup drive: Plug it in weekly for local backups. Pair it with a cloud solution for the best protection. Our cloud backup vs. local NAS cost comparison can help you figure out the right balance.
- Travel file transfer drive: Perfect for moving large files between computers, especially in places with slow or no internet. If you’re comparing this option against buying a new portable SSD, check our roundup of the

James Kennedy is a writer and product researcher at Drives Hero with a background in IT administration and consulting. He has hands-on experience with storage, networking, and system performance, and regularly improves and optimizes his home networking setup.