A Beginner’s Guide to NAS and Home Storage
Your phone’s running out of space. Your laptop’s internal drive is packed. You’ve got family photos scattered across three different cloud accounts, and you still can’t find that video from last Christmas. If this sounds like your life, a NAS (Network Attached Storage) might be exactly what you need.
A NAS is essentially your own personal cloud, sitting right in your home. It’s a dedicated storage device connected to your home network that lets every device in your household access, share, and back up files automatically. And unlike cloud subscriptions that charge you monthly forever, a NAS is a one-time investment that you actually own. In this guide, I’ll walk you through everything you need to know to pick the right one, set it up, and start using it like a pro.
What Exactly Is a NAS (and Why Should You Care)?
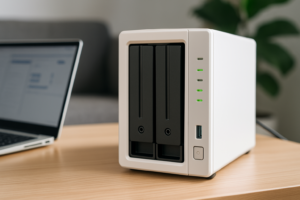
A NAS is a small box, usually about the size of a thick hardcover book, that holds one or more hard drives and connects directly to your router. Once it’s on your network, every computer, phone, tablet, and smart TV in your home can access the files stored on it. Think of it like a shared hard drive that doesn’t need to be physically plugged into any single device.
But a modern NAS does a lot more than just store files. Most NAS units run their own operating system with apps you can install. You can use it as a media server to stream movies to your TV, an automatic backup destination for every device in your house, a personal photo library (like Google Photos but with no storage limits), or even a surveillance system hub for security cameras.
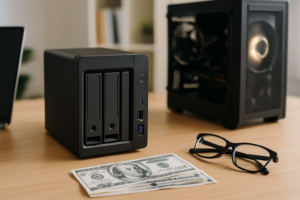
The biggest advantage over external hard drives is accessibility. An external drive sits on your desk, plugged into one computer. A NAS sits on your network, available to everyone, all the time. And unlike cloud storage, there are no monthly fees, no bandwidth limits, and no one else has access to your data. If you’re weighing the two options, our cloud backup vs. local NAS cost comparison breaks down the real numbers over time.
Pre-Built NAS vs. DIY: Which Route Should You Take?
You have two paths when getting into NAS: buy a pre-built unit from a company like Synology or QNAP, or build your own from spare parts or purpose-bought hardware.
Pre-Built NAS (Recommended for Most Beginners)
Companies like Synology, QNAP, and Asustor sell ready-to-go NAS enclosures. You buy the unit (usually sold without drives), pop in your own hard drives, and follow a guided setup wizard. The software is polished, updates are automatic, and there’s a huge community if you need help.
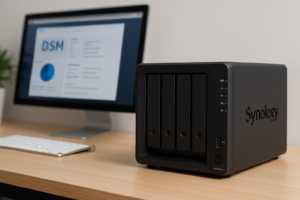
Synology’s DiskStation Manager (DSM) operating system, in particular, is genuinely pleasant to use. It looks and feels like a desktop OS, complete with a file manager, app store, and drag-and-drop interface. For a first-time NAS owner, this level of polish makes a real difference.
The Synology DS224+ is my top recommendation for most home users. It’s a 2-bay unit with enough processing power to handle media transcoding, Docker containers, and multi-user access without breaking a sweat.

Synology DS224+ 2-Bay NAS
The best all-around NAS for home users, with an intuitive OS and strong app ecosystem.
DIY NAS Builds
If you’re comfortable building a PC or enjoy tinkering, a DIY NAS can give you more power per dollar. You can repurpose an old computer, install a free NAS operating system like TrueNAS or OpenMediaVault, and configure everything yourself. We’ve actually put together a complete walkthrough for building a budget home NAS for under competitively priced if this path interests you.
The downside? Setup takes longer, troubleshooting is on you, and the software isn’t as beginner-friendly. I’d only recommend this route if you enjoy the process of building and configuring things, or if you have very specific performance requirements that pre-built units don’t meet.
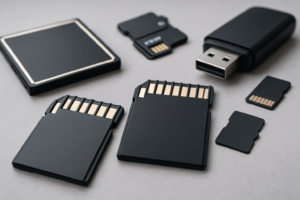
Choosing the Right Drives for Your NAS
Most pre-built NAS enclosures ship without drives, which means you’ll need to buy them separately. This is actually a good thing because it lets you pick the capacity and brand you prefer.
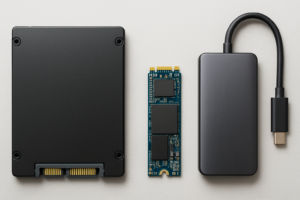
HDD vs. SSD for NAS Storage
For bulk NAS storage, traditional hard disk drives (HDDs) are still the smart choice. They offer dramatically more storage per dollar compared to SSDs, and for a NAS that primarily serves files over a network, the speed difference is negligible. Your home network’s gigabit Ethernet connection is almost always the bottleneck, not the drive’s read speed. If you want a deeper look at how these technologies compare, check out our SSD vs. HDD comparison for 2026.
Two drive lines are specifically designed for NAS use: the WD Red Plus and the Seagate IronWolf. Both are built to run 24/7, handle the vibration of multi-drive enclosures, and carry longer warranties than standard desktop drives. Don’t put a regular desktop HDD in your NAS. They aren’t rated for continuous operation and will fail sooner.

WD Red Plus 4TB NAS Hard Drive
Reliable NAS-rated drive with CMR technology, ideal for 2-bay home setups running 24/7.
How Much Storage Do You Actually Need?
This depends on what you’re storing. Here’s a quick reference:
- Documents and photos only: 2TB is more than enough for most families
- Photos plus a moderate video collection: 4TB to 8TB
- Large media library with 4K video: 8TB to 16TB
- Video editing or surveillance footage: 16TB and up
Keep in mind that if you use RAID 1 mirroring (which I recommend for data safety), you’ll lose half your raw capacity to redundancy. Two 4TB drives in RAID 1 give you 4TB of usable space, not 8TB. The tradeoff is that if one drive dies, your data survives on the other. Understanding the difference between RAID 0 and RAID 1 is essential before you set up your NAS.
Setting Up Your NAS: A Walkthrough
Setting up a modern pre-built NAS is surprisingly simple. Here’s the general process using a Synology unit as an example (QNAP and Asustor follow similar steps):
- Install the drives. Open the drive bays (most are tool-free), slide your NAS-rated HDDs in, and snap them into place.
- Connect to your router. Run an Ethernet cable from the NAS to an open port on your home router. Plug in the power cable.
- Find the NAS on your network. Open a web browser on any computer and go to find.synology.com (or your manufacturer’s equivalent). The setup wizard will detect your NAS automatically.
- Install the operating system. The wizard will download and install the latest DSM software. This takes about 10 minutes.
- Create an admin account. Pick a strong username and password. Don’t use “admin” as the username, as that’s the first thing attackers try.
- Set up your storage pool and volume. The wizard will guide you through selecting your RAID type and formatting the drives.
- Create shared folders. Make folders for different purposes: one for family photos, one for backups, one for media, etc.
The whole process takes about 30 minutes from opening the box to accessing your first shared folder. For a more detailed setup guide with screenshots, our complete NAS setup guide for beginners covers every step.
Top Use Cases for a Home NAS
Once your NAS is running, here’s where it really starts to prove its value.
Centralized File Storage and Sharing
Everyone in your household can access shared folders. Store family photos in one place instead of scattered across five phones. Share large video files between computers without USB drives. Access your documents from any room in the house. Most NAS platforms also offer mobile apps, so you can browse and upload files from your phone just like you would with Dropbox.
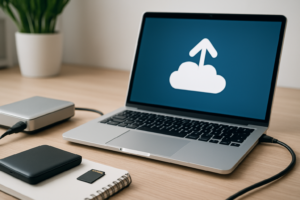
Automated Backups
This is the killer feature for most people. You can configure every computer in your home to automatically back up to the NAS on a schedule. Synology’s Active Backup suite can handle Windows PCs, Macs (via Time Machine), and even entire virtual machines. Your phones can auto-upload photos too. Once you set up automated backups, you never have to think about it again.
Media Server (Plex, Jellyfin, Emby)
Install Plex or Jellyfin on your NAS and it becomes a personal Netflix. Store your movie and TV collection on the NAS, and stream to any smart TV, Roku, Apple TV, or phone in your house. A NAS like the DS224+ has enough power to transcode a single 4K stream, which is plenty for a typical household.
Personal Photo Library
Synology Photos (included free with Synology NAS units) is genuinely comparable to Google Photos. It offers facial recognition, automatic organization by date and location, and a slick mobile app for on-the-go access. The difference? Your photos live on hardware you own, with no storage cap and no AI training on your personal images.
Remote Access
Most NAS platforms include tools for secure remote access. Synology’s QuickConnect feature lets you access your files from anywhere with an internet connection, no complex networking required. This means you can pull up a document on your phone while traveling, or stream media from your NAS while on vacation.
NAS Buying Recommendations for 2026
Here are my picks for different budgets and needs:
Best for Most Home Users
The Synology DS224+ remains the gold standard. Two drive bays, an Intel Celeron processor, 2GB of RAM (expandable), and Synology’s excellent DSM software. It handles backups, media streaming, photo management, and Docker apps with ease. Pair it with two WD Red Plus 4TB drives in RAID 1 for a reliable setup with 4TB of protected storage.
Budget-Friendly Option
The Synology DS124 is a single-bay NAS for those who want to start small. You won’t get RAID redundancy with just one drive, but you can always use it as a backup destination and keep another copy in the cloud for safety. It runs the same DSM software, so the experience is identical.
For Larger Families or Power Users
Step up to the Synology DS423+ or the QNAP TS-464. Both are 4-bay units that give you room to grow. With four bays, you can run RAID 5 (one drive’s worth of redundancy, with the rest as usable space) and have significantly more total capacity. The QNAP TS-464 is particularly strong if you want to run virtual machines or more demanding applications.

QNAP TS-464 4-Bay NAS
A powerful 4-bay NAS with dual M.2 SSD slots for caching and strong hardware for advanced users.
Common Mistakes to Avoid
After helping dozens of friends and family members set up their first NAS, here are the mistakes I see most often:
Using desktop drives instead of NAS-rated drives. Standard desktop HDDs (like the WD Blue) aren’t designed for 24/7 operation in a multi-drive enclosure. They’ll work initially but tend to fail much sooner. Spend the extra money on NAS-rated drives. It’s cheaper than losing your data.
Skipping RAID because you want maximum capacity. RAID 1 or RAID 5 costs you some usable space, but it protects you against a single drive failure. Without it, one dead drive means everything’s gone. And RAID is not a backup either. You should still keep important files backed up to a second location. This could be an external drive stored offsite or a cloud backup service.
Placing the NAS in a closed cabinet with no airflow. NAS units generate heat, especially under load. Put yours on a shelf with adequate ventilation. If the drives overheat, their lifespan drops significantly. This is one of those costly storage mistakes that’s easy to prevent.
Ignoring drive health monitoring. Your NAS can check drive health automatically using S.M.A.R.T. data. Enable these alerts. If a drive starts showing signs of failure, you’ll get an email warning and can replace it before data loss occurs.
Leaving default ports and admin accounts active. If you enable remote access, take basic security precautions. Change default ports, disable the default admin account, enable two-factor authentication, and keep the firmware updated. A NAS exposed to the internet with weak security is a target for ransomware.
Frequently Asked Questions
Can I access my NAS when I’m away from home?
Yes. All major NAS brands offer remote access features. Synology has QuickConnect, QNAP has myQNAPcloud, and Asustor has EZ-Connect. These services let you securely access files, stream media, and manage your
James Kennedy is a writer and product researcher at Drives Hero with a background in IT administration and consulting. He has hands-on experience with storage, networking, and system performance, and regularly improves and optimizes his home networking setup.