How to Build a Home NAS for Under $300 in 2026
Building your own NAS (Network Attached Storage) is one of the most satisfying tech projects you can tackle at home. You get full control over your data, avoid monthly cloud storage fees, and end up with a system tailored exactly to your needs. The best part? You don’t need to spend a fortune to get there.
This guide walks you through a complete budget NAS build for under competitively priced in 2026. I’ll cover the enclosure, drives, and software setup so you can go from zero to a fully functional home server in a single afternoon. If you want even more context on the full build process, check out our complete budget NAS build guide for additional hardware considerations.
Step 1: Choose Your NAS Enclosure
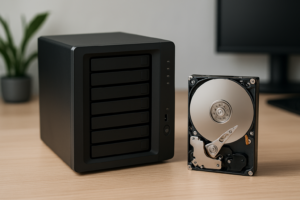
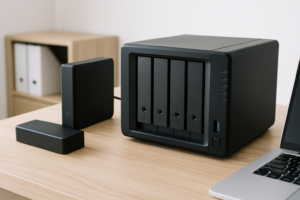
The enclosure is the foundation of your build. You have two main paths: buy a dedicated NAS enclosure from a brand like Synology or QNAP, or repurpose a mini PC or old desktop. For most people on a budget, a dedicated 2-bay NAS enclosure hits the sweet spot between simplicity and cost.
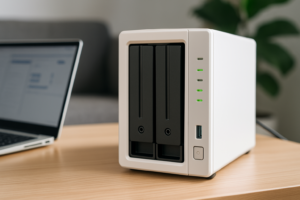
My top recommendation for a budget build is the Synology DiskStation DS223j. It’s a 2-bay unit with a clean web interface, automatic software updates, and enough processing power for file serving, media streaming, and basic Docker containers. It won’t win any speed records, but for a home NAS, it’s more than capable.

Synology DiskStation DS223j
Best budget 2-bay NAS enclosure with Synology’s excellent DSM software and beginner-friendly setup.
If you’d rather go the DIY route, an older mini PC like a used Dell OptiPlex Micro paired with a USB 3.0 drive dock can work well. You lose the polished software experience, but you gain flexibility and often save money. Just make sure whatever you pick supports at least two SATA connections or has reliable USB 3.0 ports for external drive enclosures.
A few other budget NAS enclosures worth considering include the TerraMaster F2-223 and the QNAP TS-233. Both offer competitive specs, though I find Synology’s software ecosystem easier to live with long term.
Step 2: Pick the Right Drives
Your drives will likely eat up the biggest chunk of your budget, and they’re also the most important decision you’ll make. For a NAS, you want drives specifically designed for always-on, multi-drive environments. Regular desktop drives can work in a pinch, but NAS-rated drives handle vibration better and are built for 24/7 operation.
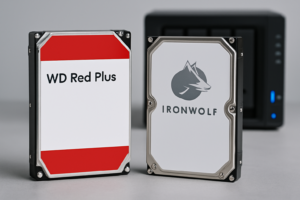
For a budget 2-bay setup, I recommend starting with two 4TB NAS drives. The WD Red Plus 4TB is the go-to choice here. It uses CMR (Conventional Magnetic Recording) rather than the slower SMR technology, which matters a lot for NAS workloads like RAID rebuilds and large file transfers. The Seagate IronWolf 4TB is an equally solid alternative with similar specs and reliability ratings.

WD Red Plus 4TB NAS Hard Drive
CMR-based NAS drive with excellent reliability and optimized firmware for always-on storage systems.
If you’re wondering whether an SSD makes sense for a NAS, for pure bulk storage the answer is usually no. Traditional hard drives still offer dramatically more capacity per dollar. Our SSD vs HDD comparison breaks down the trade-offs in detail, but for a budget NAS focused on storing files, photos, and media, spinning drives are the right call.
SSD Cache: Worth It on a Budget?
Some NAS enclosures support SSD caching, where a small SSD speeds up frequently accessed files. On a competitively priced budget, I’d skip it. The money is better spent on larger storage drives. You can always add cache later when your budget allows.
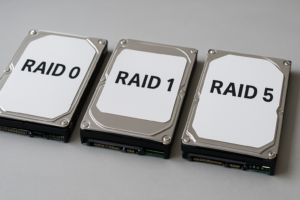
Step 3: Configure Your RAID Setup
With two drives, you have a simple choice: RAID 0 (striping for speed, no redundancy) or RAID 1 (mirroring for protection). For a home NAS, RAID 1 is almost always the right answer. You’ll lose half your raw capacity since both drives mirror each other, but if one drive fails, your data survives.
With two 4TB drives in RAID 1, you’ll have roughly 4TB of usable space. That’s plenty for most households to store documents, photos, home videos, and a decent media library. If you want a deeper breakdown of the differences, our guide on RAID 0 vs RAID 1 for NAS covers the performance and reliability trade-offs.
One important note: RAID is not a backup. It protects you from a single drive failure, but it won’t save you from accidental deletion, ransomware, or a power surge that fries both drives. You still need a separate backup strategy, which brings us to the next step.
Step 4: Initial Software Setup
If you went with a Synology enclosure, the setup process is genuinely simple. Plug in your drives, connect the NAS to your router with an Ethernet cable, power it on, and navigate to find.synology.com in your browser. Synology’s DiskStation Manager (DSM) will walk you through drive formatting, RAID configuration, and account creation.
Here’s what to configure during initial setup:
- Storage Pool: Select SHR (Synology Hybrid RAID) or RAID 1. SHR is Synology’s proprietary version that makes future drive upgrades easier.
- File System: Choose Btrfs over ext4. Btrfs supports snapshots, data checksums, and better long-term data integrity.
- User Accounts: Create individual accounts for each family member rather than sharing one login. This lets you control who accesses what.
- Shared Folders: Set up folders for different categories like Photos, Documents, Media, and Backups.
- QuickConnect: Enable this for easy remote access without fiddling with port forwarding on your router.
If you’re using a DIY build instead, install TrueNAS SCALE (free and Linux-based) or OpenMediaVault. Both are excellent open-source NAS operating systems. TrueNAS has a steeper learning curve but offers more advanced features like ZFS file system support. OpenMediaVault is lighter and more approachable for beginners.
Step 5: Set Up Automated Backups
A NAS is only as valuable as the data on it, and that data is only as safe as your backup strategy. Once your NAS is running, the first thing you should do is configure automated backups from your computers and phones.
On Synology, install Synology Drive from the Package Center. It works like a self-hosted Dropbox, syncing folders from your PC or Mac to the NAS automatically. For phones, Synology Photos handles automatic photo and video uploads over Wi-Fi. Our guide on setting up automated NAS backups in 30 minutes covers the full process with screenshots.
For off-site protection, consider pairing your NAS with a cloud backup service like Backblaze B2 or Synology C2. If you’re debating whether cloud or local storage makes more sense for your situation, our cloud backup vs local NAS cost comparison lays out the numbers. The short version: a NAS pays for itself within about a year compared to most cloud storage subscriptions, and adding a small cloud backup for critical files gives you the best of both worlds.
Seagate IronWolf 4TB NAS Hard Drive
Reliable alternative NAS drive with built-in health monitoring and a strong 3-year warranty.
Budget Breakdown: Staying Under competitively priced
Here’s how the budget roughly shakes out. Check current Amazon pricing for exact numbers, as drive prices fluctuate frequently:
- 2-Bay NAS Enclosure (Synology DS223j or similar): the largest single expense, but frequently available at competitive prices
- 2x 4TB NAS Hard Drives (WD Red Plus or Seagate IronWolf): your second biggest cost, with frequent sales making the competitively priced total very achievable
- Ethernet Cable (Cat 6): you likely already have one, but budget a few dollars if not
Timing your purchase around major sales events can make a significant difference. Keep an eye on seasonal deals, especially for storage drives, which tend to see notable discounts during big shopping events.
Frequently Asked Questions
Can I use old hard drives I already have for my NAS build?
You can, and it’s a great way to save money. Just be aware that desktop drives aren’t optimized for 24/7 NAS use and may fail sooner than NAS-rated drives. Check the drive’s SMART data before committing. If the drive has thousands of hours already logged, consider it a temporary solution while you save for proper NAS drives. Also, if you’re repurposing drives from an old system, make sure to securely wipe them before putting them into a new environment, especially if they contained sensitive data.
Is a 2-bay NAS enough for a family of four?
For most families, absolutely. A 2-bay setup in RAID 1 with 4TB drives gives you 4TB of protected storage. That’s enough for tens of thousands of photos, hundreds of hours of home video, and all your important documents. If you find yourself running low, you can upgrade to larger drives (8TB or 12TB) down the road without replacing the enclosure.
How much power does a budget NAS use?
A 2-bay NAS like the Synology DS223j typically draws between 10 and 20 watts during normal operation. That’s roughly equivalent to leaving a LED light bulb on. Over a full year, you’re looking at minimal electricity costs, which
James Kennedy is a writer and product researcher at Drives Hero with a background in IT administration and consulting. He has hands-on experience with storage, networking, and system performance, and regularly improves and optimizes his home networking setup.