How Do I Clone My Laptop Hard Drive to Ssd?
Upgrading your laptop from a traditional hard drive to a solid-state drive (SSD) can dramatically improve your computer’s performance, but the thought of reinstalling your operating system and all your programs might seem daunting. The good news is that you can clone your existing hard drive to an SSD, creating an exact copy that preserves all your data, settings, and installed applications.
Cloning a laptop hard drive to SSD involves creating an exact replica of your original hard drive on a new solid-state drive. This process transfers all your data, applications, system files, and the operating system from the old hard drive to the SSD, making it possible to upgrade your laptop without the hassle of reinstalling programs or manually transferring files. The cloned SSD will boot up exactly like your original drive, but with significantly improved performance.
Why Clone Instead of Fresh Install
While performing a fresh installation of your operating system on a new SSD might seem like a clean approach, cloning offers several advantages. You won’t need to spend hours reinstalling all your software, reconfiguring settings, or hunting down license keys for your programs. Your desktop wallpaper, browser bookmarks, email accounts, and personal preferences will all remain intact.
Cloning also reduces the risk of forgetting to back up important files or losing customized application settings that you’ve fine-tuned over time. For business users or professionals who rely on specific software configurations, cloning ensures zero downtime and maintains productivity immediately after the upgrade.
What You’ll Need Before Starting
Before beginning the cloning process, gather the necessary equipment and software. You’ll need an SSD that matches or exceeds the capacity of your data (though it can be smaller than your original drive if you’re not using all the space). A USB-to-SATA adapter cable or external enclosure is essential for connecting the new SSD to your laptop during the cloning process.
Choose reliable cloning software such as Macrium Reflect, EaseUS Todo Backup, AOMEI Backupper, or the free option Clonezilla. Some SSD manufacturers like Samsung, Crucial, and WD provide their own cloning software with their drives. Ensure your laptop has enough free space and is running smoothly before starting the process.
Preparing Your System for Cloning
Before starting the cloning process, create a complete backup of your data using an external drive or cloud storage service. While cloning is generally safe, having a backup provides peace of mind in case something goes wrong. Clean up your current hard drive by removing unnecessary files, emptying the recycle bin, and running disk cleanup utilities to reduce the amount of data that needs to be cloned.
Check your current drive for errors using Windows Check Disk utility or similar tools for Mac and Linux systems. Defragmenting a traditional hard drive before cloning can also speed up the process, though this step isn’t necessary for SSDs. Ensure your laptop is plugged into power during the entire cloning process to prevent interruptions.
Step-by-Step Cloning Process
Connect your new SSD to your laptop using a USB-to-SATA adapter cable or external enclosure. The SSD should appear as a new drive in your system. Download and install your chosen cloning software, making sure to get it from the official website to avoid malware.
Launch the cloning software and select your current hard drive as the source and the new SSD as the destination. Most cloning programs will automatically detect both drives and display them clearly. Be extremely careful to select the correct source and destination drives, as the cloning process will completely overwrite the destination drive.
Configure the cloning settings according to your needs. Many programs offer options to clone only used sectors (which speeds up the process) or to resize partitions automatically if your SSD is a different size than your original drive. Start the cloning process and be patient, as it can take anywhere from 30 minutes to several hours depending on the amount of data and the speed of your drives.
Physical Installation of the SSD
Once cloning is complete, shut down your laptop completely and disconnect the power adapter. Remove the battery if possible for safety. Locate your laptop’s hard drive bay, which is usually accessible through a panel on the bottom of the laptop or by removing the entire bottom cover.
Carefully disconnect the SATA cable and power connector from your old hard drive, then remove any mounting screws holding it in place. Slide out the old drive and replace it with your newly cloned SSD, ensuring the connectors align properly. Secure the SSD with the same screws and reconnect all cables firmly.
Some laptops use proprietary connectors or have the hard drive integrated into the motherboard, making replacement more challenging. Consult your laptop’s manual or manufacturer’s website for specific instructions if you’re unsure about the installation process.
Post-Installation Setup and Verification
After installing the SSD, reassemble your laptop and power it on. The system should boot normally from the cloned SSD, appearing exactly as it did with the original hard drive. Check that all your programs, files, and settings are intact by opening frequently used applications and accessing important documents.
Verify that the SSD is properly recognized by checking the device manager or system information. The drive should show up with its correct capacity and model number. Run a few benchmark tests to confirm you’re getting the expected performance improvements from the SSD upgrade.
Update your SSD’s firmware if necessary, as manufacturers occasionally release updates that improve performance or fix compatibility issues. Enable TRIM support in your operating system to maintain optimal SSD performance over time. Windows typically enables this automatically for SSDs, but you can verify it’s working using command-line tools.
Troubleshooting Common Issues
If your laptop doesn’t boot after installing the cloned SSD, don’t panic. First, double-check that all connections are secure and properly seated. Some systems require you to change BIOS settings to recognize the new drive or switch from Legacy to UEFI boot mode.
Boot order issues can prevent the system from starting correctly. Access your laptop’s BIOS settings during startup and ensure the SSD is set as the primary boot device. If you’re still having trouble, try booting from a Windows installation media and running startup repair tools.
Performance issues might occur if the SSD isn’t properly aligned or if legacy drivers are being used. Most modern cloning software handles partition alignment automatically, but older tools might not. Consider using manufacturer-provided migration software if you continue experiencing problems.
Maximizing SSD Performance
After successfully cloning and installing your SSD, optimize your system settings to take full advantage of the improved performance. Disable disk defragmentation for the SSD, as it’s unnecessary and can reduce the drive’s lifespan. Enable fast startup and hybrid sleep modes to take advantage of the SSD’s quick boot times.
Consider moving your page file to the old hard drive if you’re keeping it as secondary storage, as this reduces unnecessary writes to the SSD. Adjust your system’s power settings to prevent the SSD from entering sleep mode too aggressively, which can cause brief delays when accessing data.
Monitor your SSD’s health using built-in tools or third-party software that can track wear levels and remaining lifespan. Modern SSDs are quite durable, but keeping an eye on their condition helps you plan for future upgrades.
Frequently Asked Questions Of How Do I Clone My Laptop Hard Drive To Ssd
How Long Does It Take To Clone Laptop Hard Drive To Ssd?
The cloning time depends on several factors including the amount of data being transferred, the speed of your original hard drive, the connection method used, and the performance of your cloning software. For a typical laptop with moderate data usage, expect the process to take between 1-3 hours. Drives with large amounts of data or slower USB connections may take significantly longer, sometimes up to 6-8 hours for heavily used drives.
What Software Do I Need To Clone My Laptop Hard Drive To Ssd?
Several reliable cloning programs are available, including free options like Clonezilla and commercial solutions such as Acronis True Image, Macrium Reflect, and EaseUS Todo Backup. Many SSD manufacturers provide their own free cloning software with purchase, such as Samsung Data Migration, Crucial Storage Executive, or WD Acronis True Image. Choose software that supports your operating system and offers features like automatic partition resizing.
Is It Necessary To Clone The Entire Hard Drive To Ssd?
Yes, cloning the entire hard drive ensures that all system files, boot sectors, and partition tables are properly transferred to the SSD. This includes the operating system, installed programs, user data, and system configuration files. Partial cloning or copying only data files would require reinstalling the operating system and all applications, defeating the purpose of cloning for a seamless upgrade.
Does Cloning To Ssd Improve Laptop Performance?
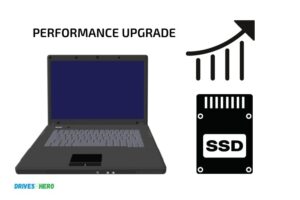
Absolutely. SSDs offer dramatically faster read and write speeds compared to traditional hard drives, resulting in faster boot times, quicker application launches, and improved overall system responsiveness. You’ll notice reduced loading times for large files, smoother multitasking, and better performance when working with demanding applications. The improvement is often immediately noticeable and can make an older laptop feel significantly more responsive.

Harold Williams is a senior writer and technical editor at Drives Hero with 20+ years of experience in IT administration. He specializes in storage systems, SSD reviews, and performance testing, bringing real-world insight to every guide.