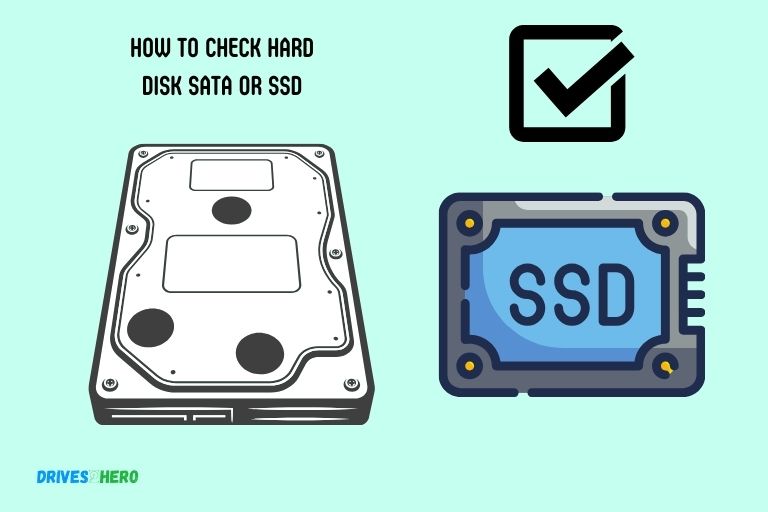
How to Check Hard Disk Sata Or Ssd? Type Device Manager!
To determine whether your computer’s hard disk is a SATA or SSD, first open the Start Menu on your computer and type “Device Manager”.
Open the device manager and drop down the tab named “Disk Drives”. This will display the type of hard drive your computer is equipped with.
The Device Manager is a control panel applet in Microsoft Windows operating systems. It allows users to view and control the hardware attached to the computer.
When a piece of hardware is not working, the offending hardware is highlighted for the user to deal with. In this case, the “Disk Drives” section in the device manager shows the type of hard disk your computer has.
Identifying whether your hard drive is a SATA or SSD can be done easily through the Device Manager in Windows.
This simple method provides accurate information about your hard drive type. Always remember to handle hardware settings with care to prevent any system errors.
5 Steps Checking Hard Disk Sata vs SSD
| Step Number | Directions for Windows | Directions for macOS |
|---|---|---|
| 1 | Open the Device Manager | Go to “About This Mac” |
| 2 | Expand “Disk Drives” | Click on “System Report” |
| 3 | Look for your hard drive in the list | Scroll down to “Hardware” and click on “SATA/SATA Express” |
| 4 | Check the model of your hard drive | Look for the “Link Speed” in the right pane |
| 5 | Search the model number online to find out if your drive is SATA or SSD | If the link speed is 6 Gigabit, your hard drive is SATA. If it is not, your drive is likely an SSD. |
Key Takeaway
Five Facts About Checking Hard Disk Sata and SSD
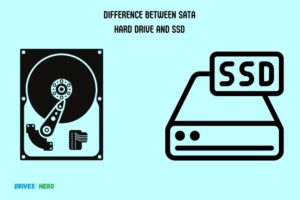
Differentiating Between Sata And Ssd
Differentiating between SATA and SSD is crucial, and there are ways to check if your hard disk is SATA or SSD.
By identifying the type of technology, you can better understand your storage device’s performance and make informed decisions regarding upgrades or replacements.
Sata – The Traditional Storage Technology
SATA, or Serial Advanced Technology Attachment, is a widely used storage interface for connecting hard drives to computers.
Here are the key points to understand about SATA:
- Compatible with both traditional hard disk drives (HDD) and solid-state drives (SSD), SATA has been the go-to technology for storage for many years.
- It uses a cable connection to connect the drive to the motherboard, allowing for high-speed data transfer.
- SATA drives are available in different sizes, with 2.5-inch and 3.5-inch being the most common options.
- Offers larger storage capacities at a more affordable price compared to SSDs.
- Suitable for tasks that do not require lightning-fast speed, such as storing large media files or running applications with high storage requirements.
Ssd – The Modern Solid-State Drive
SSD, short for solid-state drive, represents the latest and most advanced storage technology. It offers several advantages over traditional HDDs.
Take a look at the following points to understand the benefits of SSDs:
- Uses flash memory chips to store data, resulting in lightning-fast read and write speeds.
- Because it lacks any moving parts, SSDs are more durable and less prone to mechanical failure than HDDs.
- Significantly faster boot times and application loading speeds that can greatly enhance overall computer performance.
- Consumes less power, resulting in longer battery life for laptops and other portable devices.
- Comes in both traditional 2.5-inch form factor and smaller M.2 form factor, which is ideal for compact and slim devices.
- Although generally more expensive than traditional HDDs, the prices of SSDs have been steadily decreasing over time.
By understanding the differences between SATA and SSD, you can make an informed choice when deciding on the most suitable storage option for your needs.
While SATA is the more traditional and cost-effective solution, SSDs provide a significant performance boost and increased durability.
Ultimately, the choice between SATA and SSD will depend on your specific requirements and budget.
Identifying The Type Of Hard Disk In Your System
Learn how to easily identify whether your system uses a SATA or SSD hard disk by following these simple steps. Understand the difference and optimize your storage device accordingly.
If you’re wondering whether your computer uses a SATA or SSD hard disk, it’s important to know how to check the type to ensure you have the right information for troubleshooting or upgrading purposes.
Follow the steps below to identify the type of hard disk in your system based on your operating system.
Using Device Manager In Windows:
- Open the Start menu and type “Device Manager” in the search bar.
- Click on the “Device Manager” result to open the application.
- In the Device Manager window, expand the “Disk drives” category.
- You will see a list of all the disk drives connected to your computer.
- Look for the name of your hard disk, which will typically include its brand and model number.
- If the name includes “SSD” or “Solid State Drive,” then you have an SSD. Otherwise, it is likely a SATA hard disk.
Checking System Information In Macos:
- Click on the Apple icon in the top left corner of your screen and select “About This Mac” from the drop-down menu.
- In the Overview tab, click on the “System Report” button.
- In the sidebar on the left, under the “Hardware” section, click on “Storage.”
- On the right side, you will find detailed information about your storage devices.
- Look for the “Medium Type” column and find the description that matches your hard disk.
- If it says “Solid State” or “SSD,” then your hard disk is an SSD. Otherwise, it is likely a SATA hard disk.
Identifying the type of hard disk in your system is crucial for troubleshooting issues or determining if an upgrade is needed.
Use the instructions provided for your operating system to easily find out whether you have a SATA or SSD hard disk.
Verifying If Your Hard Disk Is Connected Via Sata
To verify if your hard disk is connected via SATA, open the Device Manager in Windows and look under the “Disk drives” category.
If your hard disk is listed as a SATA drive, it means it is connected using the SATA interface.
Is your computer running slowly?
Or maybe you’re just curious to know if your hard disk is connected using SATA technology? We’ll guide you through the process of checking if your hard disk is connected via SATA.
Follow the steps below to ensure your hard disk is using the latest and most efficient connection.
Opening The Computer Case
To check if your hard disk is connected via SATA, you’ll need to open your computer case.
Here’s how to do it:
- Shut down your computer and unplug it from the power source.
- Remove any peripherals connected to your computer.
- Locate the screws or latches securing the computer case.
- Use a screwdriver or your hands to unscrew or unclip the case.
- Carefully remove the case, making sure not to damage any internal components.
Locating The Hard Disk Cables
Now that you have opened your computer case, it’s time to locate the cables connected to your hard disk.
Here’s what you need to do:
- Identify the hard disk. It will typically be a rectangular metal or plastic box mounted inside your computer.
- Look for the data cables connected to the back of your hard disk. These cables are responsible for transmitting data between your hard disk and the motherboard.
Ensuring The Sata Cable Is Securely Connected
Now that you have located the hard disk cables, it’s time to verify if the SATA cable is securely connected.
Follow the steps below:
- Identify the SATA cable. It is a thin and flat cable with a connector at each end.
- Check if both ends of the SATA cable are firmly plugged into the hard disk and the motherboard.
- Ensure that the connectors are aligned properly and inserted all the way into the corresponding ports.
- Double-check that the cable is not loose or disconnected.
By following these steps, you can easily verify if your hard disk is connected via SATA.
Taking this precautionary measure can help you diagnose any potential issues with your hard disk’s connection and ensure optimum performance.
Remember to handle the internals of your computer with care and keep track of any screws or clips during the process.
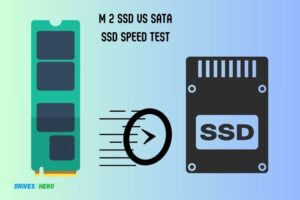
Measuring The Performance Of Your Solid-State Drive
Discover how to effectively measure the performance of your solid-state drive (SSD) or hard disk SATA with these simple steps.
Ensure your storage device is running at its optimal speed and efficiency for enhanced performance and productivity.
Ready to check the performance of your solid-state drive (SSD)? By utilizing benchmarking software, you can get valuable insights into its capabilities.
Here’s a step-by-step guide on how to measure and interpret the performance of your SSD:
Utilizing Benchmarking Software
To accurately assess the performance of your SSD, follow these steps:
- Research and select a reliable benchmarking software based on user reviews and recommendations.
- Download and install the chosen benchmarking software onto your computer.
- Launch the software and locate the option to benchmark your storage devices.
- Initiate the benchmarking process for your SSD. This process might take some time, so be patient.
Assessing Sequential And Random Read/Write Speeds
Once you have completed the benchmarking process, the software will provide you with various statistics and measurements.
Pay particular attention to the following:
Sequential Read/Write Speeds:
- Check the sequential read speed, which indicates how quickly data is read from consecutive memory locations on the SSD.
- Assess the sequential write speed, which measures how fast your SSD can write data in a consecutive manner.
Random Read/Write Speeds:
- Evaluate the random read speed, which represents the speed at which data can be read from random memory locations on the SSD.
- Analyze the random write speed, which indicates how fast your SSD can write data to random memory locations.
Interpreting The Test Results
Now that you have the test results, it’s crucial to understand their implications.
Consider the following in interpreting the performance of your SSD:
- Higher read/write speeds generally indicate better performance and faster data transfer rates.
- Compare your SSD’s results to the average benchmarks for your specific model to determine if it is performing optimally.
- Keep in mind that different benchmarking software may produce slightly different results, so it’s essential to use the same software for consistent comparisons.
Remember, it’s important to periodically test the performance of your SSD to ensure optimal functionality.
Regular benchmarking provides valuable insights into any degradation or anomalies in your drive’s performance, allowing you to take proactive measures if necessary.
So, keep checking your SSD’s performance and enjoy a smoother computing experience!
Checking The Health And Lifespan Of Your Ssd
Check the health and lifespan of your SSD easily with these steps. Get to know the condition of your hard disk SATA or SSD for optimal performance and reliability.
Solid State Drives (SSDs) have revolutionized storage technology with their improved performance and durability compared to traditional hard disk drives (HDDs).
However, it is essential to regularly monitor the health and lifespan of your SSD to ensure optimal performance and prevent data loss.
We will explore different methods for checking the health and lifespan of your SSD.
Using Manufacturer-Provided Software:
- Manufacturer-provided software offers specific tools to monitor and maintain your SSD effectively.
- Install the software provided by your SSD manufacturer to access features such as firmware updates, diagnostic tests, and performance monitoring.
- Utilize the diagnostic tests offered by the software to assess the health of your SSD and identify any potential issues.
- Regularly update the firmware provided by the manufacturer to enhance the performance and stability of your SSD.
Monitoring Smart Attributes:
- SMART (Self-Monitoring, Analysis, and Reporting Technology) attributes provide valuable information about your SSD’s health and potential failures.
- Use SSD monitoring software compatible with SMART to access and interpret these attributes.
- Pay attention to attributes like temperature, bad sectors, and wear leveling count, as they indicate potential health concerns.
- Regularly monitor these attributes to detect any changes or abnormalities that may require immediate attention.
Interpreting Ssd Health Indicators:
- SSD health indicators provide crucial information about the overall condition and expected lifespan of your SSD.
- These indicators can vary depending on the manufacturer and software used, but common health indicators include disk health percentage, estimated lifespan, and wear leveling count.
- A disk health percentage of 100% indicates an excellent condition, while a lower percentage may suggest wear and potential issues.
- The estimated lifespan provides an estimate of the remaining lifespan of your SSD, allowing you to plan for its replacement if necessary.
- The wear leveling count indicates how much data your drive has been subjected to, giving you an idea of how worn out it may be.
- Interpret these indicators according to the guidelines provided by your SSD manufacturer, and take appropriate action if any concerning signs appear.
Regularly checking the health and lifespan of your SSD is essential to ensure the longevity and performance of your storage device.
By utilizing manufacturer-provided software, monitoring SMART attributes, and interpreting SSD health indicators, you can stay proactive in maintaining the health of your SSD.
Take the time to regularly assess your SSD to address any potential issues promptly and preserve your data integrity.
Troubleshooting Common Problems In Sata Drives
Learn how to troubleshoot common problems in SATA drives with this comprehensive guide. Discover step-by-step instructions on checking your hard disk SATA or SSD for any issues.
SATA drives are commonly used in computers to store and retrieve data. However, like any technology, they can encounter problems that can hinder their performance.
We will explore some common issues that may arise with SATA drives and how to troubleshoot them effectively.
Checking For Errors In Windows Event Viewer
- Open the Windows Event Viewer by pressing the Windows key and typing “Event Viewer” in the search bar.
- Click on “Windows Logs” in the left panel, followed by “System.”
- Look for any errors or warnings related to your SATA drive in the middle panel.
- Analyze the error codes or messages provided and search online for possible solutions.
- Take note of any recurring errors, as they may indicate a more serious issue.
Running Disk Checks And Repairs
- Press the Windows key and type “Command Prompt” in the search bar.
- Right-click on “Command Prompt” and select “Run as administrator.”
- In the Command Prompt window, type “chkdsk /f” followed by the letter of your SATA drive (e.g., “chkdsk /f C: “) and press Enter.
- If prompted, type “Y” to schedule the disk check for the next system restart.
- Restart your computer, and Windows will automatically run a disk check and repair any errors it finds.
Resolving Driver Or Firmware Issues
- Open the Device Manager by pressing the Windows key and typing “Device Manager” in the search bar.
- Expand the “Disk drives” category and locate your SATA drive.
- Right-click on your SATA drive and select “Update driver.”
- Choose the option to search automatically for updated driver software.
- If no updates are found, visit the manufacturer’s website to download and install the latest driver for your SATA drive.
- If your SATA drive has firmware, check the manufacturer’s website for any firmware updates and follow their instructions for installation.
Remember, troubleshooting common problems with SATA drives requires careful analysis and following the appropriate steps.
By using the Windows Event Viewer to check for errors, running disk checks and repairs, and resolving driver or firmware issues, you can effectively address and resolve any issues affecting the performance of your SATA drive.
Enhancing The Performance Of Your Hard Disk
Is your hard disk SATA or SSD? Learn how to check and determine the type of your hard disk, enhancing its overall performance effectively. Maximize your storage capabilities with these simple steps.
Is your hard disk running slow? Don’t worry, we’ve got you covered! With a few simple techniques, you can boost the performance of your hard disk, whether it’s a SATA drive or an SSD.
We’ll walk you through the steps to optimize your hard disk, ensuring that your computer runs smoothly and efficiently.
Enabling Ahci Mode For Sata Drives:
If you’re using a SATA drive, enabling AHCI (Advanced Host Controller Interface) mode can significantly improve its performance.
Here’s how you can do it:
- Access your computer’s BIOS settings by restarting the system and pressing the appropriate key (usually F2 or Del) during startup.
- Look for the SATA configuration in the BIOS menu. It may be listed as “SATA Configuration,” “Storage Configuration,” or something similar.
- Change the SATA mode from IDE (or Compatibility) to AHCI.
- Save the changes and exit the BIOS settings.
- Restart your computer and let the changes take effect.
Enabling AHCI mode enhances the efficiency of data transfer between your SATA drive and the rest of your system, resulting in faster overall performance.
Updating Drivers And Firmware:
Outdated drivers or firmware can cause issues and decrease the performance of your hard disk. By keeping them up to date, you can ensure your hard disk is running at its best. Here’s how you can update them:
- Identify the model and manufacturer of your hard disk.
- Visit the manufacturer’s website and navigate to the support or downloads section.
- Search for the latest drivers and firmware for your specific model.
- Download the updates and follow the provided instructions on installing them.
- After installation, restart your computer to apply the changes.
Regularly updating drivers and firmware ensures compatibility with newer software and helps maximize your hard disk’s potential.
Configuring Ssd-Specific Optimizations:
If you’re using an SSD (Solid-State Drive), there are additional optimizations you can make to further enhance its performance.
Consider the following:
- Enable TRIM: TRIM is a feature that helps maintain the longevity and speed of an SSD. To enable TRIM, open the command prompt as an administrator and type the following command: “fsutil behavior set DisableDeleteNotify 0”.
- Disable indexing: SSDs don’t benefit from the indexing feature, so disabling it can free up system resources. Right-click on your SSD drive, select “Properties,” and uncheck “Allow files on this drive to have contents indexed.”
- Enable write caching: Enabling write caching can improve the write performance of your SSD. Go to the Device Manager, find your SSD drive under “Disk drives,” right-click, select “Properties,” go to the “Policies” tab, and check the “Enable write caching on this device” option.
By implementing these SSD-specific optimizations, you can ensure your SSD operates at its full potential, providing fast and efficient storage.
Optimizing your hard disk is a simple yet effective way to improve your computer’s overall performance.
Whether you have a SATA drive or an SSD, enabling AHCI mode, updating drivers and firmware, and configuring SSD-specific optimizations will help you unlock the full power of your hard disk.
Give them a try and experience a noticeable difference in speed and efficiency!
Ensuring The Safety Of Your Data
Ensure the safety of your data by checking your hard disk SATA or SSD. Take the necessary steps to protect your valuable information and maintain the optimal performance of your storage device.
When it comes to your computer’s hard disk, whether it’s a SATA or SSD, ensuring the safety of your data is of utmost importance.
To protect your valuable files and personal information from loss, theft, or corruption, there are several measures you can take.
By implementing regular backups, encrypting sensitive data, and protecting against malware and viruses, you can significantly enhance the security of your hard disk and safeguard your information.
Let’s delve into each of these measures in detail:
Implementing Regular Backups
Regular backups are essential for safeguarding your data in case of hardware failure, accidental deletion, or any unforeseen circumstances. By backing up your files, you can easily restore them when needed.
Here are some key points to consider when implementing regular backups:
- Use reliable backup software or cloud storage solutions to automatically back up your files on a scheduled basis.
- Ensure that your backups are stored in a separate location or on external storage devices to prevent data loss due to physical damage or theft.
- Test your backups periodically to verify their integrity and accessibility.
Encrypting Sensitive Data
Encrypting sensitive data adds an extra layer of protection to prevent unauthorized access to your confidential information.
Encryption transforms your data into a coded format that can only be deciphered with a corresponding decryption key.
Follow these steps to effectively encrypt your sensitive data:
- Use encryption software or built-in encryption tools provided by your operating system to encrypt specific files, folders, or the entire hard disk.
- Choose strong encryption algorithms, such as AES (Advanced Encryption Standard), to ensure robust security.
- Keep your encryption keys in a secure and separate location to prevent them from falling into the wrong hands.
Protecting Against Malware And Viruses
Malware and viruses pose a significant threat to the integrity and security of your hard disk. These malicious programs can corrupt files, steal your personal information, or grant unauthorized access to hackers.
To protect your data from such threats, take these precautions:
- Install reputable antivirus software and keep it up to date to detect and eliminate malware and viruses.
- Enable automatic scanning and real-time protection to ensure continuous monitoring of your system.
- Regularly update your operating system and other software to patch known security vulnerabilities.
- Avoid downloading files or clicking on suspicious links from untrusted sources.
By implementing regular backups, encrypting sensitive data, and protecting against malware and viruses, you can create a robust defense system for your hard disk.
Prioritize the safety of your data to prevent potential loss or compromise. Stay proactive and vigilant in maintaining the security of your hard disk, ensuring the long-term integrity and accessibility of your valuable information.
FAQ Of How To Check Hard Disk Sata Or Ssd
How Do I Know If My Hard Drive Is Ssd Or Hdd?
To determine if your hard drive is SSD or HDD, check the specifications or look for SSD or HDD in the product name.
How Do I Know If My Hard Drive Is Sata?
To determine if your hard drive is SATA, check the connectors on the back of the drive. SATA drives have smaller, L-shaped connectors.
How Can I Know My Hard Disk Type?
To find out your hard disk type, follow these steps:
1. Go to “This PC” or “My Computer” on your Windows computer.
2. Right-click on “Properties” and select “Device Manager”.
3. Expand the “Disk Drives” category to see the type of hard disk installed.
4. Look for the specific model name or number to identify the type accurately.
Is My Hard Disk Sata Or Ssd?
Determining whether your hard disk is SATA or SSD can be done by checking the physical appearance and performance characteristics.
SATA hard disks have a traditional rectangular shape with multiple connectors, while SSDs are generally smaller, solid-state devices without any moving parts.
Additionally, SSDs offer faster read/write speeds compared to SATA hard disks.
Conclusion
Understanding the difference between hard disk SATA and SSD is crucial for optimizing your computer’s performance.
By checking the type of storage device you have, you can make informed decisions about upgrades, data transfers, and overall system maintenance.
SATA drives offer larger capacities at a more affordable price, making them suitable for bulk storage needs. On the other hand, SSDs bring unparalleled speed and durability, perfect for faster boot times and quicker data access.
Remember to consider factors such as budget, storage needs, and intended usage when making your decision.
Regardless of the type of storage you have, regular maintenance, backups, and updates are essential for prolonging the lifespan of your hard disk.
So, make sure to keep these tips in mind to ensure your computer continues to run smoothly for years to come.

Harold Williams is a senior writer and technical editor at Drives Hero with 20+ years of experience in IT administration. He specializes in storage systems, SSD reviews, and performance testing, bringing real-world insight to every guide.