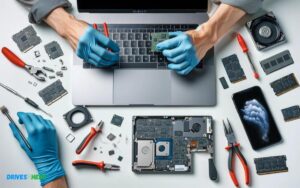
How to Clone Macbook Air Ssd to New Ssd? 10 Steps!
Upgrading to a new SSD for your MacBook Air is an exciting endeavor that promises improved performance and storage capacity. However, the thought of transferring your data can be daunting.
Check out this helpful video on the topic:
With the process of cloning, you can seamlessly migrate all your files, applications, and settings from the old SSD to the new one, ensuring a hassle-free transition and preserving your digital ecosystem.
We’ll walk you through the straightforward steps to clone your MacBook Air SSD to a new SSD, empowering you to enjoy the benefits of upgraded storage with minimal effort.

Key Takeaway
Cloning MacBook Air SSD to New SSD: Step-by-Step Guide
Step 1: Prepare New SSD
- Ensure your new SSD is connected to your MacBook Air using an external enclosure or adapter.
Step 2: Download Cloning Software
- Download and install cloning software such as Carbon Copy Cloner or SuperDuper! on your MacBook Air.
Step 3: Launch Cloning Software
- Open the cloning software you installed.
Step 4: Select Source and Destination
- Choose your current SSD (source) and the new SSD (destination) in the cloning software.
Step 5: Start the Cloning Process
- Follow the prompts in the cloning software to start the cloning process.
- This may take some time depending on the size of the data on your current SSD.
Step 6: Verify Cloned Data
- Once the cloning process is complete, verify that all data has been successfully copied to the new SSD.
Step 7: Shutdown MacBook Air
- Power off your MacBook Air.
Step 8: Replace SSD
- If the new SSD is internal, follow the instructions to physically replace the old SSD with the new one.
- If the new SSD is external, disconnect it from your MacBook Air.
Step 9: Boot from New SSD
- Turn on your MacBook Air and hold down the Option key.
- Select the new SSD as the startup disk from the list of options.
Step 10: Verify Operation
- Once your MacBook Air has booted from the new SSD, verify that everything is working correctly.
- Ensure that all your files, applications, and settings have been successfully transferred.
By following these steps, you can clone your MacBook Air’s SSD to a new SSD, ensuring a seamless transition with all your data intact.
Understanding The Importance Of Ssd Cloning

Upgrading your MacBook Air’s performance starts with migrating to a new SSD cloning ensures a smooth transition. This seamless process copies your system precisely, making sure you’re up and running with minimal downtime.
Benefits Of Cloning Macbook Air Ssd
- Effortless Upgrade: Cloning your MacBook Air SSD to a new one ensures that all your data, preferences, and installed applications move to your new SSD without the need for individual reinstallation.
- Time-Saving: The cloning process can save valuable time compared to manually transferring data and reinstalling software, which can be a lengthy ordeal.
- No Data Loss: With cloning, the risk of data loss is minimized as an exact copy of the original SSD is created, preserving all your files and settings.
- Immediate Boot: After cloning, the new SSD is bootable immediately, thus maintaining the smooth operation of your MacBook Air with no system downtime.
Precautions Before Starting The Cloning Process
Before initiating the SSD cloning operation, users must take certain precautions to guarantee a successful and smooth experience:
- Backup Data: Always back up critical files to an external hard drive or cloud storage as a precaution against unforeseen issues during the cloning process.
- Ensure Compatibility: Verify the new SSD is compatible with MacBook Air. It must also have adequate capacity to accommodate the data from the old SSD.
- Update Software: If applicable, update the MacBook Air’s operating system and firmware to avoid post-cloning compatibility issues.
- Power Supply: Ensure your MacBook Air is connected to a reliable power source to prevent interruptions during the cloning.
- Cloning Software: Choose reliable and compatible SSD cloning software specifically designed for macOS and follow its instructions carefully throughout the process.
Taking these steps seriously improves the likelihood of a hassle-free SSD upgrade, resulting in minimal disruption to your workflow and data integrity.
Necessary Preparations For Cloning
Welcome to the critical first steps in upgrading your MacBook Air’s SSD the cloning process. Upgrading your solid-state drive (SSD) promises not only additional storage capacity but often enhanced performance as well.
However, before diving into the technicalities of cloning, it’s crucial to make the necessary preparations. Ensuring a smooth transition from your old SSD to the new one involves a few key actions.
Backing Up Important Data
- Identify critical files and folders that require backup.
- Use Time Machine or a preferred backup software to create a complete backup.
- Store the backup on an external drive or cloud service for easy retrieval.
Remember, data loss is a real risk during hardware transitions; a comprehensive backup serves as your failsafe.
Securing The Original And New Ssd
Handle your SSDs with care. Both the original and new SSDs are sensitive to static electricity and other physical damages.
Follow these guidelines for security:
- Work in a static-free environment to prevent electrostatic discharge (ESD).
- Use proper SSD enclosures or handle them by the edges.
- Confirm compatibility of the new SSD with your MacBook Air model.
- Keep the SSDs away from magnets and moisture at all times.
Securing your SSDs ensures the integrity of your data during the cloning process.
Installing Cloning Software
- Research and select a trusted cloning software compatible with macOS.
- Download and install the cloning software on your MacBook Air.
- Understand the software’s interface and cloning options.
- Verify that the software can create a bootable clone for your Mac’s OS.
With the right cloning software, you will ensure a complete and accurate duplication of your existing SSD.
Verification And Testing
Before transferring data to a new SSD on a MacBook Air, it’s critical to perform thorough verification and testing. This ensures a seamless and error-free cloning process, protecting your valuable data during the transition.
Verifying The Cloned Ssd
Once booted from the new SSD, explore various directories and files to confirm their existence and integrity.
Pay special attention to the following:
- System files: Confirm they are present and have the correct permissions.
- Applications: Launch a few to make sure they run smoothly.
- Personal data: Check documents, pictures, and music to ensure they’re all accessible.
Testing The Functionality Of The New Ssd
- Running diagnostics: Tools such as Apple Diagnostics (formerly known as Apple Hardware Test) can help detect hardware issues.
- Using benchmarks: Software like Blackmagic Disk Speed Test to measure read/write speeds.
- Monitoring system health: Check S.M.A.R.T status and other drive health indicators.
Do remember to test out functions that are crucial to your daily tasks, for instance, file transfers, application loading times, and multitasking abilities.
A successful test assures that your MacBook Air, equipped with its new SSD, stands ready for peak performance.
Troubleshooting And Common Issues
Successfully cloning your MacBook Air SSD to a new SSD should feel like a breeze. But sometimes, the wind doesn’t blow in our favor, and we encounter storms of issues.
From failures in the cloning process to compatibility hiccups, these problems can halt your upgrade journey.
Addressing Cloning Failures
- Check Connections: Ensure that the connection between your original SSD and the new one is secure. Loose cables or improper docking can cause interruptions.
- Software Updates: Make sure the cloning software is up to date. Outdated versions can lead to incompatibility and failure.
- Disk Permissions: Repair disk permissions via Disk Utility to ensure no access issues are preventing the clone.
- Drive Health: Examine the health of both SSDs using a disk utility tool. Bad sectors or damage can be the culprits behind cloning failure.
- Free Space: Verify that the new SSD has sufficient free space for the clone. Lack of space is a common reason for failed attempts.
Fixing Compatibility Issues
- Check if the new SSD is formatted correctly. It should be formatted to APFS for macOS High Sierra and later, or Mac OS Extended (Journaled) for earlier versions.
- Ensure the SSD is compatible with your Mac’s model and year. Refer to the manufacturer’s specifications or consult Apple’s upgrade guides.
- Update your Mac’s firmware to the latest version available to support new hardware.
- If the SSD is not recognized, try resetting the System Management Controller (SMC) following Apple’s official guidelines.
- For persistent compatibility issues, consider reaching out to the SSD manufacturer for firmware updates or specific troubleshooting steps.
Additional Considerations For Macbook Air
When cloning the SSD of your MacBook Air, it pays to consider additional aspects specific to this line of Apple laptops.
Understanding how to optimize the cloned SSD will ensure that the MacBook Air’s performance remains stellar, and it operates without a hitch after the upgrade.
Optimizing The Cloned SSD for Macbook Air Configuration
- Trim Support: Ensure that TRIM is enabled on the new SSD. TRIM is a macOS feature that helps manage the quality and speed of the SSD over time. Enabling it can lead to significant performance improvements.
- FileVault: Consider re-enabling FileVault to encrypt your drive for added security purposes. This step is crucial if you handle sensitive data.
- System Integrity Protection (SIP): After cloning, SIP should remain enabled to protect your system files from being modified. This security feature is a cornerstone of the macOS defense strategy.
- Software Update: Check for any macOS updates as a new installation might uncover updates that weren’t previously available.
Conclusion
Upgrading your MacBook Air SSD can boost your system’s performance remarkably. By following the steps outlined, you’ve learned to clone your old drive seamlessly to a new SSD.
Embrace the change, and enjoy your MacBook Air’s newfound speed and efficiency.

Harold Williams is a senior writer and technical editor at Drives Hero with 20+ years of experience in IT administration. He specializes in storage systems, SSD reviews, and performance testing, bringing real-world insight to every guide.