How to Connect Internal Ssd to Laptop
One of the most common questions we get is how to connect an internal SSD to a laptop. The process is actually pretty simple, but there are a few things you need to know before you get started. In this blog post, we’ll walk you through everything you need to know about connecting an internal SSD to your laptop.
First, you’ll need to purchase an SSD that is compatible with your laptop. There are many different brands and models of SSDs on the market, so be sure to do your research before making a purchase. Once you’ve purchased an SSD, the next step is to physically install it into your laptop.
This process will vary depending on the make and model of your laptop, but generally speaking, you’ll need to remove the existing hard drive from your laptop and then insert the SSD in its place.Once the SSD is installed, you’ll need to format it before you can start using it. This process will also vary depending on your operating system, but Windows 10 has a built-in tool that makes formatting an SSD a breeze.
After formatting the SSD, all that’s left to do is install your operating system of choice and start using it!
- Purchase an internal SSD that is compatible with your laptop
- Make sure to check the compatibility before making your purchase
- Once you have the SSD, locate a free SATA port on your laptop motherboard
- If you’re not sure which one is the SATA port, consult your laptop’s manual or look for a label next to the port
- Connect one end of the SATA cable to the SSD and the other end to the SATA port on your motherboard
- Secure the SSD to your laptop chassis using screws (if necessary)
- Some SSDs come with brackets that make it easy to mount them in a case or bay
- Once everything is connected, power on your laptop and boot into your operating system
Can I Connect an Ssd to a Laptop?
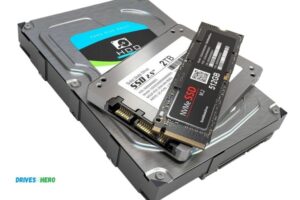
An SSD (solid state drive) is a newer type of hard drive that stores data on interconnected flash-memory chips. SSDs are faster than traditional hard drives, but they cost more and hold less data. You can connect an SSD to a laptop using a SATA cable.
How Do I Connect an Internal Ssd to My Computer?
If you’re looking to upgrade your computer’s storage by adding an internal SSD, you may be wondering how to go about connecting it. This is a relatively simple process and can usually be done in just a few steps.
First, you’ll need to identify an available SATA port on your computer’s motherboard.This is where you’ll plug in the SSD. Once you’ve located the SATA port, simply insert the SSD into it.Next, you’ll need to connect power to the SSD.
Most SSDs will have their own power connector, which can be plugged into an available 4-pin or 8-pin power connector on your motherboard. If your SSD doesn’t have its own power connector, you can often use one of the extra SATA power connectors that are typically included with most power supplies.Once both data and power are connected to the SSD, it should now be recognized by your computer and will show up in BIOS/UEFI or as a bootable drive option (if Windows is installed on it).
How Can I Use Internal Ssd As External Storage?
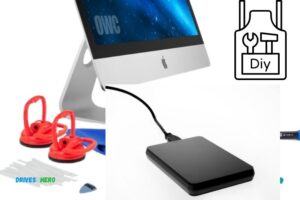
If you’re looking to use your internal SSD as external storage, there are a few things you’ll need to do first. First, you’ll need an enclosure for your SSD. This will allow you to connect your SSD to your computer via USB or Thunderbolt.
Once you have your enclosure, simply insert your SSD into it and close it up. Then, connect the enclosure to your computer and format the drive. After that, you should be able to use it just like any other external drive!
How Do I Activate My Internal Ssd?
Assuming you are referring to a MacBook internal SSD, the process is actually quite simple. First, locate your SSD on the left side of your computer, just below the optical drive. You will see that it is slightly smaller than a traditional hard drive.
To remove the SSD, simply unscrew the single screw that holds it in place and then slide it out gently.Once you have removed the SSD, you can connect it to an external enclosure or adapter using a USB cable. Then, launch Disk Utility on your Mac and format the drive as OS X Extended (Journaled).
Once that is complete, close Disk Utility and restart your computer while holding down the Option key. This will bring up a boot menu where you can select your new SSD as the startup disk. That’s all there is to it!
How to Check Ssd in Laptop
If you’re a laptop user, you might be wondering how to check your SSD’s condition. Luckily, it’s not too difficult to do! Here are the steps:
1. Open My Computer or This PC. Right-click on your SSD drive and select Properties.
2. Go to the Tools tab and under Error checking, click Check now.
3. Make sure both options are checked and click Start. The scan will begin and could take a while to finish, depending on the size of your SSD drive.
4. Once the scan is complete, you’ll see the results under each category.
If there are any bad sectors, you can try fixing them by clicking on the Repair button.
How to Install M.2 Ssd in Laptop
M.2 SSDs are becoming increasingly popular in laptops and other devices, as they offer a significant performance boost over traditional hard drives. If you’re looking to upgrade your laptop with an M.2
SSD, here’s a quick guide on how to do it.First, you’ll need to purchase an M.2 SSD that is compatible with your laptop.
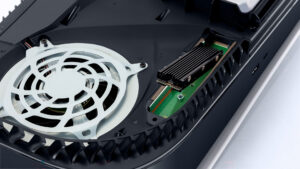
Make sure to check the compatibility list before making your purchase. Once you have the SSD, remove the bottom panel of your laptop so that you can access the drive bay.Next, insert the M.2
SSD into the slot and secure it with screws (if provided). Then, connect the SATA and power cables to the SSD. Finally, reattach the bottom panel of your laptop and boot up into Windows.
You should now see a noticeable difference in performance thanks to your new M.2 SSD!
How to Connect Ssd to Laptop Externally
If you have an SSD and want to use it as an external drive, there are a few things you need to know. First, you’ll need an adapter or enclosure that supports SATA III (6 Gb/s) or faster. Next, you’ll need to connect the SSD to your computer using a USB 3.0 or Thunderbolt cable.
Finally, you’ll need to format the SSD so that it can be used with your operating system.Once you have all of the necessary hardware, follow these steps:1. Connect the SSD to the adapter or enclosure.
Make sure that the connection is secure and that there are no loose wires.
2. Connect the other end of the adapter or enclosure to your computer using a USB 3.0 or Thunderbolt cable.
3. If prompted, open Disk Utility and format the SSD so that it can be used with your operating system (Mac OS X Extended (Journaled) for Macs).
You can also choose to partition the drive if you want to use it for different purposes (e.g., one partition for backups and another for scratch disk space).
4. Once the formatting is complete, close Disk Utility and open Finder . Your SSD should now appear on the Desktop or in Finder under Devices .
You can now copy files to and from your SSD just like any other external drive!
How to Install Ssd in Laptop Without Reinstalling Windows
If you’re looking to upgrade your laptop by installing a solid state drive, or SSD, there’s no need to reinstall Windows. With a few simple steps, you can clone your current hard drive onto the SSD, and be up and running in no time. Here’s how:
1. Connect the SSD to your laptop via USB or SATA port.2. Use disk cloning software to copy the contents of your hard drive onto the SSD. We recommend using EaseUS Todo Backup for this purpose.
3. Once the cloning process is complete, disconnect the SSD from your laptop and connect it internally in place of your hard drive. Make sure to consult your laptop’s manual for instructions on how to do this properly.4. Power on your laptop and enjoy the speed boost that comes with having an SSD!
Conclusion
If you want to connect an internal SSD to your laptop, there are a few things you need to do. First, make sure that the SSD is compatible with your laptop. Next, locate the SATA port on your laptop and plug in the SSD.
Once it’s plugged in, you’ll need to format the SSD before you can use it. Finally, install any necessary drivers for the SSD and restart your computer.

Harold Williams is a senior writer and technical editor at Drives Hero with 20+ years of experience in IT administration. He specializes in storage systems, SSD reviews, and performance testing, bringing real-world insight to every guide.