How to Initialize M 2 Ssd? 12 Steps!
To initialize an M.2 SSD, you need to access the Disk Management tool in your operating system, locate the new drive, and create a new partition with the desired file system.
Initializing an M.2 SSD is a process that prepares the drive for use by creating a new partition and assigning a file system to it.
This is done through the Disk Management tool available in Windows, Linux, and macOS operating systems. By initializing the drive, you’re allowing your system to recognize it as a usable storage device.
Accessing the Disk Management tool is easy and varies slightly depending on the operating system. In Windows, right-click on the Start button and select Disk Management.
For macOS, open Disk Utility found in the Utilities folder within Applications. In Linux, use a command-line tool like fdisk or a graphical tool like GParted.
Once you’ve accessed the appropriate tool, locate the M.2 SSD in the list of drives, create a new partition, assign the desired file system, and your M.2 SSD will be initialized and ready for use.
12 Steps to Initialize M 2 SSD
| Step | Description |
|---|---|
| 1 | Gather necessary equipment (M.2 SSD, compatible motherboard, screwdriver, your computer’s manual) |
| 2 | Turn off and unplug your computer |
| 3 | Open the computer case |
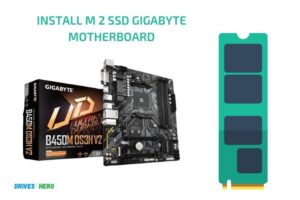
| 4 | Locate the M.2 slot on your motherboard (refer to your computer’s manual if necessary) |
| 5 | Remove the screw securing the M.2 slot cover (if applicable) |
| 6 | Insert the M.2 SSD into the slot at a 30-degree angle |
| 7 | Gently push the SSD down and secure it with the screw |
| 8 | Close the computer case |
| 9 | Plug in and turn on your computer |
| 10 | Enter the BIOS/UEFI to confirm the M.2 SSD is recognized, and adjust boot order if necessary |
| 11 | Save changes and exit BIOS/UEFI |
| 12 | Install an operating system on the M.2 SSD (if you’re using it as your primary drive) or format the drive (if you’re using it as a secondary storage device) |
Key Takeaway

Five Facts About Initializing M 2 SSD
Checking Compatibility And Prerequisites
Before initializing an m. 2 ssd, it’s crucial to check the compatibility of your existing system.
The following are some of the prerequisites you should consider before the initialization process:
List Of Compatible Systems And Motherboards
- Double-check the motherboard documentation or manufacturer’s website for m.2 compatibility.
- Make sure that your motherboard has an m.2 slot.
- Verify that the m.2 slot type on your motherboard is compatible with your ssd. M.2 ssds can come in various lengths and keys, such as b-key or m-key.
Checking Firmware And Bios Versions
Correct firmware and bios versions are imperative to initializing your m. 2 ssd successfully.
Follow the below steps to check the firmware and bios versions:
- Access the bios by restarting the system and pressing the appropriate key (usually del, f2, or f10).
- Find the firmware and bios version details in the ‘main’ or ‘system information’ menu.
- Check if the firmware and bios versions that you have installed are compatible with the target m.2 ssd. If not, upgrade the firmware to meet the recommended specifications.
Preparations Before Initialization
Preparation is key for avoiding problems while initializing an m. 2 ssd.
Here’s what you need to do:
- Check if the m.2 ssd is physically clean and free from dust. If not, clean it with a soft cloth.
- Ensure that the m.2 ssd is correctly seated in the m.2 slot on the motherboard.
- Disable any password, encryption, or other security settings on the m.2 ssd before initialization.
- Make sure that there aren’t any hibernation or sleep modes enabled on your system before initializing.
After completing the above preparations, you are ready to initialize your m. 2 ssd. By adhering to the guidelines, you will have a smooth initialization process, resulting in a speedy and efficient ssd.
Step-By-Step Guide To Initialize M 2 Ssd
Downloading And Installing Necessary Software
Before initializing your m 2 ssd, you need to download and install some necessary software.
Here are the key points to follow:
- Visit the manufacturer’s website and download the required software for your ssd brand.
- Install the software on your computer.
- Connect your m 2 ssd to your computer.
Checking Ssd Status And Initializing
After you have installed the software, it’s time to check your ssd status and initialize it.
Here’s what you need to do:
- Press the windows key + r on your keyboard to open the run dialog box. Type ‘diskmgmt.msc’ and press enter.
- Find your ssd in the disk management window.
- Initialize the ssd by creating a partition and formatting it with ntfs file system.
- Give the new partition a name and change the drive letter if necessary.
Configuring The Ssd
After initializing your ssd, you need to configure it to optimize its performance.
Here are some steps to follow:
- Open the installed software and select your ssd from the list.
- Follow the software’s instructions to configure your ssd to your desired settings.
- Enable trim to ensure your ssd performance is maintained.
- If desired, enable encryption for your ssd.
Remember that following these steps will ensure that your m 2 ssd is properly initialized and configured for maximum performance.
Troubleshooting M 2 Ssd Initialization Errors
Initializing M 2 Ssd – Troubleshooting Initialization Errors
M 2 ssd initialization provides better speed and improved performance than traditional hard drives, making it a preferred storage solution for modern devices.
However, during the initialization process, errors may occur, leading to data loss, damage to the ssd or device, or unusable storage.
In this post, we will discuss common errors and how to mitigate them during the m 2 ssd initialization process.
Common Errors During M 2 Ssd Initialization
Initialization errors may occur due to various reasons such as incorrect hardware installation, outdated firmware or drivers, and software conflicts.
Here are some common errors during m 2 ssd initialization:
- No drive found: The system fails to detect the m 2 ssd, which may occur due to inadequate power supply, improper mounting, firmware issues, or a damaged motherboard.
- Raw, unallocated drive: The m 2 ssd shows an unallocated status, with no volume or partition. This occurs when the drive is not initialized, or the initialization process has been interrupted.
- Disk write protection: The system may detect the ssd as write-protected, making it impossible to format or partition the drive.
- Inaccessible boot device: In some cases, the m 2 ssd may show as an inaccessible boot device, leading to booting failures or blue screens.
How To Mitigate The Errors
Addressing initialization errors can be challenging, but here are some solutions:
- Check hardware connection: Ensure that the m 2 ssd is properly mounted and connected. Sometimes, loose screws or improper installation may cause the ssd to fail to initialize.
- Update firmware or drivers: Firmware or driver issues may cause m 2 ssd initialization errors. Check for the latest updates from the manufacturer and install them.
- Allocate and format the drive: If the ssd shows as raw and unallocated, initialize the ssd, allocate partitions, and format the drive.
- Disable write protection: If the system detects the ssd as write-protected, disable write-protection using diskpart in the command prompt.
- Check boot order: If the system detects the m 2 ssd as an inaccessible boot device, ensure that the boot sequence is correctly set up in the bios.
The m 2 ssd initialization process may encounter several errors, causing data loss or damage to the ssd or device. However, by following the above measures, you can prevent and mitigate these errors, ensuring optimal performance and efficient usage of the m 2 ssd.
Optimizing And Maintaining M 2 Ssd After Initialization
So, you’ve got your m 2 ssd set up and ready to go. Congratulations! However, you need to keep in mind that your m 2 ssd is a valuable piece of hardware that requires appropriate care and maintenance.
To ensure that your m 2 ssd functions optimally, you need to follow specific best practices and regularly maintain it.
Best Practices For Using M 2 Ssd
Here are some best practices for using your m 2 ssd:
- Always check the compatibility of your m 2 ssd with your computer’s motherboard before installation.
- Make sure your data is regularly backed up, and you keep a backup of critical files.
- Update your computer’s bios firmware before installing the m 2 ssd to keep your computer up-to-date.
- Avoid overloading your m 2 ssd with data, which can slow down the performance speed. It’s recommended to leave 20-25% storage space free.
- Always store your m 2 ssd in a cool and dry place, away from any magnetic sources that can cause data loss.
Regular Maintenance Practices
Here are some regular maintenance practices to keep your m 2 ssd running smoothly:
- Run periodic disk checks and defragmentations to ensure there are no issues with the disk and files are arranged efficiently.
- Remove any temporary files and cache from the system to free up storage space and increase the performance speed.
- Use the built-in maintenance tool of your computer’s operating system to schedule automatic maintenance and updates for the m 2 ssd.
- Update the m 2 ssd firmware to the latest version to fix any bugs or issues and enhance performance.
- Avoid physical damage to the m 2 ssd. Handle the hardware with care and avoid bending or dropping it.
By following these best practices and regular maintenance practices, you can optimize and maintain your m 2 ssd, ensuring it functions optimally for a long time. Remember, the m 2 ssd is an investment, and taking good care of it will extend its lifespan.
FAQ On Initializing M 2 SSD
What Is M.2 Ssd?
M. 2 ssd is a small solid-state drive that fits into the m. 2 slot on the motherboard.
How Do I Initialize M.2 Ssd?
You can initialize m. 2 ssd by accessing the disk management tool in windows, and then initializing the drive.
What Does Initializing A Drive Do?
Initializing a drive prepares it for use by setting up the necessary structures on the drive.
Why Won’t My Computer Recognize My M.2 Ssd?
Your computer may not recognize your m. 2 ssd due to incorrect installation, outdated drivers, or bios settings.
Conclusion
Initializing an m. 2 ssd can seem daunting at first glance, but it is actually a straightforward process that requires minimal technical know-how. Whether you are upgrading your system or starting with a new setup, follow the steps outlined in this article, and you will be up and running in no time.
It is essential to check the system’s compatibility with the m. 2 interface and the type of sata mode before proceeding with the initialization process. Once the m. 2 ssd is detected by the system, you can proceed with the installation of the operating system and other applications.
Regular maintenance, such as updating the firmware and driver, can help ensure the optimal performance of the m. 2 ssd. With proper initialization and maintenance, you can enjoy faster boot and load times, improved system responsiveness, and a smoother computing experience overall.

Harold Williams is a senior writer and technical editor at Drives Hero with 20+ years of experience in IT administration. He specializes in storage systems, SSD reviews, and performance testing, bringing real-world insight to every guide.