How to Install Internal Ssd in Desktop
Solid-state drives are becoming increasingly popular as a storage option, especially for desktops. Unlike traditional hard drives, SSDs don’t have any moving parts and instead rely on flash memory to store data. This makes them much faster and more durable than HDDs, which is why they’re often used in laptops and other devices where space is limited.
| Steps to Install Internal SSD in Desktop |
|---|
| 1. Turn off the desktop and unplug all cables. |
| 2. Open the desktop case by removing the side panel. |
| 3. Locate the hard drive bay and remove the SATA data and power cables from the old hard drive. |
| 4. Remove the old hard drive from the bay. |
| 5. Insert the SSD into the empty bay and secure it with screws. |
| 6. Connect the SATA data and power cables to the SSD. |
| 7. Close the desktop case and plug in all cables. |
| 8. Turn on the desktop and enter the BIOS settings. |
| 9. Configure the boot order to prioritize the SSD. |
| 10. Save the changes and exit the BIOS settings. |
| 11. Install the operating system and other software on the SSD. |
| 12. Enjoy the faster performance of your desktop with the new SSD. |
If you’re looking to upgrade your desktop with an SSD, the process is relatively simple. In this article, we’ll walk you through everything you need to know about how to install an internal SSD in your desktop computer.
How Do I Install an Internal Ssd in My Computer?
If you’re looking to upgrade your computer with a new internal SSD, there are a few things you’ll need to take into account before making your purchase. This guide will walk you through the process of installing an internal SSD in your computer, from start to finish.
First and foremost, check compatibility between your computer and the SSD.
Most laptops and desktops released in the past few years should be compatible with SATA III drives (the current standard), but it’s always best to check beforehand. Once you’ve confirmed that everything is compatible, it’s time to make sure you have the proper tools for installation.
For most installations, all you’ll need is a Phillips head screwdriver.
Some laptops may require different screws (such as Torx or Pentalobe), so be sure to check what type of screws are required before proceeding. With the proper tools in hand, it’s now time to begin installation.
The first step is removing any existing storage drive from your computer (this includes both hard drives and optical drives).
In most cases, this will involve unscrewing a few screws and then gently pulling the drive out of its bay. With your old storage drive removed, it’s now time to install the SSD.
Start by inserting the SSD into its bay – again, this will usually just involve lining up some connectors and then screwing in place (again, using only a Phillips head screwdriver).
Once everything is snugged down tight, reattach any power cables or data cables that were connected to your old storage drive – these same cables can now be used with your new SSD. The final step is simply booting up your computer – if everything went according to plan, you should now be booting off of lightning-fast solid state storage!
Can I Add an Internal Ssd to My Desktop?
Yes, you can add an internal SSD to a desktop computer. The process is fairly simple and does not require any special tools or skills. First, you will need to purchase an SSD that is compatible with your computer’s motherboard.
Next, you will need to physically install the SSD into an empty drive bay in your computer case. Finally, you will need to configure your operating system to recognize and use the new SSD.
If you are looking to improve the performance of your desktop computer, adding an internal solid state drive (SSD) is a great option.
SSDS are significantly faster than traditional hard drives when it comes to read/write speeds, meaning that your computer will boot up quicker and applications will load faster. And because they have no moving parts, they are also more resistant to physical shock and vibration – making them ideal for use in desktop computers that may be subject to jostling around (like if you move your tower frequently).
Installing an SSD is relatively easy – even if you’re not particularly tech-savvy – and only takes about 30 minutes from start to finish.
The first thing you’ll need to do is purchase an SSD that fits the form factor of your computer’s motherboard (most likely 2.5″ or 3.5″). Once you’ve got the right SSD in hand, open up your computer case and locate an empty drive bay big enough to accommodate the new hardware; then simply insert the drive into place and screw it in snugly.
The next step is connecting the power supply and data cables from the SSD into vacant connectors on your motherboard; most SATA-based SSDS will fit into standard SATA slots on today’s motherboards without issue (if yours doesn’t fit directly into a SATA slot, consult your motherboard manual for instructions on how adaptors can be used).
Finally, once everything is plugged in correctly inside the case close it back up and power on your machine; during boot-up enter BIOS setup (usually done by pressing F2 or DEL during startup) so that you can change the boot order of devices connected to your machine – make sure that USB or optical drives aren’t being given priority over hard drives!
How Do I Install an Internal Ssd in Windows 10?
Installing an internal SSD in Windows 10 is a simple process that can be completed in just a few minutes. Here’s a step-by-step guide on how to do it:
1. Firstly, you’ll need to purchase an SSD that is compatible with your computer.
Make sure to check the specifications of your motherboard and CPU to ensure compatibility.
4. Connect one end of an SATA cable to the back of the SSD and connect the other end to an available SATA port on your motherboard. If you’re not sure which SATA port to use, consult your motherboard manual or look for any markings on the ports themselves. 5. With everything connected, go ahead and close up your computer case and power on your PC.
How to Install Ssd in Pc Without Reinstalling Windows
If you’re looking to upgrade your PC with a solid state drive, but don’t want to go through the hassle of reinstalling Windows, then this guide is for you. Installing an SSD in your PC is a fairly simple process, and we’ll walk you through everything you need to know step-by-step.
Before we get started, there are a few things you’ll need:
A Phillips head screwdriver
An SSD (obviously)
A SATA cable
Optional: A 2.5″ to 3.5″ adapter if your SSD is 2.5″
Now that you have everything you need, let’s get started!
1. Begin by shutting down your PC and unplugging all cables from the back.
This includes any power cables, as well as any data cables that are connected to external storage devices like hard drives or optical drives. Once everything is disconnected, open up your case and locate your existing hard drive. It will be mounted in a drive bay with screws holding it in place.
2. Use your Phillips head screwdriver to remove the screws and carefully pull the hard drive out of the bay. Note which way the hard drive faces so that when you install the SSD, it faces the same way.
3. With the old hard drive removed, it’s now time to install the SSD into the empty bay.
Again, make sure that it’s facing the same way as the old hard drive did before securing it with screws (don’t overtighten them!).
4 .Once the SSD is installed in its new home, connect one end of a SATA cable into its port on the back ofthe drive (it will only fit one way), and then connectthe other end into an available SATA port onyour motherboard—again making sure that it clicksinto place before moving on.
. If everything went accordingto plan, congrats! The hardest part is overand now it’s time to boot up your PC withits new solid state drive installed.. Butbefore we do that,. 5 there’s just onelast thing we needto do… 6 7 8 9 10 …formatting!
How to Install a Second Ssd
If you’re like most PC gamers, you’re always looking for ways to improve your rig. One of the best ways to do this is by adding a second SSD. Not only will this give you more storage space for games and other files, but it can also help improve loading times and overall performance.
Installing a second SSD is relatively simple, but there are a few things you’ll need to keep in mind. First, make sure that your motherboard supports multiple SSDs. Most modern boards do, but it’s always best to check before making any changes to your system.
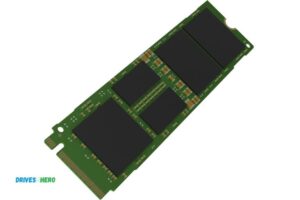
Second, you’ll need to decide which type of SSD you want to add. There are two main types: M.2 and SATA-based drives. M.2 drives are newer and offer more speed and features than SATA drives, but they can be more expensive.
SATA drives are still plenty fast and offer great value for the price. Once you’ve chosen your drive, it’s time to install it into your system.
Installing New Ssd Windows 10
If you’re looking to upgrade your computer with a new SSD, there are a few things you need to know. In this guide, we’ll show you how to install a new SSD on your Windows 10 PC.
First, you’ll need to purchase an SSD that is compatible with your computer.
Make sure to get one with enough storage for all of your files and applications. We recommend at least 128GB for most users.
Once you have your new SSD, the next step is to back up all of your data.
This is important because installing a new SSD will erase everything on your current hard drive. There are many ways to back up your data, but we recommend using an external hard drive or cloud storage service.
Once you have backed up your data, it’s time to begin the installation process.
First, turn off your computer and unplug any cables that are connected to it. Next, open up the case and locate the SATA ports on your motherboard. Once you’ve found the SATA ports, remove the screws that are holding in your current hard drive.
You can now remove the hard drive from its bay and set it aside.
Now it’s time to install the new SSD into the empty hard drive bay. First, insert the SSD into the bay and secure it with screws (if applicable).
Ssd for Desktop
Solid-state drives are becoming more and more popular these days. Many people are now using them in their desktop computers, and for good reason. They offer many advantages over traditional hard drives, including faster data access, lower power consumption, and increased durability.
If you’re thinking about upgrading to an SSD, there are a few things you should know. In this article, we’ll cover the basics of SSDs and help you decide if one is right for your desktop PC.
What is an SSD?
An SSD (solid-state drive) is a type of storage device that uses flash memory chips instead of spinning disks to store data. Flash memory is similar to the type ofmemory used in USB thumb drives or digital cameras. It’s fast, reliable, and consumes less power than a traditional hard drive.
One of the biggest advantages of using an SSD is speed. Data access times on an SSD can be up to 100 times faster than on a traditional hard drive! This means your computer will boot up faster, programs will load quicker, and files will transfer at lightning speeds.
If you’re looking for a significant performance boost for your desktop PC, switching to an SSD is one of the best upgrades you can make.
In addition to being much faster than traditional hard drives, SSDs are also more durable and require less power to operate. Because they have no moving parts inside them (unlike hard drives), they’re not as susceptible to physical damage from drops or bumps .
And since they don’t need to spin up likehard drives do when they’re accessed , they use less power overall , which can save you money on your energy bill .
Conclusion
If you’re looking to upgrade your desktop computer by installing an internal SSD, this guide will show you how to do it. The first thing you’ll need to do is purchase an SSD that is compatible with your desktop’s make and model. Once you have the SSD, you’ll need to physically install it into your desktop.
After the SSD is installed, you’ll need to format it so that your computer can use it. Finally, once the SSD is formatted and working properly, you can transfer your operating system and files over to it.


