How to Install Samsung Ssd 870 Qvo? 10 Steps!
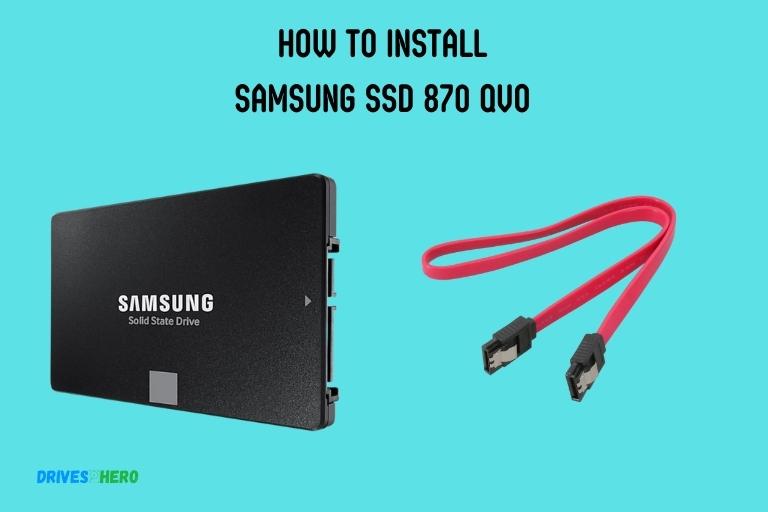
To install Samsung SSD 870 QVO, connect the SSD to your computer’s SATA power and data cables and secure it in your computer’s drive bay. Upgrading to an SSD can significantly enhance your system’s performance and responsiveness.
We’ll take you through the essential steps to seamlessly integrate your Samsung SSD 870 QVO into your computer.
From gathering the necessary tools to connecting cables and securing the SSD in place, this guide ensures a smooth installation process for users of all levels.
Key Takeaway
Installing the Samsung SSD 870 QVO: A Guide
Tools Needed:
- Samsung SSD 870 QVO
- SATA data cable
- SATA power cable
- Screwdriver
- Mounting bracket (if needed)
Step 1: Gather Materials
Ensure you have all the necessary tools and components before starting the installation process.
Step 2: Power Off Your System
Shut down your computer and disconnect it from the power source to ensure safety during the installation.
Step 3: Identify SATA Ports
Locate the SATA ports on your motherboard. There are usually two types: SATA II and SATA III. Connect the SSD to a SATA III port for optimal performance.
Step 4: Connect SATA Data Cable
Connect one end of the SATA data cable to the SSD and the other end to an available SATA port on the motherboard.
Step 5: Connect SATA Power Cable
Connect the SATA power cable to the SSD. Ensure a secure connection to provide power to the SSD.
Step 6: Mount the SSD
If your case has dedicated SSD mounting points, secure the SSD using screws. If not, use a mounting bracket to install the SSD in a 3.5-inch drive bay.
Step 7: Secure SSD in Place
If you’re using a mounting bracket, secure it in the designated drive bay inside your computer case using screws.
Step 8: Power On Your System
Reconnect your computer to the power source and power it on. Ensure that your system recognizes the new SSD.
Step 9: Format and Partition (if necessary)
If the SSD is not detected, you may need to format and partition it. Go to Disk Management (Windows) or Disk Utility (Mac) to perform these tasks.
Step 10: Install Operating System (Optional)
If you’re using the SSD as your primary drive, you may need to install your operating system on it. Follow your OS installation instructions.
You’ve successfully installed your Samsung SSD 870 QVO. Enjoy improved speed and reliability with your new storage solution.
Configuring Bios Settings For Samsung Ssd 870 Qvo
Learn how to configure the BIOS settings for the Samsung SSD 870 QVO to ensure a smooth installation process. Easily optimize your system for optimal performance with these helpful steps.
Power on your computer and enter the BIOS menu:
- Press the power button on your computer to start it up. As soon as you see the manufacturer’s logo appear on the screen, start pressing the designated key to access the BIOS menu. This key differs depending on the computer manufacturer, so refer to your user manual or do a quick online search to find the correct key for your specific PC.
Locate the “Boot” or “Storage” section in the BIOS menu:
- Once you’re inside the BIOS menu, navigate to the “Boot” or “Storage” section. The exact location and naming may vary depending on your computer’s motherboard and BIOS version. Look for options related to boot devices, storage settings, or SATA configuration.
Set the SSD as the primary boot drive:
- Within the “Boot” or “Storage” section, you’ll find a list of boot devices. Identify the entry for the Samsung SSD 870 QVO and select it as the primary boot drive. This will ensure that your computer boots up from the SSD instead of any other connected storage devices.
Save the changes and exit the BIOS:
- After selecting the SSD as the primary boot drive, save the changes made in the BIOS settings. Typically, you can do this by pressing the designated key to save and exit the BIOS, which is often F10. Confirm your selection when prompted, and your computer will restart, applying the newly configured BIOS settings.
You have successfully configured the BIOS settings for your Samsung SSD 870 QVO. Now your computer will prioritize booting from the SSD, allowing for faster startup times and improved performance.
Formatting And Partitioning The Samsung Ssd 870 Qvo
Learn how to easily format and partition your Samsung SSD 870 QVO for seamless installation. Our step-by-step guide ensures a hassle-free setup, allowing you to optimize your storage without any technical difficulties.
Restart Your Computer And Access The Operating System:
To begin the process of formatting and partitioning your Samsung SSD 870 QVO, you’ll need to restart your computer and access the operating system.
Follow these steps to get started:
- Restart your computer to ensure a fresh start for the installation process.
- Once your computer has booted up, log in to the operating system using your username and password.
Open The Disk Management Utility (Windows) Or Disk Utility (Mac):
After successfully accessing the operating system, you’ll need to open the appropriate disk management utility based on your computer’s operating system.
Here’s how to do it:
For Windows users:
- Open the Disk Management utility by right-clicking on the Start button and selecting “Disk Management” from the context menu.
For Mac users:
- Open the Disk Utility by clicking on the “Finder” icon in the Dock, then navigating to “Applications,” “Utilities,” and selecting “Disk Utility.”
Locate The Samsung Ssd 870 Qvo In The List Of Drives:
Once you have the disk management utility open, the next step is to locate your Samsung SSD 870 QVO in the list of drives.
Follow these steps:
- Look for the list of drives or storage devices displayed in the disk management utility.
- Identify the Samsung SSD 870 QVO from the list, which should be named accordingly.
Initialize The Ssd And Create Partitions (If Desired):
Before you can format the Samsung SSD 870 QVO, you’ll need to initialize the SSD and create partitions if desired.
Here’s how:
- Right-click on the Samsung SSD 870 QVO in the disk management utility and select “Initialize Disk” (for Windows) or “Partition” (for Mac).
- Follow the on-screen prompts to choose the partition style and allocate the desired amount of space for each partition, if creating multiple partitions.
Format The Ssd With The Appropriate File System:
Once you have initialized the Samsung SSD 870 QVO and created partitions (if desired), it’s time to format the SSD with the appropriate file system.
Follow these steps:
- Right-click on the partition(s) you want to format in the disk management utility and select the “Format” option.
- Choose the desired file system for your SSD, such as NTFS (for Windows) or APFS (for Mac).
- Follow the on-screen prompts to finalize the formatting process.
By following these steps, you’ll be able to successfully format and partition your Samsung SSD 870 QVO, ensuring optimal performance and usability.
Transferring Data To The Samsung Ssd 870 Qvo
Learn how to seamlessly transfer your data to the Samsung SSD 870 QVO with our step-by-step installation guide. Upgrade your storage and boost your device’s performance effortlessly with this reliable SSD.
Copy Or Move Your Files And Data To The Ssd
Follow these steps to smoothly copy or move your data:
- Back up your data: Always create a backup of your important files before transferring them to the new SSD. This ensures that your data remains safe and secure throughout the process.
- Connect the SSD: Install the Samsung SSD 870 QVO into your computer by connecting it to an available SATA port. Ensure that the power cables are properly connected as well.
- Initialize the SSD: Open your computer’s Disk Management utility and initialize the newly installed SSD. Follow the on-screen instructions to complete the process.
- Choose a data transfer method: There are a few different methods you can use to copy or move your data to the SSD:
- Manual file transfer: You can manually copy and paste your files from the old drive to the new SSD. This method is suitable for smaller amounts of data.
- Disk cloning: Use disk cloning software, such as Samsung’s Data Migration or third-party tools like Clonezilla, to clone your entire existing drive to the new SSD. This method is useful when you want to replicate your entire system, including the operating system and applications.
- Update software settings: Once the data transfer is complete, update any relevant software settings to recognize the new SSD as the default drive. This may involve changing the boot order in your computer’s BIOS settings or updating application preferences.
- Test performance and functionality: It is essential to ensure that your new Samsung SSD 870 QVO is functioning optimally. Test its performance by running benchmarking software or performing everyday tasks to gauge its speed and responsiveness.
By copying or moving your files and data to the Samsung SSD 870 QVO, you are taking advantage of its high-speed performance and storage capacity.
Troubleshooting Common Installation Issues
Follow our troubleshooting tips to overcome common installation issues without any hassle.
Ssd Not Recognized By The Bios
If you have installed the Samsung SSD 870 QVO and it’s not being recognized by the BIOS, don’t worry, we’ve got you covered.
Here are some troubleshooting steps to help you resolve this issue:
- Check the physical connections: Make sure the SSD is properly connected to the motherboard. Check the power and data cables and ensure they are securely plugged in.
- Update the BIOS: Sometimes, an outdated BIOS version can cause compatibility issues. Visit the motherboard manufacturer’s website and check for any available BIOS updates. Install the latest version to ensure compatibility with the SSD.
- Enable AHCI mode: Access the BIOS settings and make sure the SATA controller mode is set to AHCI (Advanced Host Controller Interface) mode. This mode enables the full capabilities of the SSD.
- Check for firmware updates: Visit the Samsung website to see if there are any firmware updates available for the SSD. Updating the firmware can resolve certain compatibility and performance issues.
Operating System Unable To Detect The Ssd
If your operating system is unable to detect the Samsung SSD 870 QVO, try the following troubleshooting steps:
- Check the device manager: Press Win + X and select Device Manager. Expand the “Disk drives” section and look for the SSD. If it’s listed with an exclamation mark, right-click on it and select “Update driver.” Allow Windows to search for the latest driver for your SSD.
- Initialize the SSD: Press Win + X and select Disk Management. If the SSD appears in the list of drives but is marked as unallocated or not initialized, right-click on it and select “Initialize disk.” Follow the on-screen instructions to complete the process.
- Format the SSD: If the SSD is already initialized but doesn’t have a drive letter assigned, right-click on it in Disk Management and select “Change Drive Letter and Paths.” Assign a drive letter to the SSD and it should now be accessible in File Explorer.
- Check for drive conflicts: Sometimes, other drives or devices may conflict with the SSD. Disconnect any unnecessary external drives or devices and restart your computer to see if the SSD is detected.
These troubleshooting steps should help you resolve common installation issues with the Samsung SSD 870 QVO.
Remember to always ensure that you follow the manufacturer’s instructions and guidelines when installing or troubleshooting any hardware components.
Conclusion
Installing the Samsung SSD 870 QVO can significantly enhance your computer’s performance and storage capacity. With its impressive speed and reliability, this SSD is a worthy investment for any user.
The installation process is straightforward and user-friendly, making it accessible to both novices and experienced computer enthusiasts. By following the step-by-step guide provided in this blog post, you can easily install the SSD without any hassle.
The Samsung Magician software further enhances the installation experience by providing optimization and management tools for your SSD.
With its advanced technologies and features, the Samsung SSD 870 QVO is a reliable and durable storage solution.


