How to Install Ssd Sata? 12 Easy Steps!
To install an SSD SATA drive, you need to follow a series of steps which include preparing your system, physically installing the SSD into your computer, and then initializing the drive on your system.
Before the installation, it is recommended to backup your data. Physically installing the SSD involves inserting it into the appropriate slot in your computer, which usually involves removing the computer’s casing.
Once installed, you need to initialize the SSD drive using the system’s Disk Management tool, and then format the drive to make it ready for use.
Installing an SSD SATA drive can significantly enhance the performance and speed of your computer. However, it’s important to ensure correct installation.
Back up your data before starting the process. Physically installing the drive involves opening your computer casing and fitting the SSD into the right slot.
Finally, initialize and format your new SSD drive on your system, making it ready for use.
12 Steps To Installing SSD SATA
| Steps | Description |
|---|---|
| 1. | Purchase Compatible SSD SATA |
| 2. | Backup Existing Data |
| 3. | Turn Off the Computer |
| 4. | Open the Computer Case |
| 5. | Locate the SATA and Power Cables |
| 6. | Connect the SATA Cable to SSD |
| 7. | Connect the Power Cable to SSD |
| 8. | Secure SSD in the Drive Bay |
| 9. | Close the Computer Case |
| 10. | Turn On the Computer |
| 11. | Configure SSD as Boot Drive in BIOS |
| 12. | Install Operating System on the SSD |
Key Takeaway
Five Facts About Installing SSD SATA
Benefits Of Upgrading To An Ssd Sata
Upgrade your storage to an SSD SATA for faster performance and improved efficiency. Learn how to easily install an SSD with our step-by-step guide.
Leave behind slower load times and embrace the benefits of high-speed data transfer.
Upgrading your computer’s storage drive to a Solid State Drive (SSD) SATA can bring a multitude of benefits.
From faster boot times to improved data transfer speeds, an SSD SATA can significantly enhance your overall computing experience. Let’s explore these advantages in more detail:
Faster Boot Times:
- With an SSD SATA, your computer can boot up in seconds rather than minutes, allowing you to quickly jump into your work or leisure activities.
- Say goodbye to the frustrating wait times during startup. An SSD SATA can dramatically reduce the time it takes for your operating system and essential applications to load.
- Enjoy a seamless experience as you power on your computer and get straight to business or entertainment.
Increased Overall Performance:
- An SSD SATA can significantly boost the overall performance of your computer. It provides faster access to your files and applications, resulting in smoother multitasking and improved responsiveness.
- Say goodbye to those annoying lags and delays while working with resource-intensive software or opening multiple programs simultaneously.
- Enjoy a seamless computing experience, with applications launching and running fluidly, allowing you to accomplish tasks with efficiency and ease.
Improved Data Transfer Speeds:
- One of the most significant advantages of an SSD SATA is its enhanced data transfer speeds compared to traditional hard disk drives (HDDs).
- With read and write speeds that are notably faster, transferring files and data between your computer and external storage devices becomes a breeze.
- Whether you’re working with large multimedia files, transferring backups, or simply moving data around, an SSD SATA ensures rapid and efficient data transfers.
Upgrading to an SSD SATA can revolutionize your computer’s performance. Experience faster boot times, increased overall speed, and improved data transfer speeds.
Take advantage of this cutting-edge technology to unlock the true potential of your computer and optimize your productivity.
Backing Up Important Data
Learn how to easily install an SSD SATA drive for backing up important data. It’s a simple process that can significantly improve your data storage and ensure data security.
Losing important data can be a nightmare. That’s why it’s crucial to have a solid backup plan in place before installing an SSD SATA drive.
We’ll explore two popular methods for backing up your important data: saving files to an external hard drive or cloud storage and creating a system restore point.
Saving Files To An External Hard Drive Or Cloud Storage:
Backing up your files to an external hard drive or cloud storage ensures that your data remains safe and accessible in case of any mishaps during the installation process.
Here are some key points to consider:
- Connect an external hard drive to your computer or sign up for a reliable cloud storage service.
- Identify the files and folders that you want to save, such as documents, photos, videos, or any other important data.
- Copy these files to the connected external hard drive or upload them to the cloud storage service.
- Ensure that the backup process is complete and that you can access the backed-up files from the external hard drive or cloud storage.
By following these steps, you can safeguard your valuable data and have peace of mind during the SSD SATA installation process.
Creating A System Restore Point:
Another essential precaution to take before installing an SSD SATA drive is creating a system restore point. This allows you to revert back to your computer’s previous state if anything goes wrong during the installation.
Here’s what you need to know:
- Open the System Properties window by right-clicking on the Windows Start button and selecting “System.”
- In the System Properties window, click on the “System Protection” tab.
- Click on the “Create” button to create a new restore point.
- Provide a name for the restore point that will help you identify it easily.
- Click on “Create” to initiate the creation of the system restore point.
- Wait for the process to complete and verify that the system restore point has been successfully created.
Having a system restore point ensures that you can quickly restore your computer to a stable state in case something doesn’t go as planned during the SSD SATA installation.
Remember, taking these backup measures is crucial to minimize the risk of data loss and potential complications.
Safeguarding your important files and creating a system restore point will give you peace of mind while installing your brand new SSD SATA drive.
Checking Compatibility
Installing an SSD SATA requires checking compatibility with your system for optimal performance. Ensure a smooth installation process by verifying compatibility before proceeding with the upgrade.
Verifying If Your Computer Supports An Ssd Sata
If you’re looking to boost your computer’s performance, installing an SSD SATA is a great option. But before you jump into the installation process, you need to ensure that your computer is compatible with this type of storage upgrade.
Here’s how you can check the compatibility of your computer with an SSD SATA:
- Check your computer’s specifications: Look for the make and model of your computer and search for its specifications online. Make sure to pay attention to the hardware requirements and see if an SSD SATA is supported.
- Check the motherboard: The motherboard is a crucial component when it comes to compatibility with an SSD SATA. Find out if your motherboard has an available SATA port for connecting the SSD. Additionally, check if your motherboard supports the SATA version of the SSD you plan to install.
Check the BIOS:
Access your computer’s BIOS settings by restarting your computer and pressing a specific key (usually displayed during startup).
Once in the BIOS, look for options related to storage or SATA settings. Ensure that the SATA mode is set to AHCI or RAID, as these modes are commonly compatible with SSD SATA.
- Consult the manufacturer’s documentation: If you’re uncertain about your computer’s compatibility, it’s always a good idea to consult the manufacturer’s documentation. Visit the manufacturer’s website or contact their support for specific information regarding SSD SATA compatibility.
- Use online compatibility tools: Some websites offer compatibility tools that can scan your computer’s hardware and determine if it supports an SSD SATA. These tools can provide you with detailed information about your computer’s compatibility, making your task easier.
By checking the compatibility of your computer with an SSD SATA before installation, you can ensure a smooth and successful upgrade.
Now that you know how to verify compatibility, let’s move on to identifying the appropriate SSD SATA form factor.
Gathering The Required Tools
To install an SSD SATA, gathering the necessary tools is crucial. Be sure to have a screwdriver, SATA cables, and an SSD mounting bracket at hand for a smooth installation process.
To install an SSD SATA drive, you will need a few essential tools to ensure a smooth and successful process.
Make sure you gather the following tools before you begin:
- Screwdriver: A screwdriver is necessary for removing or securing screws. Ensure you have a screwdriver that fits the screws in your computer’s casing.
- Anti-static wrist strap: Protecting your SSD SATA drive from electrostatic discharge is crucial. An anti-static wrist strap prevents static electricity from damaging sensitive components.
Remember, having the right tools at hand will make the installation process much easier and minimize the risk of damage to your hardware.
Opening The Computer Case
Learn how to install an SSD SATA by opening the computer case. This quick and easy process will help enhance your computer’s speed and storage capacity.
When it comes to installing an SSD SATA in your computer, the first step is to open the computer case. This will allow you to access the internal components and make the necessary changes.
To open the computer case, follow these steps:
- Start by shutting down the computer and unplugging all the cables from the back of the case. This will ensure your safety and prevent any damage to the computer or yourself.
- Place the computer on a flat surface such as a desk or table.
- Identify the screws that hold the case together. These screws are usually located on the back or side of the computer case.
- Use a screwdriver to carefully remove the screws. Keep them in a safe place as you will need them when putting the case back together.
- Gently slide the side panel or top cover of the case off to expose the internal components.
Handling the computer components with care is crucial to prevent damage.
Here are a few tips to keep in mind:
- Avoid touching any exposed circuit boards or sensitive components with your hands. Use an antistatic wrist strap or touch a grounded metal object before handling any components.
- When handling the SSD SATA, hold it by the edges to prevent any damage from static electricity or fingerprints.
- Make sure to place the components on a clean and static-free surface.
- Be mindful of any cables or connections that may be attached to the components and gently remove them if necessary.
By following these instructions and handling the computer components with care, you can now move on to the next step of installing the SSD SATA without any issues.
Installing The Ssd Sata
Learn how to easily install an SSD SATA drive in just a few simple steps. Upgrade your computer’s storage and improve performance with this helpful tutorial.
When it comes to upgrading your computer’s storage capabilities, installing an SSD SATA can provide a significant boost to its speed and performance.
Though it might seem like a daunting task, the process of installing an SSD SATA is actually quite straightforward. We will walk you through the steps required to successfully install your new SSD SATA.
Locating The Available Sata Ports:
To begin the installation process, you will first need to locate the available SATA ports on your computer’s motherboard. These ports are typically rectangular in shape and marked with the letters SATA.
Follow these steps to find the SATA ports:
- Open your computer case and locate the motherboard.
- Look for the SATA ports, which are usually positioned near the lower edge of the motherboard.
- Identify the number of available SATA ports to determine where to connect your SSD SATA.
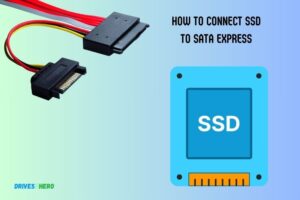
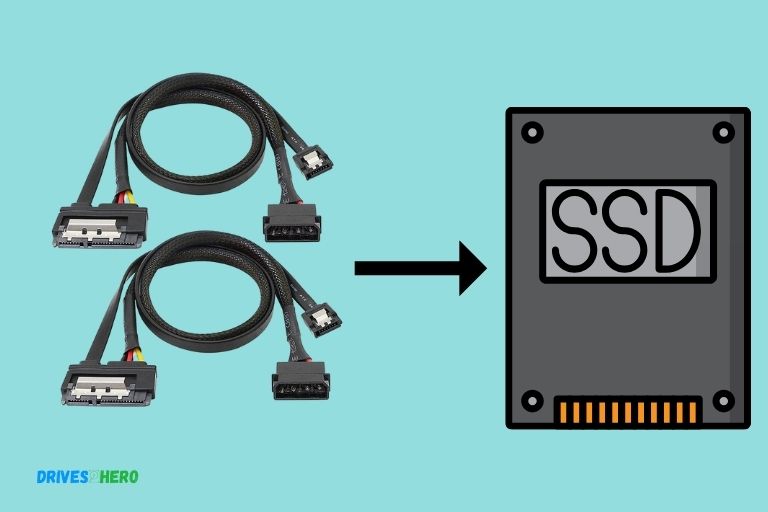
Connecting The Ssd Sata To The Power And Data Cables:
Once you have located the SATA ports, you can proceed to connect your SSD SATA to the power and data cables.
Here are the steps to follow:
- Connect one end of the SATA data cable to the SATA port on your motherboard.
- Connect the other end of the SATA data cable to the SSD SATA, ensuring a secure connection.
- Next, connect one end of the SATA power cable to the power supply unit.
- Connect the other end of the SATA power cable to the power port on the SSD SATA.
- Ensure that both the data and power cables are securely connected to avoid any connection issues.
Securing The Ssd Sata In The Designated Slot:
To complete the installation process, you will need to secure the SSD SATA in the designated slot within your computer case.
Follow these steps to properly secure the SSD SATA:
- Locate the designated slot on your computer case where the SSD SATA will be installed.
- Carefully position the SSD SATA in the slot, ensuring that it aligns properly with the mounting holes.
- Use the provided screws or fasteners to secure the SSD SATA in place, making sure it is firmly attached to the case.
- Double-check that all connections are secure and that the SSD SATA is properly seated in the slot.
By following these steps, you can successfully install your SSD SATA, enhancing your computer’s storage capacity and overall performance.
Enjoy the benefits of faster data access and improved system responsiveness with your new SSD SATA.
Closing The Computer Case
Learn the step-by-step process of installing an SSD SATA in your computer case. Follow our easy-to-understand guide for a smooth and efficient installation.
Closing the computer case is the final step in installing your SSD SATA drive. This step ensures that your computer is properly secured and ready for use.
Here are the steps to follow:
Reattaching the screws to secure the case:
- Locate the screws that were removed during the opening of the computer case. These screws are usually located along the edges of the case or at the back panel.
- Align the screw holes on the case with the corresponding holes on the chassis.
- Insert the screws into the holes and tighten them using a screwdriver. Make sure not to overtighten the screws, as this may damage the case or the components inside.
Ensuring all connections are secure:
- Before closing the case, double-check all the connections inside your computer. Ensure that the SATA data cable and power cable are securely connected to the SSD and the motherboard.
- Additionally, ensure that all other cables, such as the cables for the hard drive, graphics card, and power supply, are properly connected and secured.
- Gently tuck any excess cables away from fans or other components to prevent them from interfering with the computer’s operation.
Check for any loose components:
- Carefully inspect the inside of the computer case for any loose components that may have shifted during the installation process.
- Check that the RAM modules, expansion cards, and any other installed components are firmly seated in their respective slots.
- If you notice any loose components, gently push them back into place, ensuring that they are properly secured.
Close the computer case:
- Once you have reattached the screws and ensured all connections and components are secure, carefully close the computer case.
- Gently slide the side panel back into place, aligning it with the edges of the case.
- Push the panel until it clicks or until you feel it is securely closed.
- Finally, if your computer case has any latches or locks, make sure to secure them to prevent the case from accidentally opening.
Following these steps will ensure that your computer case is safely closed and all internal components are secure. Now you’re ready to power on your computer and enjoy the benefits of your newly installed SSD SATA drive.
Formatting The Ssd Sata
Looking to install a SSD SATA? Here’s a step-by-step guide to formatting your SSD and getting it up and running smoothly.
When it comes to installing an SSD SATA, one crucial step is formatting it correctly. This ensures that the drive is ready to be used and that it performs optimally.
We will walk you through the process of formatting your SSD SATA with step-by-step instructions.
Accessing Disk Management:
To start the formatting process, you first need to access the Disk Management tool on your computer.
Follow these steps:
- Press the Windows key + R to open the Run dialog box.
- Type “diskmgmt.msc” and click on OK.
- The Disk Management window will open, displaying a list of all the drives connected to your computer.
- Locate the SSD SATA drive that you want to format.
Initializing The Ssd Sata:
Once you have accessed the Disk Management tool and located the SSD SATA drive, the next step is to initialize it.
Here’s how:
- Right-click on the SSD SATA drive and select “Initialize Disk” from the context menu.
- Choose the desired disk initialization option (MBR – Master Boot Record or GPT – GUID Partition Table).
- Click on OK to initialize the drive.
Formatting The Ssd Sata:
Now that you have initialized the SSD SATA drive, it’s time to format it.
Follow these steps to format the drive:
- Right-click on the unallocated space of the SSD SATA drive.
- Select “New Simple Volume” from the context menu.
- The New Simple Volume Wizard will open. Click on Next.
- Specify the volume size for your SSD SATA drive. The default value is recommended.
- Assign a drive letter or path to the drive.
- Choose the file system format for the drive (NTFS is recommended for Windows).
- Set the volume label (optional).
- Enable the “Perform a quick format” option.
- Click on Next and then Finish to start the formatting process.
By following these steps, you can easily format your SSD SATA drive and get it ready for use. Remember to ensure that you have backed up any important data before formatting the drive.
Now you’re all set to enjoy the improved performance and storage capacity that an SSD SATA can offer.
Setting The Ssd Sata As The Boot Drive
Discover how to easily install and set up your SSD SATA as the boot drive in just a few simple steps, ensuring faster boot times and overall improved performance for your computer.
Say goodbye to slow loading times and hello to a seamless computing experience.When it comes to optimizing your computer’s performance, setting the SSD SATA as the boot drive can make a significant difference.
By doing this, you ensure that your operating system and essential files load faster, resulting in quicker startup times.
We will guide you through the process of accessing the BIOS menu and selecting the SSD SATA as the primary boot device. Let’s get started!
Accessing The Bios Menu:
To access the BIOS menu and make changes to your computer’s boot options, follow these steps:
- Start your computer and look out for the key you need to press to enter the BIOS setup. Commonly used keys include F2, F12, or the Delete key.
- Restart your computer if you miss the opportunity to enter the BIOS menu the first time.
- After entering the BIOS menu, navigate using the arrow keys on your keyboard.
Selecting The Ssd Sata As The Primary Boot Device:
Once you have accessed the BIOS menu, it’s time to select the SSD SATA as the primary boot device.
Here’s how you can do it:
- Locate the “Boot” or “Boot Options” section in your BIOS menu.
- Within the “Boot” section, you will find a list of bootable devices. Look for an option related to your SSD SATA.
- Use the arrow keys to move the SSD SATA to the top of the boot order list. This ensures that the system looks for the operating system on the SSD SATA first.
- Save your changes and exit the BIOS setup. This will restart your computer.
By following these steps, you have successfully set the SSD SATA as the boot drive for your computer.
Now, each time you start your system, it will directly access the operating system and files stored on the SSD, resulting in improved performance and reduced boot times.
Enjoy the speed and efficiency provided by your new boot drive! Remember, it’s essential to correctly follow the instructions provided to avoid any unintended changes to your computer’s settings.
Enabling Trim Support
To enable TRIM support, follow these steps to install an SSD SATA drive on your system. Ensure optimal performance and longevity for your SSD by enabling this essential feature.
Verifying Trim Support
Before enabling TRIM support on your SSD SATA, it’s crucial to ensure that your system and drive support this feature.
Here are the steps to verify TRIM support:
Check system compatibility:
- Ensure that your computer’s operating system is Windows 7 or later, or macOS 10.10.4 or later.
- Confirm that you have the latest updates installed for your operating system.
Confirm SSD compatibility:
- TRIM is supported by most modern SSDs, but it’s always good to double-check.
- Visit the manufacturer’s website and search for your SSD model to confirm TRIM support.
- Look for specifications or documentation that explicitly mention TRIM support.
Check TRIM status on Windows:
- Open the command prompt by pressing Win + R and typing “cmd”.
- Type the command “fsutil behavior query DisableDeleteNotify” and hit Enter.
- If the response is “DisableDeleteNotify = 0” or “Not Set”, TRIM support is enabled.
- If it’s “DisableDeleteNotify = 1”, TRIM support is disabled. Continue to the next step to enable it.
Enable TRIM on Windows:
- Open the command prompt with administrative privileges (right-click on it and select “Run as administrator”).
- Type “fsutil behavior set DisableDeleteNotify 0” and hit Enter.
- You should receive a confirmation message indicating that TRIM support has been enabled.
Verify TRIM status on macOS:
- Open the Terminal by searching for it in Spotlight or navigating to Applications > Utilities.
- Type “sudo trimforce enable” and hit Enter.
- Enter your password when prompted.
- Follow the on-screen instructions to enable TRIM support.
Enabling Trim On The Ssd Sata
Once you’ve confirmed TRIM support, it’s time to enable it on your SSD SATA drive.
Here’s how:
Windows users:
- Open the Start menu, right-click on “Computer” or “This PC,” and select “Manage.”
- In the Computer Management window, click on “Device Manager” in the left-hand pane.
- Expand the “Disk drives” category and locate your SSD SATA drive.
- Right-click on the drive and select “Properties.”
- In the Properties window, go to the “Policies” tab.
- Check the box that says “Enable write caching on the device” and ensure that “Turn off Windows write-cache buffer flushing on the device” is unchecked.
- Click “OK” to save the changes.
MacOS users:
- Go to the Apple menu and select “System Preferences.”
- Click on “Energy Saver.”
- In the Energy Saver window, click on “Power Adapter.”
- Uncheck the box that says “Put hard disks to sleep when possible.”
- Close the Energy Saver window.
By following these steps, you can ensure that TRIM support is properly enabled on your SSD SATA drive, allowing it to efficiently manage data and maintain optimal performance.
Disabling Power Saving Features
Learn how to install an SSD SATA by disabling power saving features, maximizing your drive’s performance and ensuring optimal functionality. Say goodbye to slow boot times and lagging applications with this simple guide.
When it comes to installing an SSD SATA drive, properly optimizing power settings is essential for maximizing performance.
Disabling power-saving features can prevent the SSD SATA from entering power-saving modes and ensure optimal functioning. This section will explore how to disable these features effectively.
Preventing The Ssd Sata From Entering Power-Saving Modes:
Disable power-saving mode in the BIOS: Access the BIOS settings by restarting your computer and pressing the designated key (such as F2 or Del) during the boot-up process.
Find the power management options and disable any settings related to power-saving modes for the SATA drive.
Modify power settings in the operating system: Go to the power settings in your operating system, typically found in the control panel or settings menu. Look for the advanced power settings and navigate to the hard drive or storage settings.
Disable power-saving features such as sleep mode and turn off hard disk after a certain period of inactivity.
Update SSD firmware: Check the manufacturer’s website for firmware updates for your specific SSD SATA model. Keeping the firmware up to date can ensure that power-saving features are optimized for performance.
Maximizing Performance By Disabling Power-Saving Features:
Enhanced performance mode: Many SSD SATA drives come with a software utility that allows you to enable an enhanced performance mode.
This mode disables power-saving features and prioritizes performance, resulting in faster data transfer speeds. Install and activate this utility to take advantage of enhanced performance.
Trim support: Ensure that the Trim command is enabled for your SSD SATA drive. Trim improves performance by optimizing the drive’s efficiency in managing deleted data.
You can enable Trim by going to the operating system’s settings or using the SSD manufacturer’s software utility.
Check power plan settings: In the operating system’s power plan settings, make sure that the power plan is set to high performance.
This setting prevents the system from entering power-saving modes and allows the SSD SATA drive to operate at maximum performance.
By following these steps and disabling power-saving features, you can unlock the full potential of your SSD SATA drive.
Keep in mind that different operating systems and SSD models may have slight variations in settings and options, so refer to the manufacturer’s documentation for specific instructions.
FAQ On How To Install Ssd Sata
Can I Install Ssd In Sata Slot?
Yes, you can install an SSD in a SATA slot.
Is It Easy To Install Sata Ssd?
Yes, installing a SATA SSD is easy as it requires a few simple steps.
How Do I Install An Ssd For The First Time?
To install an SSD for the first time, follow these steps:
1. Shut down your computer and disconnect the power cable.
2. Open the case and locate the hard drive bays.
3. Choose an empty bay and attach the SSD using screws or brackets.
4. Connect the SSD to the motherboard using a SATA cable.
5. Connect the power cable to the SSD.
6. Close the case and reconnect the power cable.
7. Turn on your computer and configure the SSD in the BIOS settings.
8. Install the operating system on the SSD and transfer files from the old hard drive if desired.
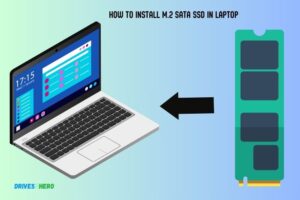
How To Install Ssd Sata Laptop?
To install an SSD SATA laptop:
1. Power off the laptop and disconnect any external cables.
2. Remove the laptop’s back cover or battery, if necessary.
3. Locate the existing hard drive and disconnect it.
4. Connect the SSD SATA to the laptop using the provided cables.
5. Secure the SSD in the same spot as the previous hard drive.
6. Reattach the laptop’s cover or battery.
7. Power on the laptop and ensure the SSD is recognized in the BIOS.
8. Install the operating system and transfer data as needed.
9. Your laptop should now be running on the new SSD SATA drive!
How Do I Install An Ssd Sata?
To install an SSD SATA, first, shut down your computer, open the case, locate an available SATA slot, connect the SSD, and secure it with screws. Then, close the case and power on your computer.
Conclusion
To sum up, installing an SSD SATA drive is a straightforward process that can greatly enhance the performance of your computer.
By following the steps outlined in this guide, you can quickly and easily upgrade your storage and enjoy faster boot times and improved overall system speed.
Remember to gather all the necessary tools and components before beginning, and take care to properly initialize and format the SSD to ensure optimal functioning.
Don’t be intimidated by the process—it may seem complex at first, but with a little research and patience, you can successfully install an SSD SATA drive and reap the benefits it brings.
So go ahead, take the plunge, and give your computer the boost it deserves. Happy upgrading!

Harold Williams is a senior writer and technical editor at Drives Hero with 20+ years of experience in IT administration. He specializes in storage systems, SSD reviews, and performance testing, bringing real-world insight to every guide.