How to Test Sata Power Cable? 8 Steps Guide!
Ensuring the integrity of your SATA power cables is crucial for maintaining the smooth operation of your computer’s storage devices.
A faulty SATA power cable can lead to data loss or hardware damage. We’ll walk you through the step-by-step process of testing your SATA power cable using a multimeter.
By following these simple instructions, you can quickly determine whether your cable is functioning properly and take appropriate action if any issues are detected.
Key Takeaway
Testing SATA Power Cable: Step-by-Step Guide
Step 1: Gather Necessary Tools
Ensure you have the following tools ready:
- SATA power cable
- Multimeter
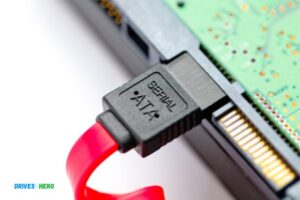
Step 2: Inspect the Cable
Visually examine the SATA power cable for any signs of damage, such as frayed wires or burnt marks. If you notice any damage, do not proceed with testing.
Step 3: Set Up the Multimeter
Set the multimeter to measure DC voltage. Choose the appropriate voltage range for SATA power cables, typically 5V or 12V.
Step 4: Power Off Devices
Ensure that all devices connected to the SATA power cable are powered off and unplugged from the electrical outlet.
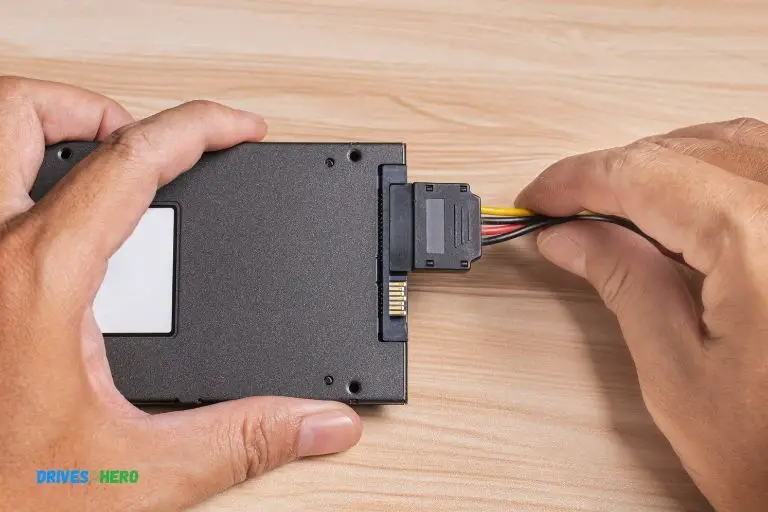
Step 5: Connect the Multimeter
Connect the black probe (negative) of the multimeter to a ground point, such as the metal casing of the device or the ground pin of a power outlet. Connect the red probe (positive) to the yellow wire of the SATA power cable.
Step 6: Measure Voltage
Turn on the power to the devices connected to the SATA power cable. The multimeter should display a voltage reading close to the specified voltage (5V or 12V). If the reading is significantly lower or higher, there may be an issue with the cable.
Step 7: Test Other Wires (Optional)
Repeat step 6 for the red (5V) and orange (3.3V) wires of the SATA power cable, if applicable.
Step 8: Disconnect and Conclude
Once testing is complete, disconnect the multimeter and power off all devices. If the voltage readings are within the expected range, the SATA power cable is functioning correctly. If not, consider replacing the cable.
By following these steps, you can effectively test the functionality of a SATA power cable using a multimeter.
Regular inspection and testing of cables are essential to ensure the reliable operation of your devices and prevent potential damage from faulty connections.
Five Facts About: Testing SATA Power Cables
It is a computer bus interface that connects host bus adapters to mass storage devices like hard disk drives and optical drives. (source: https://techterms.com/definition/sata)
(source: https://www.lifewire.com/sata-15-pin-power-connector-pinout-2624585)
Power supply tester provides a straightforward solution for checking whether or not power is being supplied. (source: https://itstillworks.com/test-computer-power-supply-4844698.html)
This can cause issues such as a computer not booting up, random shutdowns, or flickering display.
Inspecting The External Appearance
When testing a SATA power cable, it’s important to inspect the external appearance. Look for any physical damage or loose connections that could affect its performance.
When it comes to testing a SATA power cable, one of the first steps is to inspect its external appearance.
Visual examination for any noticeable wear or tear:
Take a closer look at the cable, checking for any signs of fraying, cuts, or damage to the insulation. These issues can lead to connectivity problems or even electrical hazards. Make sure the cable is intact and in good condition.
Identifying bent or broken pins:
Inspect both ends of the SATA power cable to ensure the pins are all straight and undamaged. Bent or broken pins can prevent the cable from making proper contact with the connector, resulting in power supply issues.
Looking for any burn marks or discoloration:
Burn marks or discoloration on the SATA power cable can indicate overheating or electrical issues. Such damage might affect the cable’s ability to carry power effectively. Inspect the cable for any signs of discoloration or burn marks, paying close attention to the connectors.
Remember, examining the external appearance of a SATA power cable is just the first step in the testing process.
If you notice any physical damage or abnormalities during this inspection, it’s important to address them before using the cable.
Using A Multimeter For Voltage Testing
To test a SATA power cable, you can use a multimeter to measure the voltage. Follow the steps carefully for accurate results.
Understanding The Basics Of A Multimeter
A multimeter is a versatile tool used for measuring electrical quantities such as voltage, current, and resistance. Understanding the basics of a multimeter will help you effectively test a SATA power cable.
Here are some key components and functions of a multimeter:
- Display: The multimeter’s digital screen displays measurement results.
- Selector Switch: This allows you to choose the quantity you want to measure, such as voltage or resistance.
- Test Leads: The red lead is positive, while the black lead is negative, allowing you to make connections for testing.
- Function Buttons: Additional buttons enable you to switch between different functions or ranges.
Setting Up The Multimeter For Testing
Before testing the SATA power cable, it’s essential to set up the multimeter correctly.
Follow these steps to ensure accurate measurements:
- Insert the red test lead into the socket marked “VΩmA” for voltage measurements.
- Insert the black test lead into the common socket marked “COM” or “-“.
- Turn the selector switch to the “V” or voltage setting.
Ensuring Safety Precautions While Handling The Multimeter
Safety is crucial when working with electrical devices.
Take the following precautions to ensure your well-being:
- Never touch the metal probes of the test leads while the multimeter is connected to a power source.
- Avoid testing live circuits, as it can be dangerous. Disconnect the power source before working on any electrical connections.
- Keep the multimeter away from water and damp areas to avoid damage.
Checking For Voltage Output
To test the SATA power cable for voltage output, follow the steps below:
- Make sure the power source is disconnected from the SATA power cable.
- Connect the black test lead to the ground pin of the SATA power cable.
- Connect the red test lead to the 5V or 12V pin of the SATA power cable, depending on the required voltage.
- Ensure the voltage selector on the multimeter is set to the appropriate range for the expected voltage output.
Testing Each Pin For Proper Voltage Output
Once the connections are secured, you can test each pin individually:
- Touch the black test lead to the ground pin of the SATA power cable.
- Touch the red test lead to each pin on the SATA power cable, starting with pin 1 and continuing through each pin.
- Observe the multimeter’s display for the voltage reading at each pin.
- Note any significant deviations from the expected readings.
Interpreting The Results
Understanding the voltage range and interpreting the results is crucial for identifying issues with the SATA power cable.
Consider the following:
- Desired Voltage Range: SATA power cables typically have a 5V or 12V range. Ensure the voltage reading falls within this range for proper functionality.
- Deviations from Expected Readings: Significant variations from the expected voltage values indicate potential problems with the cable, such as a loose connection or faulty components.
By following these steps and interpreting the voltage readings accurately, you can effectively test a SATA power cable using a multimeter.
Measuring Continuity With A Continuity Tester
The continuity of a SATA power cable can be easily verified by using a continuity tester. This simple tool ensures proper functionality and prevents any power supply issues.
Introduction To Continuity Testing
Continuity testing is a vital process that ensures the integrity of electrical connections and cables. By testing the continuity of a SATA power cable, you can verify that each pin is properly connected and there are no interruptions in the circuit.
The Purpose Of Continuity Testing
Continuity testing helps identify any issues or interruptions in an electrical circuit. By checking the continuity of each pin in a SATA power cable, you can ensure that power will flow smoothly, preventing any potential electrical malfunctions or damage to connected devices.
Basics Of A Continuity Tester
A continuity tester is a simple but effective device used to check for the presence of an electrical connection between two points.
The two most common types of continuity testers are digital multimeters and dedicated continuity testers.
Here are some key points about continuity testers:
- A continuity tester is an essential tool for electricians, technicians, and anyone working with electrical systems.
- It measures the electrical conductivity between two points to determine if a circuit is complete or interrupted.
- The tester emits an audible beep or displays a visual indicator when continuity is detected, indicating a complete circuit.
Preparing The Continuity Tester For Use
Before testing the SATA power cable, you need to prepare the continuity tester.
Follow these steps to ensure the tester is ready for accurate measurements:
- Ensure the continuity tester is turned off and disconnected from any power source.
- Set the tester to the continuity or resistance mode. This mode allows for precise detection of continuity.
- Check the battery level of the tester and replace the battery if necessary to ensure accurate readings.
Testing The Connections
Once the continuity tester is prepared, it’s time to test the SATA power cable for continuity.
Follow these steps to ensure a thorough test:
- Connecting the continuity tester to the SATA power cable
- Insert the positive and negative leads of the continuity tester into the corresponding connectors on the tester.
- Make sure the leads are securely connected to the tester and the SATA power cable.
- Monitoring the continuity of each pin
- Start by identifying the pins on the SATA power cable connector. Refer to the cable’s documentation or visual guides for proper identification.
- Touch the positive lead of the continuity tester to the first pin on the connector, and the negative lead to the corresponding ground pin.
- Observe the continuity tester for any indication of a complete circuit, such as an audible beep or a visual indicator.
- Identifying any interruptions in the circuit
- Move on to the next pin and repeat the process of connecting the tester leads and checking for continuity.
- Continue testing each pin individually until you have checked all the pins on the SATA power cable.
Analyzing The Results
After completing the continuity test, it’s time to analyze the results and determine if the cable passes or fails the test.
Here are the key steps to interpret the test results:
- Understanding the concept of continuity
- Continuity refers to the uninterrupted flow of electrical current between two points.
- A successful continuity test indicates that there are no interruptions, ensuring proper electrical connectivity.
- Determining if the cable passes or fails the continuity test
- If the continuity tester emits an audible beep or displays a visual indicator for each pin, it signifies a successful continuity test. The cable passes.
- If the continuity tester doesn’t indicate continuity for any pin, it suggests an interruption in the circuit. The cable fails and needs further investigation or replacement.
By following these steps, you can effectively test the continuity of a SATA power cable and ensure its proper functioning.
Regularly testing cables can prevent potential power issues and ensure a reliable electrical connection between devices.
Assessing The Results
Assessing the results of a test on a SATA power cable is crucial to ensure its functionality. By using a multimeter and checking for voltage readings, you can effectively determine if the cable is working as intended.
Analyzing The Collected Data
After conducting a thorough test on the SATA power cable, it is important to analyze the collected data to understand the performance and potential issues.
By doing so, you can make informed decisions about the next steps to take.
Here are some key points to consider:
Check the voltage levels:
- Measure the voltage using a multimeter to ensure it falls within the acceptable range.
- A stable voltage supply is crucial for the effective functioning of the SATA power cable.
Evaluate the current flow:
- Assess the current flow to determine whether it matches the expected levels.
- Excessive current can lead to overheating and potential damage to connected devices.
Examine the cable for physical damage:
- Inspect the cable for any visible signs of damage, such as frayed or exposed wires.
- Physical damage can affect the overall performance and safety of the cable.
Test multiple connections:
- Connect the SATA power cable to different devices and check if it delivers power consistently.
- Ensure that the cable securely connects without any loose connections that may cause intermittent power supply.
Identifying Potential Issues Based On The Test Results
Once you have analyzed the collected data, it is crucial to identify any potential issues that may have been revealed during the test.
Here are some common problems to watch out for:
Voltage fluctuations:
- If the voltage levels fluctuate excessively, it could indicate a faulty or inadequate power supply.
- In such cases, consider using a different power source or replacing the cable altogether.
Inconsistent current flow:
If the current flow fluctuates significantly or exceeds the recommended limits, it may cause harm to connected devices or lead to system instability. Consider replacing the cable or seeking professional assistance.
Physical damage:
Visible signs of physical damage, such as exposed wires or frayed insulation, can pose safety hazards and affect the cable’s efficiency. Replace the cable immediately if any damage is found.
Loose connections:
Loose connections can result in intermittent power supply or complete power loss. Ensure that all connections are tight and secure to avoid such issues.
Determining The Next Steps Based On The Findings
Based on the test results and identified issues, it’s time to determine the next steps to ensure the optimal performance of the SATA power cable.
Consider the following actions:
Replace the cable:
- If the test results indicate significant issues or damage, replacing the SATA power cable is recommended.
- It’s essential to use a reliable and high-quality cable that meets the required specifications.
Seek professional assistance:
- If the test results reveal complex issues or if you are unsure about the findings, it’s advisable to consult with a professional technician or seek assistance from the manufacturer.
- They can provide expert guidance and help resolve any problems effectively.
Optimize power supply:
- If the test results suggest power supply related issues, consider optimizing the power source.
- Ensure that the power outlet or power supply unit is functioning correctly and can provide a stable voltage supply.
Regular maintenance:
- To prevent future issues, establish a routine maintenance schedule for your SATA power cable.
- Regularly inspect and clean the cable, connections, and devices to ensure they are in good condition.
By following these steps and taking appropriate action based on the test results, you can ensure the reliability and performance of your SATA power cable.
Regular testing and maintenance will help prevent potential problems and provide a stable power supply to your devices.
Troubleshooting Tips For Sata Power Cable Issues
Get your SATA power cable issues fixed with these troubleshooting tips. Learn how to test your SATA power cable and ensure efficient power delivery to your devices.
When it comes to troubleshooting SATA power cable issues, there are several steps you can take to identify and resolve the problem.
By following these troubleshooting tips, you can quickly diagnose the issue and take appropriate action.
Checking The Power Supply:
Inspect the power supply connections:
Ensure that the SATA power cable is securely connected to the power supply unit (PSU). Make sure it’s firmly attached and not loose.
Verify the power supply output:
Use a multimeter to check the voltages of the SATA power cable. Ensure that the voltage readings are within the acceptable range specified by the manufacturer.
Test with a different power supply:
If possible, connect the device to a different power supply to see if the issue persists. This can help determine if the problem lies with the power supply itself.
Inspecting The Motherboard Or Device Interface:
Examine the motherboard connections:
- Ensure that the SATA power cable is properly connected to the motherboard or device interfaces. Check for any visible damage or looseness.
Clean the connections:
- Over time, dust and debris can accumulate on the connectors, leading to poor contact.
- Gently clean the SATA power cable connectors and the motherboard/device interfaces to establish a reliable connection.
Testing The Cables With Different Devices:
Connect the SATA power cable to a different device:
- If possible, use the same SATA power cable to connect another device and check if it receives power.
- If the other device works fine, the issue might be specific to the initial device or component you were troubleshooting.
Swap cables between devices:
If you have multiple SATA power cables, try swapping them between devices to see if the issue follows the cable or stays with the device. This can help identify if the issue lies with the cable itself.
Replacing The Sata Power Cable If Necessary:
Purchase a new SATA power cable:
- If you have exhausted all troubleshooting options and the issue persists, consider purchasing a new SATA power cable.
- Ensure that you select a cable compatible with your device and meets the necessary power requirements.
Replace the cable:
- Disconnect the old SATA power cable and replace it with the new one. Make sure to secure the connection properly at both ends.
Test the device after replacing the cable:
- Once the new SATA power cable is in place, test the device to ensure it receives the necessary power.
- If the issue is resolved, you have successfully troubleshooted and resolved the SATA power cable issue.
Remember, it’s important to follow proper safety precautions when working with power cables and computer components.
If you are unsure or uncomfortable with any troubleshooting steps, it’s advisable to seek assistance from a professional.
FAQ About How to Test Sata Power Cable
How Do I Know If My Sata Power Cable is Working Correctly ?
To check if your SATA power cable is working correctly, plug it into the power supply and motherboard connectors.
If the system turns on and all of its connected components boot up properly, then the cable is functioning correctly.
What Tools are Necessary to Test a Sata Power Cable ?
To test a SATA power cable, an ohmmeter or multimeter is necessary.
Is It Safe to Test a Sata Power Cable With a Multimeter ?
Yes, it is safe to test a SATA power cable with a multimeter.
It is important to ensure that the multimeter is set correctly to measure voltage and not amperage.
The multimeter probes should be placed on each end of the power cable’s pins in order to check for continuity and determine if there are any shorts or other problems with the cable.
Are There Any Specific Instructions for Testing the Voltage of a Sata Power Cable ?
Yes, there are some specific instructions for testing the voltage of a SATA power cable. The first step is to set the multimeter on its DC volts setting and then connect it to one end of the SATA power cable.
Then, connect the other end of the cable to a reliable source such as an AC adapter or battery before turning on your device.
Next, measure the voltage that is being supplied by touching both probes onto either side of each pin in turn until you get an accurate reading.
Once complete, turn off your device and disconnect all cables from their source before removing any connections made with your multimeter.
Conclusion
To ensure the smooth functioning of your computer system, it is essential to properly test your SATA power cable. By following the step-by-step instructions mentioned in this blog post, you can easily conduct a thorough test.
Start by checking the connections and ensuring that the cable is securely plugged into both the power supply unit and the device.
Then, use a multimeter or a power supply tester to measure the voltage and test for any abnormal fluctuations.
Pay attention to any overheating or unusual noises as well. Regularly testing your SATA power cable can help prevent potential damage to your computer and safeguard your valuable data.

Harold Williams is a senior writer and technical editor at Drives Hero with 20+ years of experience in IT administration. He specializes in storage systems, SSD reviews, and performance testing, bringing real-world insight to every guide.