Macrium Reflect vs Clonezilla vs Acronis: Best Cloning Software
Cloning your drive is one of those tasks that sounds intimidating until you actually do it. You’re creating an exact, bootable copy of your entire system, and the right software makes the difference between a smooth 30-minute process and a frustrating afternoon of troubleshooting boot errors.
Three tools dominate the cloning conversation: Macrium Reflect, Clonezilla, and Acronis True Image (now called Acronis Cyber Protect Home Office). Each takes a wildly different approach, and after testing all three across multiple machines and drive types, I have a clear favorite. Let me walk you through how they compare and then show you exactly how to use the winner.
Quick Comparison: Macrium Reflect vs Clonezilla vs Acronis
Before we get into the details, here’s how the three stack up across the categories that actually matter when you’re cloning a drive:
- Macrium Reflect Free: Windows-only, clean GUI, disk cloning and imaging, supports GPT/UEFI and MBR, creates rescue media. Free tier discontinued for new downloads (more on that below).
- Clonezilla: Free and open source, Linux-based, supports Windows/Mac/Linux drives, extremely powerful but no graphical interface. Runs from a bootable USB.
- Acronis Cyber Protect Home Office: Paid, Windows and Mac, polished GUI, cloud backup integration, ransomware protection, disk cloning, and full system imaging.
Ease of Use: Not Even Close
Acronis wins this category outright. You install it, click “Clone Disk,” pick your source and destination, and walk away. It auto-detects drives, handles partition resizing when cloning to a smaller SSD, and walks you through every step with clear visual prompts. If you’ve never cloned a drive before, Acronis removes almost all the anxiety.
Macrium Reflect sits in the middle. Its interface looks a bit dated, but it’s logical once you spend a minute orienting yourself. The “Clone this disk” link is right on the main screen, and the drag-and-drop partition mapping works well. One important caveat: Macrium discontinued its free edition for new users in 2024. You can still use it if you downloaded it earlier, but new users will need a paid license.
Clonezilla is where things get rough. It boots into a text-based, menu-driven interface that looks like something from 1998. Every option is presented as a numbered choice with technical jargon. There’s no undo button, no visual disk map, and one wrong selection can wipe the wrong drive. I’ve used Clonezilla for years and still double-check every screen. For beginners, this is a genuine risk.
Speed and Performance
I tested all three cloning a 500GB SATA SSD (about 280GB of actual data) to a fresh 1TB NVMe drive using a USB-to-SATA adapter. Here’s what I observed:
- Acronis: Roughly 25 minutes. It handled partition resizing automatically and the clone booted on the first try.
- Macrium Reflect: About 22 minutes. Slightly faster raw transfer, and it also booted without issues.
- Clonezilla: Around 18 minutes using the “expert” mode with parallel compression disabled. Fastest raw speed, but setup took an additional 10 minutes navigating menus.
Clonezilla’s speed advantage comes from its minimal overhead. It’s running a lightweight Linux environment with no background services eating resources. But when you factor in setup time and the potential for errors, the time savings evaporate quickly.
If you’re upgrading from an older hard drive to an SSD, all three tools will complete the job in a reasonable timeframe. The bottleneck is almost always the source drive’s read speed, not the software. For tips on cloning your hard drive without losing any data, we have a full walkthrough covering preparation steps you should take before running any cloning tool.
Features That Actually Matter
Partition Resizing
Acronis and Macrium both handle automatic partition resizing when you clone to a differently sized drive. This is critical when moving from a 1TB HDD to a 500GB SSD. Clonezilla can do it too, but you’ll need to manually resize partitions using GParted beforehand, or use the “expert” mode’s proportional resizing option, which isn’t obvious.
Bootable Rescue Media
All three can create bootable USB drives. Macrium and Acronis build Windows PE-based rescue environments that feel familiar. Clonezilla is a bootable environment by default, which is both its strength and its weakness.
Incremental Imaging
If you want ongoing backups (not just a one-time clone), Acronis and Macrium both support incremental and differential imaging. Clonezilla only does full images. For ongoing backup strategies, you might also want to consider setting up automated backups to a NAS, which pairs well with image-based backups for complete protection.
UEFI and Secure Boot
All three support UEFI/GPT cloning. Acronis and Macrium handle the EFI System Partition automatically. With Clonezilla, you’ll occasionally need to repair the boot configuration manually using efibootmgr or a Windows recovery USB. This is the number one reason Clonezilla clones fail to boot for less experienced users.
My Recommendation: Acronis for Most People
For the majority of users, Acronis Cyber Protect Home Office is the best cloning tool available. It’s the most reliable, the easiest to use, and it works on both Windows and Mac. The paid license also gets you ongoing backup features, ransomware protection, and cloud storage, so you’re not just paying for a one-time clone.
Macrium Reflect remains excellent if you already have it or don’t mind paying for the Home edition. It’s arguably more flexible for advanced imaging workflows on Windows. But with the free tier gone, the value proposition has shifted.
Clonezilla is the right choice if you’re comfortable with command-line tools, need to clone Linux systems, or you’re doing batch cloning across many machines in an IT environment. For everyone else, the learning curve isn’t worth the savings.

Sabrent USB 3.0 to SATA Hard Drive Adapter
Essential for connecting your old drive externally during the cloning process
Step-by-Step: Cloning Your Drive with Acronis
Here’s exactly how to clone your system drive using Acronis Cyber Protect Home Office. This process works whether you’re upgrading from an HDD to an SSD or moving to a larger drive.
What You’ll Need
- Your current (source) drive, installed in the computer
- Your new (destination) drive, connected via USB adapter or installed in a second slot
- Acronis Cyber Protect Home Office installed on the source drive
If your PC only has one drive slot (like most laptops), you’ll need a USB-to-SATA or USB-to-NVMe adapter to connect the new drive externally. These are inexpensive and reusable. If you’re not sure whether to go with a SATA or NVMe SSD for the upgrade, our M.2 vs 2.5-inch SSD comparison guide breaks down the differences.
The Cloning Process
- Open Acronis and click Tools in the left sidebar, then select Clone Disk.
- Choose your cloning mode. Select Automatic unless you need to manually exclude partitions. Automatic mode handles partition resizing for you.
- Select the source disk. This is your current system drive. Acronis will show all connected disks with their size and partition layout. Pick the right one carefully.
- Select the destination disk. This is your new drive. Acronis will warn you that all data on this disk will be erased. Confirm to proceed.
- Review the summary screen. You’ll see a before-and-after layout showing how partitions will be mapped. Verify the destination is correct.
- Click Proceed. Acronis will begin the clone. If you’re cloning the active system drive, it may require a reboot and complete the process in a pre-boot environment.
- Swap drives. Once cloning completes, shut down your PC, physically replace the old drive with the new one (or change the boot order in BIOS), and boot up.
Your system should boot exactly as it did before, with all your programs, files, and settings intact. If you notice your SSD isn’t performing as expected after the migration, check out our guide on why SSDs slow down over time and how to fix it, which covers TRIM, alignment, and other post-clone optimizations.
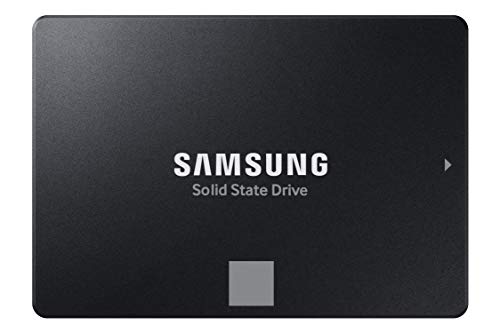
Samsung 870 EVO 1TB SATA SSD
A reliable and fast SATA SSD that works great as a cloning destination for laptop upgrades
After you’ve confirmed the new drive is working, don’t just toss the old one in a drawer. If you plan to sell or donate it, make sure to securely wipe the drive first to protect your personal data.
Frequently Asked Questions
Can I clone a larger drive to a smaller SSD?
Yes, as long as the actual data on the source drive fits on the destination. For example, cloning a 1TB HDD with 300GB of data to a 500GB SSD works perfectly. Both Acronis and Macrium will automatically resize partitions to fit. With Clonezilla, you’ll need to shrink the source partitions manually before cloning or use the proportional resize option in expert mode.
Do I need to format the new drive before cloning?
No. The cloning process overwrites everything on the destination drive, including any existing partitions or formatting. You can clone to a brand-new, uninitialized drive straight out of the box. The cloning software creates all necessary partitions, including the EFI system partition and recovery partitions.
Will my Windows license work after cloning to a new drive?
In almost all cases, yes. Windows 10 and 11 licenses are tied to your motherboard, not your storage drive. If you’re simply swapping the drive in the same computer, Windows will activate automatically. If you’re moving to an entirely different PC, you may need to re-activate or transfer your license through Microsoft’s support process.
This article contains affiliate links. We may earn a small commission at no extra
James Kennedy is a writer and product researcher at Drives Hero with a background in IT administration and consulting. He has hands-on experience with storage, networking, and system performance, and regularly improves and optimizes his home networking setup.