Windows on Sata Ssd Vs Nvme: Which One Is Superior?
Installing Windows on SATA SSD vs NVMe can have a noticeable difference in performance, with NVMe drives being significantly faster due to their direct connection to the CPU, reducing latency and increasing read/write speeds.
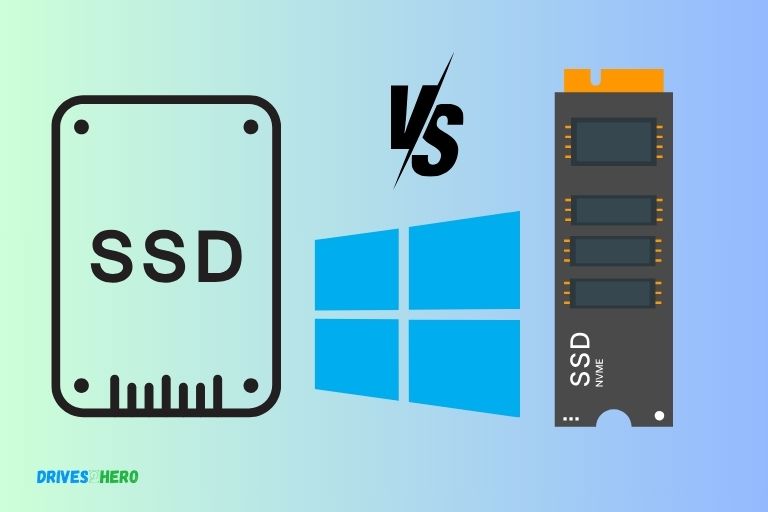
The difference between installing Windows on a SATA SSD and NVMe comes down to their technological architecture. SATA SSDs use the SATA interface, known for its backward compatibility and affordability.
However, NVMe drives connect directly to the CPU via PCIe lanes, leading to substantially lower latency and higher bandwidth, which translates to faster data transfer speeds.

9 Features Of Windows On SATA SSD Vs NVMe
| Features | SATA SSD | NVME |
|---|---|---|
| Speed | Up to 550 MB/s | Up to 3500 MB/s |
| Latency | Higher latency | Lower latency |
| Form Factor | 2.5″ form factor, mSATA, M.2 | M.2, U.2, PCI-E |
| Cost | More affordable | More expensive |
| Power Efficiency | Less energy efficient | More energy efficient |
| Ease of Installation | Easier to install (generally) | May require some technical knowledge to install |
| Suitable for | Average users, small workloads | Gamers, heavy workloads, professionals |
| Durability | Less durable due to presence of mechanical parts | More durable due to lack of mechanical parts |
| Availability | More widely available | Less widely available but increasing |
Key Takeaway
The Difference Between Sata Ssd And Nvme Ssd
SATA SSD and NVMe SSD have noticeable differences regarding Windows performance. SATA SSD provides reliable speed and storage, while Nvme SSD offers significantly faster data transfer, resulting in quicker Windows booting and application loading times.
Both options offer significant improvements over traditional HDDs (Hard Disk Drives), but they have distinct features that set them apart. We will explore the pros and cons of each to help you make an informed decision.
Sata Ssd: Pros And Cons
SATA SSDs have been a popular choice for many years, providing a reliable and affordable storage solution for computer users.
Here are the key advantages and disadvantages of SATA SSDs:
- Faster Performance: SATA SSDs offer a substantial performance boost compared to traditional HDDs. They provide faster data transfer speeds, resulting in quicker file loading times and improved system responsiveness.
- Cost-Effective: SATA SSDs are generally more affordable compared to NVMe SSDs, making them an accessible option for users on a budget.
- Wide Compatibility: SATA SSDs use standard SATA connectors, making them compatible with most computers and laptops. They can be easily installed in existing systems without the need for any additional hardware.
- Lower Maximum Speeds: While SATA SSDs offer impressive performance, their maximum speeds are limited by the SATA interface. This means they cannot achieve the same lightning-fast speeds as NVMe SSDs.
- Limited Scalability: SATA SSDs have a lower maximum capacity compared to NVMe SSDs. If you require large amounts of storage, you may need multiple SATA SSDs or consider other options.
Nvme Ssd: Pros And Cons
NVMe SSDs have gained popularity in recent years due to their exceptional performance capabilities.
Here’s a closer look at the pros and cons of NVMe SSDs:
Lightning-Fast Speeds: NVMe SSDs utilize the NVMe protocol and PCIe (Peripheral Component Interconnect Express) interface, enabling them to achieve significantly faster data transfer speeds.
This results in lightning-fast boot times, near-instantaneous file loading, and improved overall system performance.
Superior Scalability: NVMe SSDs offer higher maximum capacity options compared to SATA SSDs. If you require massive amounts of storage for demanding tasks like video editing or gaming, NVMe SSDs can accommodate your needs.
Reduced Latency: NVMe SSDs have lower latency compared to SATA SSDs, meaning data can be accessed more quickly. This reduces the time it takes for applications to load and improves the overall user experience.
Higher Cost: NVMe SSDs tend to be more expensive compared to SATA SSDs due to their advanced technology and superior performance. However, the benefits they offer may outweigh the higher price for users who require top-tier performance.
Limited Compatibility: NVMe SSDs require a motherboard with an available PCIe slot that supports NVMe. Not all systems are equipped with this feature, so compatibility should be considered before purchasing an NVMe SSD.
Both SATA SSDs and NVMe SSDs have their advantages and disadvantages. SATA SSDs provide reliable performance at an affordable price, while NVMe SSDs offer lightning-fast speeds and better scalability.
Consider your specific needs and budget before deciding which option is best for your computer.
Performance Comparison: Sata Ssd Vs Nvme Ssd
Comparing the performance of Windows on SATA SSD and NVMe SSD reveals noticeable differences.
We will compare the performance of SATA SSD and NVMe SSD in terms of sequential read and write speeds, random read and write speeds, and input/output operations per second (IOPS).
Sequential Read And Write Speeds:
SATA SSD:
- Sequential read speeds: SATA SSDs typically offer sequential read speeds of up to 550 MB/s.
- Sequential write speeds: SATA SSDs generally have sequential write speeds of around 520 MB/s.
NVMe SSD:
- Sequential read speeds: NVMe SSDs can provide significantly higher sequential read speeds, reaching up to 3500 MB/s.
- Sequential write speeds: NVMe SSDs excel in sequential write speeds as well, offering up to 3000 MB/s.
Overall, NVMe SSDs outperform SATA SSDs when it comes to sequential read and write speeds. With NVMe SSDs, you can achieve much faster data transfer rates, resulting in quicker file access and reduced loading times.
Random Read And Write Speeds:
SATA SSD:
- Random read speeds: SATA SSDs typically offer random read speeds of up to 100,000 IOPS (input/output operations per second).
- Random write speeds: SATA SSDs generally have random write speeds of around 80,000 IOPS.
NVMe SSD:
- Random read speeds: NVMe SSDs can provide significantly higher random read speeds, reaching up to 700,000 IOPS.
- Random write speeds: NVMe SSDs excel in random write speeds as well, offering up to 600,000 IOPS.
NVMe SSDs outshine SATA SSDs when it comes to random read and write speeds.
Their faster IOPS rates allow for quicker access to small, random data sets, making them ideal for tasks that involve frequent data retrieval or usage, such as gaming or editing large multimedia files.
Input/Output Operations Per Second (Iops):
- SATA SSD: SATA SSDs typically offer up to 100,000 IOPS for both read and write operations.
- NVMe SSD: NVMe SSDs can provide significantly higher IOPS rates, with up to 700,000 IOPS for read operations and 600,000 IOPS for write operations.
With NVMe SSDs, you can experience much higher IOPS rates compared to SATA SSDs. This means faster and more efficient data transfers, resulting in improved system responsiveness and reduced latency.
NVMe SSDs clearly outperform SATA SSDs in terms of sequential read and write speeds, random read and write speeds, and IOPS rates.
Compatibility And Installation
Windows on Sata Ssd and Nvme offer different compatibility and installation options. With Sata Ssd, users can easily install Windows with older systems, while Nvme provides faster speeds and is compatible with newer systems.
Choose the right option based on your needs and system requirements.
Windows On Sata Ssd :
- SATA SSDs, also known as Serial ATA solid-state drives, offer excellent compatibility with Windows operating systems.
- These drives use the SATA interface, which is widely supported by most modern Windows versions, including Windows 10, Windows 8, and Windows 7.
- Installing a SATA SSD in a Windows system is a straightforward process that requires a few simple steps.
Here’s a guide to installing a SATA SSD on your Windows computer:
- Shut down your computer and disconnect the power cable.
- Open the computer case and locate an available SATA port on the motherboard.
- Connect one end of a SATA data cable to the SSD and the other end to the motherboard’s SATA port.
- Take a SATA power cable from the power supply and connect it to the SSD.
- Secure the SSD in an available drive bay using screws or other mounting hardware.
- Close the computer case and reconnect the power cable.
- Power on your computer and enter the BIOS settings.
- Configure the BIOS to recognize the newly installed SATA SSD.
- Save the changes and exit the BIOS.
- Your Windows system should now detect and utilize the SATA SSD.
Windows On Nvme Ssd Compatibility And Installation:
- NVMe SSDs, or Non-Volatile Memory Express solid-state drives, provide fast and advanced storage capabilities for Windows systems.
- Windows 10 is fully compatible with NVMe SSDs and offers native support for these high-performance drives.
- Installation of an NVMe SSD on a Windows computer might require additional steps compared to SATA SSDs.
Here’s a step-by-step guide to installing an NVMe SSD on your Windows system:
- Power off your computer and unplug the power cable.
- Open the computer case and locate an M.2 slot on the motherboard.
- Insert the NVMe SSD into the M.2 slot, ensuring it is properly aligned.
- Secure the NVMe SSD in place using the provided screw or mounting mechanism.
- Close the computer case and reconnect the power cable.
- Power on your computer and enter the BIOS settings.
- Check if the NVMe SSD is detected in the BIOS.
- If necessary, adjust the BIOS settings to enable NVMe support.
- Save the changes and exit the BIOS.
- Windows should now recognize and utilize the NVMe SSD.
While SATA SSDs offer good compatibility and easy installation for Windows systems, NVMe SSDs provide even faster performance and advanced storage features.
Consider your specific requirements and system capabilities when choosing between SATA and NVMe SSDs for Windows.
Partition Alignment For Ssds And Nvme Ssds
Partition alignment is critical for both SATA SSDs and NVMe SSDs when running Windows. While SATA SSDs require manual alignment for optimal performance, NVMe SSDs usually align partitions automatically, leading to faster speeds and improved efficiency.
Always remember to align your partitions correctly to maximize the capabilities of your chosen storage devices.
Windows On Sata Ssd Vs Nvme:
Transition: When it comes to optimizing the performance of your solid-state drive (SSD), partition alignment plays a crucial role.
Whether you have a SATA SSD or the faster NVMe SSD, aligning your partitions correctly can significantly enhance read and write speeds.
We will explore the importance of partition alignment and provide a step-by-step guide on how to align partitions for both SATA SSDs and NVMe SSDs.
Here’s why partition alignment is important:
- Reduced latency: Aligned partitions allow for faster access to data, reducing the time it takes for your computer to read or write information on the SSD.
- Enhanced lifetime: Proper alignment avoids excessive wear on specific NAND flash memory cells, distributing the workload evenly across the drive and extending its lifespan.
- Optimal performance: Aligned partitions facilitate streamlined data transfers, maximizing the SSD’s potential read and write speeds.
How To Align Partitions For Ssds And Nvme Ssds
Aligning partitions for SSDs and NVMe SSDs is a straightforward process that can be done using built-in Windows tools.
Follow these steps to ensure your partitions are aligned correctly:
- Identify the SSD: Open the Disk Management tool in Windows and locate your SSD or NVMe SSD in the list of drives.
- Create a New Partition: Right-click on the unpartitioned space of the SSD and select “New Simple Volume.” Follow the on-screen instructions to create a new partition.
- Set Partition Size: Specify the desired partition size, keeping in mind that larger partitions may impact performance. For optimal speed, it is recommended to create multiple smaller partitions.
- Choose Alignment Options: During partition creation, Windows will prompt you for alignment options. Select “Align partitions to 1,048,576-byte intervals” for SSDs and “Align partitions to 4,096-byte intervals” for NVMe SSDs. This ensures optimal alignment for each respective drive.
- Complete the Partition Setup: Assign a drive letter, choose the file system (NTFS is recommended for Windows), and give the partition a meaningful label. Confirm the settings and finalize the partition setup.
- Repeat for Additional Partitions: If you plan to create multiple partitions, repeat steps 2 to 5 for each partition, ensuring that you align them correctly according to the drive type.
- Format the Partitions: Right-click on each newly created partition and select “Format.” Choose the desired file system, allocation unit size, and perform a quick format.
By following these simple steps, you can align your SSD or NVMe SSD partitions correctly, maximizing their performance potential and ensuring smooth operations. Remember, partition alignment is a crucial step in optimizing your SSD’s performance.
Whether you have a SATA SSD or an NVMe SSD, aligning your partitions is worth the effort, providing you with faster read and write speeds and improving the overall lifespan of your drive.
Enabling Trim For Ssds In Windows
Enabling TRIM for SSDs in Windows optimizes performance and longevity. Compare the benefits of running Windows on SATA SSDs versus NVMe for a faster and more efficient computing experience.
Understanding Trim
- TRIM is an important feature for maintaining the performance and lifespan of SSDs (Solid-State Drives).
- It helps to optimize the data storage process by marking the blocks of data that are no longer in use.
- TRIM ensures that the SSD’s flash memory is cleared of unnecessary data, making room for new data to be written more efficiently.
- This feature is crucial because SSDs handle data differently than traditional hard disk drives (HDDs), and without TRIM, their performance can degrade over time.
Enabling Trim Support In Windows
To enable TRIM support for your SSD in Windows, follow these steps:
- Step 1: Open the Command Prompt as an administrator by right-clicking on the Start button and selecting “Command Prompt (Admin).”
- Step 2: Type “fsutil behavior query DisableDeleteNotify” and press Enter.
- Step 3: If the result is “DisableDeleteNotify = 0,” TRIM support is already enabled. If the result is “DisableDeleteNotify = 1,” TRIM is currently disabled.
- Step 4: To enable TRIM support, type “fsutil behavior set DisableDeleteNotify 0” and press Enter.
- Step 5: Close the Command Prompt and restart your computer for the changes to take effect.
- Once you have enabled TRIM support, Windows will automatically send TRIM commands to your SSD, enhancing its performance and prolonging its lifespan.
By enabling TRIM support for your SSD in Windows, you can ensure that your SSD operates at its optimal performance level.
With TRIM enabled, the SSD is able to efficiently manage and organize data, resulting in faster read and write speeds. Remember to regularly check the status of TRIM support on your SSD to ensure that it remains enabled.
Regular Firmware Updates For Ssds And Nvme Ssds
Regular firmware updates are essential for both SSDs and NVMe SSDs on the Windows platform. This ensures optimal performance and security by addressing any potential issues and providing improved features and compatibility.
Stay up-to-date with the latest firmware releases to get the most out of your storage devices. Windows on SATA SSDs vs NVMe:
Firmware updates play a crucial role in optimizing the performance, stability, and security of your SSDs, whether they are SATA or NVMe SSDs.
These updates, often released by manufacturers, introduce bug fixes, improve compatibility with operating systems, and enhance overall functionality.
We will explore the importance of firmware updates for both types of SSDs and provide insights on how to update firmware effectively.
Importance Of Firmware Updates:
Improves performance: Firmware updates often include performance enhancements that can boost the speed and responsiveness of your SSDs. These updates optimize the way data is processed, leading to faster read and write speeds and improved overall system performance.
Enhances stability: Firmware updates address any known issues or bugs within the SSD’s firmware. By fixing these issues, updating the firmware ensures the stability and reliability of the drive, minimizing the chances of data corruption or unexpected system crashes.
Increases compatibility: As new operating systems and technologies emerge, firmware updates help ensure that your SSD remains compatible with these advancements.
By incorporating compatibility improvements, manufacturers guarantee seamless integration and optimal performance with the latest software and hardware.
Enhances security: SSD firmware updates can include critical security patches that protect against potential vulnerabilities. Updating your firmware ensures that your SSD is equipped with the latest security measures, safeguarding your data against malicious attacks.
How To Update Firmware:
Updating the firmware of your SSDs is a relatively straightforward process.
Follow these simple steps to keep your SSD firmware up to date:
- Identify your SSD model: Visit the manufacturer’s website or refer to the user manual to determine the exact model of your SSD. This information is vital as firmware updates are specific to each SSD model.
- Download the latest firmware: Once you have identified your SSD model, check the manufacturer’s website for the most recent firmware update available. Download the update file to your computer.
- Backup your data: Before proceeding with the firmware update, it is essential to back up any important data stored on your SSD. This precaution ensures that you can recover your data in case of any unexpected issues during the update process.
- Install the firmware update: Launch the firmware update tool provided by the manufacturer and follow the on-screen instructions to install the latest firmware onto your SSD. Make sure to follow the specific steps outlined in the user manual for your SSD model.
- Verify the update: After the installation is complete, restart your computer and verify whether the firmware update was successful. Some SSD management software may offer features to confirm the updated firmware version.
Regularly updating the firmware of your SSDs is essential to unlock their true potential in terms of performance, stability, compatibility, and security.
By staying up to date with the latest firmware releases, you ensure that your SSDs function optimally and provide you with the best computing experience possible.
Make it a habit to check for updates periodically to take advantage of the advancements and improvements offered by manufacturers.
Proper Power Settings For Ssds And Nvme Ssds In Windows
Optimizing power settings for both SATA SSDs and NVMe SSDs in Windows is crucial. Understanding the differences between the two and configuring them properly can help enhance performance and extend the lifespan of your storage devices.
Power Management And Its Impact On Ssd Performance:
Proper power settings for SSDs and NVMe SSDs in Windows are crucial for optimizing their performance. Power management directly affects the speed and lifespan of these storage devices.
Adjusting power settings can significantly enhance their overall performance, ensuring a smooth and efficient user experience.
Let’s dive into the details:
Adjusting Power Settings For Optimal Ssd Performance:
- Maximum Performance: Selecting the “High Performance” power plan ensures that the SSD or NVMe SSD operates at its full potential by eliminating any power-saving measures.
- Link Power Management (LPM): Adjusting LPM settings helps optimize power consumption during periods of idle activity. This feature controls power delivery to the drive for more efficient energy usage.
- Turn off Hard Disk After: Configure this setting to prevent the system from unnecessarily spinning down the SSD or NVMe SSD when it’s not in use for an extended period.
- Balanced Power Plan: Choosing this power plan allows for a good balance between performance and power optimization. It ensures smooth functioning while minimizing energy consumption during idle periods.
- AHCI Link Power Management – Adaptive: Enable this feature to allow the system to adjust the power management mode dynamically, depending on the usage patterns. It helps strike a balance between power and performance.
Remember that adjusting power settings for SSDs and NVMe SSDs is essential to unleash their full potential.
By fine-tuning these settings, you can enhance performance, improve durability, and optimize power consumption for a seamless computing experience.
Conclusion
The choice between Windows on SATA SSD and NVMe ultimately depends on your specific needs and budget. SATA SSDs are a reliable and affordable option for most users, providing significant improvements in speed and performance compared to traditional hard drives.
NVMe, on the other hand, offers lightning-fast speeds and enhanced performance, making it ideal for power users and professionals who rely heavily on data-intensive tasks like gaming or content creation.
When deciding between the two, it’s important to consider factors such as price, storage capacity, and the specific requirements of your work or personal use.
Ultimately, whether you choose Windows on SATA SSD or NVMe, both options provide significant improvements over traditional hard drives and can greatly enhance your computer’s overall performance and user experience.


