What Is Ssd on Macbook Air? The Ultimate Guide!
The SSD on a MacBook Air refers to its Solid State Drive, which is the storage device used in the laptop to hold all the user’s data, applications, and the operating system.
Check out this helpful video on the topic:
Unlike traditional hard drives, SSDs have no moving parts, making them faster, more reliable, and less prone to physical shock damage.
SSDs utilize flash-based memory, which is much faster than the spinning disks of a conventional hard disk drive (HDD).
Having an SSD in your MacBook Air provides several benefits:
For instance, when you turn on your MacBook Air or launch an application, you’re likely to notice the difference in speed compared to an older MacBook with an HDD.
Equipped with a high-speed SSD, the MacBook Air delivers exceptional performance and quick access to your digital world, enhancing productivity and user experience.
Key Takeaway
Understanding Ssd Storage Performance
Understanding SSD storage performance on a MacBook Air is pivotal for optimizing speed and efficiency. SSDs in Apple’s lightweight laptops provide faster data access and improved durability over traditional hard drives.
Speed Comparison Of Ssd And Hdd
| Storage Type | Read Speed | Write Speed | Boot Time |
|---|---|---|---|
| SSD (Solid-State Drive) | 500 MB/s – 3500 MB/s | 200 MB/s – 3000 MB/s | <10 seconds |
| HDD (Hard Disk Drive) | 80 MB/s – 160 MB/s | 50 MB/s – 150 MB/s | 30-40 seconds |
SSDs offer a dramatic enhancement in both read and write speeds, resulting in a more fluid and responsive computer.
Impact Of SSD on Macbook Air Performance
- Instantaneous Application Launch: Apps open almost instantly thanks to the rapid data transfer rates.
- Enhanced Data Security: The lack of mechanical parts reduces the risk of data loss due to physical damage.
- Quiet Operation: SSDs operate silently, providing a noise-free environment.
- Improved Battery Life: With greater energy efficiency, the MacBook Air enjoys a longer battery lifespan.
- Future-Proof: SSDs are designed to meet the demands of modern software and large files.
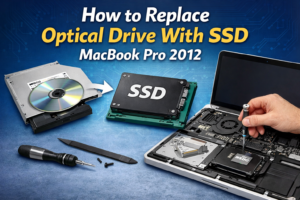
SSD Upgrade Options For Macbook Air
Upgrading the solid-state drive (SSD) in your MacBook Air can breathe new life into your device, offering quicker boot-up times, faster data access, and improved overall performance.
While older MacBook Air models offer easier upgradability, newer models have less flexibility due to soldered components.
Nevertheless, understanding your options and how to upgrade your MacBook Air’s storage can help you make an informed decision. Explore the steps you need to follow and the compatible SSD options to enhance your MacBook Air’s capabilities.
Steps To Upgrade To Ssd
- Back up your data: Using Time Machine or another backup solution, make sure all your important files are secure.
- Gather the necessary tools: Typical tools include a Pentalobe screwdriver and a Torx T5 screwdriver, depending on your MacBook Air model.
- Power down the MacBook Air: Shut down your device completely before starting the upgrade.
- Open the back cover: Remove the screws from the bottom case to access the internals.
- Disconnect the battery: For safety, disconnect the battery before proceeding.
- Remove existing SSD: Take out the current SSD by unscrewing it and gently pulling it free from the slot.
- Install the new SSD: Align the new SSD with the slot and press it into place. Secure it with the screw.
- Reconnect the battery and close the case: Once the new SSD is in place, reconnect the battery and reassemble the back cover.
- Restore your data: After turning on your MacBook Air, use your backup to restore your data onto the new SSD.
Compatible Ssd Options For Macbook Air
- Apple Proprietary SSDs: Some MacBook Air models require original Apple SSDs or third-party options that use the same connector and dimensions.
- OWC Aura Pro SSDs: These SSDs are known for their high-speed performance and are designed to be compatible with various MacBook Air models.
- Transcend JetDrive SSDs: A reliable, upgrade solution that also offers an external enclosure for your old SSD, turning it into a portable drive.
Optimizing SSD Usage On Macbook Air
Understanding the SSD (Solid State Drive) in your MacBook Air can unlock faster performance and enhanced storage management.
Optimizing its use entails managing space efficiently and ensuring your operating system takes full advantage of its speed for peak functionality.
Tips For Managing Ssd Storage
- Regularly Review Your Storage: Use the built-in storage management tool to monitor the space used up by different file categories.
- Delete Unused Apps: Uninstall applications that are no longer necessary.
- Streamline Your Startup Disk: Keep only essential items and trim down startup programs to conserve SSD space.
- Utilize Cloud Storage: Offload infrequently accessed files to cloud services to free up SSD space.
- External Storage Solutions: Consider investing in an external hard drive for archiving purposes.
Maintaining Ssd Performance And Longevity
| Action | Benefits |
|---|---|
| Enabling TRIM | Improves the efficiency of data writing processes. |
| Regular Software Updates | Ensures you have the latest performance enhancements and security improvements. |
| Minimize Disk Space Usage | Leaving at least 10-15% of your SSD empty can prolong its life. |
Troubleshooting SSD issues On Macbook Air
Solid State Drives (SSD) in MacBook Air models offer rapid data access and reliability. Addressing SSD issues involves diagnostic steps and potential software fixes to ensure optimal drive performance.
Common Ssd Problems On Macbook Air
Here are some typical SSD-related problems that Macbook Air users may experience:
- Drive not Recognized: The SSD is not detected by the system.
- Slow Performance: The SSD operates slower than expected.
- Failure to Boot: The Macbook Air fails to start up from the SSD.
- Data Corruption and Loss: Files become corrupted or go missing.
- Read/Write Errors: Persistent errors when attempting to read from or write to the SSD.
- Noises: Odd sounds coming from the SSD, although this is rare since SSDs have no moving parts.
Troubleshooting Steps For Ssd Issues
- When SSD problems arise, the following troubleshooting steps can be invaluable:
- Check Connections: Ensure the SSD is correctly seated within the Macbook Air. A loose connection can cause recognition issues.
- Restart Your Macbook: Often a simple restart can resolve temporary glitches.
- Update macOS: Ensure your operating system is up to date. New updates often come with fixes for known issues.
- Run Disk Utility: Use the built-in Disk Utility to repair disk permissions and check the SSD for errors.
Reset SMC and PRAM/NVRAM: These resets can often fix hardware detection and performance issues.
- To reset SMC: Shut down your Macbook, hold down
Shift + Control + Optionand the Power button for about 10 seconds. - To reset NVRAM/PRAM: Restart your Macbook and immediately hold down
Command + Option + P + Rfor about 20 seconds. - Safe Mode Boot: Start your Macbook in Safe Mode (hold
Shiftwhile booting) to diagnose issues. - Reformat or Replace SSD: If none of the above steps work, consider reformatting the SSD. In case of a hardware failure, you might need to replace the drive.
Tackling SSD problems on a Macbook Air successfully often requires a methodical approach. By following these troubleshooting steps, users stand a good chance of resolving issues and getting their systems back to top performance.
| Issue Type | Troubleshooting Action |
|---|---|
| Recognition Issues | Verify the SSD connection, reset SMC and NVRAM |
| Performance Slowdown | Run Disk Utility, Safe Mode boot |
| Boot Failure | Reformat SSD, replace if necessary |
Conclusion
Wrapping up, an SSD on the MacBook Air signifies a leap in performance and durability. With its swift access times and robust build, it’s a game-changer for both casual users and professionals.
Embrace the SSD and enjoy a transformative computing experience that aligns with the sleek design of the MacBook Air. Keep exploring to fully leverage this technological advancement.

Harold Williams is a senior writer and technical editor at Drives Hero with 20+ years of experience in IT administration. He specializes in storage systems, SSD reviews, and performance testing, bringing real-world insight to every guide.