How to Upgrade Xbox One Hard Drive to Ssd
“Ready to take your Xbox One gaming to the next level? In this guide, we’ll show you how to upgrade your Xbox One’s hard drive to an SSD, unlocking faster load times, smoother performance, and ample storage space for your favorite games. Whether you’re craving quicker access to your library or aiming to reduce lag in your gameplay, this step-by-step tutorial will walk you through the process. Let’s get started on maximizing your gaming experience with an SSD upgrade for your Xbox One!”
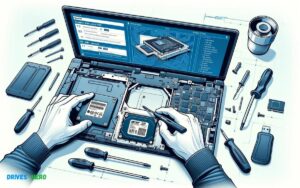
To upgrade an Xbox One hard drive to an SSD, first acquire a compatible SSD and the necessary tools. Ensure you back up any game data before beginning the upgrade process.
Upgrading your Xbox One with an SSD is a surefire way to boost the console’s performance and speed. Such an upgrade reduces loading times and enhances overall gaming experiences. Gamers often seek this improvement to revitalize their console, particularly as their game libraries grow and titles demand more from the hardware.
Replacing the hard drive with a solid-state drive allows for quicker data access, translating to faster load times and smoother in-game transitions. As the gaming world evolves, having hardware that keeps up with the latest titles is essential, making an SSD upgrade a valuable investment for any serious gamer. Remember, while the steps involved are straightforward, they require meticulous attention to detail to ensure a successful swap from HDD to SSD.
Key Takeaway
Upgrading Xbox One Hard Drive to SSD: Step-by-Step Guide
Step 1: Gather Necessary Materials
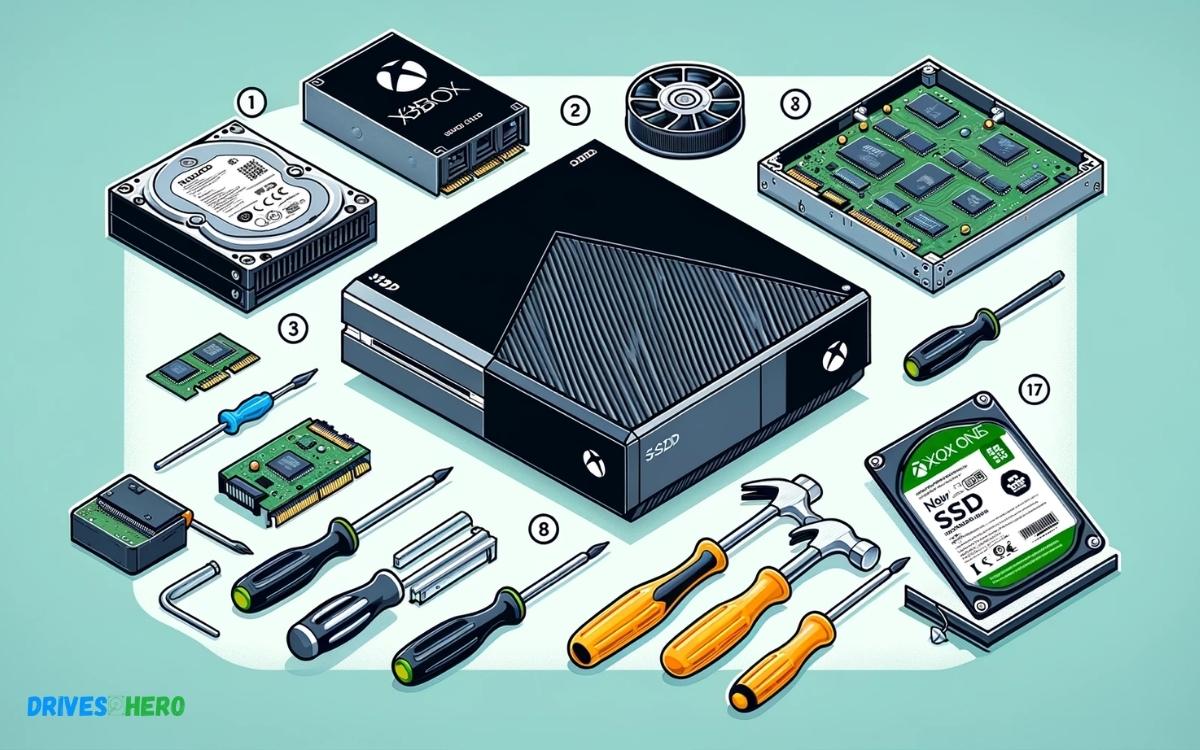
Ensure you have the following:
- SSD compatible with Xbox One
- External hard drive enclosure (optional)
- USB flash drive (at least 8GB)
- Phillips screwdriver
- USB cable
Step 2: Backup Your Data
Before beginning the upgrade process, back up all your game saves, settings, and other data from your Xbox One to an external storage device or the cloud.
Step 3: Prepare the SSD
If your SSD needs formatting, connect it to your computer via an external enclosure or USB adapter. Format it to the exFAT file system using your computer’s Disk Management tool.
Step 4: Install the SSD
Turn off your Xbox One and unplug all cables. Remove the plastic cover on the side of the console using a plastic opening tool or your fingers. Unscrew the existing hard drive using a Phillips screwdriver and carefully remove it.
Step 5: Connect the SSD
Attach the SSD to the Xbox One using the SATA connector and secure it in place with the screws. Replace the plastic cover and screw it back into place.
Step 6: Install the Xbox OS
Download the latest Xbox OS installation files from the official Xbox website onto a USB flash drive. Insert the flash drive into the Xbox One and boot it up. Follow the on-screen instructions to install the OS onto the new SSD.
Step 7: Restore Your Data
Once the OS installation is complete, connect your external storage device or access your cloud backup to restore your game saves, settings, and other data onto the new SSD.
Step 8: Test and Enjoy
After restoring your data, test your Xbox One to ensure everything is working correctly. Enjoy the improved performance and faster load times provided by the SSD upgrade!
In conclusion, upgrading your Xbox One hard drive to an SSD can greatly enhance your gaming experience with faster load times and smoother performance. By following the simple step-by-step guide provided, you can seamlessly transfer your data and install the new SSD without much hassle. With the upgrade complete, you’ll enjoy quicker access to your games and apps, allowing you to dive into your favorite titles without delay.
Introduction To Ssd Upgrades
Faster load times, smoother gameplay, and a better overall gaming experience on your Xbox One – imagine achieving all this simply by upgrading your console’s storage. With the advent of solid-state drives (SSDs), such enhancements are not just possible; they’re within easy reach. In this section, we’ll guide Xbox One owners through the process of upgrading to an SSD, ensuring you make the most informed and effective decision for your console.
Overview Of Ssd Versus Traditional Hdd
Before delving into the nitty-gritty of SSD upgrades, it’s important to understand the fundamental differences between SSDs and traditional hard disk drives (HDDs). Here’s a quick comparison:
| Feature | SSD (Solid-State Drive) | HDD (Hard Disk Drive) |
|---|---|---|
| Speed | Significantly faster read/write speeds | Slower due to mechanical parts |
| Durability | More resistant to physical shock | Prone to damage from shocks |
| Noise | Silent operation | Can be noisy during operation |
| Heat Production | Typically generates less heat | Can generate more heat |
| Energy Efficiency | More energy-efficient and increases battery life | Less energy-efficient |
The Benefits Of Upgrading To Ssd For Xbox One
Choosing an SSD over the traditional HDD for your Xbox One brings along numerous benefits. These include:
- Reduced Loading Times: Games load significantly quicker, putting you in the action faster than ever.
- Enhanced Performance: Smooth in-game experiences with reduced lag and quicker texture streaming.
- Increased Durability: SSDs lack moving parts, making them more durable and less likely to fail.
- Quieter Operation: Unlike HDDs, SSDs are silent, improving your gaming environment’s peacefulness.
- Energy Efficiency: With lower power consumption, SSDs contribute to a cooler and more energy-efficient console.
Understanding Compatibility And Choosing The Right Ssd
To upgrade your Xbox One with an SSD, it’s crucial to select a compatible drive. Ensure the SSD fits the following criteria:
- Form factor: 2.5-inch drives are suitable for Xbox One.
- Interface: The SATA III interface connects most SSDs to the Xbox One.
- Storage capacity: Decide on the amount of storage you need, typically ranging from 256GB to 2TB.
- Brand reliability: Opt for a reputable brand ensuring performance and reliability.
With these considerations in mind, you’ll be able to select an SSD that not only is compatible with your Xbox One but also caters to your gaming needs.
Preparing For The Ssd Upgrade
Are you ready to give your Xbox One a significant performance boost? Upgrading to an SSD not only means faster load times and smoother game transitions but also breathes new life into your console. Preparing for the SSD upgrade is a critical step to ensure the transition is smooth and your data remains safe. Whether you’re a gaming enthusiast or a casual player looking to improve your system, follow these steps to get your Xbox One ready for its new SSD.
Backing Up Your Xbox One Data
Before swapping out the hard drive, you must back up your existing data to avoid losing your precious game saves, apps, and personal settings. Here’s how to secure your data:
- Navigate to the ‘Settings’ menu on your Xbox One and select ‘System’.
- Choose ‘Backup & transfer’ followed by ‘Back up my settings’.
- To save your games and apps, you’ll need an external hard drive with sufficient space. Connect it to your console, and use the ‘Transfer’ feature to move contents safely.
Remember to sync your games to Xbox Live as well—which is done automatically for most titles as long as you’re connected to the internet.
Gathering The Necessary Tools And Materials
Gearing up with the right equipment is essential for a hassle-free upgrade. Ensure you have the following items on hand:
- A compatible SSD (Solid State Drive).
- A 2.5-inch hard drive enclosure or a SATA-to-USB cable.
- A TORX T10 screwdriver for opening the console.
- A Phillips head screwdriver for drive replacement.
- The latest Xbox One OS files downloaded from the Xbox website onto a PC.
Having these tools within easy reach will help you navigate the SSD installation process smoothly.
Safety Precautions And Esd Protection
Taking the right safety measures is crucial to protect both you and your console’s internals. Here’s what to keep in mind:
- Turn off your Xbox One and unplug all cables before starting.
- Work in a static-free environment to prevent static electricity from damaging electronic components.
- Consider using an ESD (Electrostatic Discharge) wrist strap or work on an ESD mat to ground yourself.
- Keep the console and SSD away from liquids and extreme temperatures.
Mindful adherence to these safety precautions can prevent accidents and damage during the SSD upgrade process.
Step-by-step Guide To Upgrading
Are you ready to experience a significant boost in your Xbox One’s performance? Upgrading from a traditional hard drive to a solid-state drive (SSD) can make your games load faster and your console run more smoothly. Whether you’re a tech enthusiast or new to DIY upgrades, this detailed guide will walk you through each step, ensuring a smooth transition to a more efficient gaming experience. Let’s dive into the upgrade process:
Opening The Xbox One Case
The first step is to safely open your Xbox One case. Doing this requires a bit of patience and the right tools:
- Unplug all cables and devices from your Xbox One.
- Set your console on a clean, flat surface.
- Using the appropriate security Torx screwdriver, remove the screws from the back of the console.
- Gently pry the case apart, taking care not to damage the internal clips.
Note: Keep track of all the screws and make sure to organize them to avoid confusion during reassembly.
Removing The Existing Hard Drive
With the case open, it’s time to remove the existing hard drive:
- Locate the hard drive and disconnect any cables attached to it.
- Remove the screws securing the hard drive to the mount.
- Carefully slide the hard drive out of its slot.
Important: Handle the old hard drive with care as it contains your data. Consider using it as an external drive or properly storing it as a backup.
Installing The Ssd
Now, prepare to install your new SSD:
- Align the SSD with the mount in the console.
- Screw the SSD into place firmly but do not over-tighten.
- Reconnect any cables that were attached to the old hard drive to the SSD.
Ensure the SSD is secured and connected properly for optimal performance.
Reassembling The Xbox One
With the SSD installed, the final step is to close up your console:
- Carefully align the case halves back together. Make sure there are no loose cables or components being pinched.
- Once aligned, press the case halves until the internal clips snap back into place.
- Replace and tighten the screws at the back of the console.
- Reconnect all cables and accessories.
Congratulations! You’ve successfully upgraded your Xbox One with a new SSD. Power up your console and enjoy a faster, more responsive gaming experience.
Setting Up The New Ssd
Welcome to the essential guide for upgrading your Xbox One hard drive to a solid-state drive (SSD). If you’ve decided to give your console a speed boost and extra storage, setting up the new SSD is a critical step. You’ll not only enjoy faster load times with an SSD but also a more responsive Xbox One system overall. Brace yourself – we’re about to dive into the nitty-gritty of getting your SSD up and running!
Formatting And Partitioning The Ssd
Before the new SSD can be introduced to your Xbox One, it must be properly formatted and partitioned. This ensures that your console will recognize and interact with the drive correctly. Here’s what to do:
- Connect the SSD to a PC: Using a USB-to-SATA adapter, connect the SSD to a computer.
- Open Disk Management: On your PC, access Disk Management tool to format the SSD.
- Initialize the SSD: If prompted, initialize the SSD as a GPT (GUID Partition Table) disk.
- Create partitions: Refer to Xbox’s official guidelines to determine the size and number of partitions required.
- Format the partitions: Use NTFS as the file system to format the created partitions on the SSD.
Installing The Xbox Operating System On The New Ssd
The next step is to install the Xbox operating system on your newly formatted SSD. This can be quite straightforward with careful attention to detail:
- Download the OSU1: Head to the official Xbox support site and download the Offline System Update (OSU1) files.
- Prepare the USB drive: You will need a USB drive with a minimum of 6 GB space and formatted in NTFS.
- Copy OSU1 files: Extract the OSU1 file and copy the contents to your USB drive.
- Plug the USB drive into Xbox: With the SSD installed, connect the USB drive to the Xbox One.
- Perform the system update: Follow the Xbox One’s system update prompts to install the operating system on the SSD.
Restoring Your Data And Games From Backup
Once the Xbox One’s operating system is in place, it’s time to restore all your beloved games and data:
- External backup is key: Hopefully, you’ve backed up your games and data to an external hard drive before starting the upgrade process.
- Plug in the external backup drive: Connect the external hard drive with your backup to the Xbox One.
- Navigate to ‘My games & apps’: On your console, go to ‘My games & apps > Manage’ to start the restoration process.
- Select items to restore: Choose which games and apps you wish to transfer back to the console.
- Initiate the transfer: Start the transfer process, sit back, and let your Xbox One work its magic.
Once you complete these steps, your Xbox One will be equipped with a brand-new SSD, all set for gaming at its finest – with quicker boot-ups and faster load times. Enjoy your upgraded gaming experience!
Troubleshooting And Optimization
Upgrading your Xbox One’s hard drive to an SSD is a fantastic way to boost performance and load times. However, after the initial setup, you might encounter a few hiccups or simply want to ensure you’re getting the best experience possible. Let’s dive into troubleshooting common issues and optimizing your new SSD.
Common Issues After An Ssd Upgrade
Even the smoothest upgrades can have their quirks. Here are some frequently encountered problems following an SSD installation:
- System not recognizing the new SSD: Make sure the SSD is properly connected. If problems persist, check for compatibility issues.
- Slower than expected speeds: Ensure firmware is up to date. Sometimes, old firmware can cap performance.
- Error messages during boot: This could be related to the data transfer process. Ensure all files were cloned or reinstalled correctly from the old drive.
Enhancing Performance Settings For Ssd On Xbox One
With your SSD now installed, adjusting a few settings can further enhance your Xbox One’s performance:
- Access the Settings menu and navigate to System.
- Select Storage, then configure your new SSD as the default installation drive.
- Consider enabling Energy-saving mode to extend the lifespan of your SSD, as this will reduce write cycles over time.
Boldly explore games with enhanced load times and experience the full might of your SSD.
Maintaining Your Ssd For Longevity And Reliability
An SSD may not have moving parts like a traditional hard drive, but it still requires care to last.
| Practice | Benefit |
|---|---|
| Regularly restart your Xbox One | Clears cache and helps manage SSD load |
| Avoid unnecessary data writes | Reduces wear and tear, prolonging life |
| Keep your console clean and ventilated | Prevents overheating, ensuring optimal performance |
Embrace these habits for a hardy and fast gaming companion.
Conclusion And Additional Resources
As we wrap up our journey on turbocharging the performance of your Xbox One with an SSD, it’s essential to reflect on how this upgrade can elevate your gaming experience. This final section will recap the benefits, explore additional enhancements, and point you towards resources for further support.
Recapping The Benefits Of Ssd Upgrades For Gaming
Upgrading to an SSD results in a significant boost in your Xbox One’s speed and performance. Gamers witness dramatically reduced load times and a more responsive system. The advantages include:
- Faster boot-up times for the console
- Quicker game loading screens
- Smoother in-game transitions and texture streaming
- More reliable performance with less lag and stutter
- Extended lifespan of the console due to SSD durability
Additional Upgrade Options For An Enhanced Gaming Setup
Besides installing an SSD, consider these upgrades for a superior gaming setup:
| Upgrade | Benefit |
|---|---|
| External SSD | Expands storage without opening the console |
| Game Drive Hub | Adds massive storage and multiple USB ports |
| Controller Battery Packs | Ensures uninterrupted gameplay with rechargeable batteries |
| Cooling Stand | Improves airflow and keeps your Xbox One cool |
Where To Find Further Guidance And Technical Assistance
Finding the right information and support is crucial:
- Consult the Xbox Support website for official guidance
- Join Xbox forums and communities for user experiences and advice
- Seek professional help from a certified technician if unsure about DIY
- Watch tutorial videos from trusted tech influencers for step-by-step instructions
- For hardware purchases, visit reputable electronics retailers or the official Xbox website
With these resources at your fingertips, you’re ready to take your gaming to new heights with an SSD upgrade.
Conclusion
Upgrading your Xbox One’s hard drive to an SSD can transform your gaming experience. With faster load times and improved performance, it’s a worthwhile investment. Remember to back up your data and follow each step carefully. Happy gaming with your speedier, more efficient Xbox One!

Harold Williams is a senior writer and technical editor at Drives Hero with 20+ years of experience in IT administration. He specializes in storage systems, SSD reviews, and performance testing, bringing real-world insight to every guide.