NAS Drive Failure: How to Replace Without Losing Data
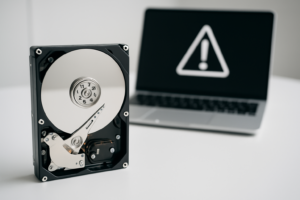
There’s a specific kind of dread that hits when your NAS starts beeping at 2 AM, and you check the management interface to find a drive marked as “degraded” or “failed.” Your stomach drops, you start doing mental math on what data you might lose, and you wonder if you should have taken that backup reminder more seriously last month.
Take a breath. If you’re running a RAID configuration, a single drive failure doesn’t mean your data is gone. It means you’re on borrowed time, and the next several hours matter a lot. This guide will walk you through the entire process of identifying the failed drive, selecting a replacement, performing the rebuild, and making sure everything comes out the other side intact.
I’ve rebuilt more NAS arrays than I’d like to admit, on Synology, QNAP, and TrueNAS systems alike. The process is remarkably similar across platforms, and the mistakes people make are nearly universal. Let’s make sure you don’t make them.
Step 1: Confirm the Failure and Assess Your RAID Status
Before you rip a drive out of the bay, you need to understand exactly what happened. Log into your NAS management interface (Synology DSM, QNAP QTS, or whatever your platform uses) and navigate to the storage manager. You’re looking for two pieces of information: which specific drive failed, and what state your RAID array is in.
A “degraded” status means your RAID is still functional but has lost its redundancy. On RAID 1, one mirror is down. On RAID 5, you’ve lost one parity drive’s worth of protection. On RAID 6 or SHR-2, you can tolerate this failure and one more before data loss occurs. Understanding your current tolerance level dictates how urgently you need to act.
Check SMART Data Before You Assume the Worst
Sometimes a drive gets flagged due to a temporary I/O error, a loose SATA connection, or a power hiccup rather than an actual mechanical failure. Pull up the S.M.A.R.T. data for the flagged drive. Key attributes to check include:
- Reallocated Sector Count (ID 5): If this number is high and climbing, the drive is actively failing.
- Current Pending Sector Count (ID 197): Sectors waiting to be remapped. A growing number is bad news.
- Uncorrectable Sector Count (ID 198): Sectors that couldn’t be recovered. Any value above zero is concerning.
- Raw Read Error Rate and Seek Error Rate: Manufacturer-dependent, but spikes indicate mechanical problems.
If S.M.A.R.T. looks clean and the drive just threw a one-time error, you might try reseating it in the bay before ordering a replacement. Power down the NAS, pull the drive, inspect the SATA connector, and firmly reinsert it. If the array recovers on reboot, run an extended S.M.A.R.T. test to confirm the drive is actually healthy.
Step 2: Back Up What You Can (Yes, Right Now)
This step is non-negotiable, and it’s the one most people skip because they’re anxious to start the rebuild. While your array is degraded, you have zero tolerance for another drive failure (unless you’re on RAID 6/SHR-2). If a second drive dies during the rebuild, you could lose everything.
Before touching anything, copy your most critical data to an external drive, a cloud service, or another NAS. You probably can’t back up the entire array on short notice, so triage ruthlessly. Family photos, business documents, financial records, and anything irreplaceable goes first. Your Linux ISO collection can wait.
If you already have a solid backup through Synology Hyper Backup, QNAP Hybrid Backup Sync, or a similar tool, verify that your most recent backup actually completed successfully. Open the backup log, check the timestamp, and confirm the destination is accessible. Backup jobs that silently failed three months ago won’t help you today.
Step 3: Choose the Right Replacement Drive
Selecting the right replacement drive is more nuanced than just matching the capacity. Here’s what matters:
Capacity: Match or Exceed
Your replacement drive must be equal to or larger than the failed drive. If you had a 4TB drive fail, a 4TB or larger replacement will work. A smaller drive won’t, period. Most RAID implementations won’t let you use a smaller drive, and you shouldn’t try to force it.
NAS-Rated Drives Are Worth It
Desktop drives (like the WD Blue or Seagate Barracuda lines) aren’t designed for the 24/7 vibration and workload of a NAS enclosure. NAS-rated drives have firmware optimized for RAID environments, better vibration tolerance, and longer warranty periods. The two most popular options are the WD Red Plus line and the Seagate IronWolf line.
For most home and small office NAS setups with 1 to 8 bays, the WD Red Plus (CMR-based, not the SMR-based WD Red) is my top recommendation. These drives use conventional magnetic recording, which handles the rewrite-heavy nature of RAID rebuilds much better than SMR drives.
WD Red Plus 4TB NAS Hard Drive (WD40EFPX)
CMR-based NAS drive with 5400 RPM, 256MB cache, and a workload rating up to 180TB/year, ideal for RAID rebuilds and daily NAS use
For larger NAS systems (8+ bays) or heavier workloads, consider stepping up to enterprise-grade drives like the Seagate Exos or WD Red Pro series. They carry higher workload ratings and longer warranties.
Avoid Mixing SMR and CMR Drives
This is a critical point that catches people off guard. Shingled Magnetic Recording (SMR) drives perform terribly in RAID rebuild scenarios. The overlapping write tracks cause massive slowdowns during the sequential rewrite process, and some users have reported rebuild times stretching to a week or more on larger SMR drives. Always confirm your replacement uses CMR (Conventional Magnetic Recording) technology. WD Red Plus, Seagate IronWolf, and all enterprise-class drives use CMR.
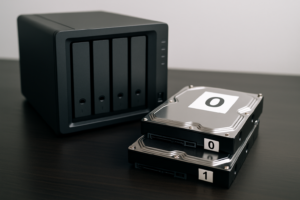
Step 4: Physically Replace the Drive
Most modern NAS enclosures support hot-swapping, meaning you can pull the failed drive and insert the new one without powering down the system. Check your NAS manufacturer’s documentation to confirm your model supports this. Synology and QNAP units built in the last decade almost universally do.
Here’s the physical process:
- Identify the correct bay. Your NAS management interface will tell you which bay number contains the failed drive. Double-check this. Pulling a healthy drive from a degraded array will likely destroy your data.
- Unlock the drive tray and slide it out. On most Synology and QNAP units, this involves pressing a small button or latch on the drive tray.
- Remove the failed drive from the tray and mount the new drive using the same screws or tool-less mounting clips.
- Slide the tray back into the bay firmly until it clicks into place.
- The NAS should detect the new drive within a few seconds.
If your NAS doesn’t support hot-swap, power it down gracefully through the management interface before making the swap. Never just yank the power cable.
Step 5: Initiate and Monitor the RAID Rebuild
On most NAS platforms, the rebuild process starts automatically once the system detects the new drive. On Synology DSM, navigate to Storage Manager > Storage Pool, and you should see it already rebuilding. On QNAP QTS, check Storage & Snapshots > Storage/Snapshots. If it doesn’t start automatically, you’ll see an option to “Repair” or “Rebuild” the array, which will prompt you to select the new drive.
How Long Will the Rebuild Take?
This is the question everyone asks, and the honest answer is: it depends on several factors.
- Array size: A 4TB drive in RAID 5 might rebuild in 8 to 12 hours. A 16TB drive could take 2 to 4 days.
- Drive speed: 7200 RPM drives rebuild faster than 5400 RPM drives.
- Active usage: If users are actively reading and writing to the NAS during the rebuild, it will take significantly longer.
- RAID level: RAID 1 rebuilds are typically faster than RAID 5/6 because they involve a straight mirror copy rather than parity recalculation.
A general rule of thumb: expect roughly 1TB per hour under ideal conditions, and much slower if the NAS is under active load.
Reduce NAS Activity During the Rebuild
This is the single most important thing you can do to protect your data during the rebuild window. The rebuild process is the most dangerous period for your array. Every drive in the pool is being read intensively, and if another drive fails from the stress, you’re in serious trouble.
During the rebuild, pause all non-essential services. Stop Plex transcoding, pause backup jobs pulling data from the NAS, shut down Docker containers that do heavy I/O, and ask other users on your network to minimize their access. The faster the rebuild completes, the shorter your window of vulnerability.
Most NAS platforms let you adjust rebuild priority. On Synology, you can set this under Storage Manager settings. Crank it to maximum rebuild speed if you can afford the temporary performance hit.
Step 6: Post-Rebuild Verification
Once the rebuild completes and your array returns to a “healthy” or “normal” status, don’t just walk away. Run these checks:
- Data integrity check: Initiate a full data scrub (called “Data Scrubbing” on Synology or “RAID Scrubbing” on QNAP). This reads every block and verifies parity consistency. It can take a long time on large arrays, but it will catch any silent corruption that occurred during the rebuild.
- S.M.A.R.T. tests: Run extended S.M.A.R.T. tests on all drives in the array, not just the new one. If the failed drive was part of a batch purchased at the same time, its siblings may not be far behind.
- Verify backups: Confirm your backup jobs are running again and completing successfully.
- Spot-check files: Open a handful of important files, photos, and videos from different folders. Make sure they’re not corrupted.
Seagate IronWolf 8TB NAS Hard Drive (ST8000VN004)
Great option for larger NAS arrays, featuring AgileArray technology, 256MB cache, and a 3-year warranty with free Rescue Data Recovery Services
Proactive Steps to Prevent the Next Failure
A drive failure is always a wake-up call. Use it as motivation to shore up your setup so the next failure is an inconvenience rather than a crisis.
Keep a Cold Spare on Hand
Having a replacement NAS drive sitting on a shelf means you can start the rebuild within minutes of detecting a failure, rather than waiting 2 to 3 days for a delivery. This is especially important if you’re running RAID 5, where you have zero redundancy during the rebuild. For a 4-bay NAS, keeping one spare drive of matching capacity is a smart investment. An extra WD Red Plus or IronWolf tucked in a closet could save you from a very bad week.
Set Up Drive Health Monitoring and Alerts
Every major NAS platform can send you email or push notifications when S.M.A.R.T. values cross warning thresholds. If you haven’t configured this, do it today. You want to know about rising reallocated sector counts before the drive actually fails. Catching a failing drive early lets you replace it on your schedule rather than scrambling at 2 AM.
Schedule Regular Data Scrubs
Monthly data scrubs catch bit rot and silent corruption before they become unrecoverable. Configure these through your NAS’s storage manager and schedule them during off-peak hours. Yes, they put additional wear on your drives, but the protection they provide far outweighs the cost.
Maintain an Off-NAS Backup
RAID is not a backup. I’ll say it again because it’s the most commonly misunderstood concept in home data storage. RAID protects against drive failure. It does not protect against accidental deletion, ransomware, fire, theft, or firmware bugs that corrupt the array. You need at least one backup that exists outside the NAS, ideally in a different physical location or in the cloud.
WD Elements 12TB External Desktop Hard Drive
Affordable high-capacity external drive, excellent as a local NAS backup target for Hyper Backup or similar tools
Frequently Asked Questions
Can I use a larger drive to replace a failed drive in my RAID array?
Yes, absolutely. A larger drive will work as a replacement in any RAID configuration. However, the extra space typically won’t be usable until all drives in the array are upgraded to the larger size (or you’re using a flexible RAID type like Synology’s SHR). The new drive will effectively act as if it were the same size as the other drives during the rebuild.
What happens if a second drive fails during the RAID rebuild?
If you’re on RAID 5 or SHR-1, a second simultaneous failure means data loss. The array cannot recover from two concurrent failures. This is exactly why RAID 6 and SHR-2 exist, as they tolerate two simultaneous drive failures. It’s also why reducing NAS activity during the rebuild and having verified backups is so critical. For arrays larger than 20TB or with drives older than 3 years, seriously consider migrating to a two-drive fault tolerance level.
Should I replace all my NAS drives at once if one fails?
Not all at once, no. Replacing all drives simultaneously would destroy the array. But if your drives were purchased together and one has failed, the others are statistically more likely to fail soon. A smart approach is to replace them one at a time over the coming weeks, letting each rebuild complete fully before swapping the next drive. This gradually refreshes the
James Kennedy is a writer and product researcher at Drives Hero with a background in IT administration and consulting. He has hands-on experience with storage, networking, and system performance, and regularly improves and optimizes his home networking setup.