How to Create a Bootable USB Drive for Windows, Mac, and Linux
Creating a bootable USB drive is one of those skills that saves you when everything else goes wrong. Maybe your computer won’t boot, you need to do a clean OS install, or you want to test a Linux distro without committing to it. Whatever the reason, the process is surprisingly simple once you know which tool to use for your operating system.
This guide walks you through creating bootable USB drives on Windows, macOS, and Linux using the best tools available for each platform. You’ll also learn which USB drives work best and how to avoid the common mistakes that leave people staring at “Boot device not found” errors.
What You’ll Need Before You Start
Before you fire up any tool, gather these essentials:
- A USB flash drive (8GB minimum, 16GB recommended). For Windows 11 ISOs, which clock in around 6GB, an 8GB drive technically works but leaves zero breathing room. A 16GB or 32GB drive gives you flexibility for larger Linux ISOs or multiple partitions.
- An ISO file. Download the official ISO from Microsoft, Apple, or your chosen Linux distribution. Always grab ISOs from official sources to avoid tampered files.
- A working computer. You need a functional machine to create the bootable drive, even if your goal is to revive a dead one.
One important detail: the USB drive will be completely erased during this process. If you have anything on it, back it up first. And if you’re planning to securely wipe a drive before selling it, a bootable Linux USB is actually a great way to do that.
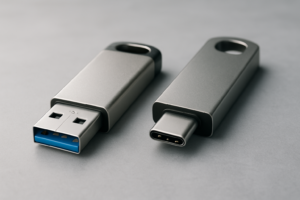
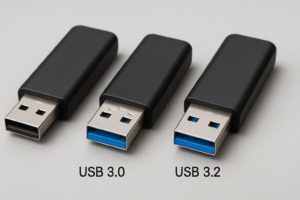
For the USB drive itself, speed matters more than you’d think. A USB 3.0 drive cuts creation time in half compared to USB 2.0, and it also makes the actual installation much faster. The Samsung BAR Plus and SanDisk Ultra Flair are both reliable picks with solid read/write speeds.

Samsung BAR Plus 64GB USB 3.1 Flash Drive
Metal body, water/shock resistant, and fast enough for bootable drives and everyday file transfers
Windows: Creating a Bootable USB with Rufus
Rufus is the gold standard for creating bootable USB drives on Windows. It’s free, lightweight (under 2MB), portable (no installation required), and handles UEFI/BIOS configurations better than most alternatives.
Step-by-Step with Rufus
- Download Rufus from rufus.ie. Grab the portable version so you can run it directly without installing anything.
- Plug in your USB drive and launch Rufus. It should automatically detect your drive under the “Device” dropdown. Double-check the drive letter so you don’t accidentally wipe the wrong disk.
- Select your ISO. Click the “SELECT” button and browse to your downloaded ISO file.
- Configure partition scheme. For modern computers (2016 and newer), choose GPT as the partition scheme and UEFI (non-CSM) as the target system. For older machines, select MBR and BIOS or UEFI.
- Leave the file system as recommended. Rufus automatically picks NTFS for Windows ISOs and FAT32 for most Linux ISOs. Don’t change it unless you have a specific reason.
- Click START. You’ll get a warning that all data on the drive will be destroyed. Confirm, and Rufus will handle the rest. Expect 5 to 15 minutes depending on your USB drive’s speed and the ISO size.
One common mistake: if you’re creating a Windows 11 bootable drive and your target PC doesn’t meet the TPM 2.0 or Secure Boot requirements, Rufus has a built-in option to bypass those checks. When you select a Windows 11 ISO, Rufus will offer to remove the TPM, Secure Boot, and RAM requirements during setup. It’s a lifesaver for older hardware.
If you’re doing a clean install on a machine with both an SSD and HDD, you might want to check out our guide on how to use an SSD and HDD together in one PC to plan your drive layout before installation.
macOS: Using Built-in Tools (createinstallmedia)
Apple provides a built-in command-line tool called createinstallmedia that creates bootable macOS installers. It’s the officially supported method, and it works reliably across macOS versions.
Step-by-Step for macOS
- Download the macOS installer from the App Store. Search for the version you want (Sonoma, Ventura, etc.). The installer will appear in your Applications folder once downloaded.
- Plug in a USB drive (16GB or larger for modern macOS versions). Open Disk Utility, select the drive, and erase it with the format set to Mac OS Extended (Journaled) and the scheme set to GUID Partition Map. Name it something simple like “MyUSB” since you’ll need to type it in Terminal.
- Open Terminal and enter the following command (using macOS Sonoma as an example):
sudo /Applications/Install\ macOS\ Sonoma.app/Contents/Resources/createinstallmedia --volume /Volumes/MyUSB
- Enter your admin password when prompted, then type Y to confirm. The process takes about 20 to 30 minutes.
- Boot from the USB by restarting your Mac and holding the Option (⌥) key at startup. On Apple Silicon Macs (M1/M2/M3), hold the power button instead until you see startup options.
If you’re installing macOS on a new SSD you’ve just put into an older MacBook, our guide on how to install macOS on a new SSD in a MacBook Pro covers the full process from start to finish.
Linux (and Cross-Platform): Balena Etcher
Balena Etcher works on Windows, macOS, and Linux, making it the best cross-platform option. It’s also the simplest tool on this list, with a three-step interface that’s almost impossible to mess up. If you’re creating a bootable Linux USB and want zero friction, Etcher is your pick.
Step-by-Step with Balena Etcher
- Download Balena Etcher from etcher.balena.io. Install it or use the portable version (available for Windows and Linux).
- Click “Flash from file” and select your ISO. Etcher supports ISO, IMG, and ZIP files.
- Click “Select target” and choose your USB drive. Etcher hides your system drives by default, which is a nice safety feature that Rufus doesn’t offer.
- Click “Flash!” and wait. Etcher writes the image and then automatically verifies it, ensuring the drive isn’t corrupted. This verification step adds a couple of minutes but can save you from a frustrating failed boot.
Etcher is perfect for Linux distros like Ubuntu, Fedora, Linux Mint, and Arch. It also handles Raspberry Pi images if you’re flashing to a microSD card. The main downside compared to Rufus is that Etcher doesn’t offer advanced partition or UEFI/BIOS options. For most Linux installations, you won’t need them.

SanDisk Ultra Flair 64GB USB 3.0 Flash Drive
Affordable and fast with up to 150MB/s read speeds, perfect for bootable drives and general storage
Quick Comparison: Which Tool Should You Use?
Here’s a direct breakdown to help you decide:
- Rufus is best for Windows users who need granular control (UEFI vs. BIOS, partition schemes, Windows 11 TPM bypass). It’s Windows-only, but it’s the most powerful option.
- Balena Etcher is best for Linux users and anyone who wants a dead-simple interface. It works across all three OSes and validates your flash after writing.
- createinstallmedia is the only reliable method for bootable macOS installers. Apple’s ecosystem is locked down, and third-party tools don’t handle macOS ISOs well.
My recommendation: keep Rufus on your Windows machine and Etcher on everything else. If you regularly troubleshoot computers, having a multi-pack of USB 3.0 flash drives with different OS installers ready to go is incredibly useful.
Troubleshooting Common Issues
Even with the right tools, things can go sideways. Here are the most common problems and fixes:
Computer doesn’t boot from the USB: Enter your BIOS/UEFI settings (usually by pressing F2, F12, DEL, or ESC during startup) and change the boot order to prioritize USB drives. Also confirm that Secure Boot isn’t blocking the drive, especially for Linux installations.
USB drive not detected by the tool: Try a different USB port, preferably a USB 2.0 port on the back of a desktop. Some USB hubs and front-panel ports cause detection issues. If your external drive isn’t showing up, many of the same fixes apply to flash drives as well.
“Boot device not found” after flashing: This usually means a mismatch between UEFI/MBR settings. If your computer uses UEFI, re-flash with GPT partition scheme. If it’s an older BIOS system, use MBR. Rufus makes this easy to toggle; Etcher doesn’t give you the option, which is why Rufus is better for tricky hardware.
Frequently Asked Questions
Can I use the same USB drive after creating a bootable installer?
Yes, but you’ll need to reformat it first. The bootable process changes the drive’s partition structure, so your OS might show it as having very little space. On Windows, open Disk Management, delete all partitions on the USB, and create a new
James Kennedy is a writer and product researcher at Drives Hero with a background in IT administration and consulting. He has hands-on experience with storage, networking, and system performance, and regularly improves and optimizes his home networking setup.