How to Use a Drive Dock to Recover Files from an Old HDD
That old hard drive sitting in a drawer, collecting dust inside a retired laptop or desktop tower, probably still has files on it. Family photos, tax documents, music libraries, maybe that novel you started in 2014. Getting those files back is easier than most people think, and you don’t need to pay a data recovery service to do it. All you need is a drive dock.
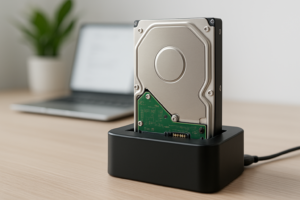
A drive dock (sometimes called a docking station) lets you connect a bare internal hard drive to your current computer via USB, just like plugging in a flash drive. Pop the drive in, power it on, and your computer recognizes it as an external storage device. Here’s exactly how to do it.
What You’ll Need
Before you start, identify what type of drive you’re working with. This determines which dock you need.
- SATA drives (2003 to present): These have an L-shaped data connector and a wider L-shaped power connector. Most 2.5-inch laptop drives and 3.5-inch desktop drives from the last two decades use SATA.
- IDE/PATA drives (pre-2005): These have a wide 40-pin ribbon cable connector and a 4-pin Molex power connector. If your drive came from a computer built before roughly 2005, it’s likely IDE.
For SATA drives, almost any modern USB drive dock will work. The Sabrent USB 3.0 Docking Station is a popular and affordable pick that handles both 2.5-inch and 3.5-inch SATA drives. Just slide the drive in vertically and connect the dock to your PC with the included USB cable.
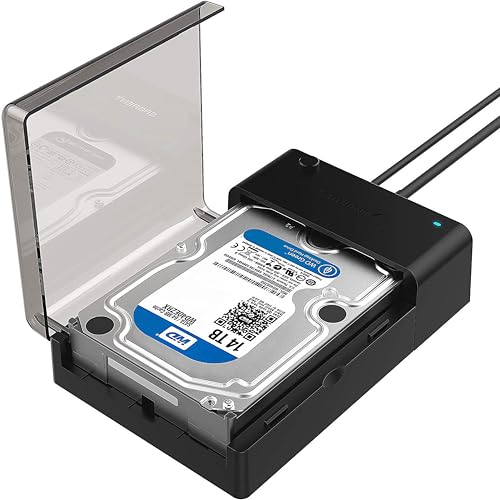
Sabrent USB 3.0 Hard Drive Docking Station
Reliable and budget-friendly dock that supports both 2.5-inch and 3.5-inch SATA drives with USB 3.0 speeds.
For IDE drives, you’ll need a dock or adapter that specifically supports IDE connections. These are less common but still available. A USB to IDE/SATA adapter kit is often the most practical choice since it comes with cables for both connection types, covering you no matter what you pull out of that old machine.

USB to IDE SATA Hard Drive Adapter Kit
Versatile kit that handles both IDE and SATA connections, perfect if you’re recovering files from multiple old drives.
Step-by-Step: Recovering Your Files
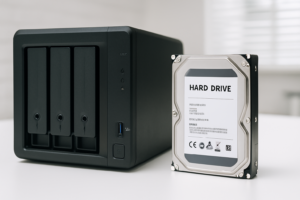
- Remove the drive from the old computer. Power down the machine, unplug it, and open the case. Laptop drives are usually held in a caddy secured by one or two screws on the bottom panel. Desktop drives are mounted in a 3.5-inch bay inside the tower. Disconnect the data and power cables, then slide the drive out.
- Connect the drive to your dock. For SATA docks, insert the drive into the top slot until the connectors seat firmly. For IDE adapters, connect the 40-pin cable and Molex power cable to the corresponding ports on the drive.
- Plug the dock into your computer via USB. Make sure to also connect the dock’s external power adapter. 3.5-inch desktop drives and IDE drives require the additional power supply to spin up. A 2.5-inch SATA laptop drive might run on USB power alone, but using the AC adapter is always more reliable.
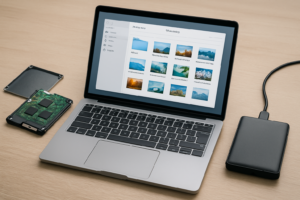
- Wait for your OS to detect the drive. On Windows, open File Explorer and look for a new drive letter. On macOS, the drive should appear on your desktop or in Finder. If the drive was formatted with NTFS (common for Windows PCs), macOS can read the files but won’t write to the drive without third-party software, which is fine for recovery purposes.
- Copy your files. Browse the drive and drag your files to your current computer’s storage, a fresh external drive, or a cloud service. If you’re moving large amounts of data, a USB 3.0 connection will save you significant time compared to USB 2.0.
If the drive doesn’t appear at all, check out our guide on fixing an external drive that’s not showing up. The troubleshooting steps apply to docked drives too.
What If the Drive Is Failing?
If you hear clicking or grinding when the drive powers on, stop immediately. Those sounds typically indicate a mechanical failure, and continued operation can make things worse. Our article on hard drive clicking sounds explains what different noises mean and when it’s time to call a professional recovery service.
For drives that mount but have corrupted or missing files, software like Stellar Data Recovery or the free tool Recuva can scan for recoverable data. We cover additional techniques in our guide to recovering data from a failed external drive.
Once you’ve successfully pulled everything off the old drive, consider what to do with it next. If you plan to sell or donate the hardware, make sure to securely wipe the drive before it leaves your hands.
Frequently Asked Questions
Can I use a drive dock to recover files from a laptop hard drive?
Yes. Most drive docks accept both 2.5-inch laptop drives and 3.5-inch desktop drives. The SATA connector is the same on both sizes. Just make sure the dock is listed as supporting 2.5-inch drives (nearly all of them do). For older laptops that used 1.8-inch drives or proprietary connectors (like some MacBooks), you’ll need a specialized adapter instead.
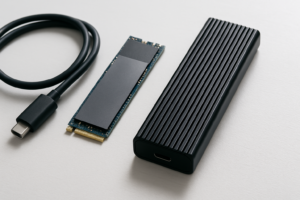
Will a drive dock work with SSDs too?
A standard SATA drive dock works with 2.5-inch SATA SSDs, since they use the same connector as a SATA hard drive. However, M.2 or NVMe SSDs require a different type of enclosure entirely. If you’re curious about the differences between drive form factors, our M.2 vs 2.5-inch SSD comparison guide breaks it all down.
This article contains affiliate links. We may earn a small commission at no extra cost to you.
James Kennedy is a writer and product researcher at Drives Hero with a background in IT administration and consulting. He has hands-on experience with storage, networking, and system performance, and regularly improves and optimizes his home networking setup.