Common Problems with SSD Enclosures and How to Fix Them
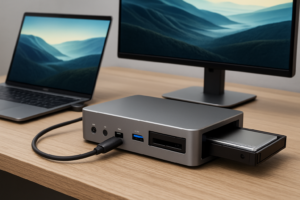
You bought an SSD enclosure expecting blazing-fast external storage, but instead you’re staring at a drive that won’t show up, transfers that crawl, or a case that’s hot enough to fry an egg. SSD enclosures are wonderfully useful tools for repurposing old drives, building portable storage, or creating fast backup solutions, but they come with a frustrating set of common problems that trip up even experienced users.
I’ve tested dozens of enclosures over the years and run into every one of these issues firsthand. This guide covers the most common SSD enclosure problems, why they happen, and exactly how to fix them, step by step.
Problem #1: SSD Not Detected When Plugged In
This is the single most common complaint with SSD enclosures, and it can have half a dozen different causes. You plug in your enclosure, wait for your computer to recognize it, and nothing happens. No new drive letter, no notification, nothing in Disk Management.
Check the Basics First
Before you assume the enclosure or drive is dead, work through these quick checks:
- Try a different USB port. Front-panel USB ports on desktop PCs are notorious for delivering insufficient power. Always try a rear port that connects directly to the motherboard.
- Swap the cable. USB cables fail more often than people realize, and many cheap cables that come bundled with enclosures are low quality. Try a known-good cable, ideally one that’s USB-IF certified.
- Test on another computer. This immediately tells you whether the issue is with your PC or the enclosure itself.
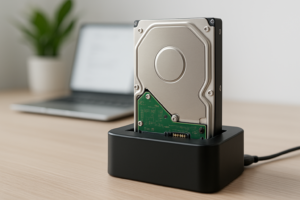
- Listen for any clicking or whirring. If you’re housing an older 2.5-inch HDD in a hybrid enclosure, unusual sounds can indicate drive failure. We have a full guide on what clicking sounds mean and what to do about them.
The Drive Needs Initialization
If you’ve installed a brand-new SSD into your enclosure, your operating system won’t automatically assign it a drive letter. On Windows, open Disk Management (right-click the Start button and select it), and look for an “Unknown” or “Not Initialized” disk at the bottom. Right-click it, select “Initialize Disk,” choose GPT for drives over 2TB (or if you plan to use it with modern systems), then create a new simple volume and format it.
On macOS, open Disk Utility. If the drive appears in the sidebar but is greyed out, select it and click “Erase” to format it as APFS or ExFAT. If you’re connecting an external SSD to a MacBook Pro, ExFAT is usually the best choice for cross-platform compatibility.
Driver and Firmware Issues
Some NVMe enclosures, especially those using the Realtek RTL9210B or ASMedia ASM2362 chipset, may need updated drivers on older versions of Windows 10. Check Windows Device Manager for any devices with yellow warning triangles. You can also visit the enclosure manufacturer’s website for firmware updates, which occasionally fix detection issues with specific SSD models.
If you’ve exhausted all software troubleshooting and the drive still doesn’t appear, our detailed walkthrough on fixing external drives that won’t show up covers even more edge cases.
Problem #2: Thermal Throttling and Overheating
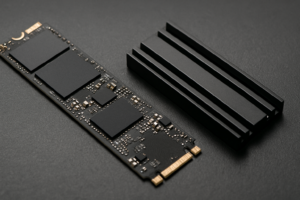
NVMe SSDs are fast, but they generate a surprising amount of heat, especially the PCIe Gen 4 models. When you seal one inside a small plastic or thin aluminum enclosure, temperatures can spike above 70°C under sustained load. At that point, the drive’s controller throttles performance to protect itself, and your transfer speeds plummet.
How to Tell If You’re Throttling
The telltale sign is a large file transfer that starts fast, then dramatically slows down after 30 to 60 seconds. You might see speeds drop from 1,000 MB/s down to 200 MB/s or less. Tools like CrystalDiskInfo (Windows) or DriveDx (macOS) can show you real-time drive temperatures. If you see temps climbing past 65°C during transfers, thermal throttling is almost certainly your bottleneck.
Practical Cooling Solutions
Start with your enclosure choice. Aluminum enclosures dissipate heat dramatically better than plastic ones. If you already own a plastic enclosure, consider upgrading to an aluminum model with built-in heatsink fins. The ORICO M.2 NVMe enclosure with heatsink is a solid option that keeps temps in check during sustained transfers.

ORICO M.2 NVMe SSD Enclosure with Heatsink
Aluminum body with heatsink fins that consistently keeps NVMe drives under safe operating temps during extended transfers.
Other tips that make a real difference:
- Add thermal pads. Most good enclosures include thermal pads, but if yours didn’t, adding a 1mm thermal pad between the SSD controller and the enclosure shell can drop temps by 10 to 15 degrees. You can grab a pack of 1mm thermal pads for very little.
- Don’t stack the enclosure on top of other warm devices like laptops or routers.
- Give it airflow. Even a small USB desk fan pointed at the enclosure during large transfers helps significantly.
- Avoid direct sunlight. It sounds obvious, but I’ve seen people leave enclosures on sunny desks and wonder why they throttle.
If your SSD is performing poorly even when it’s not overheating, the issue might be deeper. Our article on why SSDs slow down over time explains TRIM, garbage collection, and other factors that can degrade performance.
Problem #3: Slower Speeds Than Expected
You bought a USB 3.2 Gen 2 enclosure and a fast NVMe drive, expecting 1,000 MB/s reads. Instead, you’re getting 400 MB/s, or worse. This is one of the most common frustrations, and it usually comes down to a mismatch somewhere in the chain.
Understanding the Speed Chain
Your actual transfer speed is limited by the slowest link in a chain that includes: the SSD itself, the enclosure’s bridge chipset, the USB protocol, the cable, and your computer’s USB controller. If any single link is slower than the rest, that’s your ceiling.
Here’s a quick reference for maximum theoretical USB speeds:
- USB 3.0 (USB 3.2 Gen 1): 5 Gbps, roughly 500 MB/s max
- USB 3.1 (USB 3.2 Gen 2): 10 Gbps, roughly 1,000 MB/s max
- USB 3.2 Gen 2×2: 20 Gbps, roughly 2,000 MB/s max
- Thunderbolt 3/4: 40 Gbps, roughly 3,000+ MB/s max
The Most Common Speed Killers
Wrong cable. Not all USB-C cables support 10 Gbps. Many cables in the box only support USB 2.0 (480 Mbps) or USB 3.0 (5 Gbps) speeds. Look for cables explicitly rated for USB 3.2 Gen 2 or marked with the “SS10” logo. The Cable Matters 10Gbps USB-C cable is a reliable pick.
Plugged into the wrong port. Many laptops have a mix of USB-A 3.0 and USB-C 3.2 Gen 2 ports. Check your computer’s specs to confirm which ports support which speeds. On Windows, you can open Device Manager and expand “Universal Serial Bus controllers” to see what your system supports.
SATA SSD in a SATA enclosure mistaken for NVMe speeds. This trips people up constantly. If you’re using a 2.5-inch SATA SSD or an M.2 SATA SSD, you’re capped at roughly 550 MB/s regardless of how fast the enclosure’s USB interface is. Only NVMe SSDs can exceed SATA speeds. If you’re unsure about the differences between these form factors, check out our M.2 vs 2.5-inch SSD comparison guide.
USB hub or adapter bottleneck. If you’re going through any kind of USB hub, docking station, or adapter, that device may only support USB 3.0 speeds. Always plug high-speed enclosures directly into your computer’s port.
File Size Matters Too
Transferring thousands of small files is always slower than transferring one large file of the same total size. If you need to move lots of small files, compress them into a single archive first. You’ll see significantly better throughput.
Problem #4: Compatibility Issues Between SSDs and Enclosures
Not every SSD works with every enclosure, and the error messages (when you get them at all) are rarely helpful. Here’s what goes wrong and how to avoid it.
M.2 Key Types: B-Key, M-Key, and B+M Key
M.2 SSDs come with different notch configurations (keying) that determine physical compatibility:
- B-Key: Typically SATA-based M.2 drives
- M-Key: Typically NVMe-based M.2 drives
- B+M Key: Compatible with both SATA and some NVMe slots
If you try to install an M-Key NVMe drive into a B-Key SATA-only enclosure, it physically won’t fit. And if you install a B+M Key SATA drive into an NVMe-only enclosure, it may fit but won’t be detected because the enclosure’s chipset doesn’t support the SATA protocol.
The safest bet for flexibility is a dual-protocol enclosure that supports both NVMe and SATA M.2 drives. The Inateck dual-protocol M.2 enclosure handles both types and auto-detects which protocol your drive uses.

Inateck M.2 NVMe SATA Dual Protocol SSD Enclosure
Supports both NVMe and SATA M.2 drives with automatic protocol detection, eliminating compatibility guesswork.
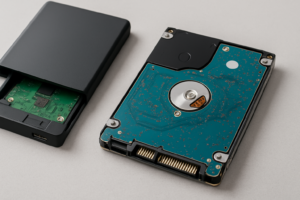
Physical Size Mismatches
M.2 SSDs come in different lengths: 2230, 2242, 2260, and 2280 are the most common. The numbers refer to width and length in millimeters (so 2280 is 22mm wide and 80mm long). Most full-size enclosures support 2280, which is the standard desktop/laptop size. But if you have a shorter 2230 drive (common in ultrabooks and the Steam Deck), you’ll need an enclosure that includes mounting points for shorter drives, or a 2230-specific adapter.
Chipset Compatibility Quirks
Certain SSD and enclosure chipset combinations just don’t play well together. Phison E18 and E26 controller-based NVMe SSDs have had reported issues with some JMicron JMS583 bridge chips. If you run into unexplained detection failures after confirming the physical connection is correct, searching for your specific SSD model plus the enclosure’s chipset name often turns up forum posts with solutions or workarounds, including firmware updates that resolve the conflict.
Problem #5: Random Disconnections During Use
Few things are more nerve-wracking than your external SSD disconnecting mid-transfer. This can corrupt files and, in worst cases, damage the file system on the drive.
Power Delivery Problems
NVMe SSDs draw more power than SATA drives, and some USB ports, especially on older laptops or through hubs, can’t supply enough. Symptoms include the drive connecting and working for a few minutes, then suddenly disappearing. Try plugging into a powered USB port, avoiding hubs, and testing with a shorter cable (longer cables can cause voltage drop). If your external drive keeps dropping out intermittently, we’ve covered seven quick fixes for disconnecting external drives that walks through every solution.
USB Selective Suspend (Windows)
Windows has a power-saving feature called USB Selective Suspend that can put USB ports to sleep after a period of inactivity. This is a common culprit for drives that disconnect when you step away and come back. To disable it:
- Open Control Panel and go to Power Options.
- Click “Change plan settings” next to your active plan.
- Click “Change advanced power settings.”
- Expand “USB settings” and then “USB selective suspend setting.”
- Set it to “Disabled” for both battery and plugged in.
Loose Physical Connections
Over time, the USB-C connector on budget enclosures can develop a slightly loose fit. If bumping the cable causes disconnections, try a different cable with a tighter connector, or consider an enclosure with a more secure port design. Some enclosures use a recessed USB-C port that provides better strain relief.
Problem #6: Enclosure Gets Extremely Hot to the Touch
A warm enclosure is normal. An enclosure you can barely hold is not. While we covered thermal throttling above from a performance perspective, excessive heat also shortens your SSD’s lifespan. NAND flash memory degrades faster at high temperatures, and sustained operation above 70°C can accelerate wear significantly. If you’re curious about long-term SSD health, our deep dive into SSD li
James Kennedy is a writer and product researcher at Drives Hero with a background in IT administration and consulting. He has hands-on experience with storage, networking, and system performance, and regularly improves and optimizes his home networking setup.