How to Recover Files from a Dead SSD or External Hard Drive
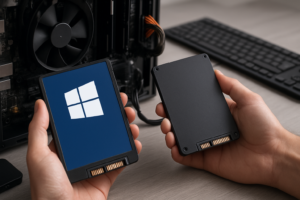
Your drive just died. Maybe your external hard drive makes no sound when you plug it in. Maybe your SSD vanished from your computer overnight. Either way, the files you need are trapped inside a device that won’t cooperate, and that sinking feeling in your stomach is all too real.
Before you panic or spend a fortune on professional recovery, there are several methods you can try at home to pull your data back from the brink. Some are free, some cost a bit, and some require specialized hardware. Let’s walk through your options from simplest to most advanced, so you can figure out exactly what makes sense for your situation.
First: Assess the Damage Before You Make It Worse
The single most important step is understanding what kind of failure you’re dealing with. This determines everything else you should do.
For external hard drives: Listen carefully when you plug it in. If you hear clicking, grinding, or beeping sounds, stop immediately. Those noises indicate mechanical failure, and continued use can scratch the platters and make recovery impossible. We’ve covered this in detail in our guide on what hard drive clicking sounds mean and what to do about them.
For SSDs: Failure is usually silent. The drive either shows up in your system or it doesn’t. If your SSD disappeared from your BIOS entirely, the controller chip may have failed. If the drive appears but you can’t access files, that’s typically a logical failure, which is much easier to recover from. Understanding how long SSDs actually last can help you gauge whether your drive has simply worn out its NAND cells.
Quick diagnostic checklist:
- Does the drive appear in Disk Management (Windows) or Disk Utility (Mac)?
- Does the drive appear in BIOS/UEFI?
- Are there any unusual sounds?
- Did the failure happen suddenly, or did the drive slow down gradually?
- Is the enclosure warm when powered on, or completely cold?
If your external drive isn’t showing up at all, it might not be dead. It could be a cable or port issue. Check out our troubleshooting guide for external drives that won’t appear before assuming the worst.
DIY Method 1: The Dock Approach (Bypass the Enclosure)
This is the first thing I’d try with any “dead” external drive, because it works more often than you’d expect. Many external drive failures are actually enclosure failures. The USB-to-SATA bridge board inside the case dies, but the drive itself is perfectly fine.
Here’s what to do:
- Open your external drive enclosure (usually a few screws or plastic clips).
- Remove the bare drive from inside.
- Connect it to your computer using a USB-to-SATA dock or adapter cable.
- Check if the drive appears in your system.
For 2.5-inch and 3.5-inch SATA drives, a Sabrent USB 3.0 to SATA docking station is one of the most popular and reliable options. It accepts both drive sizes and requires no tools.
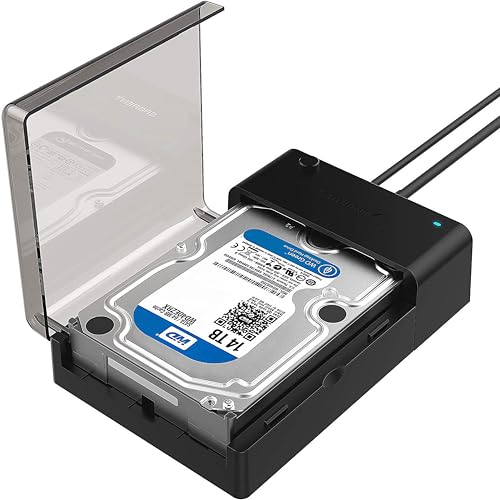
Sabrent USB 3.0 to SATA Hard Drive Docking Station
A reliable, tool-free docking station that accepts both 2.5″ and 3.5″ SATA drives for quick data access and recovery.
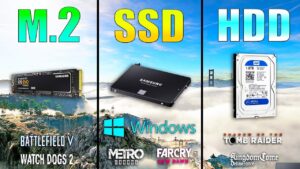
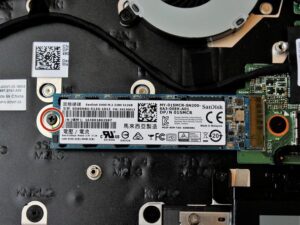
For M.2 NVMe SSDs (common in laptops from the last few years), you’ll need an M.2 NVMe enclosure instead. The UGREEN M.2 NVMe enclosure works well and supports USB 3.2 speeds. If you’re unsure what type of SSD you have, our M.2 vs 2.5-inch SSD comparison guide can help you identify it.
Important note for Mac users: If you’re recovering from a dead MacBook’s SSD, newer models (2016 and later) use proprietary connectors. You’ll need a specific adapter. We’ve put together a detailed walkthrough for recovering data from a dead MacBook Pro SSD that covers the exact adapters you’ll need.
DIY Method 2: Data Recovery Software
If your drive shows up in the system (even if you can’t browse files normally), data recovery software can often pull files from corrupted, formatted, or partially failed drives. This works best for logical failures where the drive hardware is still functioning but the file system is damaged.
Free Options
Recuva (Windows): Made by the same team behind CCleaner, Recuva handles basic recovery tasks well. It’s completely free for personal use, supports FAT, exFAT, and NTFS, and has a simple wizard-based interface. It won’t recover from severely corrupted drives, but for accidental deletion or minor corruption, it does the job.
TestDisk / PhotoRec (Windows, Mac, Linux): These open-source tools are powerful but not pretty. TestDisk can repair partition tables and recover lost partitions, while PhotoRec recovers files based on their signatures regardless of file system. They run from a command line, which can feel intimidating, but there are solid tutorials available. For complete partition recovery, TestDisk is one of the best free tools available.
Paid Options Worth Considering
R-Studio: This is what many data recovery professionals use for logical recoveries. It supports virtually every file system (NTFS, HFS+, APFS, ext4, and more), can recover data from RAID arrays, and creates disk images for safe recovery. It’s more technical than consumer tools, but dramatically more capable. Check current pricing on Amazon.
Disk Drill (Windows/Mac): A good middle ground between simplicity and power. The free version lets you preview recoverable files, and the paid version removes the recovery limit. It handles both SSD and HDD recovery, with a clean interface that doesn’t require technical expertise.

Disk Drill Data Recovery Software
User-friendly recovery software that works on both Windows and Mac with support for over 400 file formats.
One critical rule with all recovery software: Never install the software or save recovered files to the same drive you’re recovering from. This can overwrite the very data you’re trying to save. Always use a separate drive as your target.
DIY Method 3: Create a Disk Image First
If your drive is partially failing (works intermittently, produces read errors, or is extremely slow), you should create a bit-for-bit disk image before attempting any recovery. Every minute you spend reading a dying drive brings it closer to total failure.
ddrescue (free, Linux) is the gold standard for imaging failing drives. Unlike regular copy tools, it’s designed to handle read errors gracefully. It skips bad sectors on the first pass, recovers good data quickly, then goes back to retry damaged areas. You can run it from a Linux live USB if you don’t have a Linux machine.
Basic ddrescue workflow:
- Boot from a Linux live USB.
- Connect both the failing drive and a healthy target drive with equal or larger capacity.
- Run:
ddrescue /dev/sdX /dev/sdY rescue.log - Once the image is complete, run recovery software against the image, not the original drive.
This approach protects your original drive from further degradation while giving you the best possible chance of recovering everything.
When to Call a Professional
DIY recovery has limits. You should contact a professional data recovery lab if:
- Your hard drive is clicking, grinding, or beeping. These sounds mean internal mechanical failure. Opening the drive outside a cleanroom will destroy it.
- Your SSD doesn’t appear in BIOS at all. A dead controller often requires chip-off recovery, where NAND chips are desoldered and read individually with specialized equipment.
- The drive suffered water or fire damage. Corrosion and heat warp require physical intervention.
- You’ve already tried DIY methods and made things worse. Every failed attempt can reduce the chance of professional success.
Professional recovery typically costs several hundred to over a thousand dollars, depending on the failure type and urgency. Reputable labs like DriveSavers, Ontrack, and Gillware offer free evaluations and “no data, no charge” policies. Always ask about this before sending your drive anywhere.
Avoid any “recovery shop” that charges an upfront fee before diagnosis. Legitimate labs will tell you what’s wrong and give you a quote before any charges.
Preventing Future Data Loss
Once you’ve recovered your files (or mourned the ones you couldn’t), make a backup plan so this never happens again. A solid approach combines local and cloud storage. Our cloud backup vs local NAS cost comparison breaks down the economics of both options, and if you want something running in your home, our guide on setting up automated NAS backups in 30 minutes will get you protected quickly.
The 3-2-1 backup rule still holds: three copies of your data, on two different types of media, with one copy stored off-site. It sounds excessive until you’re staring at a dead drive with no backup.
Frequently Asked Questions
Can you recover data from an SSD that won’t power on?
Sometimes, but it depends on the failure. If the controller chip died but the NAND flash memory is intact, a professional lab can desolder the chips and read them directly (called “chip-off” recovery). This process is expensive and not guaranteed, but it’s the only option when the drive’s electronics are completely dead. For drives that power on but aren’t recognized, try connecting them through a different interface (dock or enclosure) before assuming the worst.
Is data recovery software safe to use, or can it make things worse?
Recovery software is safe as long as you follow one rule: never write anything to the drive you’re recovering from. Install the software on a different drive, and save all recovered files to a separate location. The software itself only reads data from the failing drive. The real risk comes from continuing to use a physically failing drive too long, which is why
James Kennedy is a writer and product researcher at Drives Hero with a background in IT administration and consulting. He has hands-on experience with storage, networking, and system performance, and regularly improves and optimizes his home networking setup.