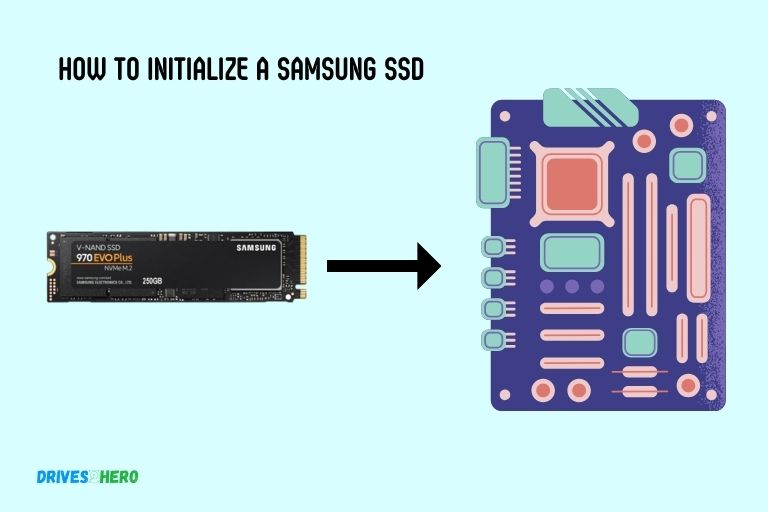
How to Initialize a Samsung Ssd? 6 Steps!
Initializing the SSD is the process of setting up a file system on it so that your operating system can recognize and use the drive. Initializing is a crucial step in preparing your SSD for use with your computer.
In this concise walkthrough, we’ll cover the essential steps, from connecting the SSD to choosing the file system. Follow along to ensure a smooth initialization process for your Samsung SSD.
Key Takeaway
Initializing a Samsung SSD: A Step-by-Step Guide
Step 1: Connect the SSD
Ensure your Samsung SSD is securely connected to your computer using the appropriate cables.
Step 2: Power On Your Computer
Turn on your computer and let the operating system recognize the newly connected SSD.
Step 3: Open Disk Management (Windows) or Disk Utility (Mac)
- For Windows:
- Press
Windows + Xand select “Disk Management.” - Locate your Samsung SSD in the list of drives.
- Press
- For Mac:
- Open “Disk Utility” from the Applications > Utilities folder.
- Find your Samsung SSD in the list of drives on the left.
Step 4: Initialize the SSD
- For Windows:
- Right-click on the unallocated space of your SSD.
- Choose “New Simple Volume” and follow the on-screen instructions to initialize the SSD.
- For Mac:
- Click on the Samsung SSD in Disk Utility.
- Select “Erase” and follow the prompts to initialize the SSD.
Step 5: Choose File System and Format
- For Windows:
- Choose the file system (NTFS is recommended for Windows) and set a volume label.
- Click “Next” and then “Finish” to format the SSD.
- For Mac:
- Choose the file system (APFS is recommended for macOS) and set a name.
- Click “Erase” to format the SSD.
Step 6: Confirm Initialization
Ensure that the initialization process completes successfully, and the status of the SSD in Disk Management or Disk Utility changes to “Healthy” or “Mounted.”
By following these simple steps, you’ll successfully initialize your Samsung SSD, getting it ready for use with your computer.
Understanding The Importance Of Initializing A Samsung Ssd
Understanding the importance of initializing a Samsung SSD is crucial when considering how to optimize its performance.
Let’s delve into the importance of initializing a Samsung SSD in more detail:
Importance Of Initializing A Samsung Ssd For Optimal Performance
Initializing a Samsung SSD offers several key benefits that contribute to its overall performance and longevity.
Here’s why it’s so important:
Initializing a Samsung SSD is crucial as it:
- Enhances Performance: Prepares the SSD for efficient data storage and retrieval, resulting in faster boot times and improved system responsiveness.
- Manages Data Effectively: Organizes the drive’s file system for easy storage, retrieval, and organization of files and folders.
- Improves Storage Efficiency: Optimizes storage by eliminating previous data, allocating the entire drive capacity for enhanced performance.
- Prevents Performance Degradation: Recalibrates the SSD, preventing performance degradation over time caused by wear leveling and garbage collection.
- Ensures Stability and Reliability: Reduces the chances of errors, corruption, or unpredictable behavior associated with improper drive configurations.
- Maximizes Lifespan: Contributes to maximizing the SSD’s lifespan by optimizing internal mechanisms, reducing the risk of premature wear and tear.
Initializing also facilitates the drive’s ability to manage data efficiently, reducing the risk of premature wear and tear.
Preparing For Initialization
Learn how to properly initialize a Samsung SSD with our step-by-step guide. Follow these instructions to ensure a seamless setup process for your SSD device.
Checking The System Requirements For Initializing A Samsung Ssd
Before you go ahead and initialize your Samsung SSD, it’s important to ensure that your system meets the necessary requirements.
Here are the key factors to consider:
Operating System Compatibility:
- Ensure that your computer is running on a compatible operating system, such as Windows 10, macOS Sierra (10.12), or higher versions. Compatibility with other operating systems may vary, so it’s advisable to check the manufacturer’s documentation for further details.
System Interface:
- Ensure that your computer has the appropriate interface to connect the Samsung SSD. Most modern SSDs use the SATA interface, so make sure that your system has SATA connectors available. If you own a newer Samsung SSD model, it may use the sleeker NVMe (Non-Volatile Memory Express) technology. In such cases, your system should have an NVMe-compatible interface, such as an M.2 slot on the motherboard or a compatible PCIe expansion card.
Available Storage Space:
- Make sure that your system has adequate storage space available to accommodate the data you want to migrate to the Samsung SSD. It’s recommended to have at least double the amount of available storage space to allow for a smooth initialization process.
Power Supply:
- Verifying that your system’s power supply is stable and reliable is crucial before initializing your Samsung SSD. Insufficient power supply or sudden power outages during the initialization process can lead to data corruption or other issues. Consider using a high-quality power supply unit (PSU) to ensure a stable power source.
Backing Up Important Data Before Initialization
To safeguard your important files, it’s crucial to back them up before proceeding with the initialization process.
Here’s why:
Data Loss Prevention:
- Backing up your data mitigates the risk of losing important files due to unforeseen circumstances or errors during initialization. Though initialization usually doesn’t erase data, it’s always a good practice to have a backup as an additional layer of protection.
Technical Glitches:
- While initializing an SSD is a relatively straightforward process, unforeseen technical hiccups can occur. In rare cases, initialization might result in data loss or system errors. Having a backup helps you recover quickly and efficiently.
Peace of Mind:
- Backing up your data provides peace of mind during the initialization process. It allows you to freely carry out the necessary steps without worrying about any potential data loss.
There are several methods to back up your data, including using external hard drives, cloud storage services, or specialized backup software.
Verifying Firmware Version And Updating If Necessary
Before initializing your Samsung SSD, it’s essential to check the firmware version of the drive and update it if needed. Firmware updates often improve compatibility and performance.
Here’s how to ensure your firmware is up to date:
Identify the Model and Firmware Version:
- Locate the Samsung SSD model number and firmware version. This information can usually be found on the SSD label or in the manufacturer’s documentation.
Verify the Latest Firmware Version:
- Visit the Samsung website or use their specialized software to check if a newer firmware version is available for your SSD model. Keep in mind that firmware updates are specific to each SSD model, so double-check the compatibility.
Perform the Firmware Update:
- If a newer firmware version is available, follow the manufacturer’s instructions to update your Samsung SSD’s firmware. This process typically involves downloading the firmware update file from the official website and running the provided software tool. Ensure that you follow the instructions carefully to avoid any issues during the update.
By verifying the firmware version and updating if necessary, you ensure that your Samsung SSD is running on the latest software, maximizing its performance and compatibility with your system.
Troubleshooting And Tips
Troubleshooting and Tips for Initializing your Samsung SSD. Learn how to easily initialize your Samsung SSD with these step-by-step instructions.
Common Issues During The Initialization Process And Their Solutions:
SSD not recognized by the system: This can happen due to incompatible hardware or outdated drivers. To resolve this issue, ensure that your motherboard supports the Samsung SSD model you are using.
Failure to initialize due to disk management errors: Sometimes, you may encounter errors such as “Disk Unknown, Not Initialized.”
In such cases, you can try the following steps:
- Press “Windows key + X” on your keyboard and select “Disk Management.”
- Right-click on the uninitialized SSD and choose “Initialize Disk.”
- Follow the on-screen instructions and select the appropriate partition style (MBR or GPT).
- Once the disk is initialized, you can create a new partition and format it as desired.
Long initialization time: The initialization process can take a while, depending on the size and speed of your SSD. It is normal for larger drives to require more time.
However, if the process seems excessively slow, make sure that your computer is not busy with other resource-intensive tasks. Ensure that you have installed the necessary firmware updates for your SSD.
Tips For Maximizing The Performance Of An Initialized Samsung Ssd:
Enable TRIM: TRIM is a feature that helps your SSD maintain performance over time.
To enable TRIM, follow these steps:
- Press “Windows key + X” and select “Command Prompt (Admin).”
- Type “fsutil behavior set DisableDeleteNotify 0” and press Enter.
- Restart your computer for the changes to take effect.
Update firmware and drivers: Regularly check for firmware and driver updates from Samsung’s official website. These updates often include performance enhancements, bug fixes, and compatibility improvements, ensuring your SSD is running at its best.
Avoid disk fragmentation: Fragmentation can impact the performance of your SSD. To prevent this, it is advisable to enable automatic defragmentation for traditional hard drives only. SSDs do not require defragmentation due to their different storage technology.
Understanding The Impact Of Initialization On Data Security:
When you initialize an SSD, it erases all existing data on the drive. Therefore, it is crucial to back up any important files before proceeding with the initialization process.
Initialization essentially prepares the SSD for use and enhances its performance. However, it does not provide data security on its own.
To ensure data security, consider the following measures:
- Data encryption: After initialization, enabling encryption on your Samsung SSD provides an additional layer of security. This way, even if someone gains unauthorized access to the drive, they won’t be able to decipher the encrypted information.
- Regular backups: Initiated or not, it is always good practice to keep regular backups of your important data. This way, even if data loss or corruption occurs, you can easily restore your files.
We have explored common issues during the initialization process and their solutions, shared tips for maximizing SSD performance, and discussed the impact of initialization on data security.
By following the troubleshooting steps and implementing performance-enhancing tips, you can ensure a smoother and more efficient experience with your Samsung SSD.
Conclusion
Initializing a Samsung SSD is an essential step to maximize its performance and ensure optimal usage. By following the steps outlined in this guide, you can confidently initialize your Samsung SSD without any hassle.
Remember to back up your data before proceeding, as initialization will erase all existing content on the SSD.
Starting with connecting the SSD to your computer and accessing the Disk Management tool, you can easily initialize the SSD by creating a new partition and formatting it to the desired file system.
It is also crucial to update the SSD firmware regularly to keep it in top condition. With a properly initialized Samsung SSD, you can enjoy improved speed, reliability, and storage efficiency for all your digital needs.

Harold Williams is a senior writer and technical editor at Drives Hero with 20+ years of experience in IT administration. He specializes in storage systems, SSD reviews, and performance testing, bringing real-world insight to every guide.