How to Install M 2 Ssd Msi Motherboard? 10 Steps!
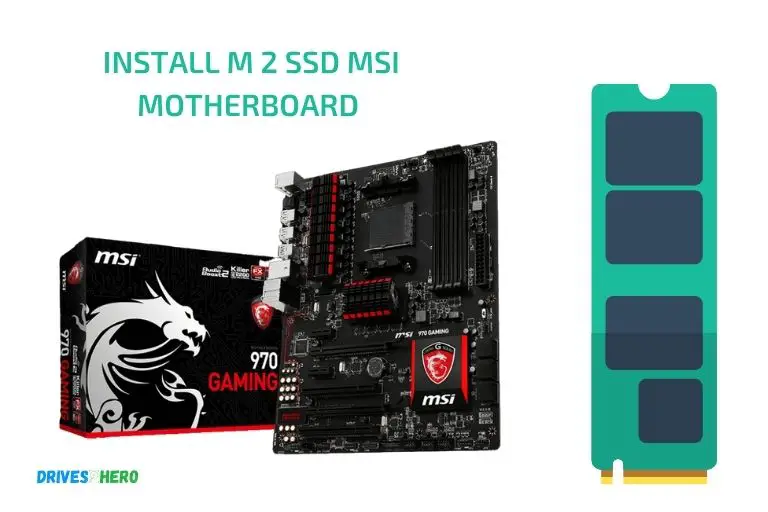
To install an M.2 SSD on an MSI motherboard, you will need to locate the M.2 slot, secure the SSD in place with the mounting screw, and connect it to the motherboard.
M.2 SSDs are compact storage devices that provide fast data transfer speeds and efficient performance.
Installing an M.2 SSD on an MSI motherboard is a relatively simple process, but it’s important to follow the correct steps and precautions to avoid damaging the components.
Before installing the M.2 SSD, power off your computer and unplug it from the power source. Open the computer case and locate the M.2 slot on your MSI motherboard, typically labeled with “M.2” or a similar identifier.
Carefully insert the SSD into the slot at a 30-degree angle, making sure the notches on the SSD align with the notches in the slot. Press down on the SSD until it lies flat against the motherboard and secure it with the mounting screw provided.
Once installed, turn on your computer and verify that the SSD is recognized by your system. If necessary, configure the BIOS settings to enable the M.2 SSD as the primary storage device.
10 Easy Steps for Installing an M.2 SSD on an MSI Motherboard
| Step | Description |
|---|---|
| 1 | Gather required tools and materials: M.2 SSD, MSI motherboard, screwdriver, and mounting screws |
| 2 | Turn off and unplug the power supply from your system |
| 3 | Open your computer case to access the MSI motherboard |
| 4 | Locate the M.2 slot on the MSI motherboard (usually labeled with “M.2”) |
| 5 | Remove the protective screw from the M.2 slot if one is present |
| 6 | Align the M.2 SSD to the slot, ensuring the notches on the SSD match the slot |
| 7 | Insert the M.2 SSD into the slot at a slight angle (approximately 30 degrees) |
| 8 | Press down the M.2 SSD and secure it with the mounting screw provided |
| 9 | Close the computer case and reconnect the power supply |
| 10 | Power on your system and enter the BIOS/UEFI to confirm the M.2 SSD is detected |
Key Takeaway

Five Facts About Installing an M.2 SSD on an MSI Motherboard
Understanding M 2 Ssd And Msi Motherboard Compatibility
Overview Of M 2 Ssd: Definition, Features, And Benefits
M. 2 ssd is a type of solid-state drive that is becoming more popular in the tech industry.
Here are some key points to understand about m. 2 ssd:
- Definition: M.2 ssd is a small card that uses the pcie interface to transfer data.
- Features: M.2 ssd is lightweight and requires less space than other storage drives. It also has a higher data transfer rate and faster boot times.
- Benefits: M.2 ssd is perfect for those who need a high-speed storage drive for their system while maximizing space.
Msi Motherboard Compatibility: Research And Pre-Installation Checks
Before installing an m. 2 ssd onto an msi motherboard, there are some crucial research and checks you need to do:
- Research: Confirm with your motherboard manual if it supports m.2 ssd. Make sure it has an m.2 slot and pcie support to be compatible with the m.2 ssd.
- Pre-installation checks: Check if your computer bios has been updated to the latest version, enough space for the installation, and the compatibility of m.2 ssd with your operating system.
Common Compatibility Issues And Troubleshooting
Despite being cautious about the m. 2 ssd and msi motherboard compatibility, certain problems can still arise.
Here are some common compatibility issues and troubleshooting tips:
- Bios update: Update motherboard bios by downloading and updating the msi motherboard utility.
- System recognition: If your system doesn’t recognize the m.2 ssd, try inserting and reinserting the card properly.
- Firmware update: Check if the firmware of your msi motherboard supports the file system of the m.2 ssd. If not, update the firmware.
- Operating system issues: If you have trouble booting your os with the m.2 ssd, enable uefi mode in your bios settings.
With these key points, you can now understand what m. 2 ssd and msi motherboard compatibility is all about. Remember to research and do pre-installation checks, so you don’t encounter any unforeseen problems.
Preparing Your Msi Motherboard For M 2 Ssd Installation
Before you install an m 2 ssd into your msi motherboard, you need to prepare the motherboard to support it.
Here are the steps for preparing your msi motherboard for m 2 ssd installation:
Checking Bios Settings For M 2 Ssd Support
Before you begin installation, confirm that your computer bios supports m 2 ssds.
Here are the steps to check your bios settings:
- Restart your computer and press “delete” or “f2” to enter the bios.
- Navigate to the “advanced” tab.
- Select “windows os configuration.”
- Make sure the “m.2 genie” is set to “enabled.”
Removing The Old Hdd And Preparing The Motherboard For M 2 Ssd
Now that you’ve confirmed m 2 ssd support on your msi motherboard and checked your bios settings, you need to remove the old hard drive and prepare the motherboard for m 2 ssd installation.
Here are the steps to do so:
- Shut down your computer and unplug the power cord.
- Open the computer case.
- Locate the sata data cable and power connector, and disconnect them from the hard drive.
- Remove the screws from the hard drive cage.
- Remove the hard drive from the hard drive cage.
- Locate the m 2 slot on the motherboard.
- Remove the m 2 slot cover.
Installing M 2 Ssd Mounting Standoff, M 2 Slot Cover, And M 2 Ssd Screws
Now it’s time to install the m 2 ssd in your msi motherboard.
Here are the steps to install the mounting standoff, m 2 slot cover, and m 2 ssd screws:
- Insert the m 2 ssd into the m 2 slot.
- Secure the m 2 ssd with the m 2 screw.
- Place the m 2 mounting standoff onto the motherboard by aligning it with the m 2 ssd mounting hole and screwing it in place.
- Place the m 2 slot cover back onto the m 2 slot.
By following these steps, you can install an m 2 ssd onto your msi motherboard easily and securely. Once the installation is complete, remember to boot up your system and format the ssd before use.
Installing Your M 2 Ssd On Msi Motherboard
Mounting The M 2 Ssd On The Motherboard
Mounting your m 2 ssd can be a tricky process, but it can be done easily if you follow these steps:
- Identify the m 2 slot on your msi motherboard.
- Remove the cover plate from the slot.
- Align the slot on your ssd with the m 2 slot on the motherboard. Note that the slot is an ‘m’ shaped connector.
- Tilt the ssd at a 30-degree angle and insert it into the slot.
- Firmly push down on the ssd, ensuring it clicks into place.
- Secure the ssd with a screw using your motherboard manual as a guide.
Connecting The M 2 Ssd To The Motherboard And Power Supply
Once you’ve mounted the ssd to your motherboard, it’s essential to connect it to both the motherboard and power supply.
Here’s how:
- Connect one end of the sata cable to the m 2 ssd and the other end to the motherboard slot labeled “m.2_1”. Refer to your manual if you’re not sure which slot to use.
- Plug in the 8-pin connector from your power supply to the power socket on the motherboard.
- Turn on your computer and press the required key to enter bios settings.
- Check that the bios detects your m 2 ssd.
Installing Operating System And Updating Drivers For M 2 Ssd
The final step is to install your operating system and update drivers for your m 2 ssd.
These steps go a long way in ensuring optimal performance of your system.
Here’s how:
- Insert your operating system installation media into your computer. If you don’t have one, you can download the operating system from the microsoft website.
- Restart your computer and boot it up from the installation media.
- Follow the setup process and select your m 2 ssd as your installation drive.
- Once the installation process is complete, you need to update the drivers for your m 2 ssd. Go to the msi website and download the latest m 2 ssd driver.
- Extract the contents of the zip file to your computer.
- Right-click on the start menu and select “device manager”.
- Right-click on your m 2 ssd and choose “update driver”.
- Browse and select the downloaded driver files, then click “install”.
Installing an m 2 ssd on an msi motherboard can seem daunting, but by following these straightforward steps, the process becomes hassle-free.
Mount the ssd to the motherboard, connect it to both your motherboard and power supply, and then install your operating system and update drivers.
Don’t forget to check that your bios detects your m 2 ssd. With these steps, your system will be optimized for the best performance.
Optimizing Your Msi Motherboard And M 2 Ssd For Peak Performance
Optimizing your msi motherboard and m 2 ssd for peak performance
Msi motherboards are known for their top-of-the-line performance and reliability. Here, we’ll be showing you the best methods to get the most out of your m 2 ssd on your msi motherboard.
Configuring Bios Settings For M 2 Ssd
Configuring bios settings for the m 2 ssd on your msi motherboard is an important step to maximize its performance.
Here are the key points to remember:
- Access your bios setup utility by restarting your computer and pressing the del key before the operating system is loaded.
- In the advanced settings, find the option “m.2 pcie ssd configuration” and set it to “pcie mode” for nvme ssds, or “sata mode” for sata ssds.
- Save the settings and restart your computer.
Installing Msi Motherboard And M 2 Ssd Drivers And Utilities
Installing the drivers and utilities for your msi motherboard and m 2 ssd will ensure that it works at its best potential.
Here is what you need to do:
- Download the latest msi motherboard drivers and utilities from their official website.
- Install them on your computer by following the on-screen instructions.
- Install the latest firmware and bios updates to keep your system up-to-date.
Maximizing The Benefits Of M 2 Ssd On Your Msi Motherboard
M 2 ssds can significantly boost your system’s performance if used correctly.
Here are the essential steps to optimize your m 2 ssd on your msi motherboard:
- Ensure that the m 2 ssd is installed correctly and firmly inserted into the m 2 slot.
- Use your m 2 ssd solely for booting your operating system and frequently used programs.
- Disable unnecessary startup programs to maximize boot times.
- Use third-party software to monitor and optimize the performance of your m 2 ssd.
- Regularly clean your computer from dust and debris to prevent overheating, which may affect the m 2 ssd’s performance.
By following these steps, you can get the most out of your m 2 ssd and msi motherboard. Enjoy faster boot times, quicker program load times, and a more responsive system overall.
FAQ About Installing M 2 Ssd Msi Motherboard
What Is An M.2 Ssd?
An m. 2 ssd (solid-state drive) is a type of storage device that uses nand-based flash memory.
Why Install An M.2 Ssd On Msi Motherboard?
An m. 2 ssd can provide faster boot and load times and improve overall system performance.
Is It Difficult To Install An M.2 Ssd On An Msi Motherboard?
Installing an m. 2 ssd on an msi motherboard is a simple process that can be done with a screwdriver and the motherboard manual.
What Are Some Tips For Installing An M.2 Ssd On An Msi Motherboard?
Be sure to properly align the m. 2 ssd in the designated slot and secure it with the screw provided. Check the motherboard manual for any additional instructions.
Conclusion
Installing an m. 2 ssd to your msi motherboard isn’t rocket science. With the right hardware and a few simple steps, you can give your system a new lease of life by adding this powerful storage solution. However, it is important to remember to handle the delicate m.
2 ssd with care to avoid damaging it. You should also be careful when handling the screwdriver and ensure that you have the correct screw size and length to avoid damaging your motherboard. Additionally, it is important to prioritize the safety of your device by unplugging your computer from its power source.
The process of installing an m. 2 ssd to your msi motherboard may seem daunting at first glance, but with our simple guide, it is a painless process, which will significantly improve your computer’s performance. We hope that this guide is helpful to you, and we wish you a successful installation process!


