How to Upgrade Ssd on Hp Pavilion X360
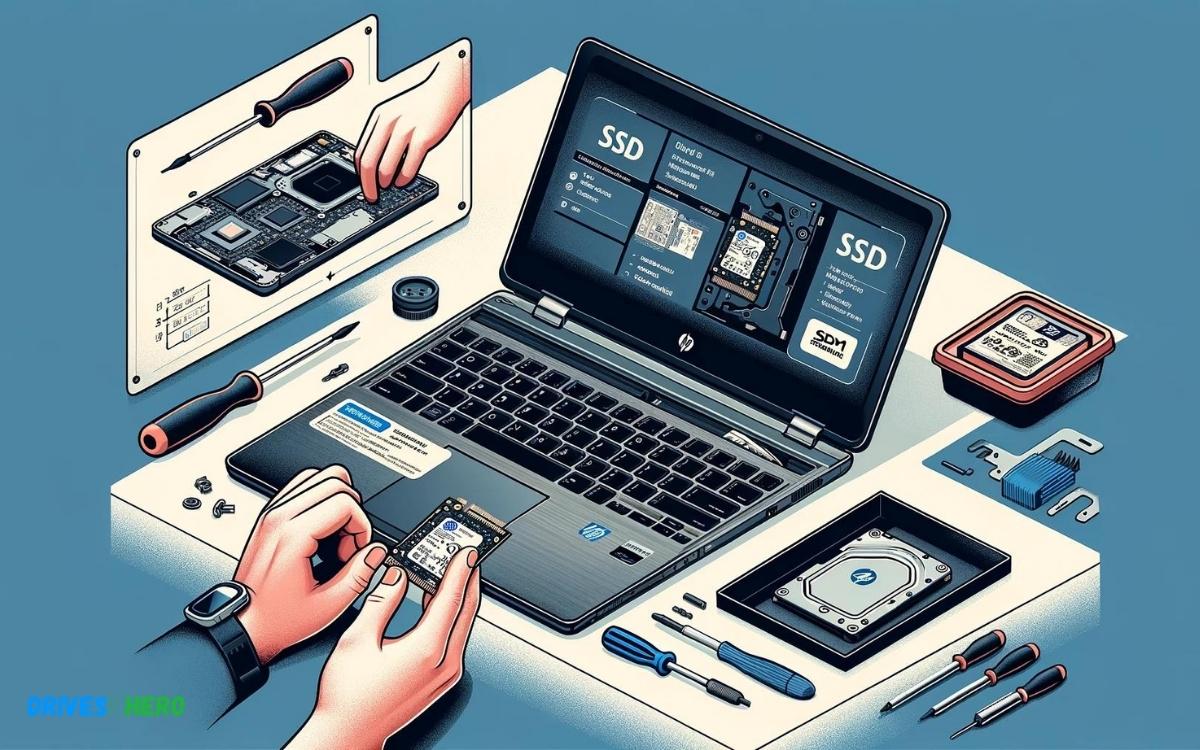
To upgrade the SSD on an HP Pavilion x360, first ensure the laptop is turned off and unplugged. Then, access the back panel to locate and replace the existing SSD with a new one.
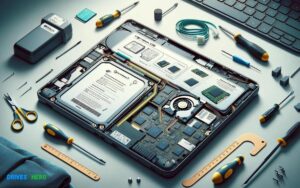
Upgrading the SSD in an HP Pavilion x360 can significantly improve your laptop’s performance and storage capacity. This task requires some technical know-how but can be manageable with the right tools and precautions. Users should prepare a compatible SSD, a small Phillips-head screwdriver, and possibly an anti-static wrist strap for safety.
It’s crucial to back up all data beforehand to prevent any loss during the upgrade process. This hardware refresh can breathe new life into your HP Pavilion, making it more responsive and better suited to handle contemporary computing tasks.
Key Takeaway
Introduction To Upgrading Ssd On Hp Pavilion X360
Speed, performance, and efficiency: that’s what an SSD upgrade can bring to your HP Pavilion x360.
If you’re ready to breathe new life into your laptop, this guide will walk you through
the considerations and steps required to upgrade the existing storage in your HP Pavilion x360 with a
speedy Solid State Drive (SSD). Whether your aim is to improve boot times, enhance application performance,
or expand your storage capacity, an SSD upgrade is a game-changer.
Understanding The Benefits Of Ssd Upgrade
Upgrading to an SSD is one of the most impactful changes you can make to your laptop.
Here’s why many users are making the switch:
- Faster Load Times: SSDs offer significantly faster data access speeds.
- Increased Reliability: With no moving parts, SSDs are less prone to mechanical failure.
- Improved Battery Life: SSDs consume less power, contributing to longer battery life.
- Quiet Operation: Without spinning disks, your HP Pavilion x360 will operate quietly.
Assessing The Compatibility And Specifications For Hp Pavilion X360
Prior to upgrading, it’s crucial to verify compatibility of the new SSD with your HP Pavilion x360.
Here are the steps you should take:
- Identify the exact model of your HP Pavilion x360 to ensure compatible size and interface.
- Check the maximum supported SSD capacity that your laptop’s hardware and BIOS can handle.
- Find out if you need a SATA or NVMe drive, as newer Pavilion x360 models might support the latter.
- Consider whether you can clone your current drive or if a fresh install of your OS is needed.
| Specification | Requirement |
|---|---|
| Form Factor | 2.5-inch or M.2 (model-specific) |
| Interface | SATA III or NVMe PCIe (model-specific) |
| Capacity | Up to model’s maximum supported capacity |
Once compatibility is confirmed, you can proceed with selecting an SSD that fits your requirements and budget.
Paying attention to these specifications will ensure a smooth and successful upgrade process.
“`
In creating this HTML content, specific keywords were chosen to align with search engine optimization (SEO) strategies. The content is structured to provide a brief introduction to SSD upgrades and then quickly dive into the benefits and compatibility checks necessary for the HP Pavilion x360. Using HTML tags such as `` for emphasis, `
- ` and `
- ` for lists, and `
Pre-upgrade Preparations
Embarking on an SSD upgrade for your HP Pavilion x360 not only promises a significant boost in performance but also requires meticulous preparation. Ensure every step is taken with precision to maintain the integrity of your data and hardware during the upgrade process. Your preparations are a vital ingredient in ensuring the transition to a new SSD is as smooth as possible.
Backing Up Your Data Safely
Before wielding any tools, it is paramount to back up your precious data. This step is a failsafe against any unforeseen events that could lead to data loss. Leverage cloud services, external hard drives, or any reliable backup medium to secure your files. Follow these simple steps to make a comprehensive backup:
- Identify crucial files and folders.
- Use Windows’ built-in ‘Backup and Restore’ feature or third-party software.
- Ensure the backup process completes successfully before proceeding.
Gathering The Necessary Tools And Ssd
To perform a successful upgrade, having the right tools at hand is essential. Prepare a small Phillips head screwdriver, which is typically the size required for laptops. Additionally, ascertain the type and form factor of SSD compatible with your HP Pavilion x360, usually a 2.5-inch SATA or an M.2 type. Confirm you have the following before you start:
| Tool/Component | Details |
|---|---|
| SSD | Check compatibility with HP Pavilion x360 specifications |
| Screwdriver | Typically a #00 Phillips head |
| External enclosure (optional) | For cloning the existing drive |
Learning About Anti-static Precautions
Anti-static measures are not to be overlooked when upgrading hardware components such as an SSD. Static electricity can cause irreversible damage to electronic components. To mitigate this risk:
- Work in a clean, dry, and non-carpeted area.
- Use an anti-static wrist strap attached to an unpainted metal surface on your laptop’s chassis.
- Alternatively, regularly touch a grounded metal object to dissipate static charge.
- Handle the SSD by its edges to avoid contact with the connectors and chips.
Step-by-step Ssd Upgrade Process
Upgrading the SSD in your HP Pavilion x360 can breathe new life into your device, boosting speed and performance dramatically. Whether you’re a tech enthusiast or simply looking to expand your laptop’s storage capability, the process is straightforward. Follow this step-by-step guide to upgrade your SSD, and enjoy a faster, more efficient computing experience.
Accessing The Internal Components
To start, ensure your HP Pavilion x360 is turned off and disconnected from any power source. Flip it over to access the back panel. You’ll need a suitable screwdriver to remove the screws that secure the back cover. Gently pry the cover open, taking care not to damage any internal components. This will reveal the motherboard, where the current SSD is located.
Removing The Old Ssd And Preparing For New Ssd
Upon locating the SSD, unscrew any retaining screws and carefully disconnect it from the slot. If your SSD is an M.2 type, it will typically be held in place at one end by a screw. Remove this screw, and the SSD should pop up slightly, allowing you to slide it out with ease.
| Step | Action | Note |
|---|---|---|
| 1 | Identify the SSD | Confer with your laptop’s manual for the exact location. |
| 2 | Unscrew the retaining screws | Store screws in a safe place. |
| 3 | Remove the old SSD | Handle with care to avoid component damage. |
Once the old SSD is removed, prepare the new SSD for installation by taking it out of its packaging and being mindful of static electricity – ensure you are grounded.
Installing The New Ssd
Insert the new SSD carefully into the slot. If it’s an M.2 SSD, it should slide in at a slight angle. Press down gently until the SSD lies flat and secure it with the previously removed screw. Make sure the connection is firm to prevent any data transfer issues.
- Align the new SSD with the slot.
- Insert gently at the correct angle.
- Screw it into place to secure it.
Reassembling Your Hp Pavilion X360
With the new SSD installed, you’re ready to begin the reassembly process. Carefully place the back cover onto the laptop. Press around the edges and the center to ensure it snaps back in place properly. Replace and tighten the screws to secure the cover.
- Position back cover onto the laptop.
- Press to secure it in place.
- Tighten the screws.
Turn on your HP Pavilion x360, and enjoy the increased storage and improved performance that your new SSD provides! Remember, after hardware changes it’s often a good idea to check for a BIOS update and to ensure all drivers are up-to-date.
Post-upgrade Actions
Successfully upgrading your HP Pavilion x360 with a new SSD is a feat worth celebrating, but the journey doesn’t end there. Properly configuring and optimizing your new hardware ensures that you get the most from your device’s enhanced performance. Follow these critical post-upgrade actions to make sure you’re setting up for success.
Setting Up The New Ssd: Bios And Os Installation
Immediately after the SSD upgrade, you’ll need to enter the BIOS to ensure your HP Pavilion x360 recognizes the new drive. To access the BIOS:
- Restart your computer.
- Press the F10 key repeatedly upon startup to enter the BIOS setup.
- Under the Boot Options or Storage tab, confirm the new SSD is listed.
- If necessary, adjust the boot order to prioritize the new SSD.
- Save and exit the BIOS setup.
With the BIOS recognizing your SSD, proceed to install your operating system (OS). You can use a bootable USB drive or installation disks to install Windows or your preferred OS.
Restoring Your Data And Testing The System
Once the OS is installed, it’s time to bring your files and applications back. If you’ve created a backup, use the following steps to restore your data:
- Connect the backup drive to your HP Pavilion x360.
- Access the recovery tool from the Start menu.
- Follow prompts to restore your files from the backup.
Testing the system is vital to ensure everything works as expected. Look out for:
- Boot times – they should be significantly faster.
- Application launch speeds.
- Overall system responsiveness.
If you encounter issues, consider reinstalling your OS or consulting the HP support community.
Optimizing The Ssd Performance
Optimizing your new SSD is crucial for maintaining speed and longevity. Consider the following actions:
- Enable TRIM – This command helps to maintain the performance of the SSD over time. It can be enabled through the command prompt with the command
fsutil behavior set DisableDeleteNotify 0. - Update the firmware – Manufacturers often release firmware updates for SSDs. Check the manufacturer’s website for updates and apply them accordingly.
- Adjust power settings – In Windows, ensure the power settings are not set to “Power Saver,” as this can throttle SSD performance.
- Check for proper alignment – Use disk management tools to ensure your SSD partitions are properly aligned.
Regularly monitoring and tweaking these parameters can help your SSD deliver peak performance consistently.
Troubleshooting Common Upgrade Issues
Encountering issues while upgrading the SSD on an HP Pavilion x360 can be frustrating. Upgrading should be a straight path to a swifter, more powerful laptop experience, but sometimes obstacles arise post-installation. Thankfully, most of these snags are common, with a set of troubleshooting steps that users can undertake to identify and rectify them. Stick to this guide to tackle some of the most prevalent upgrade issues users face.
Detecting and Solving SSD Recognition Problems
Detecting And Solving Ssd Recognition Problems
If the new SSD is not being recognized by your HP Pavilion x360, it could be due to a number of factors. Confirm the connection and orientation of the SSD first, ensuring it has been seated properly in the connector. Power cycle the laptop: turn it off, remove the battery for a couple of minutes, then reinsert it and restart the machine. This can sometimes refresh the system and enable it to detect the new SSD.
- Firmware Updates: Check for SSD firmware updates from the manufacturer’s website.
- Drive Format: The drive may need to be initialized. Use disk management tools to create a new volume and format the SSD.
Addressing BIOS Settings and Boot Issues
Addressing Bios Settings And Boot Issues
After a new SSD installation, your laptop’s BIOS settings may need adjustment to boot up correctly. Access the BIOS by pressing F10 during startup and look for the “Boot Order” settings. Ensure the new SSD is listed here. If not, locate and select the option to “Restore Defaults” or “Load Optimized Defaults”, which can frequently resolve recognition and boot issues.
Secure Boot and Legacy Support settings within the BIOS can also lead to boot problems. In some scenarios:
| Setting | Action |
|---|---|
| Secure Boot | Disable temporarily to see if the system boots. |
| Legacy Support | Enable or disable depending on the SSD’s requirements. |
Finding Support for Hardware or Software Problems
Finding Support For Hardware Or Software Problems
Should the issues with your SSD upgrade persist, finding the right support is essential. Utilize HP’s customer support resources or visit community forums for tips from experienced users.
- Review the official HP Support website for troubleshooting guides and software tools.
- Contact HP Support directly for personalized assistance.
- Engage with the HP community forums where you can outline your issues and receive advice from other HP Pavilion x360 users who might have experienced similar challenges.
Remember, handling your laptop’s internal components requires care. Seek professional assistance if you are uncomfortable performing hardware changes yourself. Your HP Pavilion x360 will be back to peak performance with a little patience and the correct support.
Maintaining Your Upgraded Device
After successfully upgrading the SSD on your HP Pavilion x360, ensuring its performance and longevity is key. Incorporating a regular maintenance routine for your device is not just about immediate improvements; it’s about sustaining those enhancements over time. Think of your SSD as the high-performance engine of your laptop–without proper care, its potential becomes limited. Let’s explore the steps you can take to maintain the speed and reliability of your new SSD.
Regular Ssd Maintenance Tips
Regular upkeep is crucial for keeping your SSD performing at its peak. Begin by cleaning unnecessary files and running disk defragmentation tools designed for SSDs. Remember that traditional defragging is a no-go, as it can reduce the lifespan of your SSD. Develop a habit to monitor the storage space, and try to keep it below 70% of its capacity to ensure optimal performance.
- Clear temporary files regularly.
- Update your operating system and software.
- Utilize TRIM functionality to optimize the read/write processes.
Keeping Drivers And Firmware Updated
Keep your system running smoothly by regularly checking for driver and firmware updates. Manufacturers often release updates that fix bugs, improve stability, and sometimes even provide a performance boost. Schedule monthly checks to ensure your SSD runs the latest firmware, and keep your drivers up to date to prevent conflicts and ensure maximum compatibility with your HP Pavilion x360.
Ensuring The Durability And Longevity Of Your Ssd
The physical integrity of your SSD also demands attention. Protect it from extreme temperatures and rough handling, as these factors can affect its functionality. Equip your HP Pavilion x360 with a robust casing if needed, and consider using cooling pads to maintain an ideal operating temperature. Regular backups are essential; not only do they keep your data safe, but they also lighten the load on your SSD, contributing to its longevity.
Never overflow the SSD to maximum capacity—this can slow down its performance and strain its operations. Mind the power settings: enabling the ‘sleep’ mode when the device is not in use will lessen the wear and tear on the SSD.
Conclusion
Upgrading your HP Pavilion x360’s SSD can significantly boost performance. With the right tools and steps, you’ll enjoy faster load times and a smoother experience. Remember to back up data and follow safety protocols. Transform your device today for a more efficient computing journey.

Harold Williams is a senior writer and technical editor at Drives Hero with 20+ years of experience in IT administration. He specializes in storage systems, SSD reviews, and performance testing, bringing real-world insight to every guide.